

How I Upcycled Coffee Table To A Bench
One mans junk is another man’s treasure. Recycle, reuse, repurpose…. or like I like to call it Upcycle! When I was first starting out making stuff I did a lot of upcycles. I thought of them as cheap learning experiences. You can usually find cheap pieces on the street, a garage sale, Facebook marketplace or Goodwill. And since they are cheap, if you totally mess them up it isn’t that big of a deal.
This post IS sponsored by Saburrtooth Power Carving Tools. All opinions are my own. This post DOES contain affiliate links. For more information on my affiliate programs, see my DISCLOSURES page.
But another benefit of them is that you can get some really cool material (wood) that is already milled (flat) cut it up and make something AWESOME out of it. And that is what I did with my latest upcycle project. I purchased an outdated solid oak coffee table on Facebook marketplace. My initial idea was just to keep it as a coffee table but give it a fresh finish. Plus, I wanted to try out a new carving burr with some paint.

BEFORE

Total 80’s Vibe

But Solid Wood.

I see potential!
Watch full build on my YouTube Channel!
But after I shared my find on Instagram stories and asked everyone what they would do with it… it got me to brainstorm a little more. So, I decided that I was going to go all out on this build and make a bench. A bench with a back.
First step was to disassemble the coffee table. In my case I was only going to be using the top. It was attached by a few screws and this step was super easy. I set the base aside in case I was gonna need the wood later on, but I ended up not using it for this piece. Maybe another upcycle in the future.

Just a few screws to remove the base from the top.
Next I cut the top into two pieces on the table saw. One was roughly 15” wide and the other about 10”. I had a lot of recommendations to cut the curved edges off the piece and while I thought about doing that if I kept it a coffee table, I kinda like the look when I decided to make a bench. I think the curves give a more mid-century modern vibe.

Once easy pass at the table saw and I have a bench seat and a bench back.
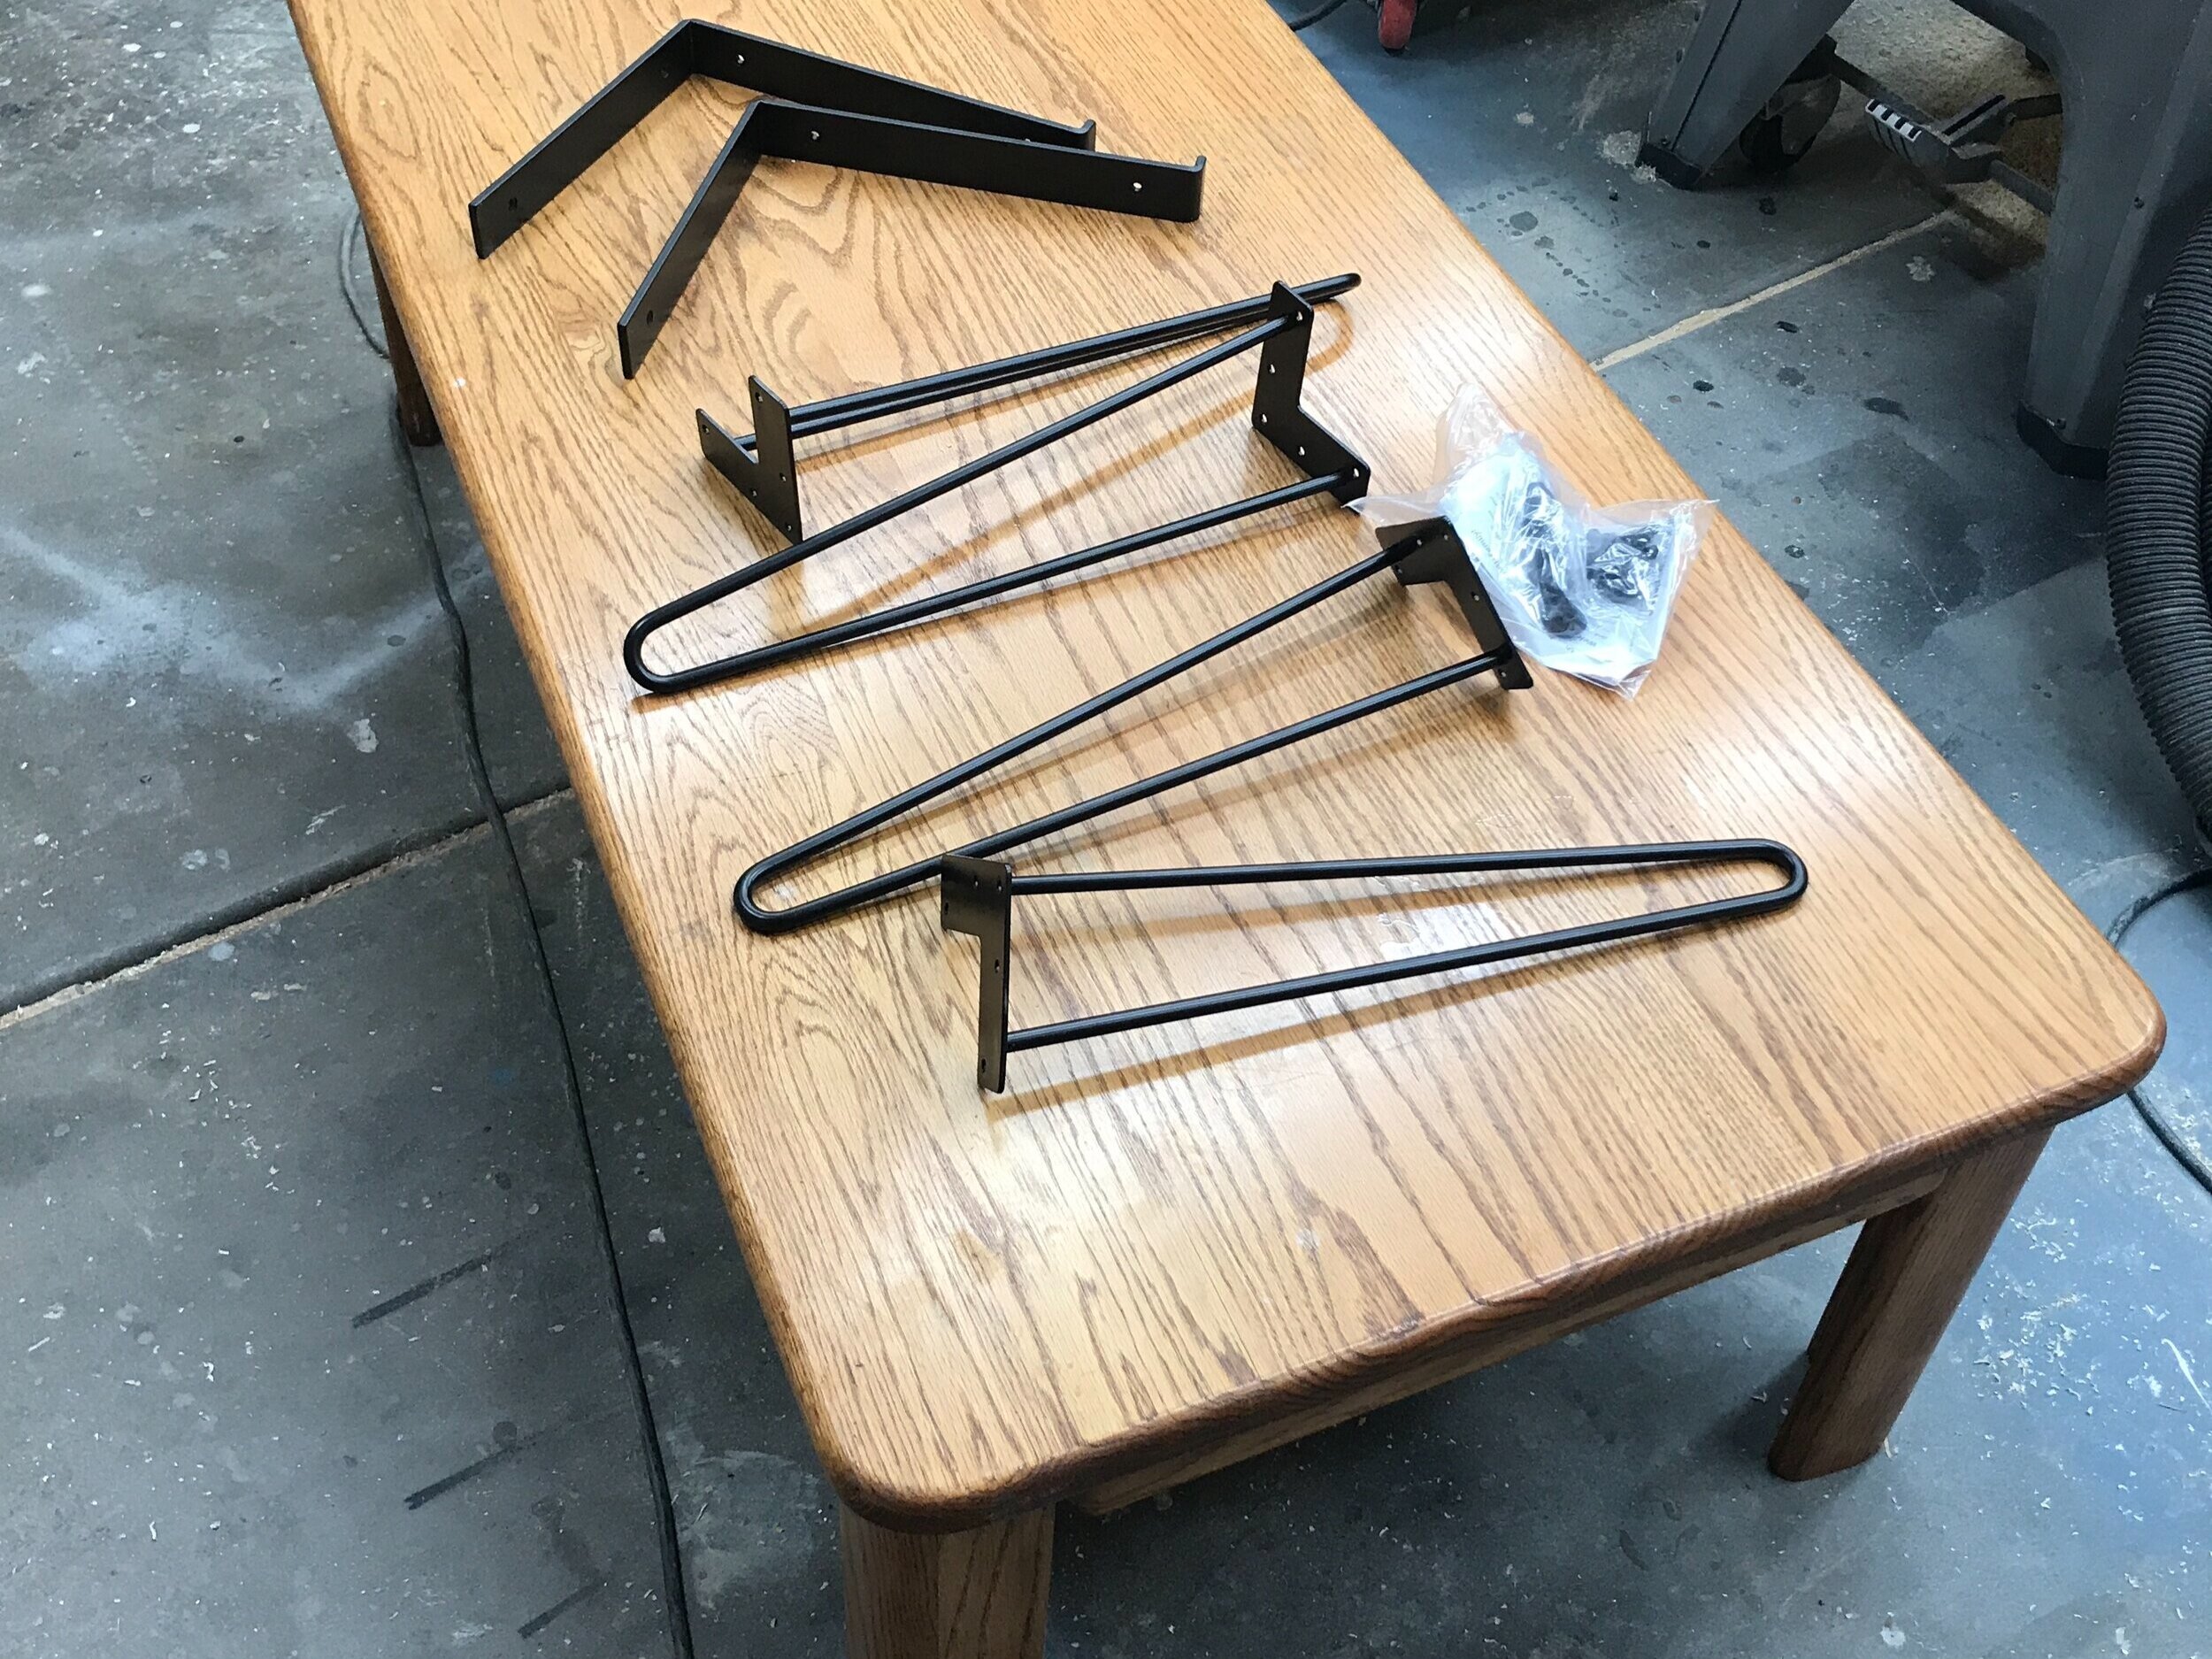
So that is when I decided the next step… to add hairpin legs. I bought this really great kit here. I comes with screws and foot pads and is super affordable for only $23. The screws that came with were 1” long so I ended up adding some random nuts that I had on hand as spacers since the oak top was only 3/4” thick. It worked out really well and saved me a trip the hardware store. Plus, it used up some random hardware at my shop…. which is starting to add up.


Hmmm, is this gonna work?
The next step was to figure out on how to attach the back. I thought about using some of the leftover wood, but I wasn’t loving the look. I wanted metal to match the legs, but I do not have much experience with metal working. I have however installed a ton of shelves around my house recently and thought the brackets just might work for this bench. So off to Home Depot I went. The brackets come in several different sizes that fit standard dimensional wood (1x6, 1x8, 1x10, 1x12, 2x6, 2x8, 2x10, 2x12). I ended up going with the largest ones. They were $14.78 a piece, you can get them here.

Getting excited imagining what it is going to look like!
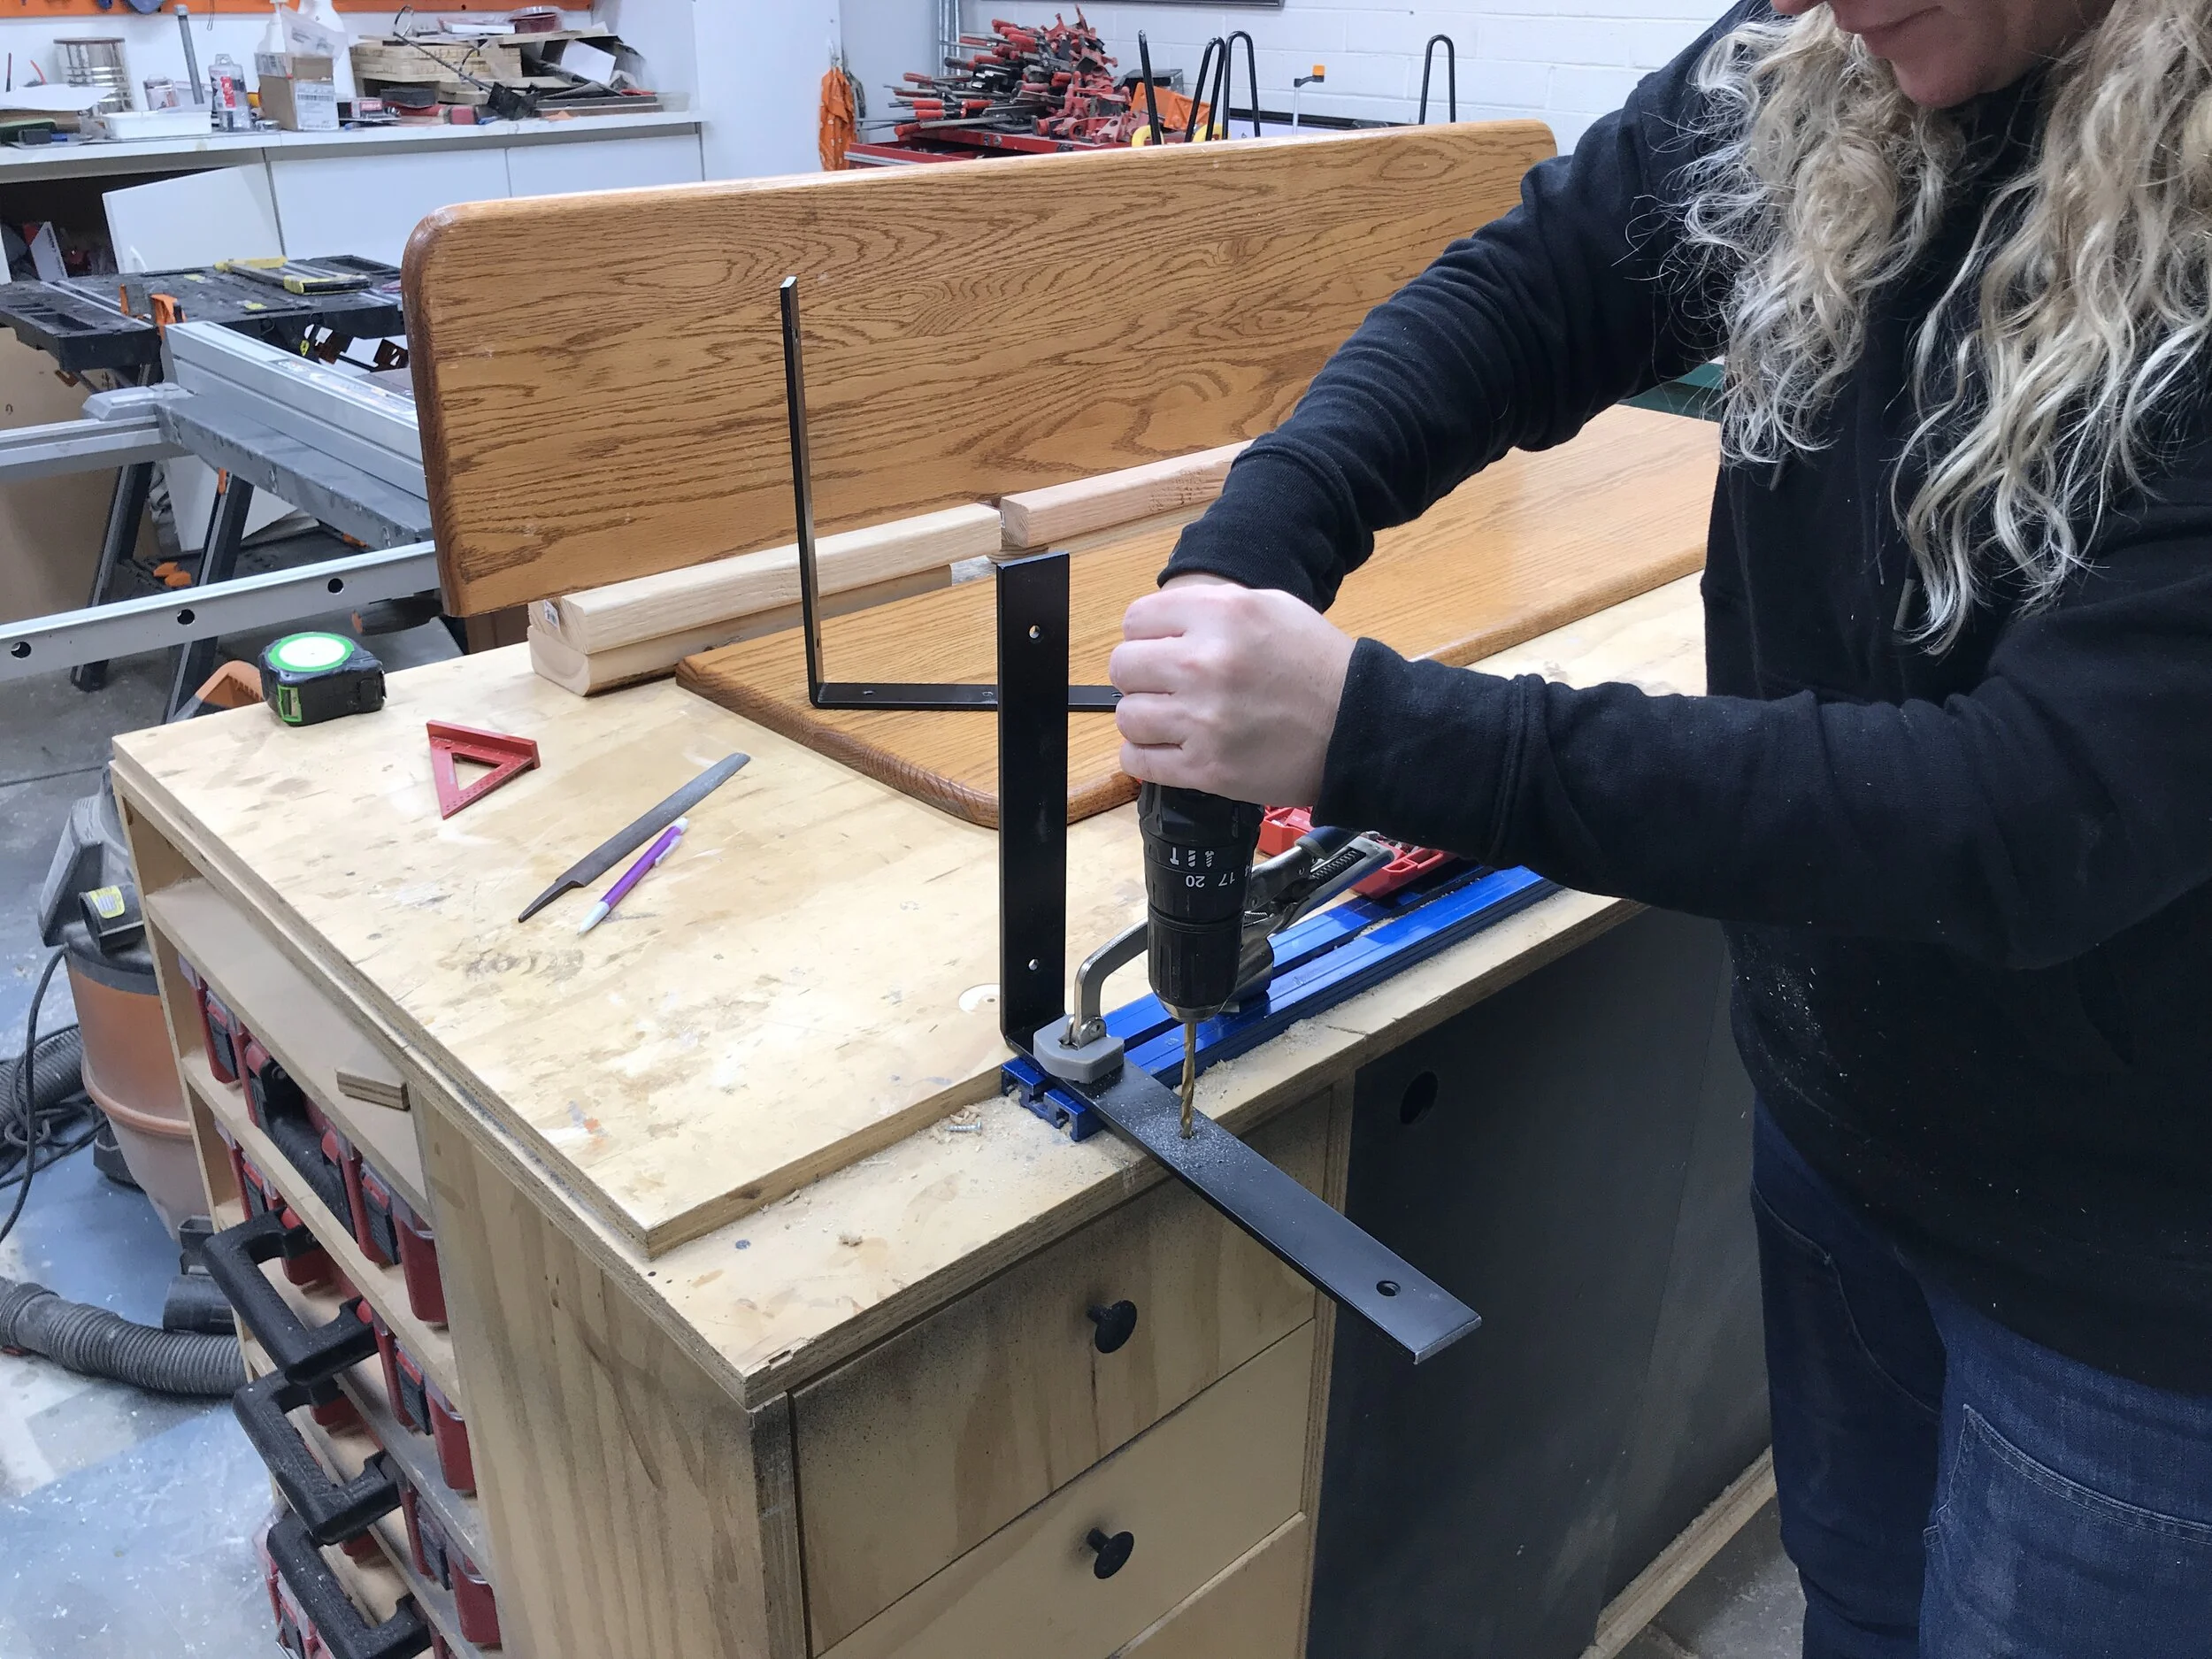
I cut off the lip of the shelf brackets and drilled new holes to attach to seat back.

After looking at them they would work, but the little lip on them looked weird to me and made it look like I wasn’t using the brackets the right way, so I decided to cut the lip off. I used a hacksaw with a metal blade and gave my arms a workout. But if you have a sawzall with a metal cutting blade that would work too.
Now that I had my hardware decided on, it was now time for the fun part. The part that was going to take the bench from cool to AWESOME…. adding texture! Power carving texture to a piece just takes it from simple to something special at least in my book. And for this project I wanted to try a carving disc that I haven’t used for texture before, Saburrtooth’s 4” Donut Wheel with a Round Face and 5/8” bore in Fine grit (yellow). I tested it out on a scrap piece of wood and loved how quickly I was able to achieve a look I liked.

Let’s get the carving party started!


Before texture.
I basically used the edge of the disc and gently tap it on the wood over and over. I did it at an angle to give it a little bit different of a motion and plus the body position was comfortable. For the seat and the backrest it took me about two hours to complete. And I think the results make the effort well worth it. The texture gave the piece character, but it isn’t took deep that it makes it uncomfortable to sit on.

After texture!
So now it is time to get this bench finished and assembled. My originally plan was to paint the bench, but when I saw the texture and the color of the wood I almost wanted to leave it natural. But then I also wanted to experiment… after all that is how we learn! So I ended up staining the wood in an ebony color and well I hated it. The wood grain ended up completing with the texture and it just looked way to busy for my liking. So I then painted the wood with a black milk paint…. and wow! The texture became the star of the show just like I wanted.

Ebony stain.

Ebony stain looked too busy, so I ended up painting it with black milk paint.
Now that the wood was black I didn’t want to keep the hairpin legs or seat back brackets black, so I was in search of the perfect color. And I think I found it in this gold spray paint. It is called gold rush. It went on great. Not too gold and shiny, more of a matte finish I like.

All the hardware getting painted included the screws.

So last but not least it was assembly time. Add the legs using the screws provided with the extra nuts so it doesn’t poke out the other side of the wood seat and then add the back rest. If you make a similar bench, be sure that the back rest hardware is inset enough that it doesn’t interfere with the legs. I didn’t even think about it when I put on my backrest and well I got luckily. It was really close but everything fit just fine.

Assembly Time!
Oh, I forgot… since there were already pre-drilled holes in the shelf brackets and one was showing when it was altogether I decided to fill it will a screw to make it look almost intentional. That was recommended to me by one of my followers over on Instagram. Are you following me on Instagram? If not, I create new projects weekly and share lots of behind the scenes on my Instagram.

Details! I hide a predrilled hole and it almost looks intentional.
So here is the completed piece! What do you think?

Love! Love! Love!
I absolutely love it. So much character. I can hardly believe that this used to be a coffee table, can you?
BEFORE

AFTER
And I was able to make this with less than $100. Now I think that is a steal.
What is your favorite part of the bench? My is that texture and that I saved a piece of furniture from going to a landfill. There is something satisfying about upcycling.
I hope this inspires you to look at the furniture around you differently. Maybe next time you decide you need a new piece it might already be in your house and just need a little love.
Thanks for following my building journey. Remember build LOUD, build WILD and have an AWESOME day!
Sadie Mae
Save this inspiration for later… PIN IT!


