

DIY Jelly Cabinet, A Gift For My Mom
My mom recently moved into a new place and was in need of some extra storage in her kitchen and asked if I could help her out. Of course I said yes! That is until she told me she wanted it to be red. Red! Red isn’t my favorite color…. orange is, of course! Haha… but after a little persuasion and time I agreed. But I told her I was gonna put my spin on it and add some power carved texture to make it AWESOME.
This post IS sponsored by Saburrtooth Power Carving Tools. All opinions are my own. This post DOES contain affiliate links. For more information on my affiliate partnership, see my DISCLOSURES page.
Oh and since my scrap pile is totally out of control, I challenged myself to only use scraps for this project. Seeing how it was going to be painted I didn’t think that would be a problem. For the legs I found an old 2x4 that I will rip down to 1 1/2 x 1 1/2 inch pieces for the legs and cross supports. And then for the sides, shelves and door I had some 3/4” plywood scraps. And my favorite find was some 8/4 ash strips I could glue together for the top!

The scraps I selected to make this project. A miss match of a little bit of everything!
So that is were I started. I milled the ash by running it thru the jointer… face side then edge side. Then I used the thickness planer to get the other face side flat. Then lastly I ripped the pieces at the table saw to get the second edge side parallel to the first one. And then since all the pieces were square and flat it was time to glue them up to make a larger panel. I used my Jorgensen parallel clamps for this. They are great because they give you a nice surface to lay the boards out on, plus they apply equal clamping pressure on both sides. And if the boards are milled correctly I don’t use any biscuits to help with alignment. The wood glue is plenty strong!

Ash top is in the back right. Love my Pony | Jorgenson Clamps!
To watch me build this piece, check out my YouTube Channel!
I set the top aside to let the glue dry and proceed to mill the rest of the pieces for the base of the cabinet. For this step, since it is going to be a rustic cabinet, I didn’t bother will jointing and planing and all that. I just used the table saw to rip the 2x4 into 2x2 (actual 1 1/2” x 1 1/2”) strips for the legs and to cut the 3/4” plywood panels to size. I have complete build plans here, if you would like to build one for yourself.

Cut and ready for assembly. Using my Kreg 320 Pocket Hole jig for this.
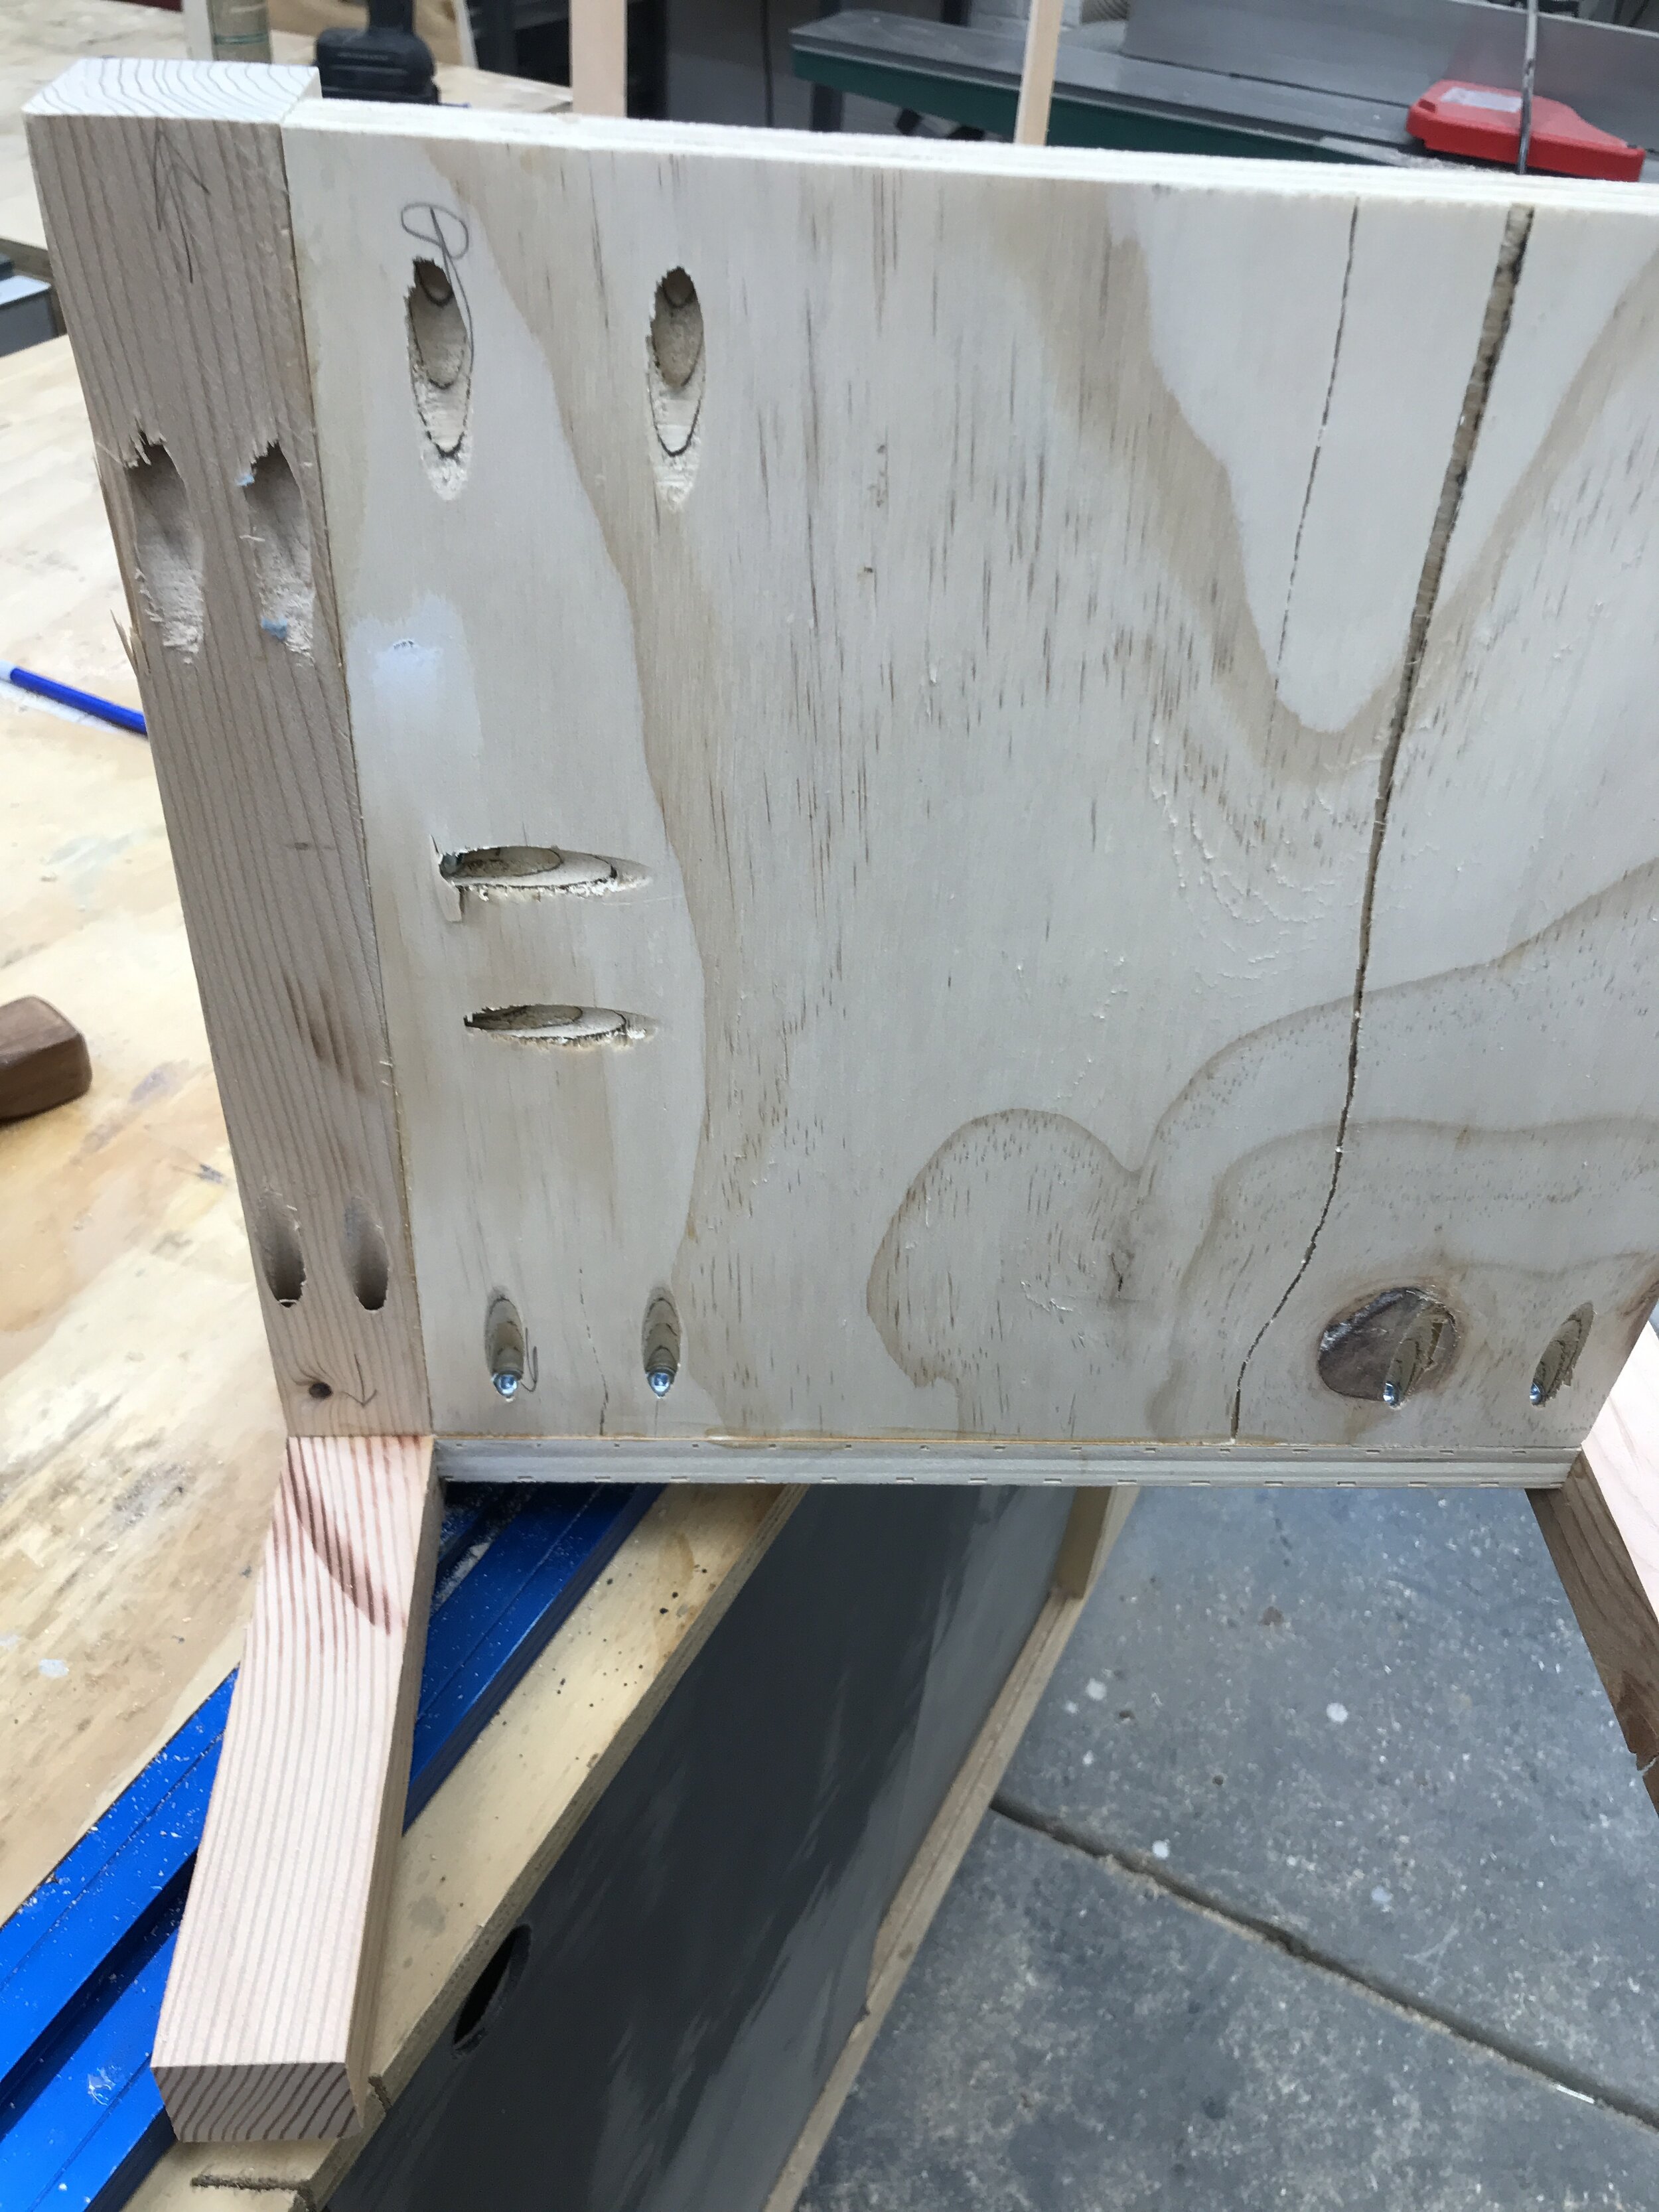
Then with everything cut to size it was time for assembly. For the joinery I have using 3/4” pocket holes and 1 1/4” pocket holes screws. I used the Kreg 320 picket hole jig to make the holes. I love how portable it is to make the holes on bigger panels. When using plywood in projects, especially scrap plywood, it can tend to me warped. So, I like to put two pocket holes next to each other that way during assembly I can clamp the piece where it needs to be and then drive a screw in next to it to hold everything straight.

Spacing the pocket holes next to each other helps with clamping and keeping plywood straight.

These right-angle clamps are essential when working with pocket holes.
Bottom view
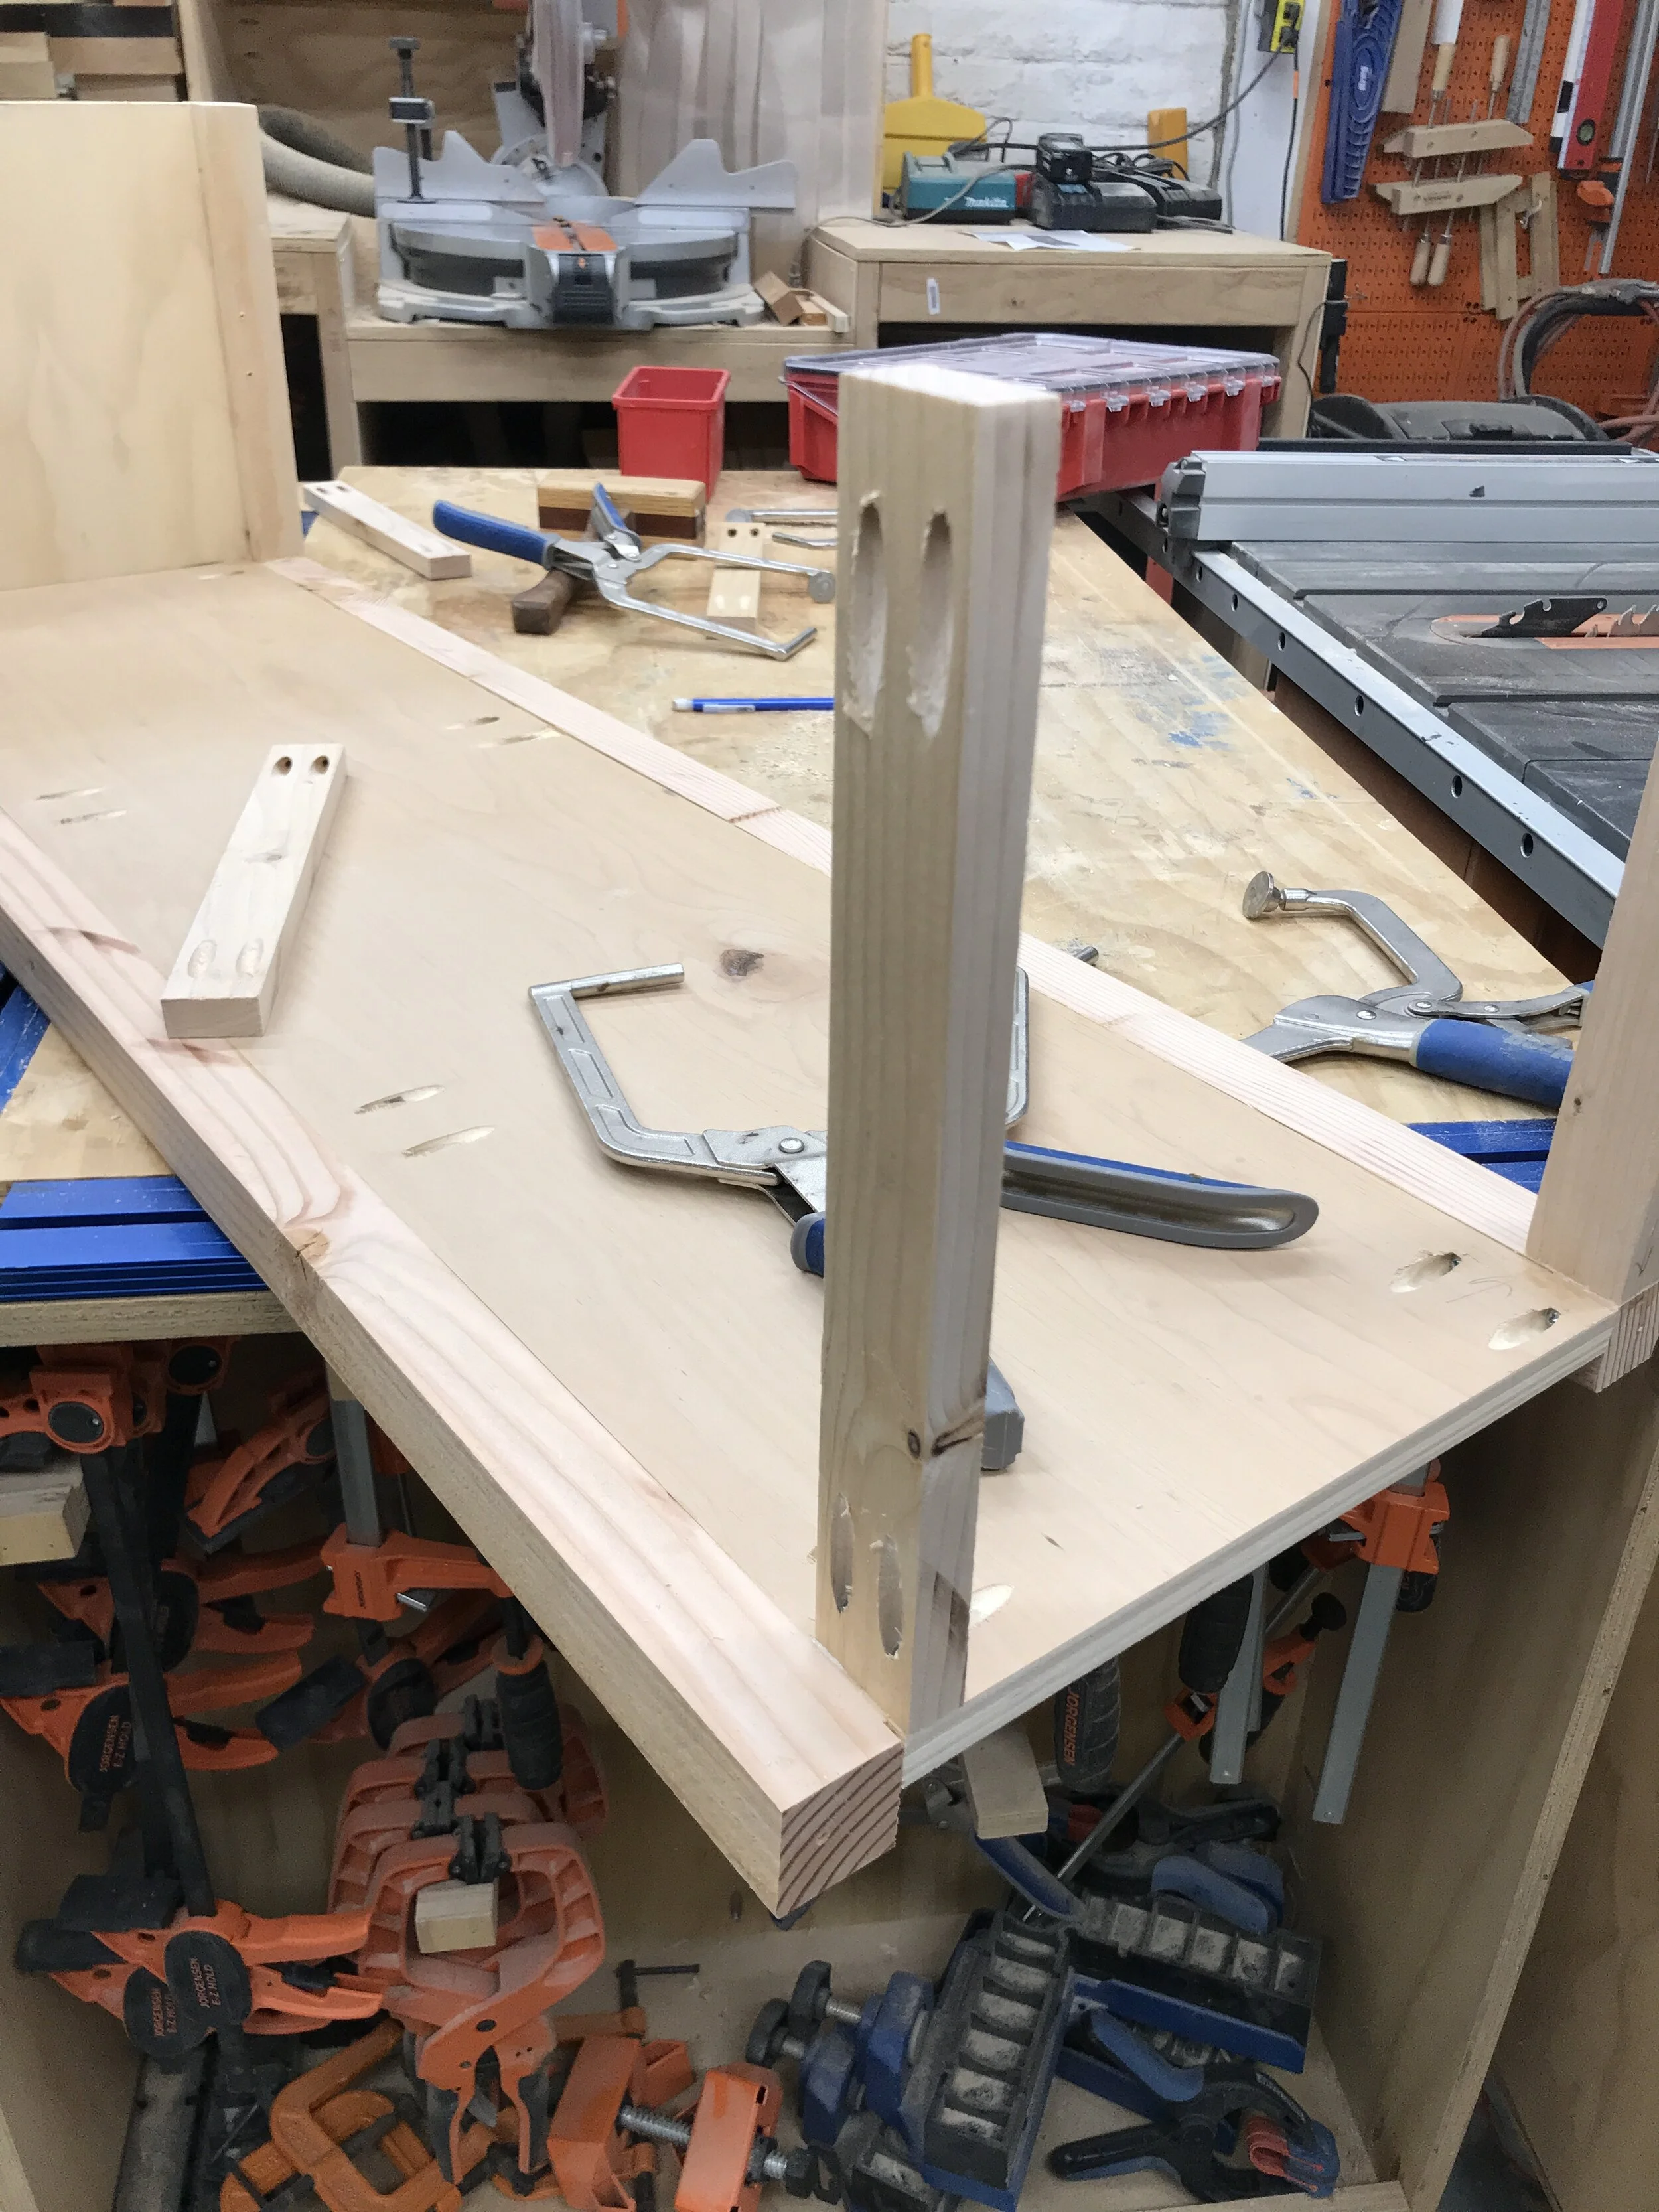
The back supports are inset, so I can easily add a back later on.

Great success! We have a cabinet base!
Once I have the base cabinet assembled I added some shelf pin holes so that the cabinet could have adjustable shelves. I love this jig for making these. It is super easy to line up and get accurate hole placement.

This shelf pin jig makes including adjustable shelves so easy!
Next, since I was using plywood for the shelves and door I went ahead and edge banded them. This will give them the look of solid wood by covering up the plys. This is an extra step that isn’t necessary, but does take the project up a notch. And it gives me something to use my iron on…. because you know I don’t use it for clothes!

Before and After edge banding. I normally only edge band the side that will be seen.
The edge banding comes with an adhesive backing, so you just iron it on, trim it (I like this trimmer) and then sand! Easy peasy!
This trimmer trims both sides at the same time!
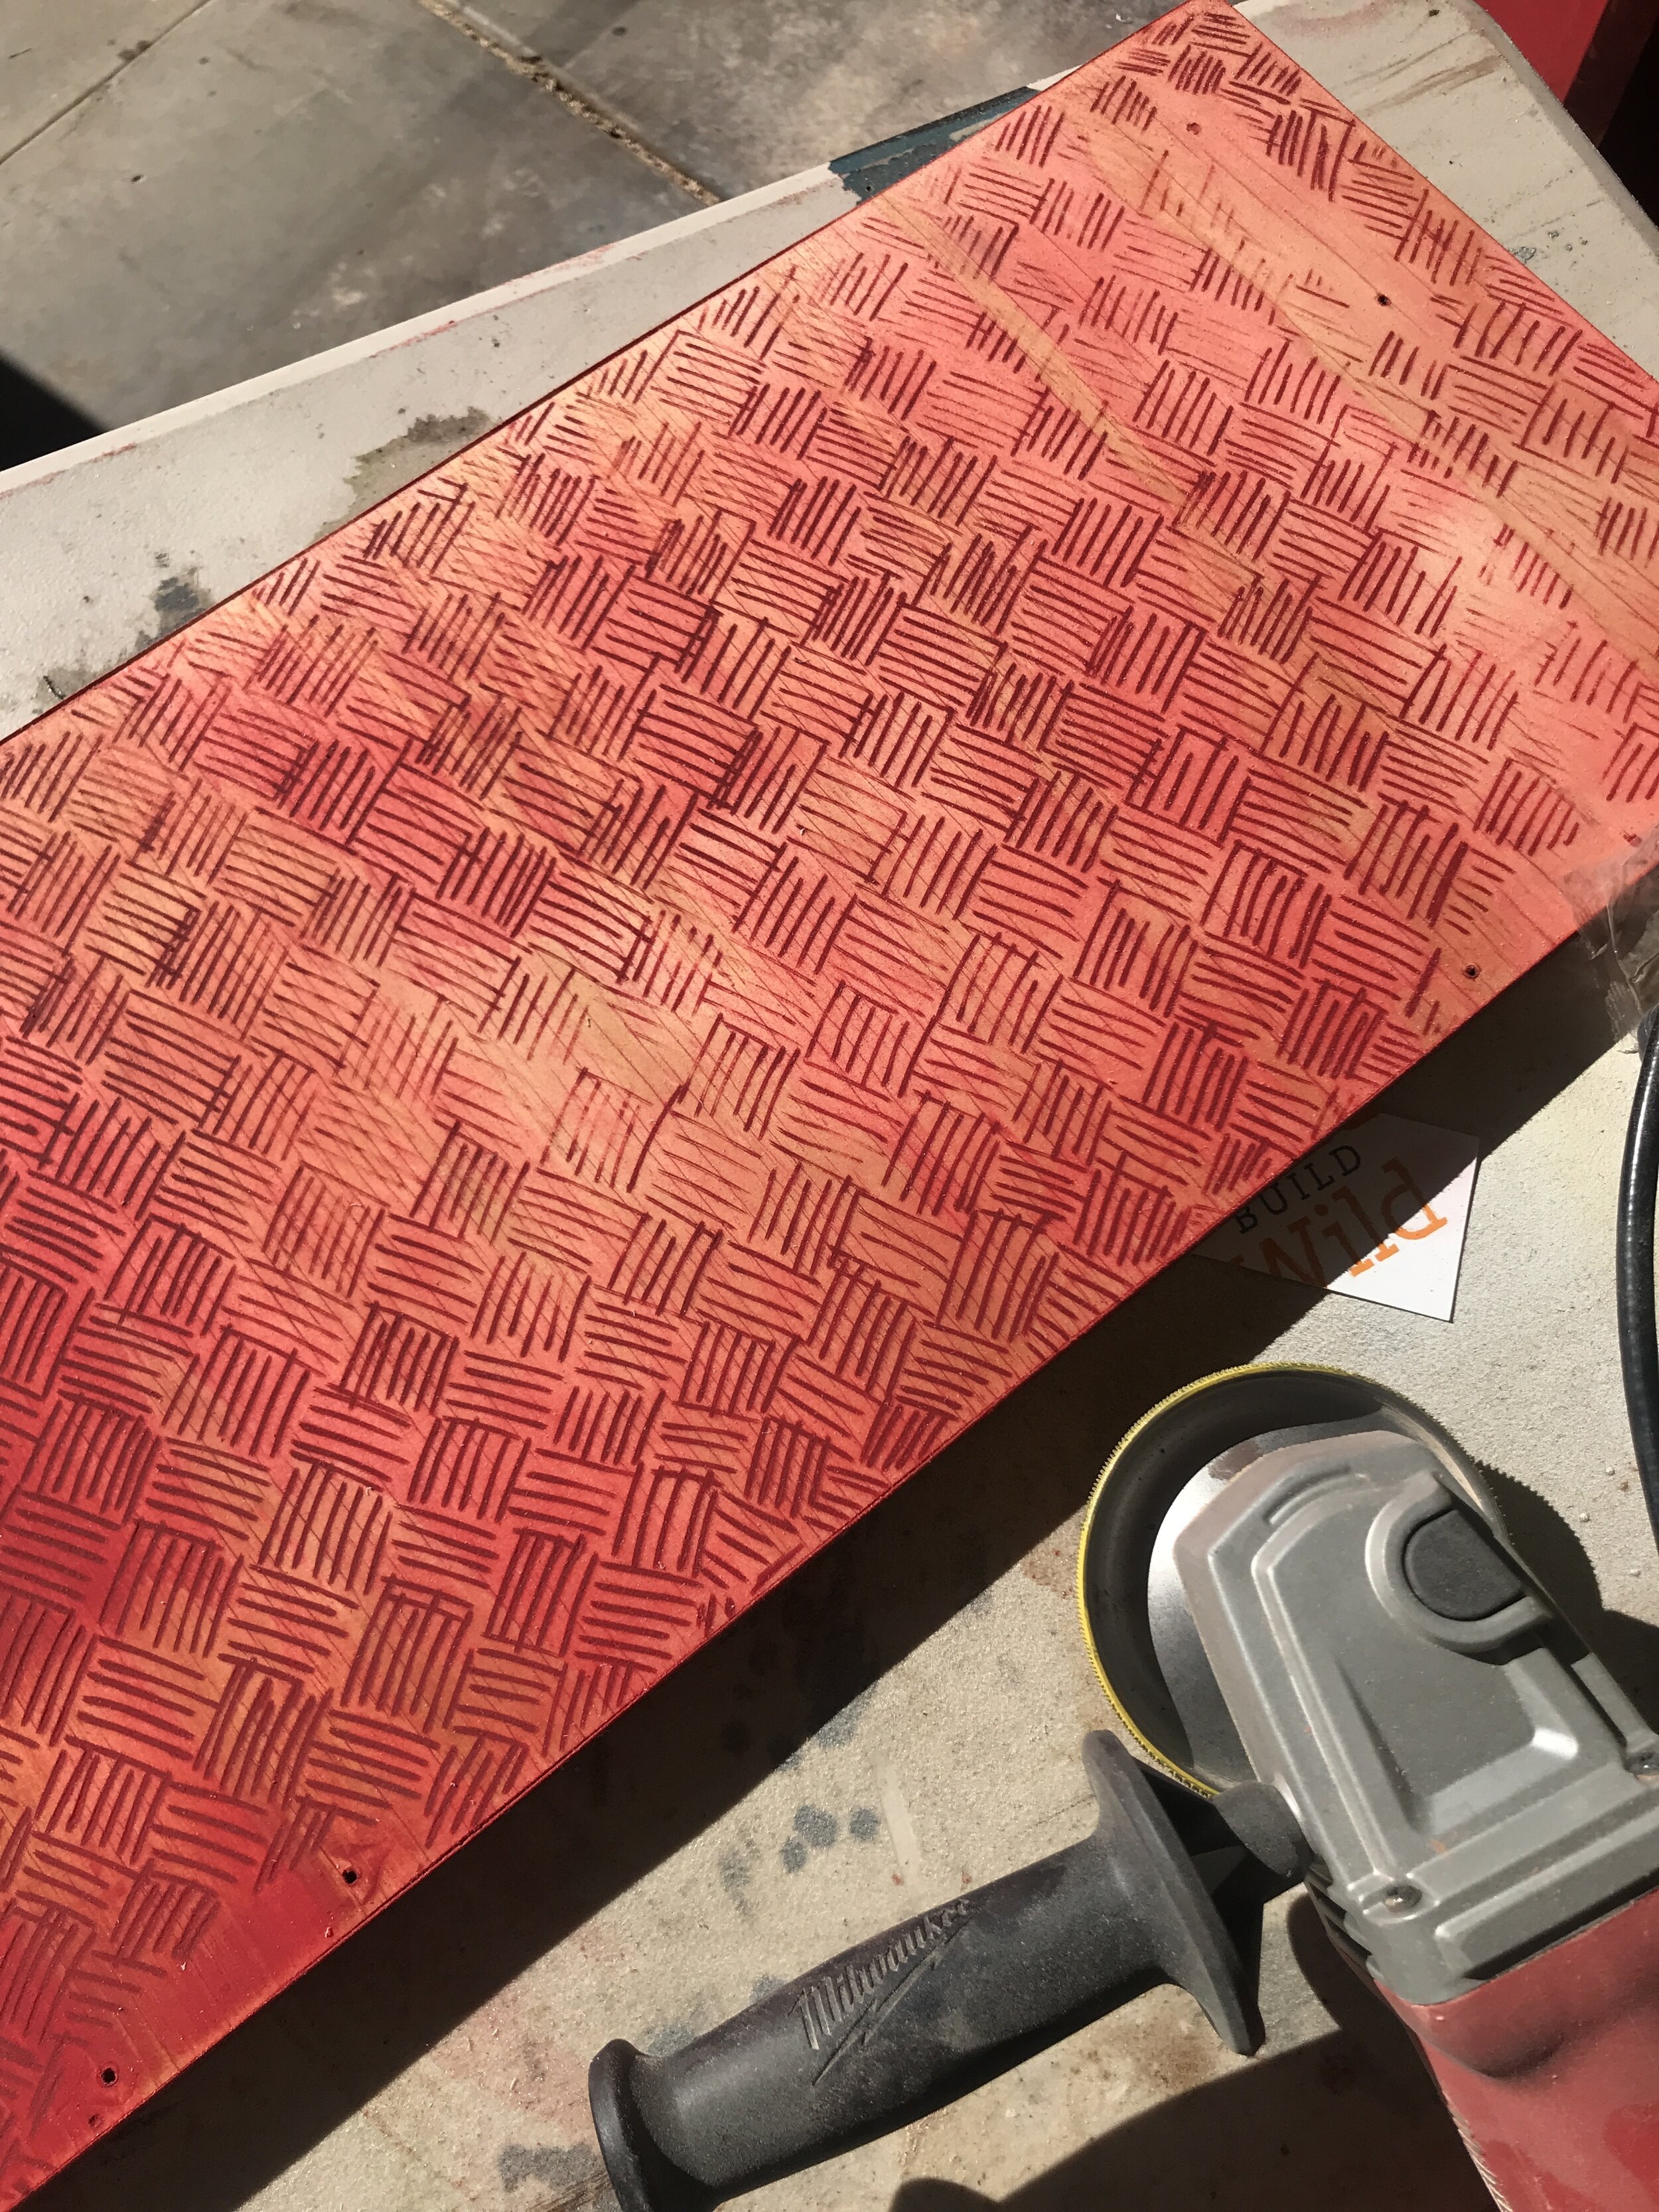
Now to the fun part of this build and the step that makes it AWESOME… power carving! I have been wanting to try out a new texture and thought it would be fun to use it on the door of this project. It is a cross hatch type design. I used the Saburrtooth dovetail burr to create this effect. It was easy to do and control because the burr is wider at the top and skinnier at the bottom. I didn’t use a guide for this pattern and just free handed it. I really like how it turned out.

I tested several different ideas on some scrap plywood before getting started.

Before paint - cross hatch design.
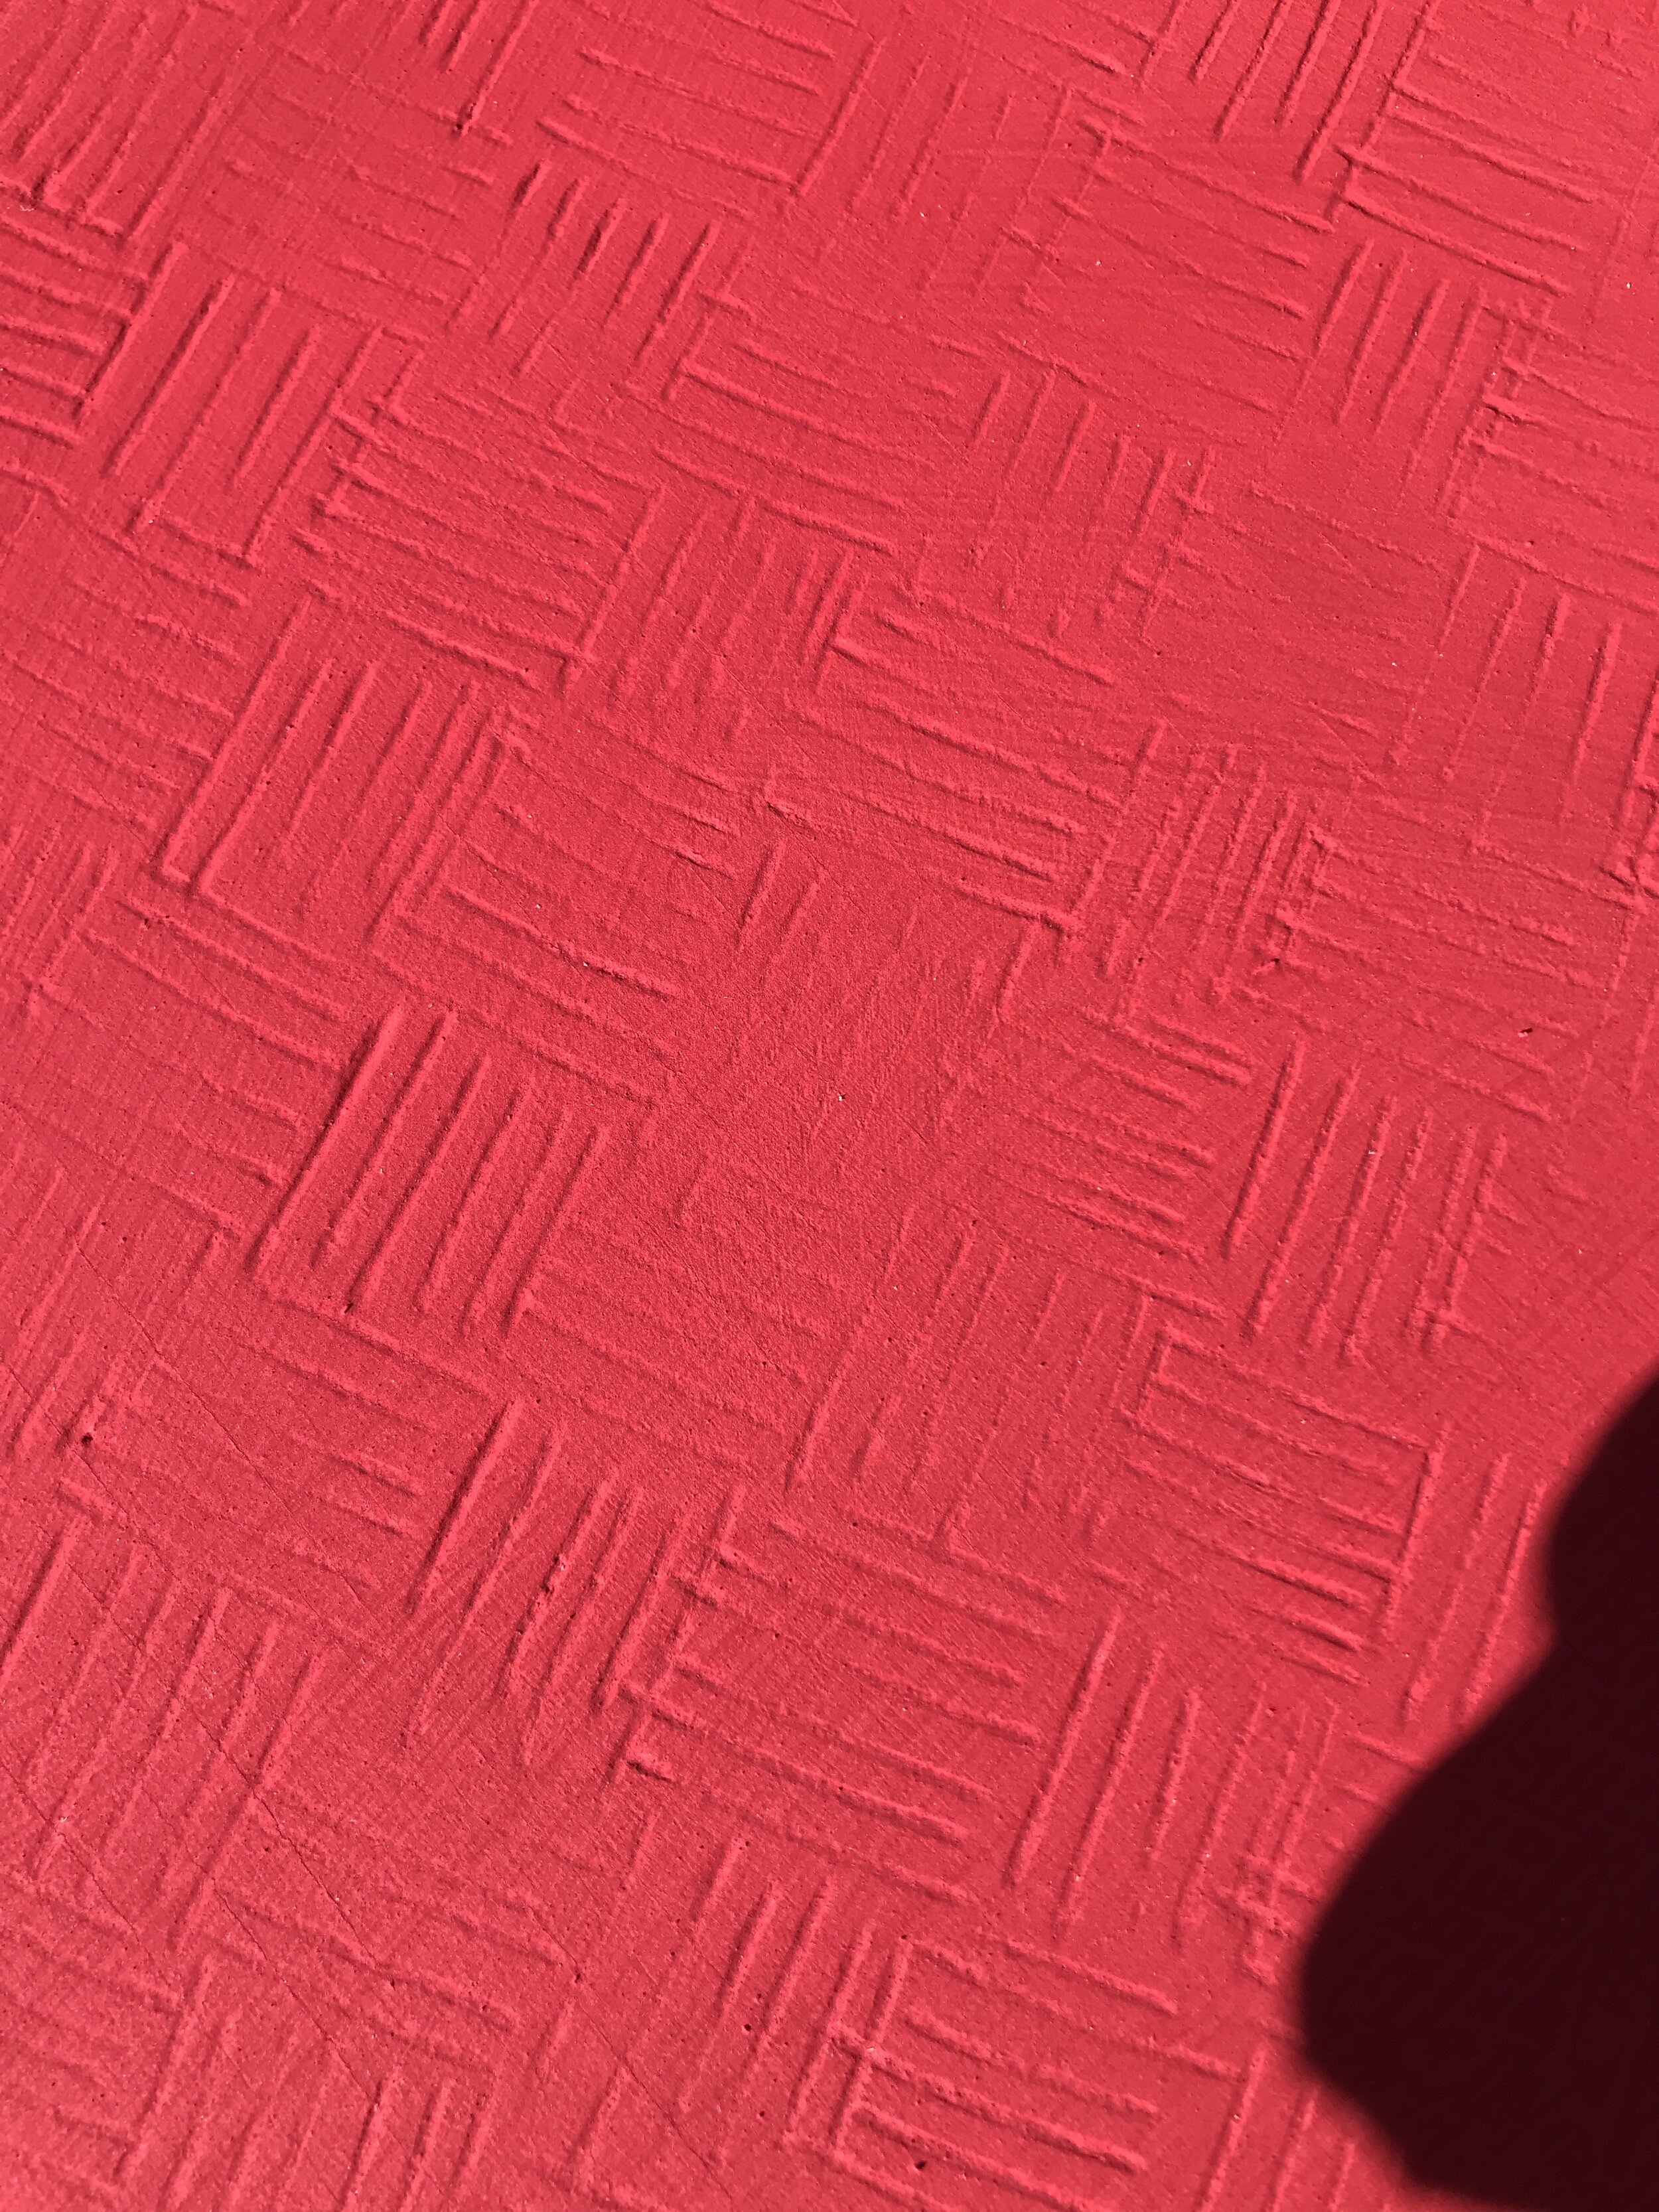
After RED paint - cross hatch design.
That is until I painted it red! With the piece red it really hid the texture and I didn’t like that. I wanted the texture to be the star of the show, so I tried distressing the door by sanding the door down. It looks pink and all the red wouldn’t come off and I hated it more. So, even though I loved the texture I don’t think it was right for this piece and the red paint and it had to go. So, I re carved the door using my Saburrtooth 4” disc in fine grit. This leaves a very clean random pattern of texture and is one of my favorites. Probably second to the bubble texture.
Distressed looked pink!

Reverse carving didn’t look clean.
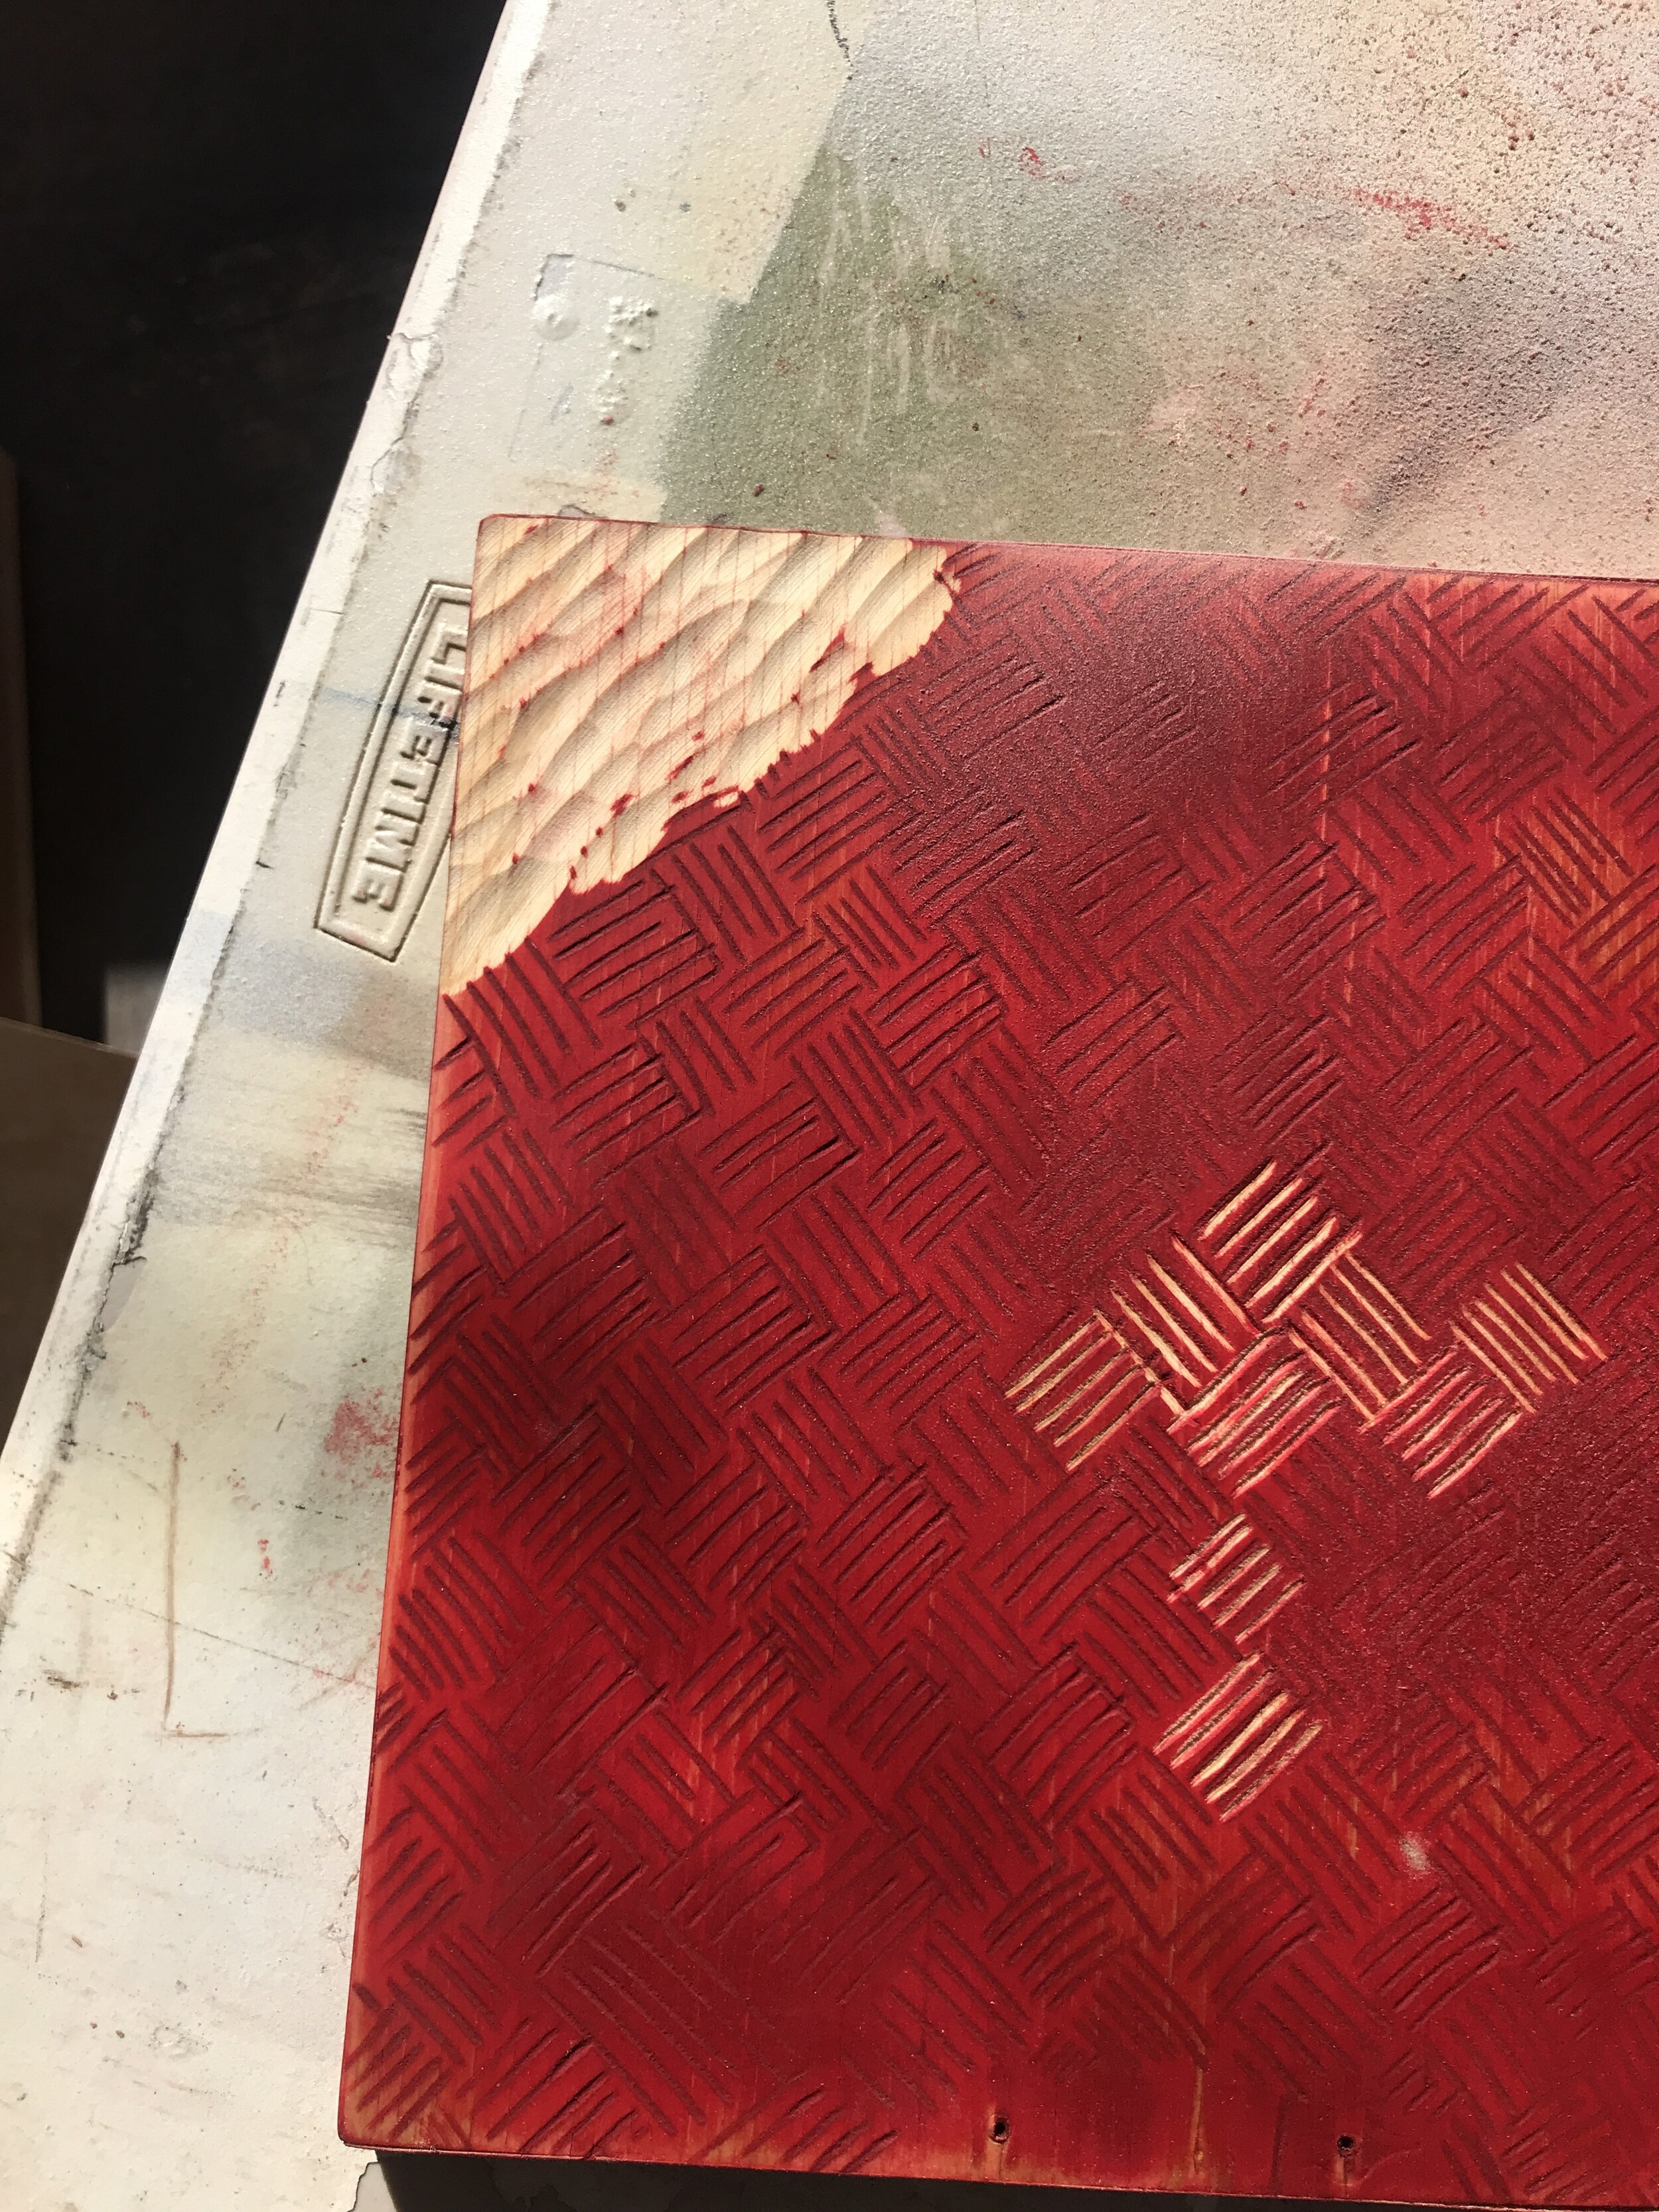
New texture = so much better!

Saburrtooth’s 4” carving wheel in fine grit.
Once that was painted…. I added the hardware and a little faux wood latch. The latch really isn’t needed because I added a magnet on the inside to hold the door close, but I like the look so I added it.

Wood latch for looks.

Magnet latch to help keep door closed.
The paint I was using was milk paint which needs to be sealed. I ended up trying a hemp oil to seal it. I like how the oil looks, but after two to three coats it didn’t completely seal the piece. Red paint wood still rub off slightly, so I will be going back over the entire piece with a wax to seal that in.
Lastly once the top was cut to size, sanded and sealed it was time to attach it to the cabinet. Since it was solid wood I wanted to attach it so that it would allow for wood movement. So I used my biscuit joiner to cut some slots in the top cross pieces. This allows me to use z-clips or table top fasteners to attach the top to the base. These are the same ones I use when making dining room tables. If you don’t have a biscuit joiner before assembling the cabinet base you could run the top cross pieces thru the table saw to create the groove or dado for the fasteners to fit into.

Ready for paint! Z-Clips

Biscuit slots for z-clips to fasten top to base.

Dry fitting door with hardware before paint.
And once the top was on… I had one very RED, but AWESOME jelly cabinet for my mom! I hope she likes it.

I hope mom likes it! Boy, oh boy this thing is red!

DIY Jelly Cabinet - Wood Latch

DIY Jelly Cabinet - Adjustable Shelves

DIY Jelly Cabinet - Ash Top!
I hope you enjoyed this project and if you want to make one for yourself, minus the red paint, you can get the complete build plans here… DIY Jelly Cabinet. The plans comes with materials list, cut list, tool list and step-by-step instructions.
Thanks for following my building journey and remember Build LOUD, Build WILD and have an AWESOME day!
Sadie Mae
Can’t make it now? PIN it and save for later!


