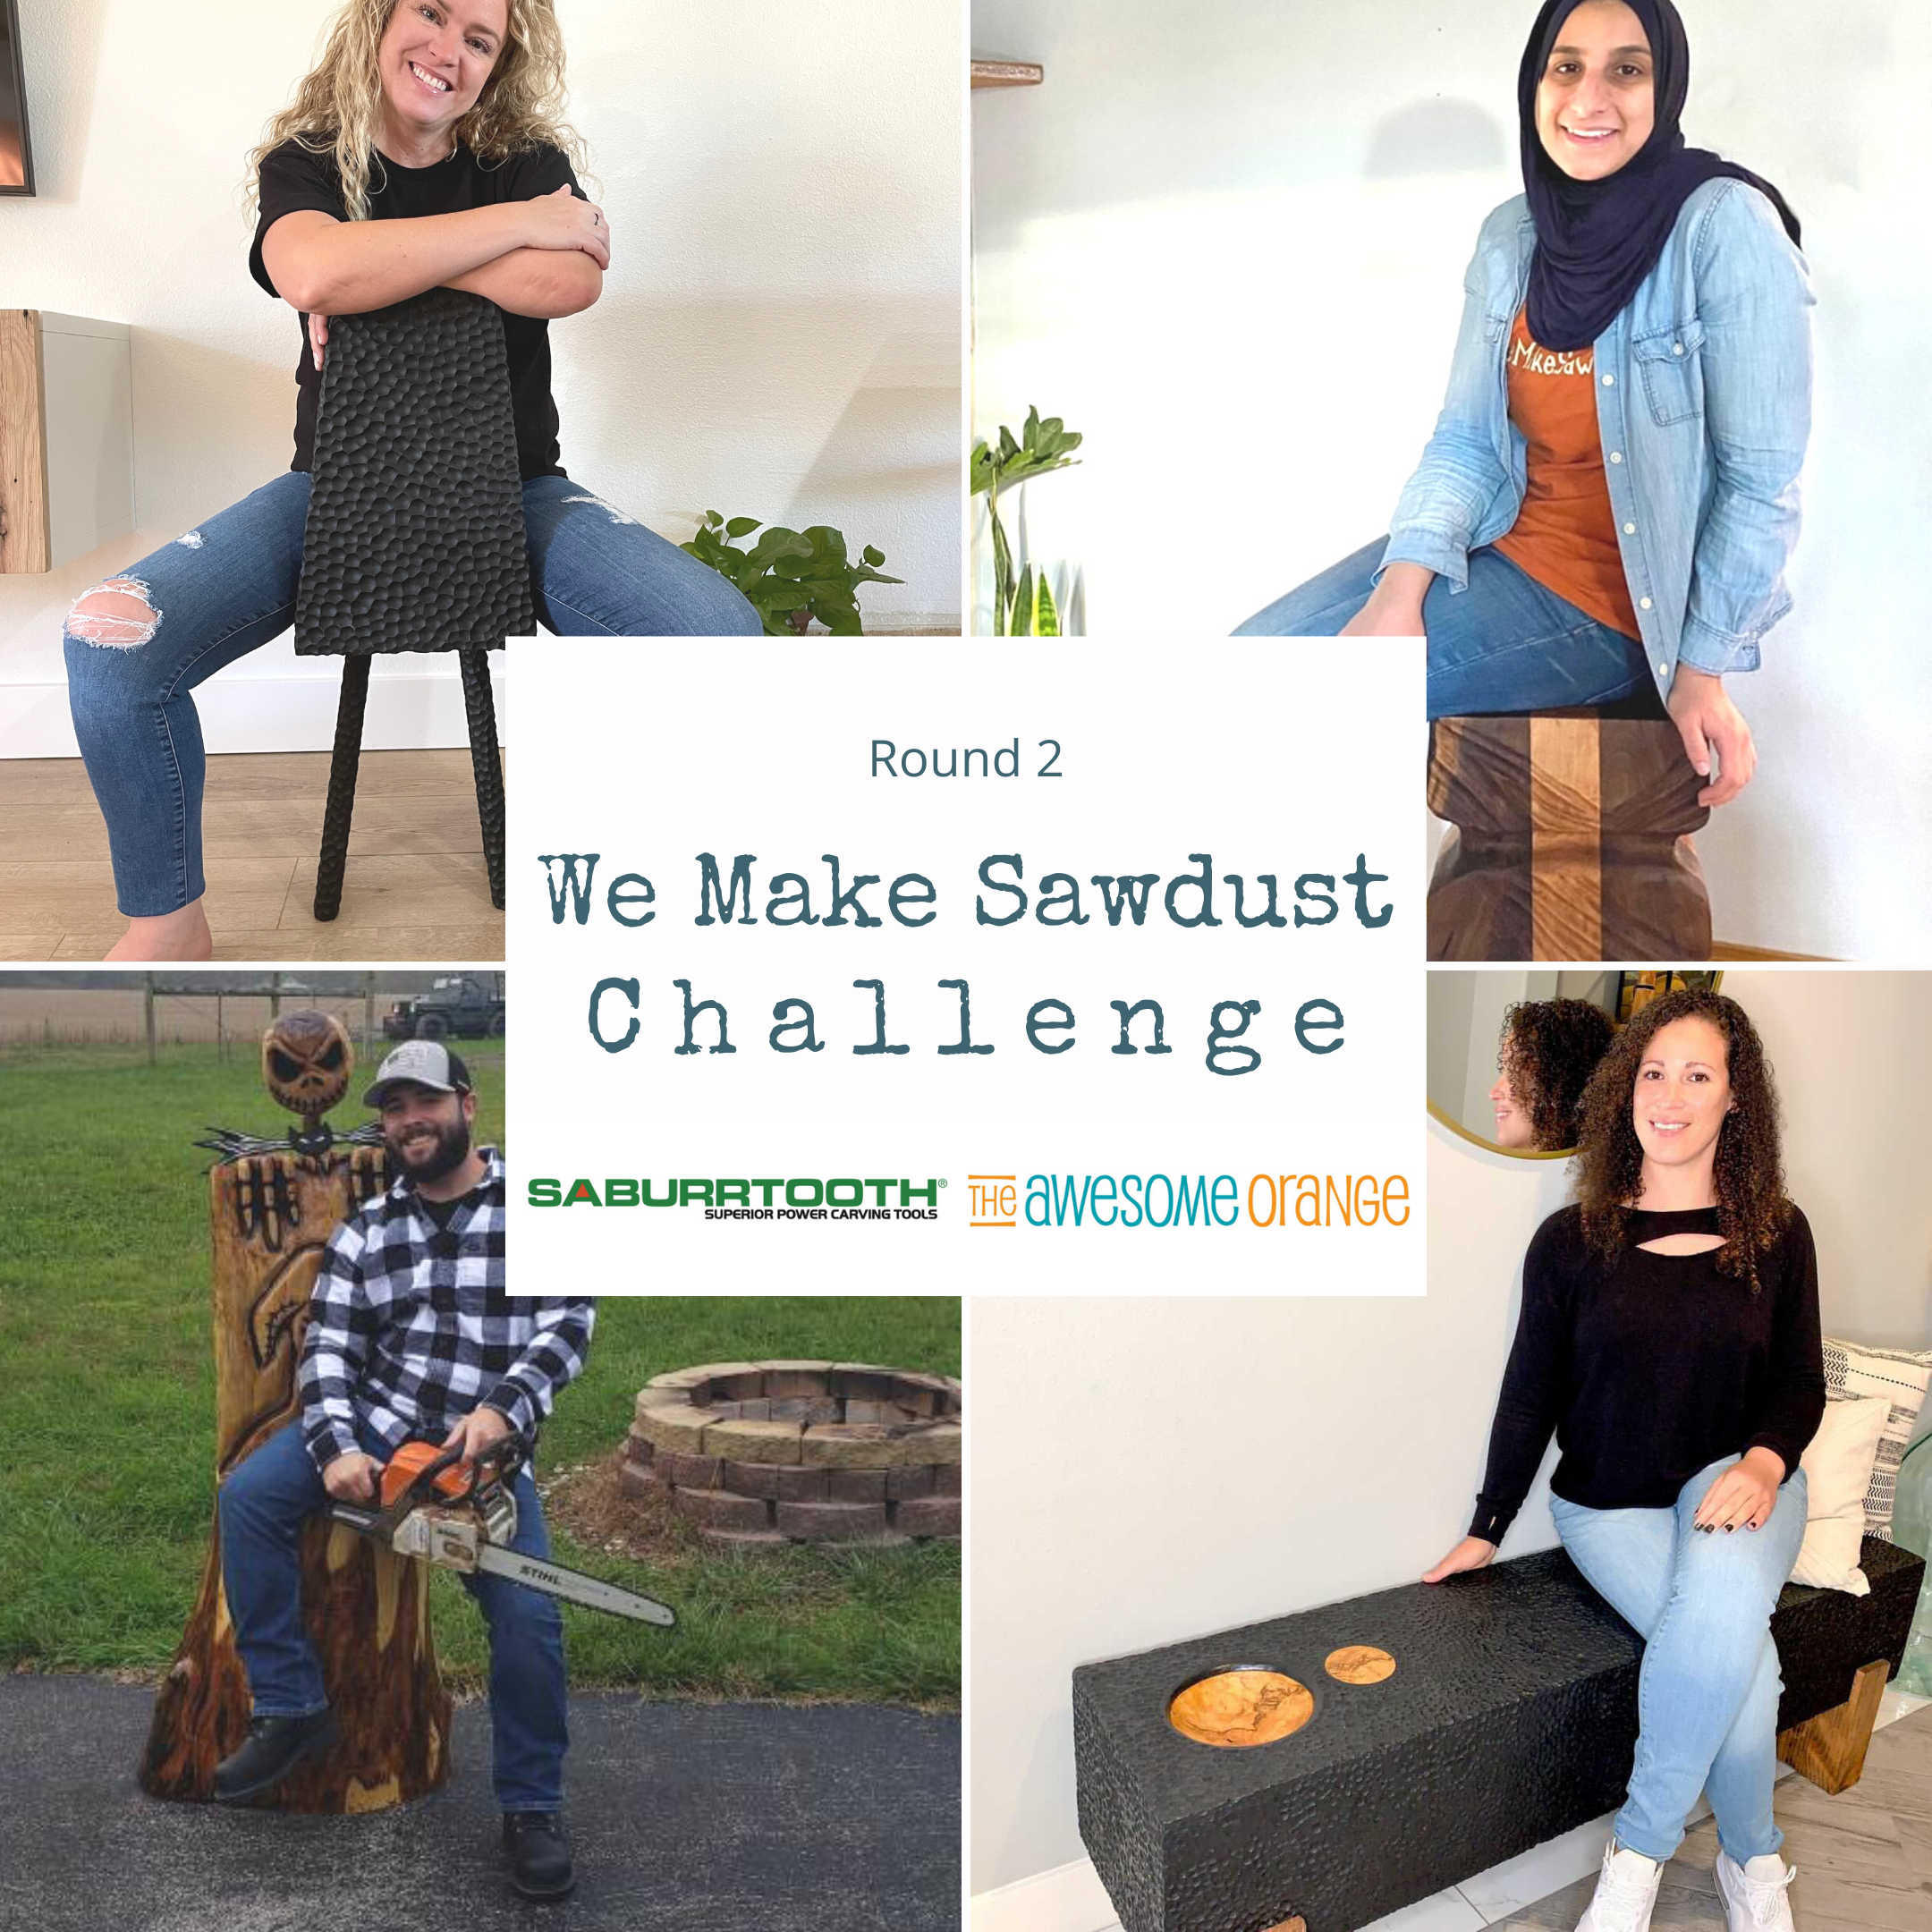
DIY Candle Holders | We Make Sawdust Challenge
I have a super special project for you today… DIY Candle Holders. But not only that I teamed up with my friend over at Saburrtooth Power Carving Tools and created the “WE MAKE SAWDUST” Challenge. Where I invited three AWESOME makers to join me in making a candle holder using 3 Saburrtooth carving burrs.
4 Makers, 3 Carving Burrs, 2 Weeks and 1 Challenge = 4 AWESOME Creations!
This post is sponsored by Saburrtooth Power Carving Burrs. All opinions are my own. This post does contain affiliate links. For more information on my affiliate programs, see my DISCLOSURES page.
Saburrtooth and I sent out each participant a goody box of all sort so swag and these three carving burrs:
We felt that this would give each of the participants a very well rounded choice of burrs no matter if they were going to use them for textures, hollowing or both! If you want to try your hand at making some candle holders using these three burrs like we did you can get the We Make Sawdust Kit here!

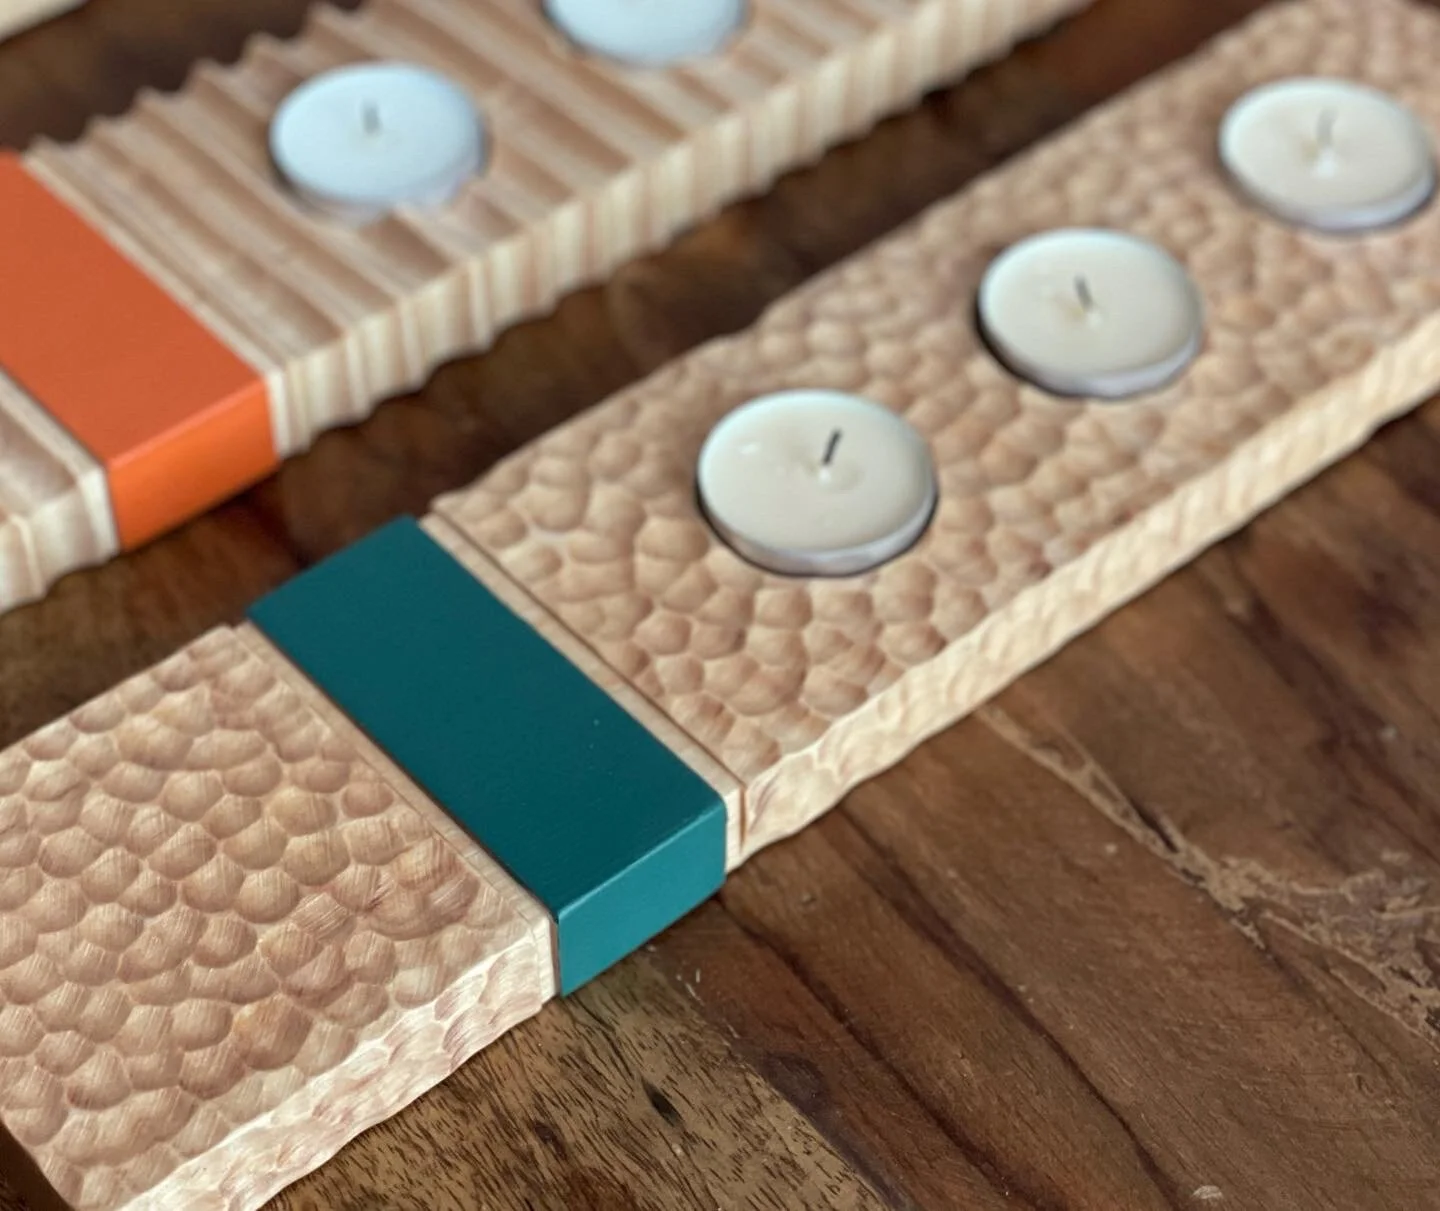
So first up let me show you how I made my 3 textured candle holders. When I was brainstorming designs I knew I wanted to add a pop of color and use votive candles… because I already had several on hand. Then I went to my scrap bin and started digging… and was lucky to find three scrap pieces of birch roughly the same size.
Step 1:
I milled the boards so they would be the exact same size. I started at the jointer face planing one side then edge planing another. Then ran them thru the thickness planer to achieve my desired thickness (roughly 3/4”). They I ran then thru the table saw with the flat size up against the fence to get a width of about 3 1/4”. And finally trimmed them to length at the miter saw.
Note: You could easily buy premilled boards and avoid this step if you don’t have the tools!

Boards after being milled

Step 2:
I needed a way to divide where the pop of color was going to go and the texture, so I ended up setting the blade on my table saw to about 1/8” and then ran the boards thru on three sides creating a section for color. Doing this made it easier for me to achieve a crisp clean paint line against the textured sections.
Note: If you don’t have a table saw you could always add your pop of color to the sides of the piece. Or you could avoid that step and let the texture speak for itself.

Laying out ho many candles I wanted on each. Left left side open to showcase texture!
Step 3:
Carve your texture! I choose to do three different textures, one on each of my candle holders. For the 1'“ sphere burr I did a dimpling texture that is one of my favorites and that I have used several times before. You can see them here and here!
The second texture, using the bullnose burr, was new to me and left a really cool wave like pattern in the wood. And the third one, the rotoscoped saw, I just kinda dragged it on top of the wood to give a rough texture.

Step 4:
Using a 1 5/8” Forstner bit I drilled three recesses to hold the candles.

Step 5:
Add my pop of color using some spare paint I had on hand…. and yes I always have orange on hand! Then I finished the rest of the piece with a wax/oil combo for a natural finish.


So which of the three textures is your favorite?

I love how these turned out and think they will make great gifts for the family!


Now… that we've seen my creation let me give you a sneak peak of what the other three participants made with their We Make Sawdust burrs!

@builtbyjessie

@worleyfab

@blackthornconcepts
All three of them had never carved before and all three of them ended up with AWESOME creations! If you want more information on how they came up with their designs or more about their builds you can find them on Instagram at:
Jessie @builtbyjessie
Kyle @worleyfab
Keith @blackthornconcepts
There were no losers in this challenge, but if you do want to know who won check out my YouTube video with more details of each build and the reveal of the first ever “WE MAKE SAWDUST” Challenge winner!
Special thanks to all the participants and Saburrtooth for allowing me to host this challenge. I hope it is the first of many to come. I would love to hear what you thought of the challenge or my candle holders in the comments!
Thank you for following my building journey! Remember Build LOUD, Build WILD and have an AWESOME day!
Sadie Mae
Can’t make these right now? PIN it and save for later!