

How to Build A Barn Door - with Tongue and Groove Joinery
Believe it or not I have been using a pirate flag for a door to my master bedroom for almost two years now or since we remodeled our master bedroom and added a walk-in closet and moved (or made) a pantry. I always knew I wanted a cool barn door there, but the last step before we could install one was to raise the ceilings in the hallway… well that happened over winter break and I finally got the hallway painted, so it is time to create a barn door!

This post IS sponsored by Diablo. All opinions are my own. The post DOES contain affiliate links. For more information on my affiliate programs see my DISCLOSURES page.
And I didn’t want just any old barn door, I wanted something special for this door… after all it was the entrance to the Master Suite… and it had big shoes to fill by replacing the pirate flag. I joke, I kid… haha. But in all seriousness I wanted something AWESOME here and I wanted to try a woodworking technique that I hadn’t done before… tongue & groove joinery! But I also wanted this build to be approachable, so I made it from 2x6 fir boards you can get at any big box store.
So here is the design. Stiles on the outside and rails all down the middle.

Step 1:
Mill boards to 5” wide. I used my jointer and planer and table saw to do this. I don’t think this step is necessary, but it will help the joinery to be a little more accurate. If you don’t have those tools, jointer and planer, I suggest just ripping the round edges off the boards to get them to 5” wide.
Wanna see this build in action? Check it out on my YouTube Channel!
Step 2:
Cut center rails to overall door width minus the 10” for the stiles, plus 2 3/4”.
My Door Size: 40”W x 85”H
40 minus 10 (stiles) + 2 3/4” (tongues) = 32 3/4” for center rails

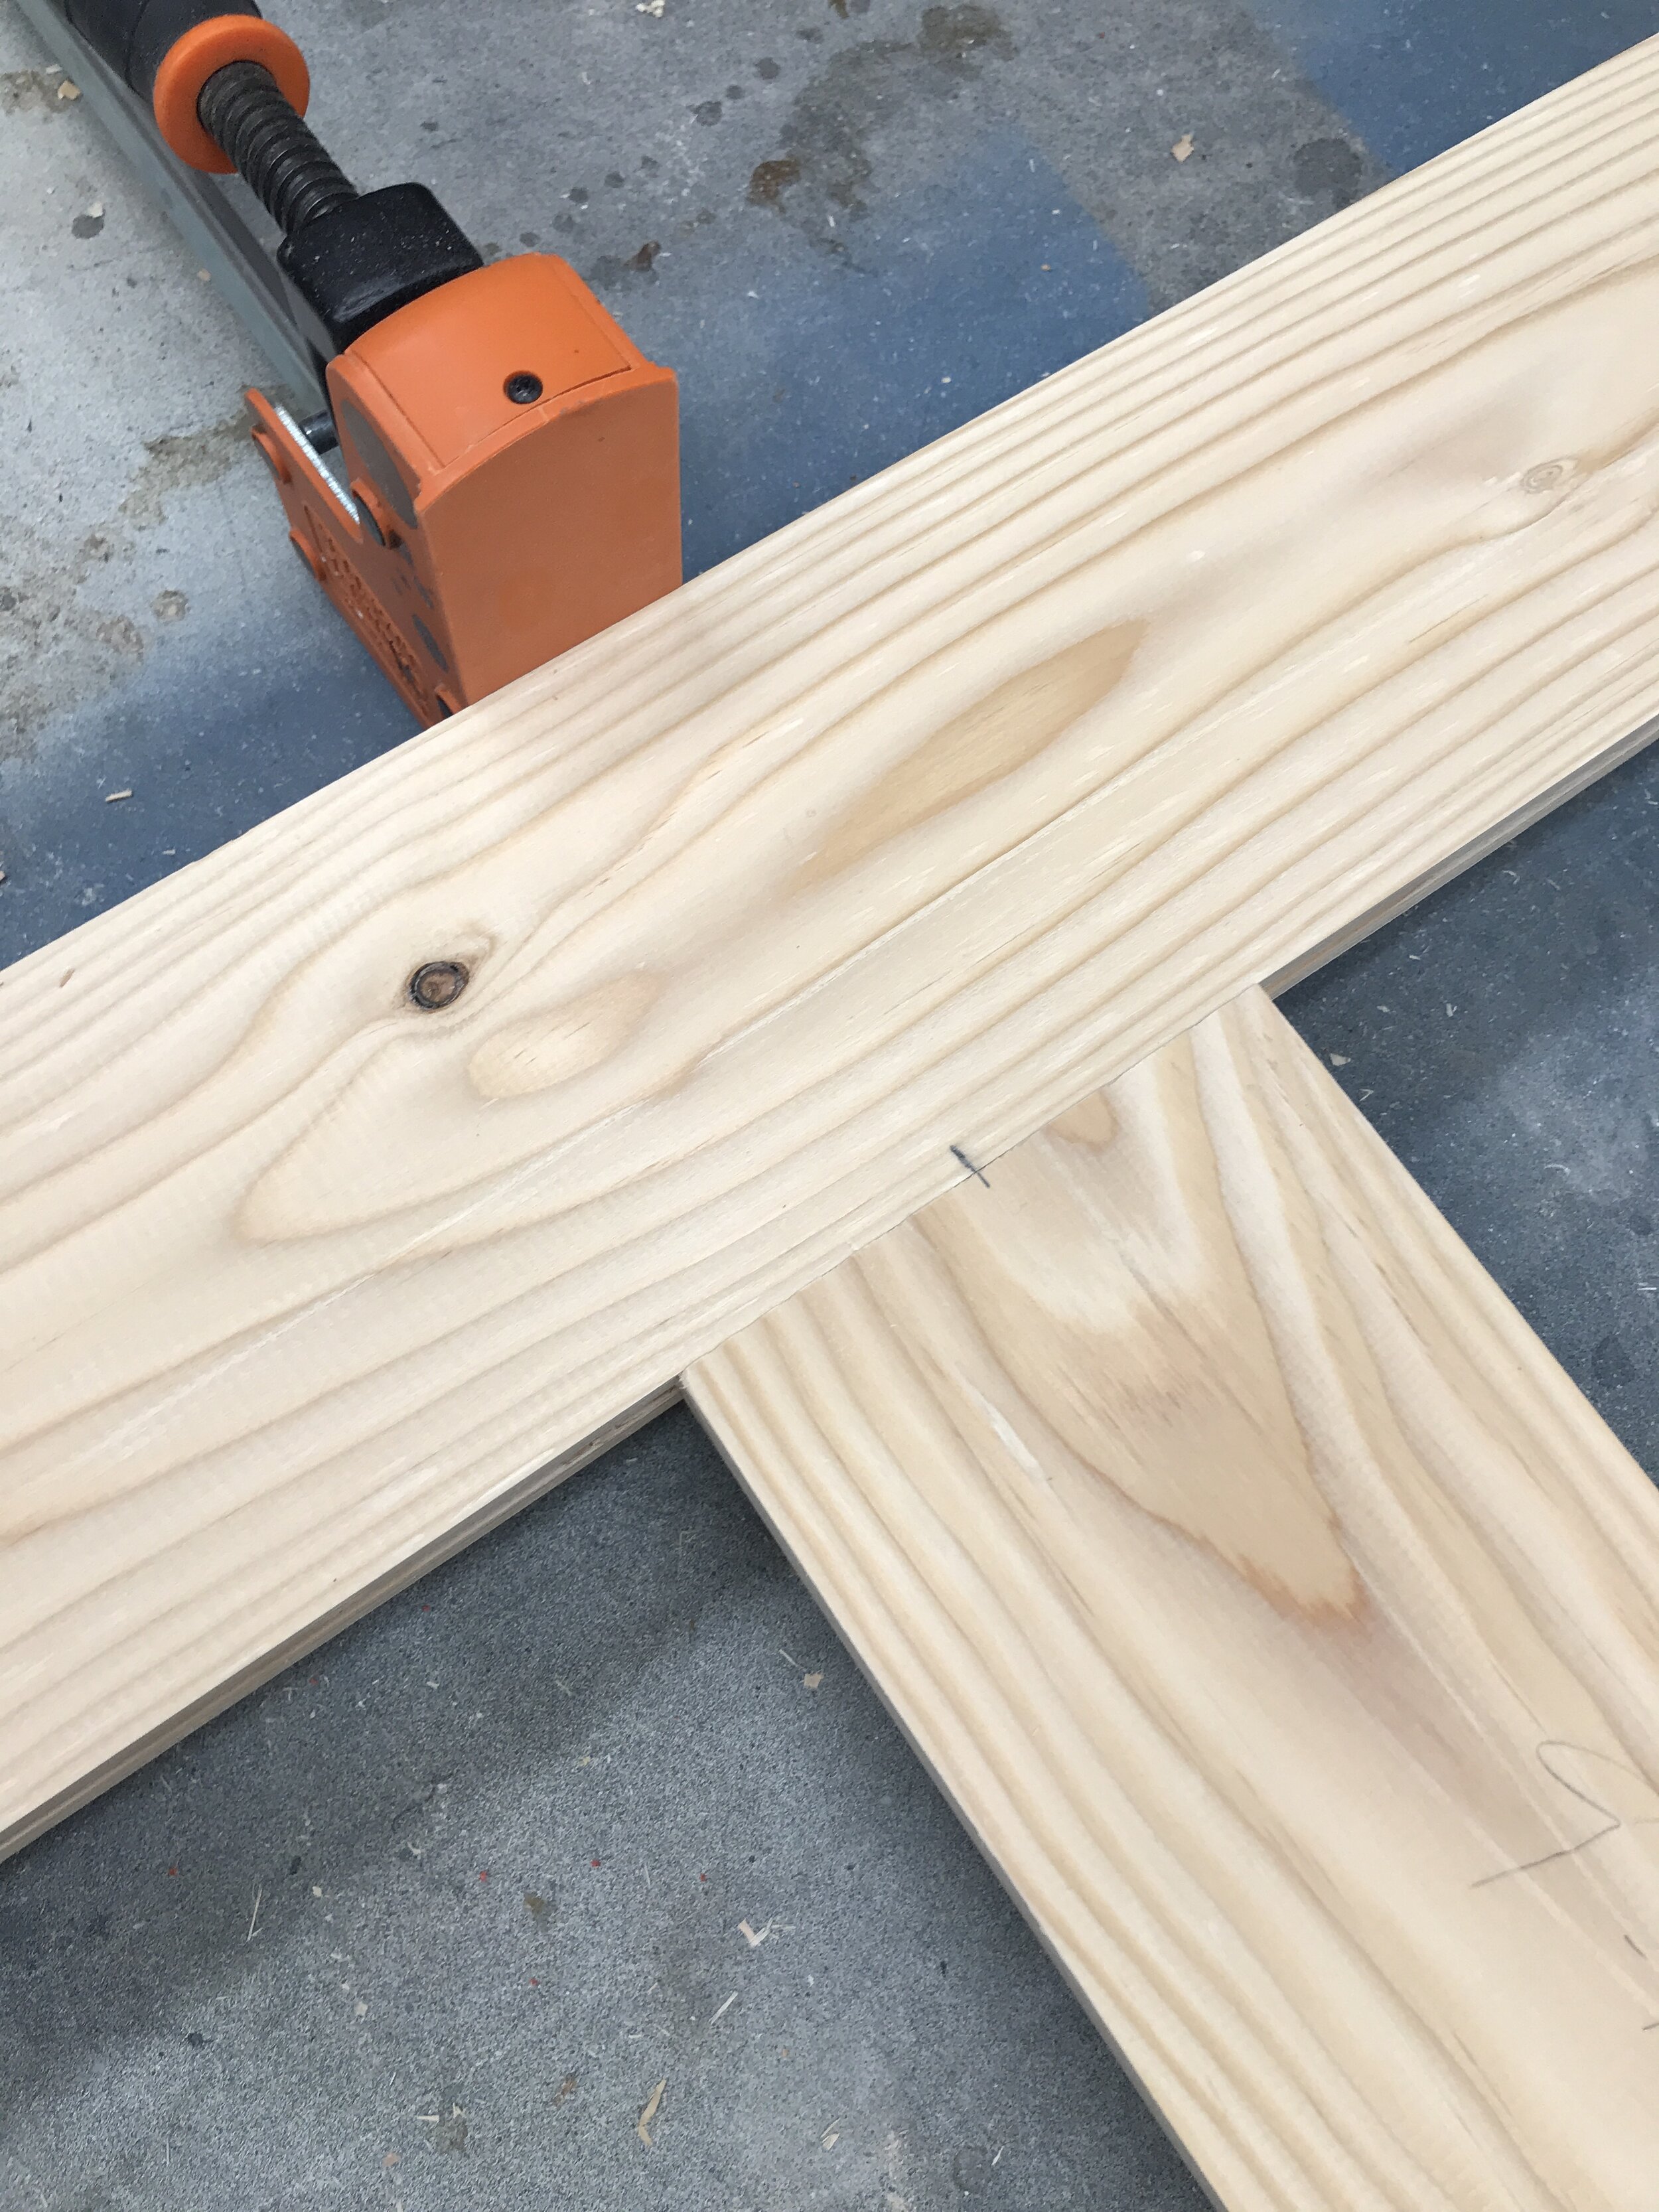
Center Rails ready for the table saw to cut the tongues!
Step 3:
Insert dado stack into table saw at 1/3 the thickness of your board thickness. So if you board is 1 1/2” thick, your dado stack should be 1/2”. This will leave you with 1/2” groove or dado. Set fence to 1/2” and blade height to 1 1/2” and run stiles thru in both directions. This will ensure that the dado/groove is dead center on the boards.

Love this dado stack from Freud. It cuts from 1/4” to 13/16” wide dados!

Stiles with the grooves cut!
Step 4:
Next set up a stop block on your miter gauge for the table saw to 1 3/8” and your blade height to a hair past 1/2”. Having the depth of the tongue at 1 3/8” instead of exactly 1 1/2” like the groove allows room for any error... I had some at the ends of my grooves because it was a little hard to hold the board completely flush to saw top at the end of cut. And if your blade isn’t flat you might not get the exact 1 1/2” depth thru the entire cut. Its wiggle room… plus it ensures that where the tongue and groove meet will be flush.

I sanded the tongues to clean up any marks from the table saw and to make them easier to insert into the grooves.
Step 5:
Run all center rails thru the table saw using the miter gauge setup like above. It will take multiple passes on each side and ends of the boards.

Tongues - Check! Now I arrange the boards to that the grain direction was up down up down and arranged the boards to a good pattern based on color and knots.
Step 6:
Find center of the stiles and make a mark, then install the middle rail into the grooves using wood glue and clamp til dry. Be sure to check for square. This is the only board that you will be putting glue on the tongue.
Assembly time! This is the only rail that gets glued it place!

Check for square after each board to make sure everything is fitting together just right.

First rail done… now only like 17 more to go!
Step 7:
Install additional center rails into grooves by sliding them down for the ends. You might need to sand or clean up the tongues on the rails before doing this. I also added a couple of dots of glue to the sides of each rail so that they would stick together. But this is completely unnecessary, I just thought it might help them move together if there was any wood movement.

The door was too big for my workbench, so I used my Pony | Jorgensen Cabinet Master parallel clamps as a platform. Plus, the help me hold everything together and help get each piece squared up.

So happy to get to this point! You can see I left my stiles long in case there was any error in assembly. I trimmed them once everything was pinned.
Step 8:
Pin middle board. Drill 3/8” hole thru the groove and tongue and glue in a 3/8” dowel or pin. The center is the only spot that has glue all the way thru touching both sides of groove and tongue.

Again, middle board is the only one that gets glue all the way thru.
Step 9:
Pin end boards. Drill 3/8” hole thru the groove and tongue. Mark dowel pin at 1” with a line, add glue to bottom side of hole or outside of groove, hammer dowel into the line, then add glue around it and finish hammering it in until you can feel it flush on the back side. Ultimately you are trying to get glue only on the outside side of the grooves and not on the tongues.

Step 10:
Once glue is dry on pins, cut them flush. Wood fill any spots as necessary and sand.
Step 11: Shou-Sugi-Ban entire door. For more information on the process I use, check out these other projects.
DIY Slatted Scrap Wood Planter
With burning the door I want to raise the grain or burn away the soft grain leaving the hard grain exposed. So after burning wire brush the door in the direction of the grain as to not leave wire marks.

First burn. I generally burn the door twice to get a good charr.

After 2nd burn.

After wire brushing to remove charr and reveal all that texture!
Step 12: I sanded all the nooks and crannies smooth using Diablo’s NEW Reusable Sanding Block. It has a dense foam side that is good for break edges and a softer side that is great for sanding all the contours after the burning process. Plus, the sandnet sand paper last forever and is easily cleanable by vacuuming the dust or blowing it off. And when it is done, just toss the paper and reuse the foam!

I love that the foam is reusable and that it uses sandnet paper!
Soft side is great for sanding contours. Dense side is great for breaking edges off of corners.
Step 13: Once door is sanded you can clear coat is as you like. The burning process leaves it a nice brown color, which I love but doesn’t really work for my space. So I ended up staining my door in Ebony stain by Varathane and then clear coating it with a matte polyurethane. And I love how rich the color turned out.
Step 14: Install your barn door hardware per the manufacturers instructions. When hanging the track on your wall be sure to install the track directly into studs. I like this hardware set I got off of Amazon because the track is one piece and it comes with the door handles stops and everything you need.
If your studs don’t line up with the holes on the track you will need to install a backer board into the studs first and then the track onto the backer board. Make sure to use real wood for the backer board, it is stronger than mdf! I like using these pre-prime boards.
And BOOM… just like you made an AWESOME barn door! I honestly love how this door turned out, it adds just the right amount of rustic character that my space needed.
I hope you found this tutorial helpful and that it gives you the confidence to get out there and build yourself one! If you do end up building yourself one, please tag me in your post… I’d love to see your work.
But if this barn door wasn’t your style or you want something a little bit easier in the building department, check out this post… How to Build a Barn Door - the Easy Way!
Thank you so much for following my journey! Remember Build Loud, Build Wild.. just go for it and have fun! OH… and have an AWESOME day!
Sadie Mae
Can’t build it now? PIN it and save it for later!


