How To Install Drawer Fronts
Alright, alright, alright.... I am ready to tackle another step in my closet renovation, drawer fronts!!! Since this project is for me and I am doing it all in between clients builds I wanted to pick a material that would be quick and easy to work with. I thought about using 3/4" plywood for the drawers fronts, but then I wasn't sure on how well the edge banding would hold up with heavy everyday use. I like the idea of shaker style, but that is just a little bit too much work than I have time for right now. Then I thought how about solid pine, but then remembered how hard it is to find straight non warped pieces let alone 10 of them. So, I decided to go with some project panels from Lowes. They are made from pine and are fingered jointed together. They are probably made from all the scraps left over at the factory. But since they are small pieces and glued and joined they are really flat and I think they will be more stable than the other two options.
This post is NOT sponsored.

Lowe's Project Panel - $11.64 each (Approximately 72"L x 12" W)
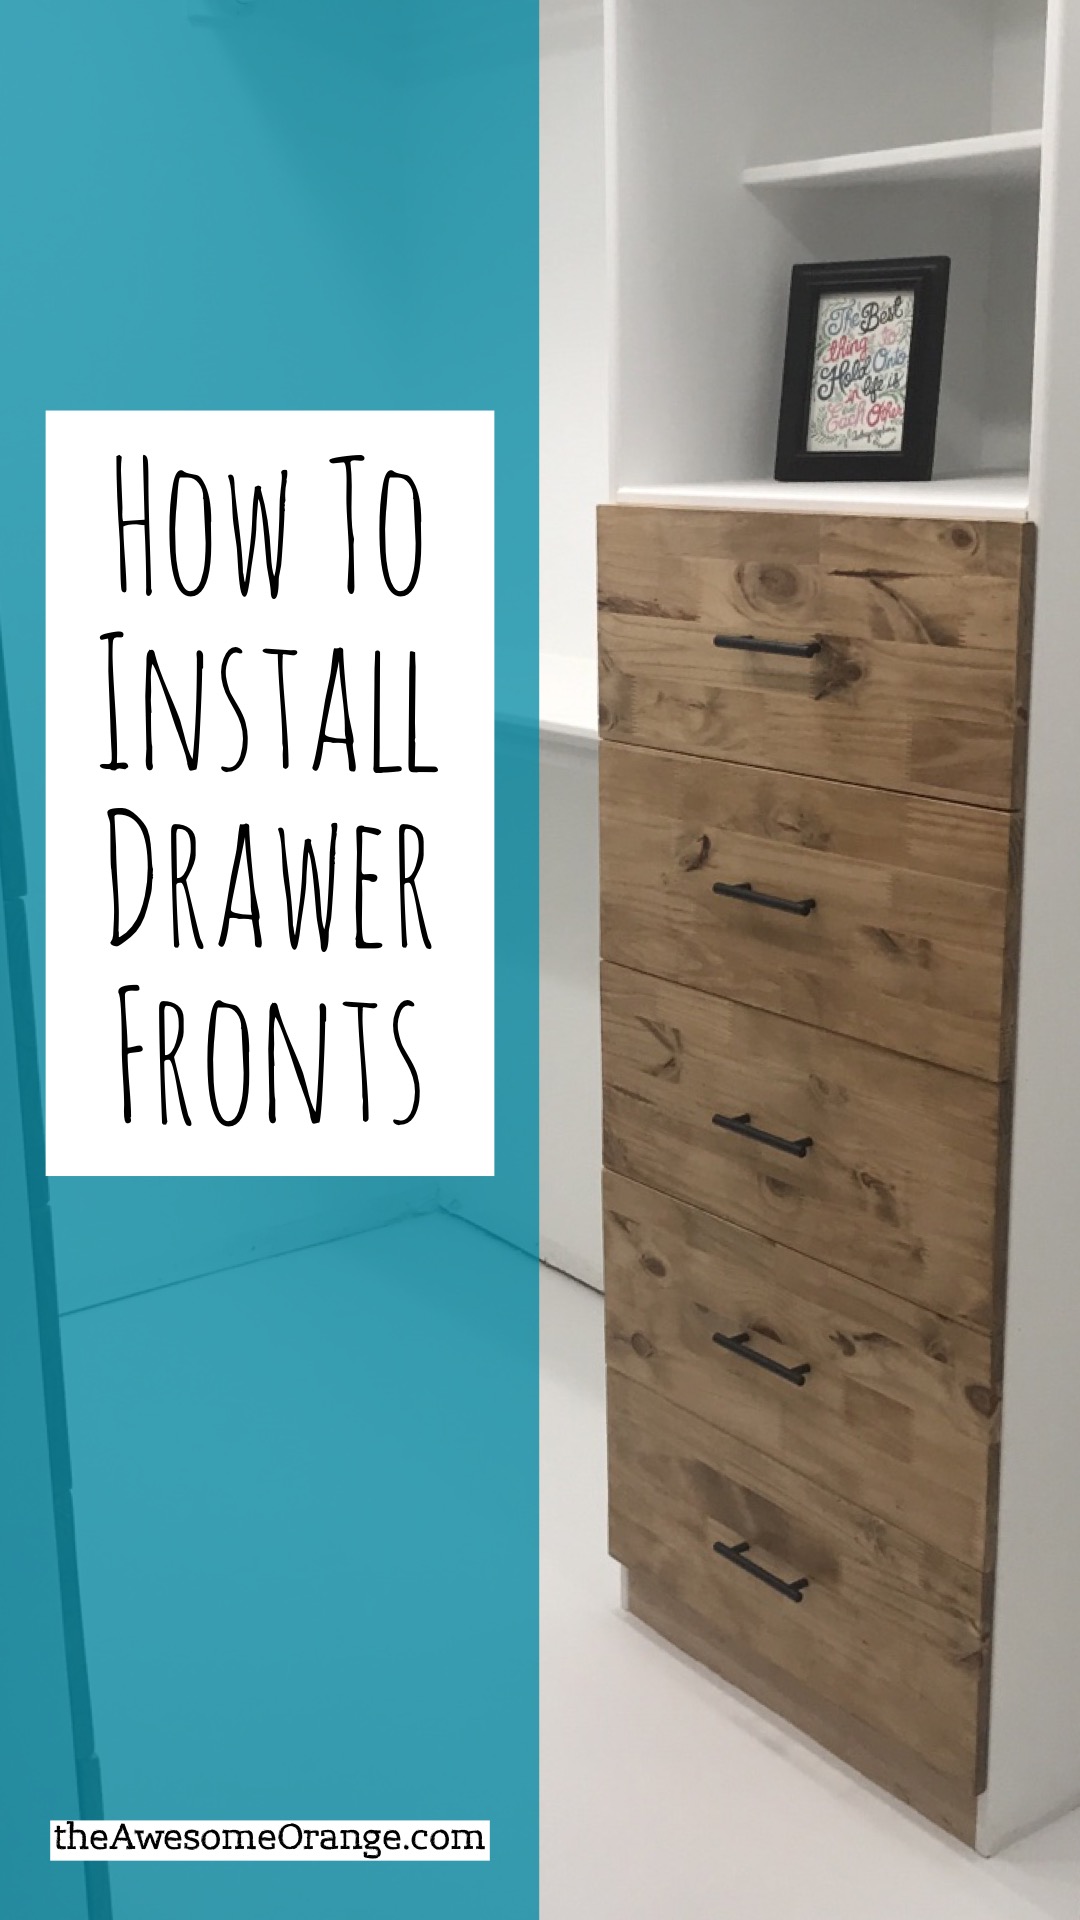
So now that I know my material I needed to decide on how to finish them. Well this was a way harder decision than I had originally thought. I originally thought of just painting them white. But since I am painting the cabinets, walls, and floors white I ended up choosing to stain them. I couldn't have made that decision without all of your help! Thanks for participating on my poll on Instagram! And now that they are done I am so happy with that decision!
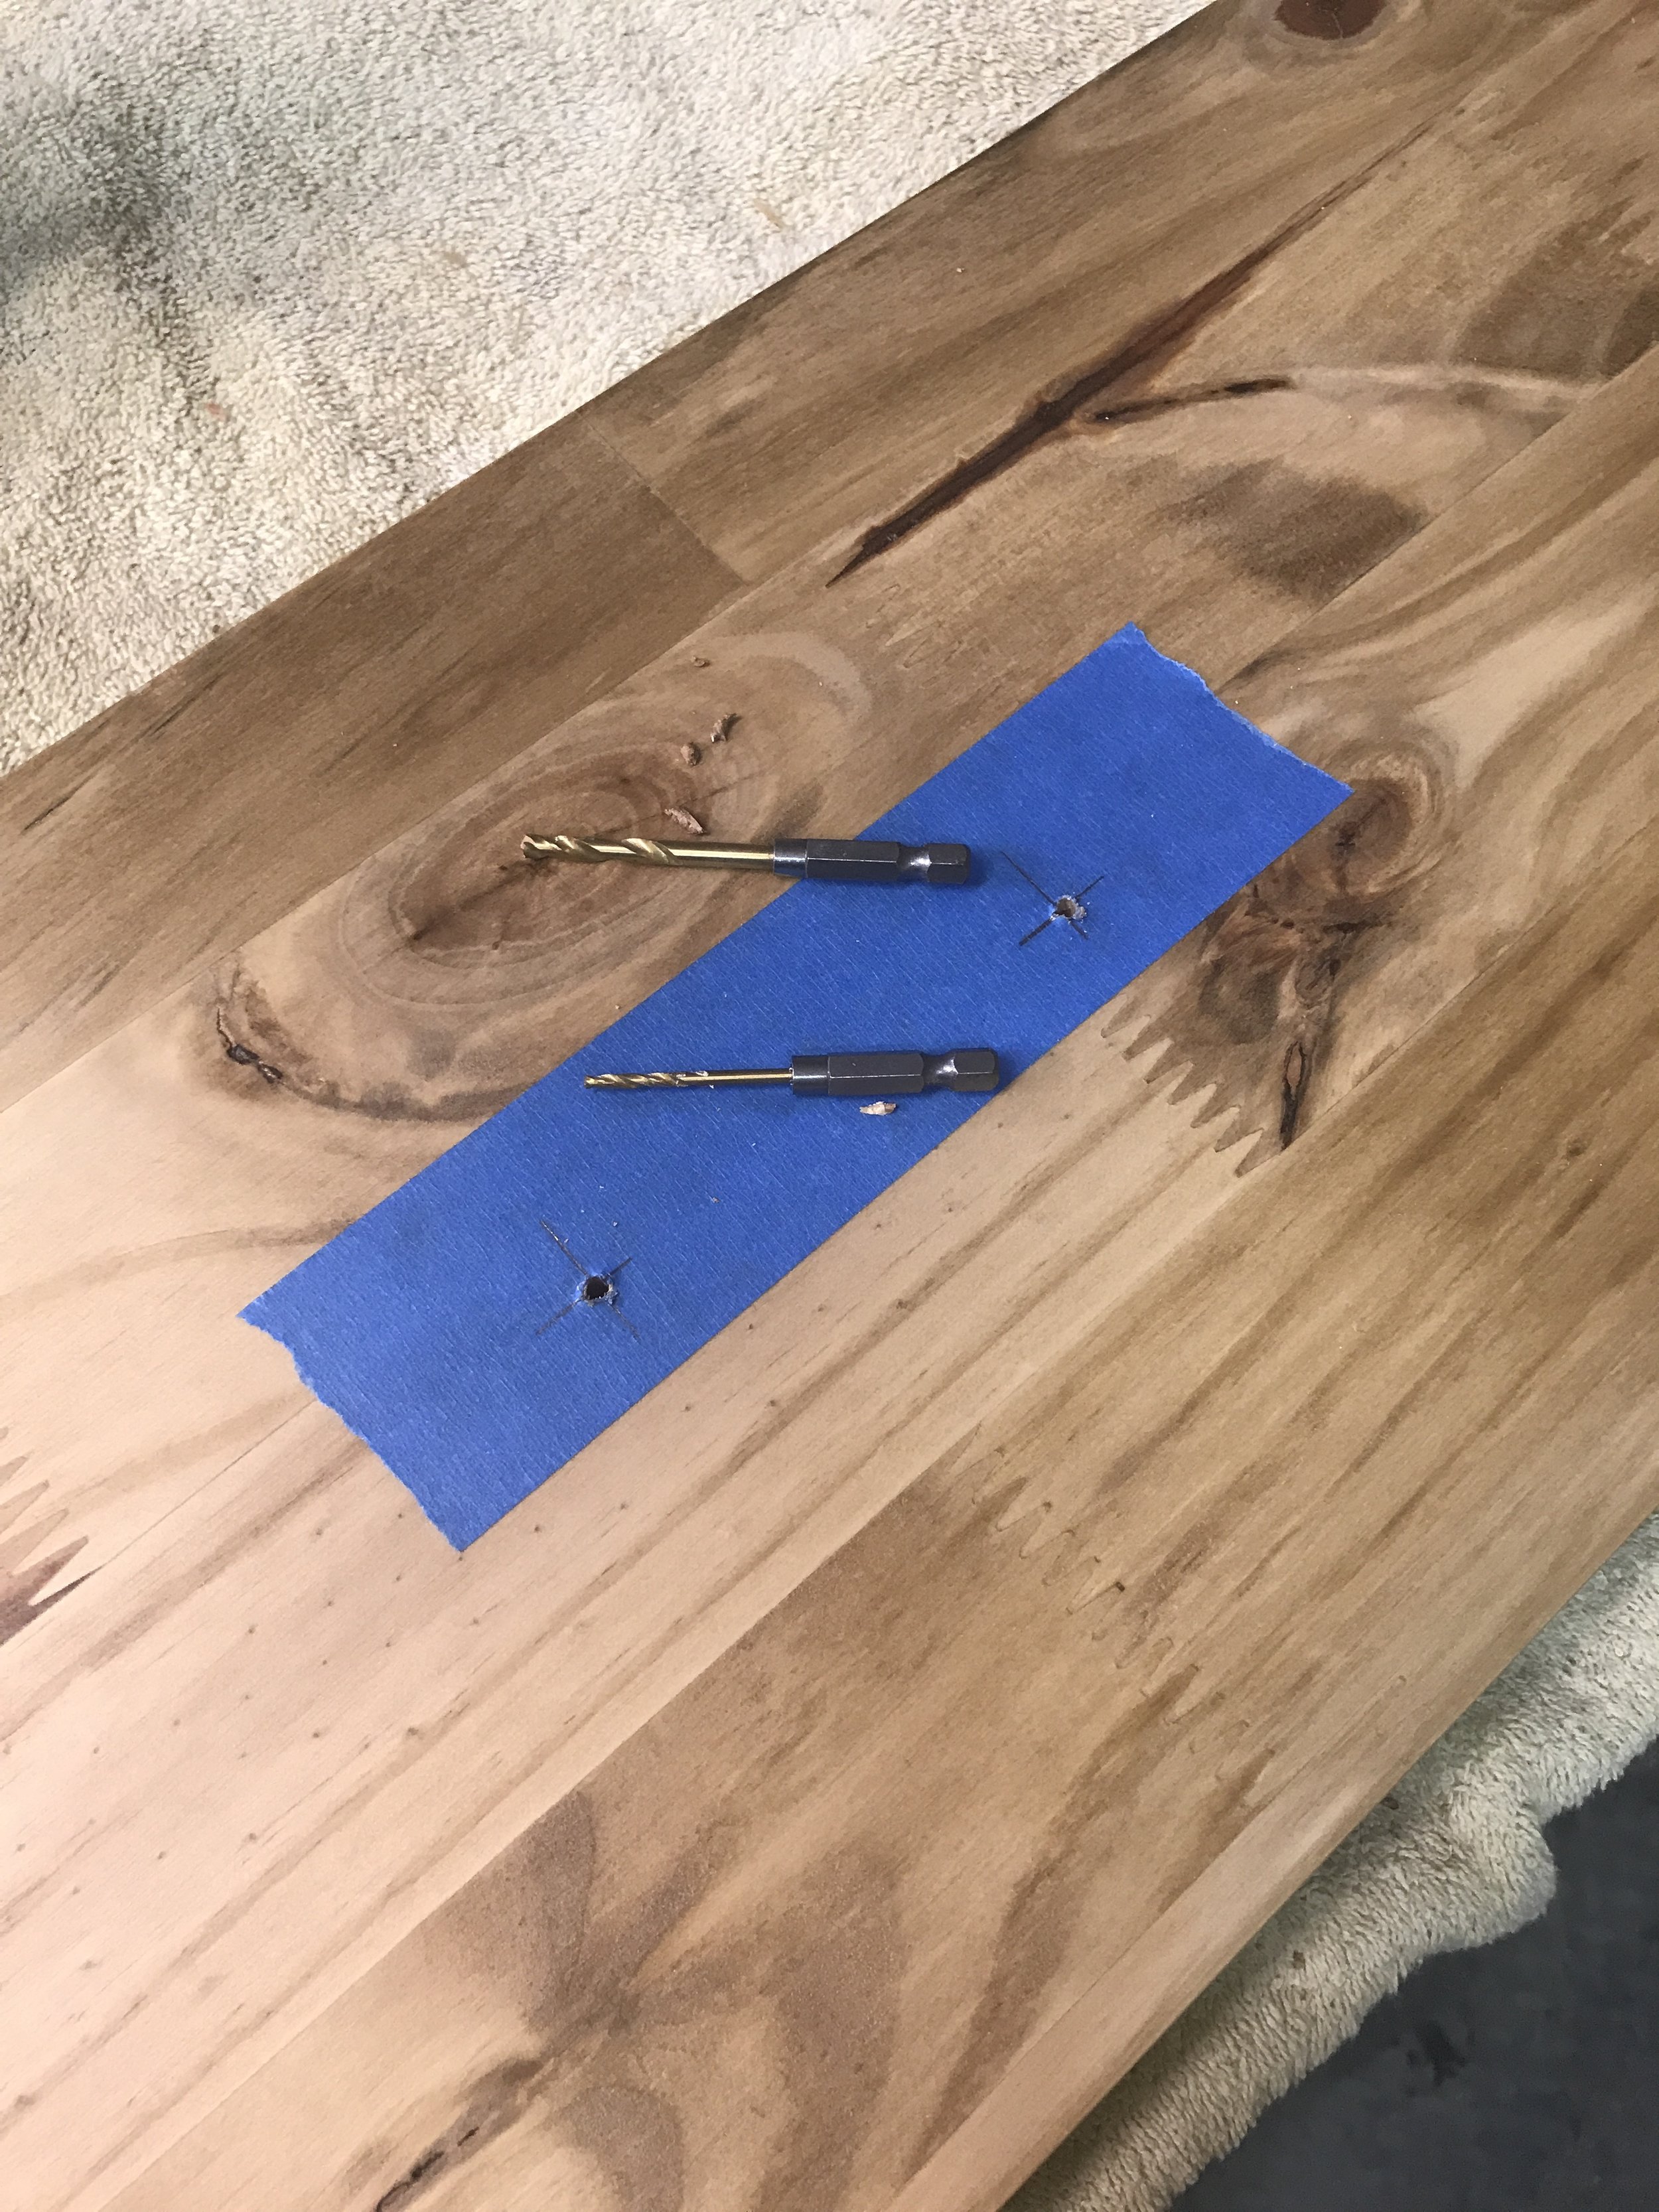
And now that we know the materials and color, lets get to how I installed them! For this method of installing drawer fronts to work you need to have your hardware picked out and your hardware needs to be a pull and not just a knob, you'll see why in a minute. So first step is to lay out where the hardware is going to go and drill the holes. I am not going to go thru how to do this because there are so many ways to do that and so many AWESOME jigs to help with this step. But once holes are there we can start actually installing the drawer fronts.

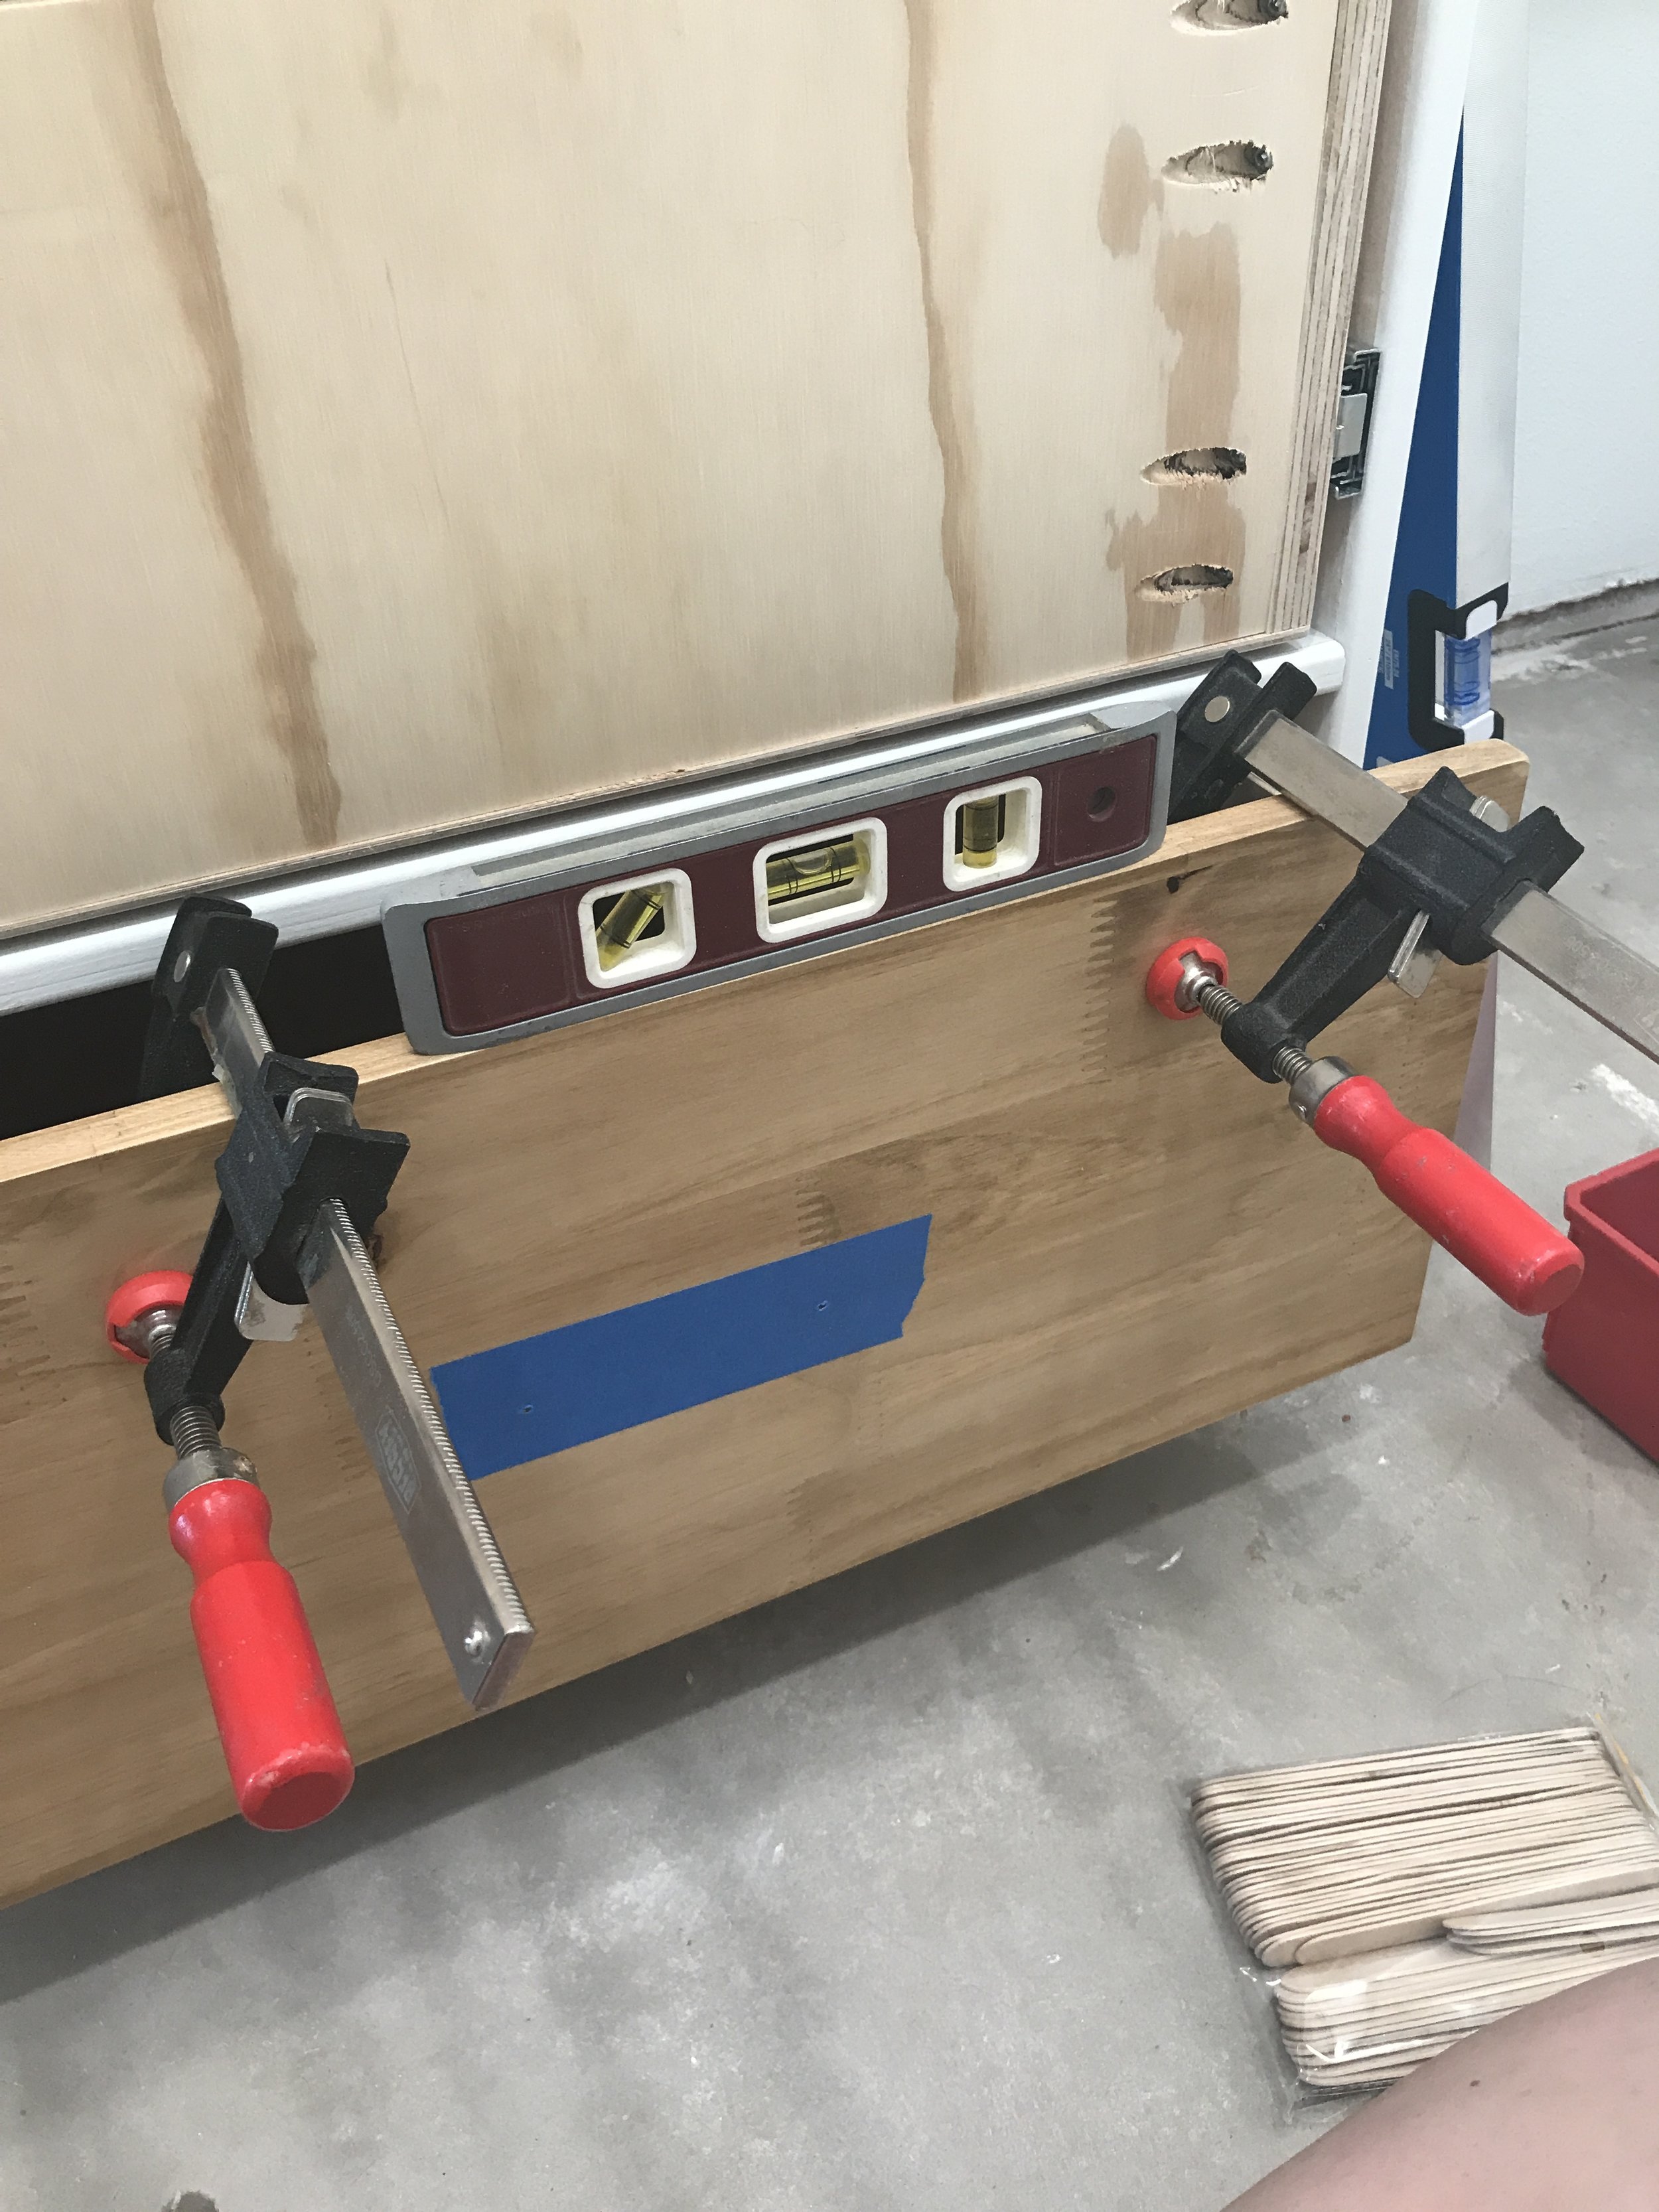
I start with the bottom drawer... and this is the toughest one to install. You have to make sure it is lined up side to side and up and down. When you are determining the height of your drawer fronts you also need to take into consideration the gap in between each drawer. I like about 1/8" gap or approximately the size of a nickel. And once I have that measurement I make a line of where the drawer front needs to line up on the bottom. And after several adjustments and checking for level you'll have it right where you want it. Make sure it is clamped on nice and tight so it doesn't move when you let go. Now using whatever screws you have laying around drill thru the hardware holes and into the drawer boxes! Be sure to use two screws, one for each hole so drawer front doesn't shift. Also, be mindful not to over drill the screw into the drawer front. Depending on the type of hardware you might not be able to cover that up later.
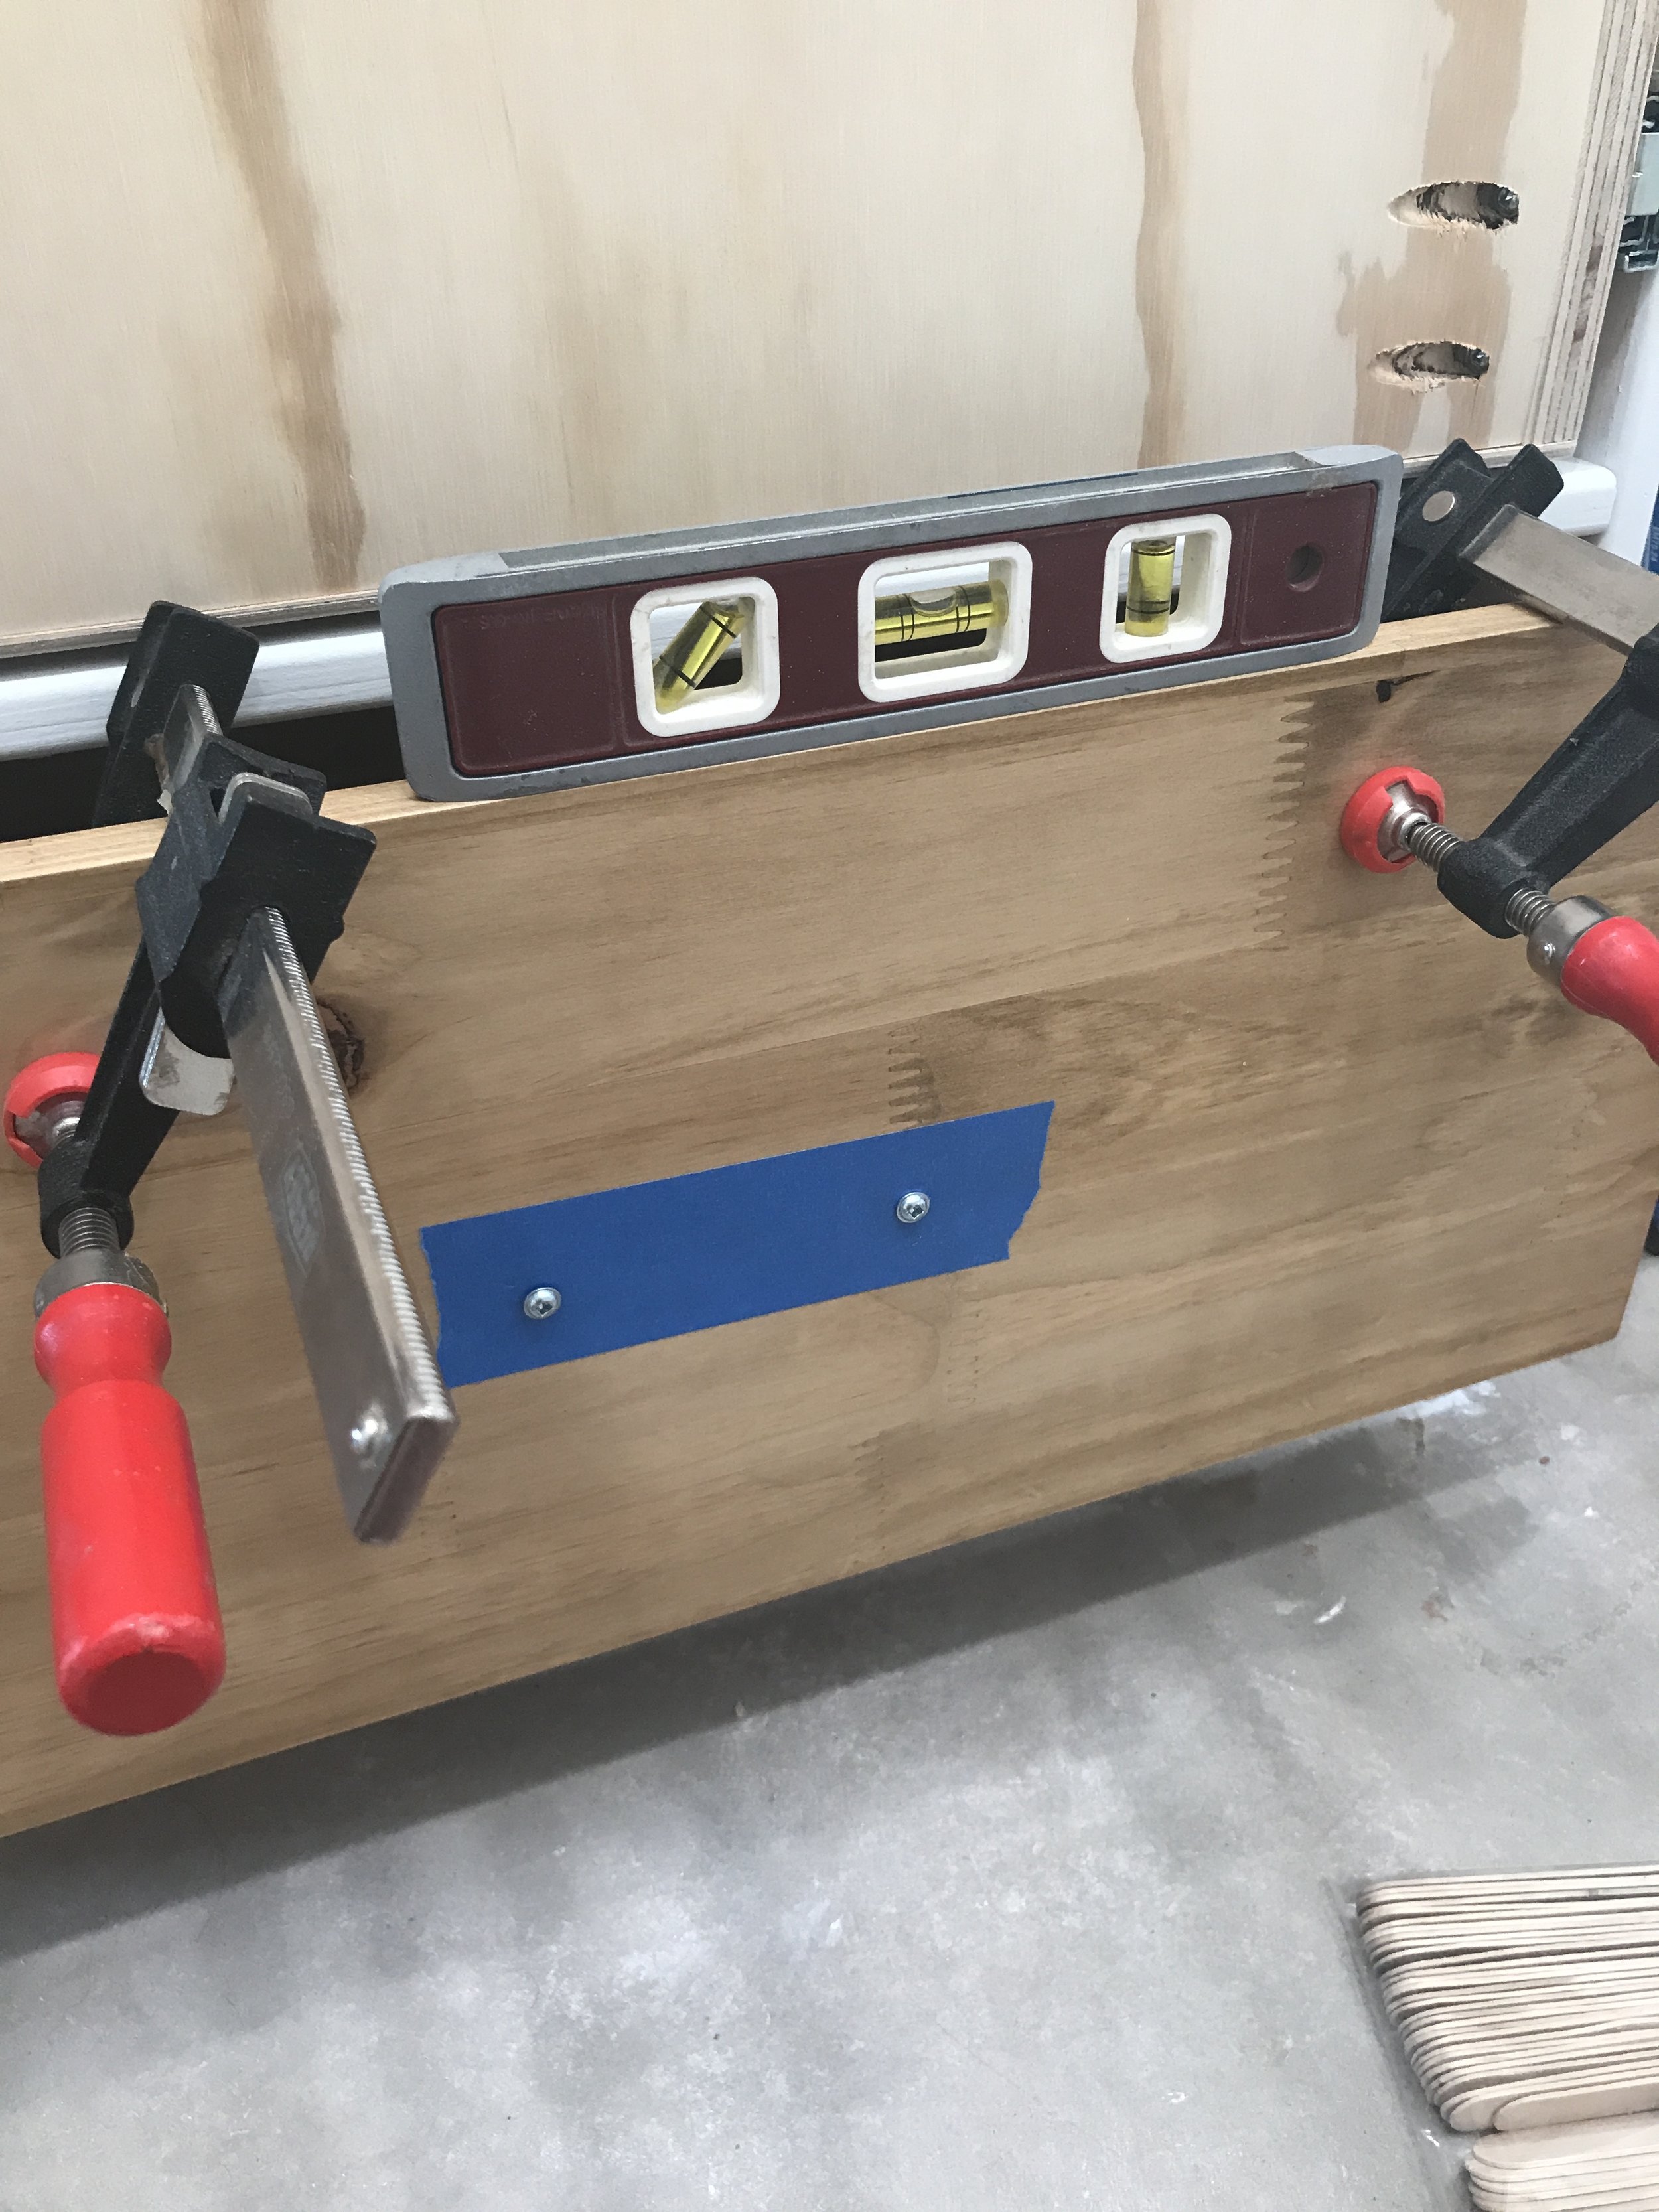
Now that you have the drawer front screwed in from the front, open the drawer and screw it 4 washer head screws thru the drawer box into the drawer front. And thats it your drawer fronts are now secure to the boxes. And the next one is even easier!

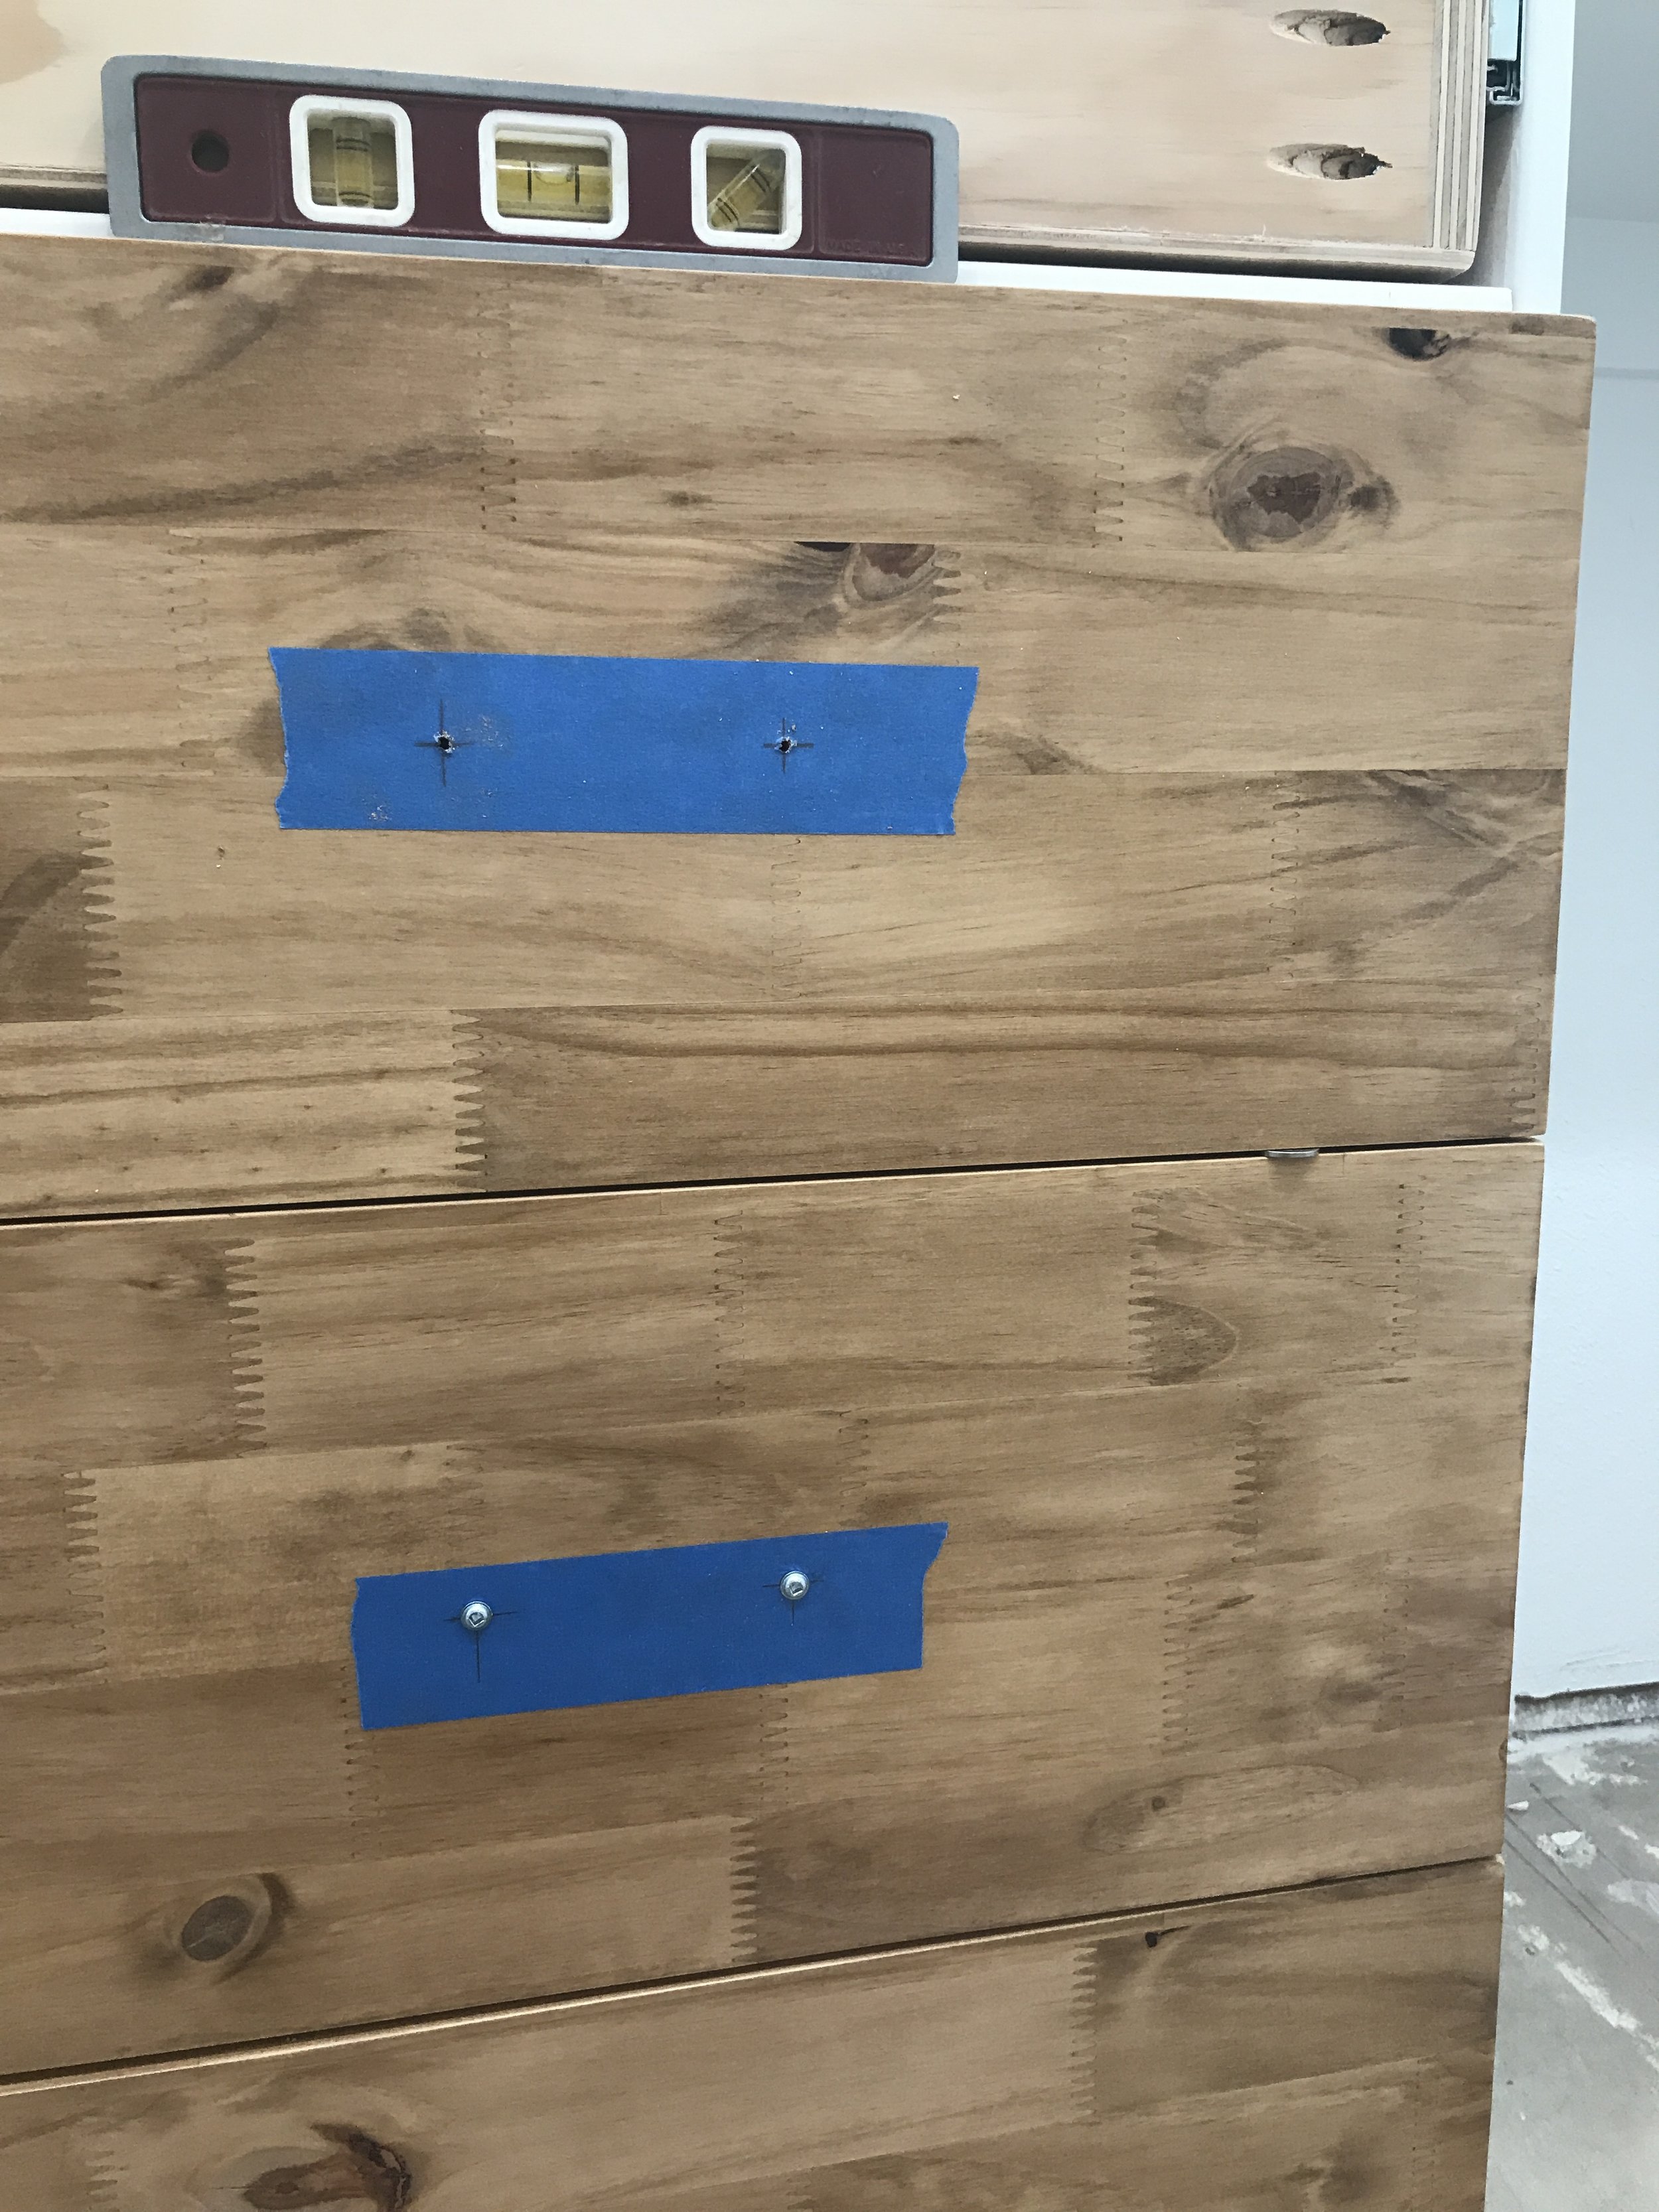
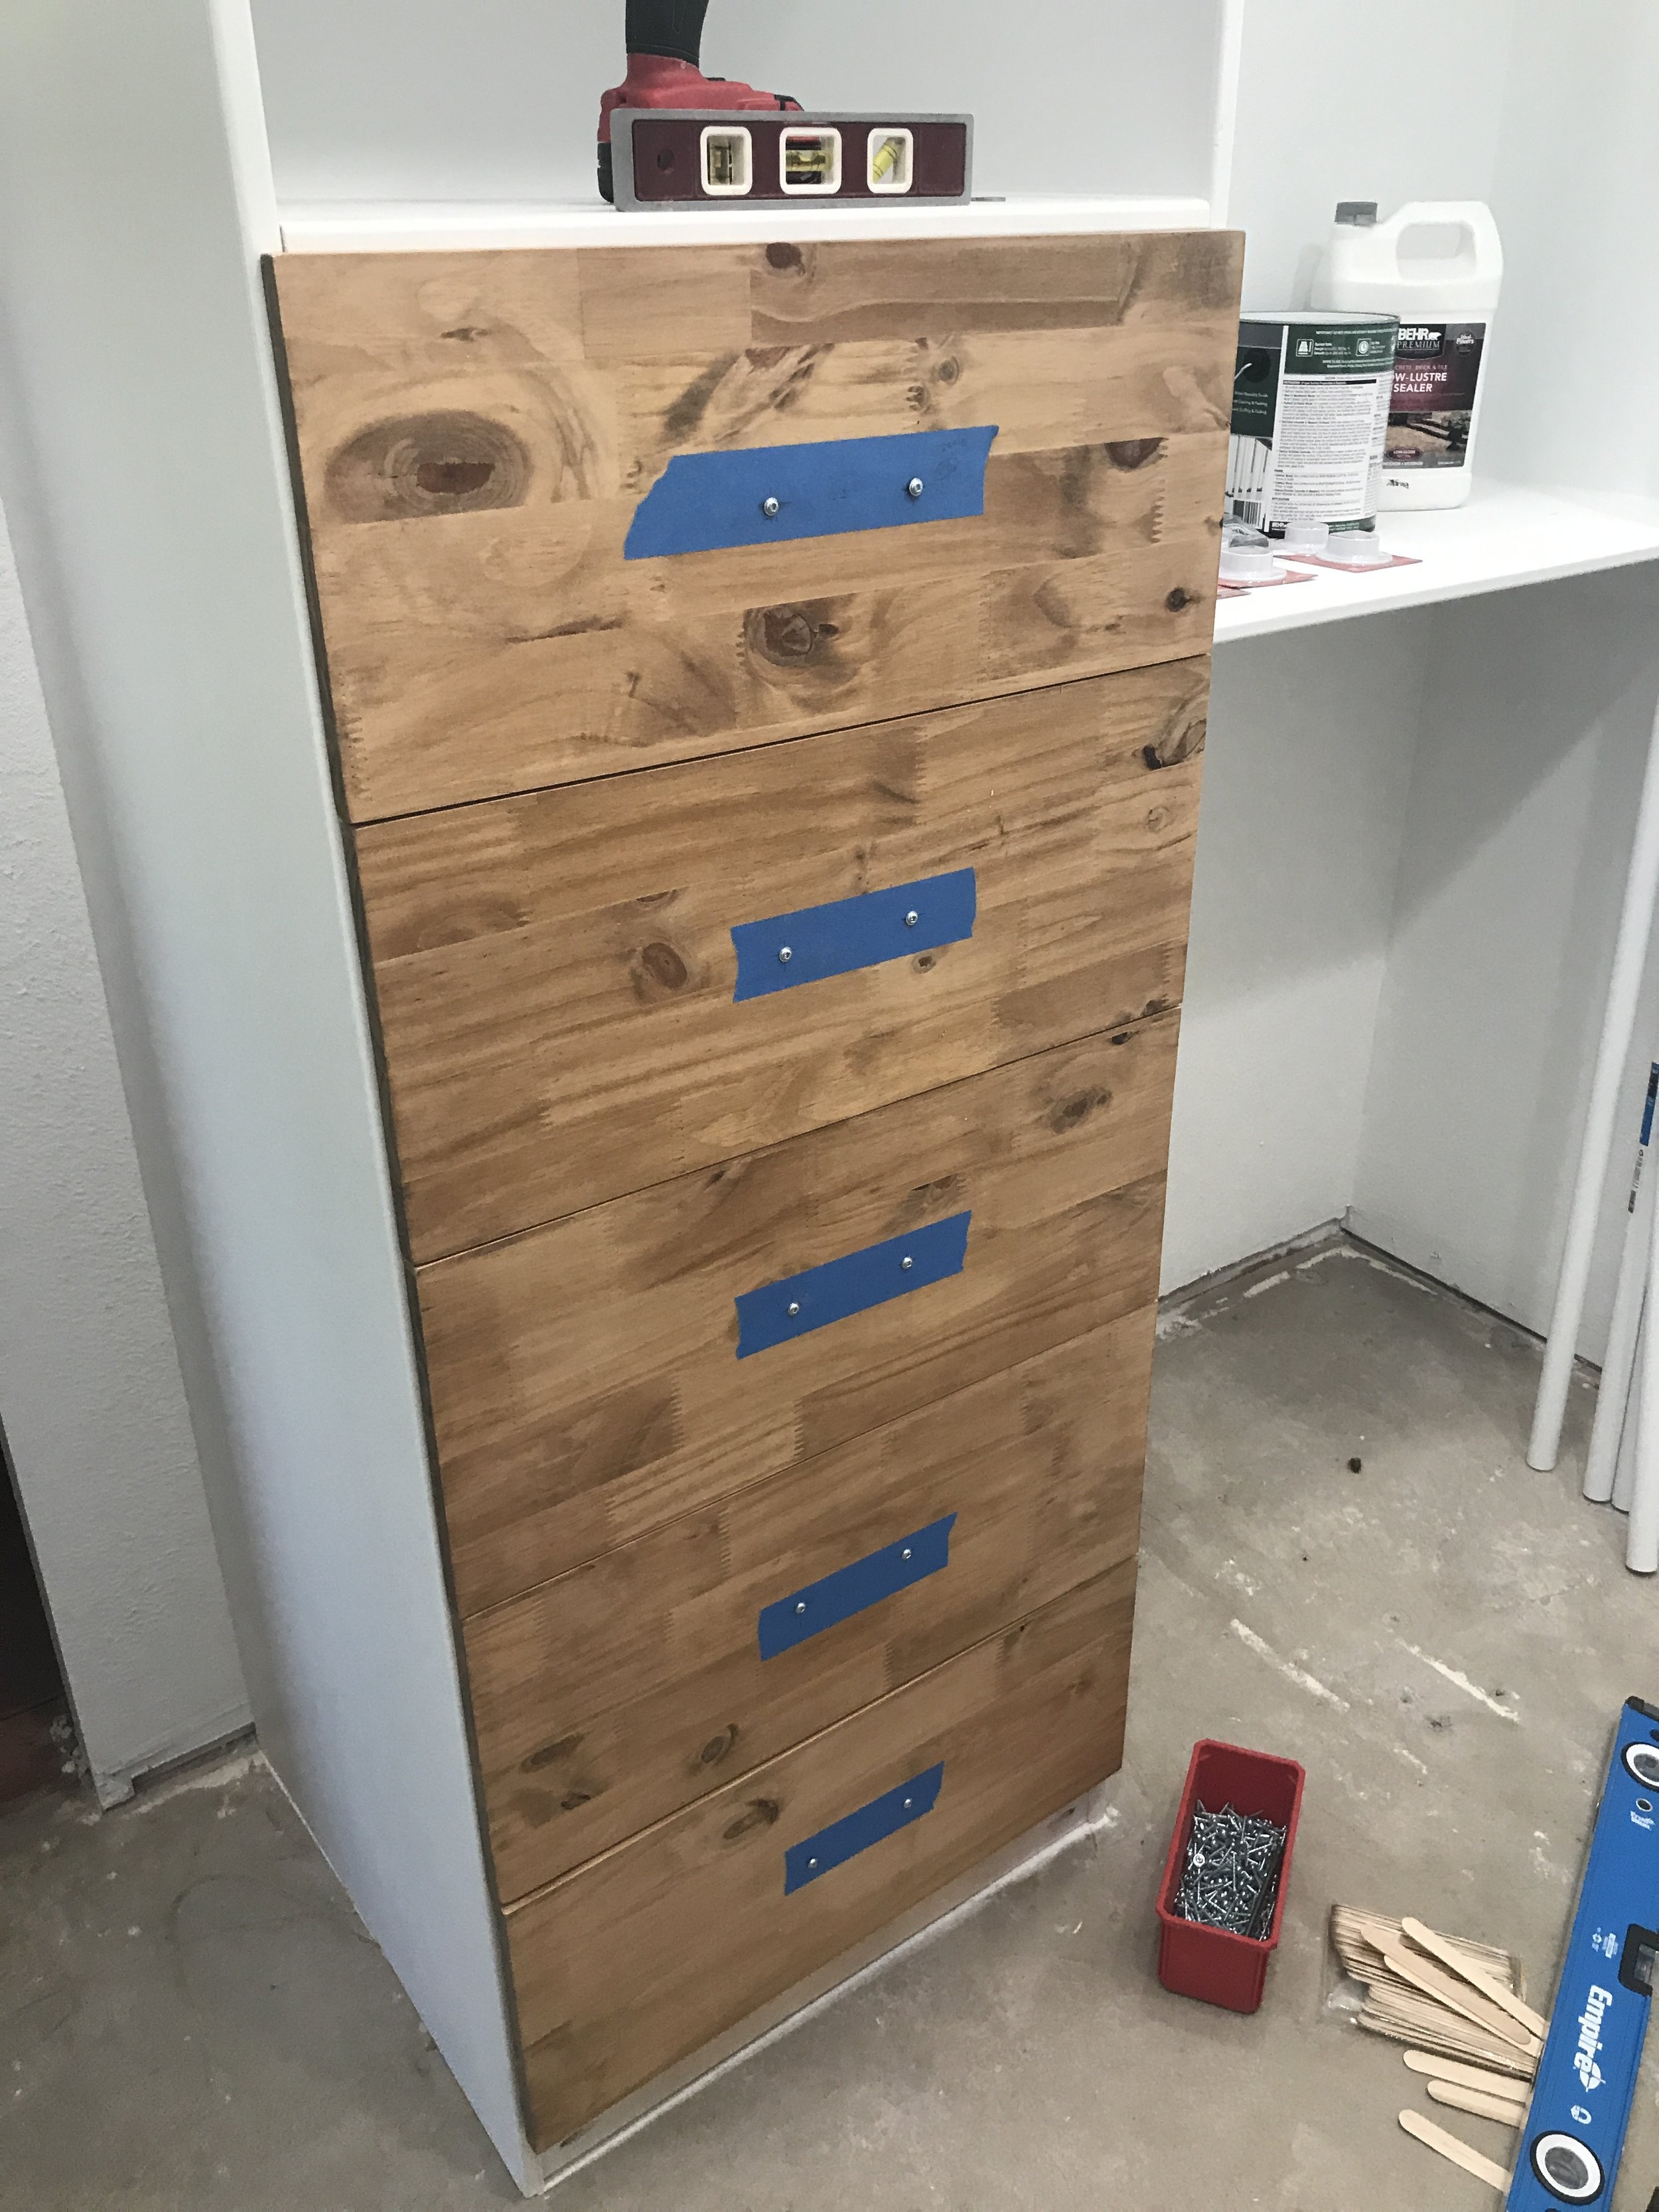
Remember those nickels or 1/8" spacers??? Well now is the time to use them. I take the clamps off the bottom drawer and close the drawer, place the nickels on top and then the next drawer front on top of that. Double check to make sure drawer front is where you want it side to side and up and down and if it is, screw two screws in the front thru the hardware holes. And then again open drawer and secure from the inside using four screws thru the drawer box into the drawer font!!! And so on and so on depending on how many drawers you have.

Once you have all the drawer fronts attached just remove the two screws from the front hardware holes. Then you will need to finish drilling your hardware holes thru the front of the drawer boxes and all the way thru the drawer boxes. Be sure to use the appropriate sized drill bit for your hardware. Once you have all the hardware holes thru the drawer boxes all you need to do is install your hardware!!! And viola you are all done! That simple!
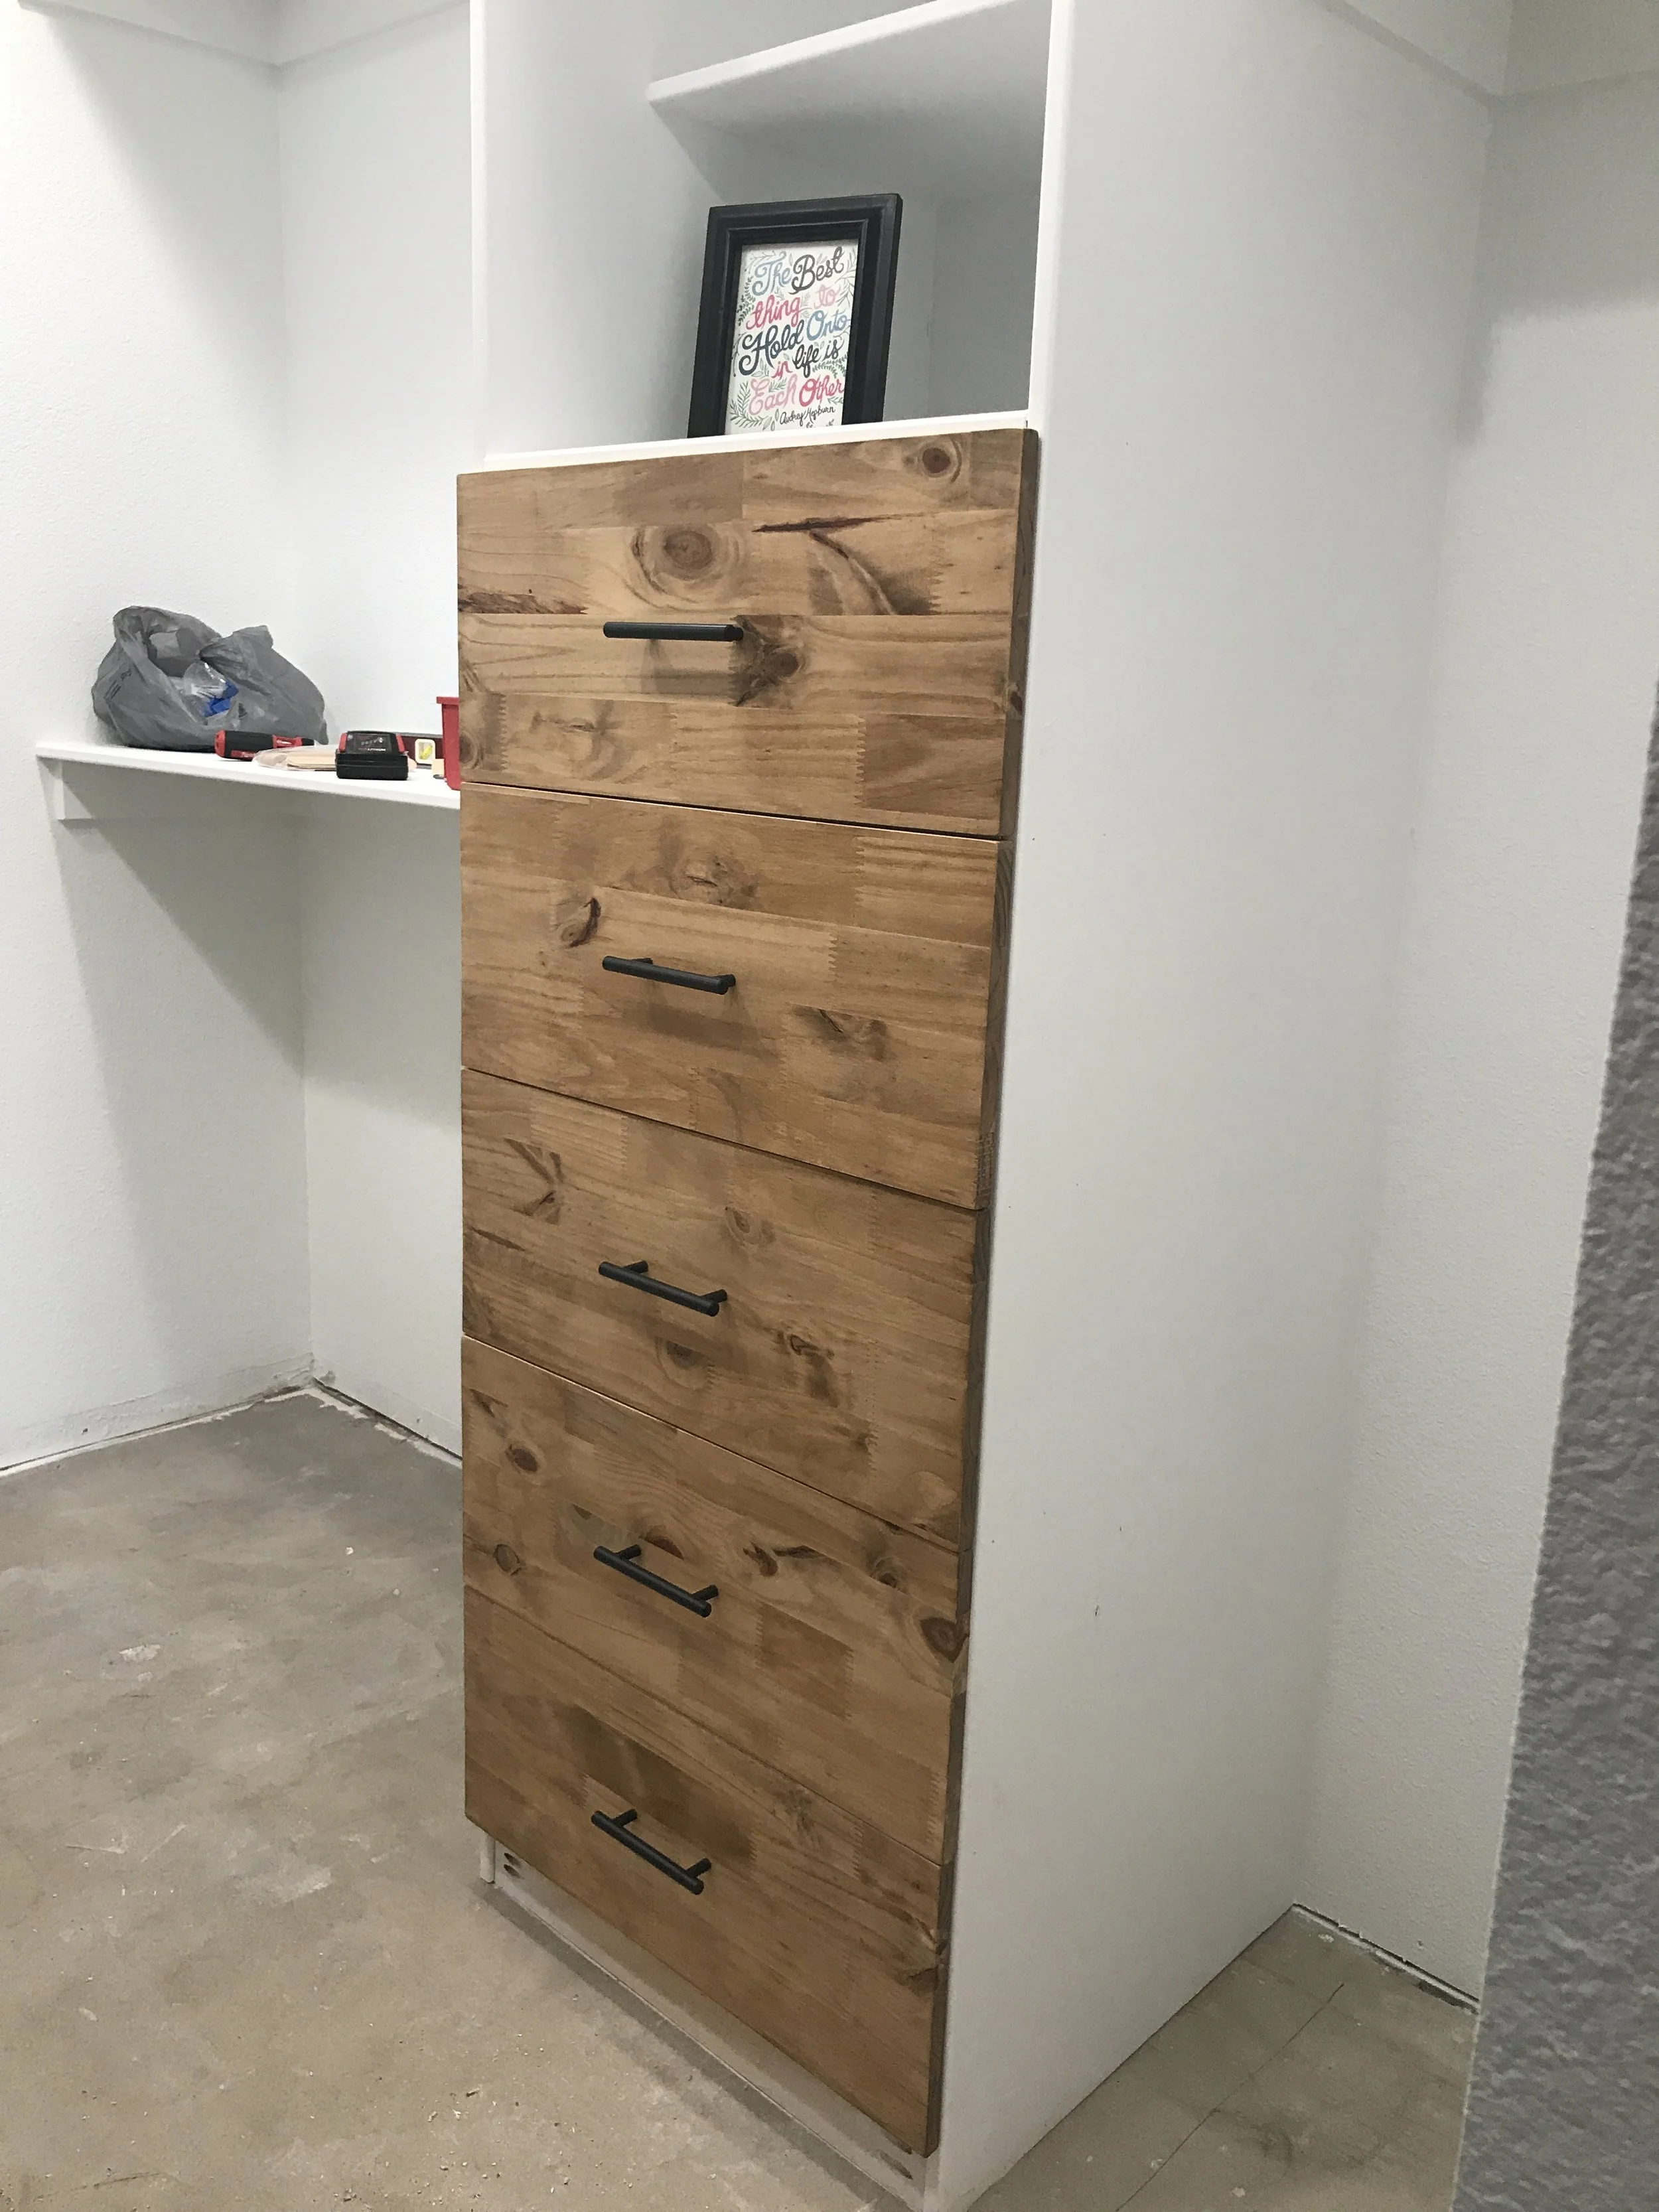
I hope this helps make installing drawer boxes less intimidating. I know it did for me! Now on to finish the rest of the closet makeover!
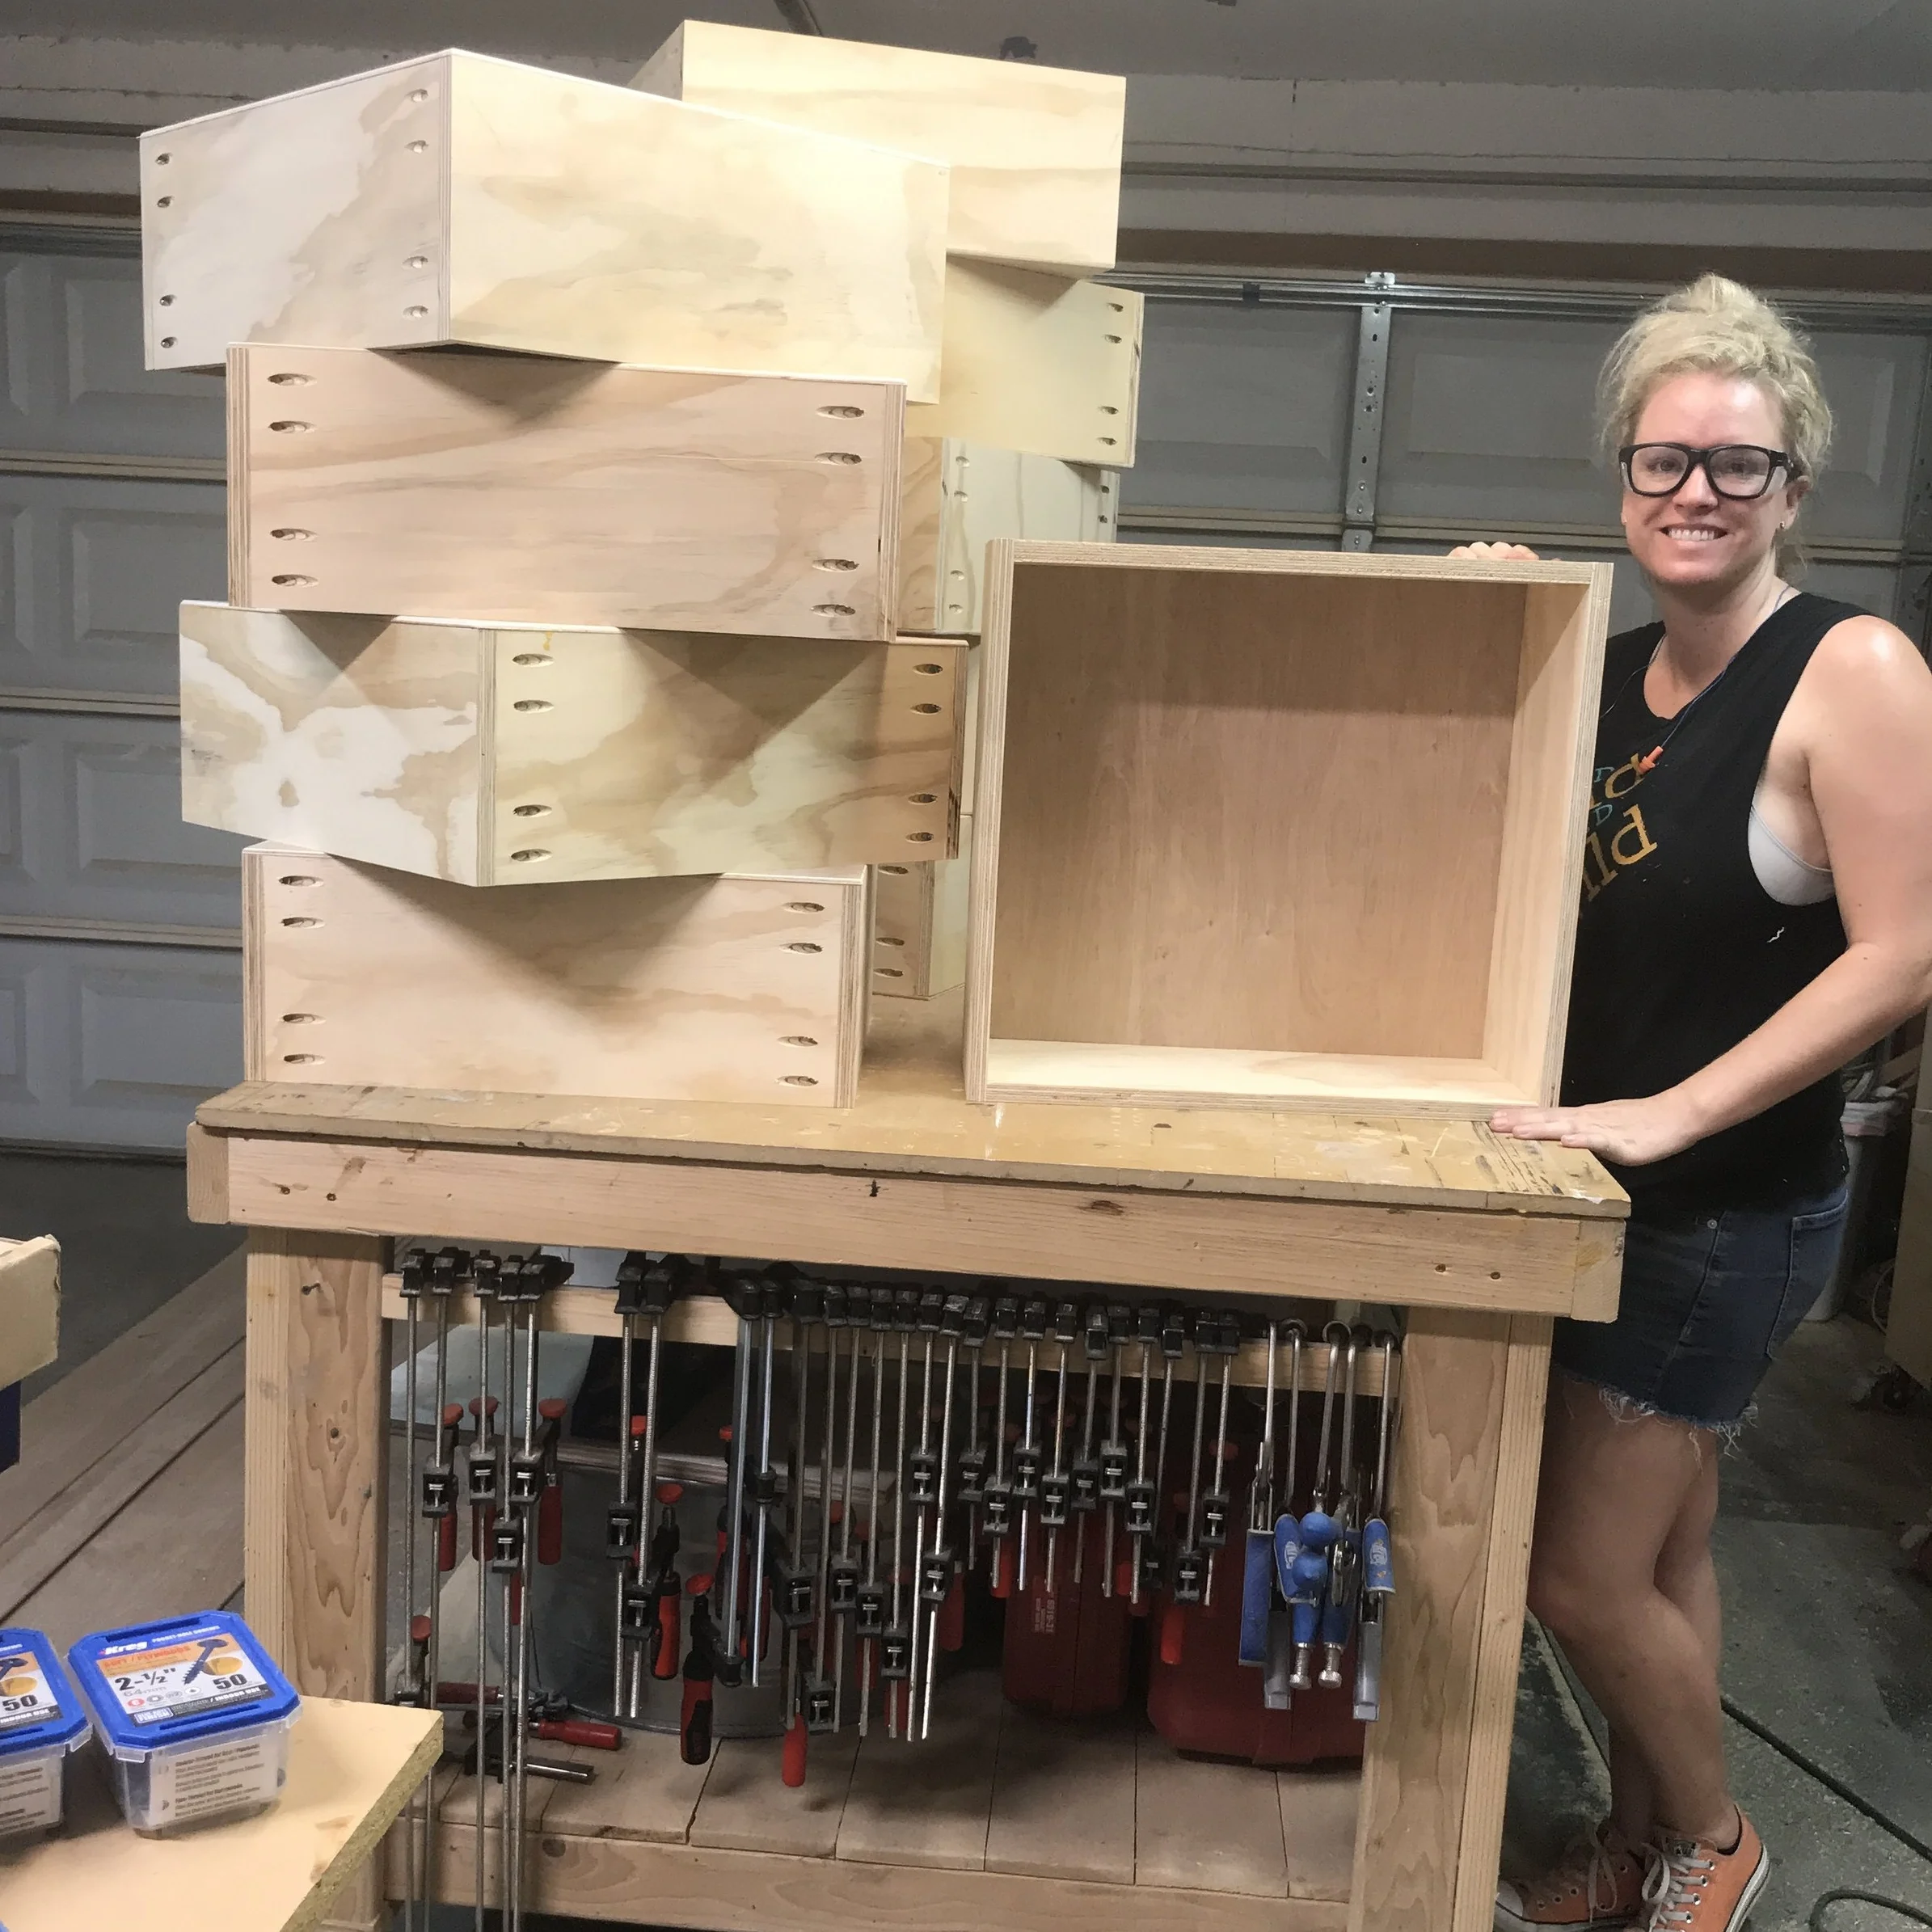
Oh and if you missed my post on How to Build Drawer Boxes - The Easy Way, just click the link. And once I am done with the closet you know I will be posting all sorts of before and afters for you!
Not installing drawer fronts today???
Save this woodworking tip by Pinning the Pic below!
Thanks for following my journey! Keep #buildingawesome! And have an AWESOME day!
-Sadie Mae