DIY Highback Mudroom Bench
If you are like most people you need a place when you first come in your home to drop stuff! Whether it be in the entryway, the laundry room, the garage, or a dedicated mudroom having a place where the shoes, coats, purses, backpacks, etc. can live helps keep the rest of the house from being one big drop zone. So when my client came to me needing a spot just like this for a small space in her laundry room, we designed something that worked perfect for her space. But not only that I think this piece could work for a lot of people and was an easy and fun build that you could easily put your design or personality stamp on.
This post is NOT sponsored, but DOES can affiliate links. See disclosure page for more information on affiliate programs.
That is why I am sharing full build plans in my shop… DIY Highback Mudroom Bench Plans. They include shopping/materials list, cut list, dimensions, tool lists and really all the information needed to build this bench for yourself.

Spending some time picking the straightest and flattest boards upfront, can save time during assembly.
But I also wanna share some additional tips with you on how I accomplished this build, so let’s start from the beginning. I bought all my materials from Home Depot and had them cut the big back piece out for me that way it was easier for me to handle when I got it home. If you don’t have a table saw you could also have them cut the rest of the plywood pieces out for you or use a circular saw with an edge guide.

Place all the pocket holes on the outside as they will be covered by the trim and planks.
Once all your plywood carcass pieces are cut out you need to drill your pocket holes to attach everything. I recommend the pocket holes to face the outside of the piece, so that they won’t be visible on the inside (you will be covering them later) and it actually makes for a stronger joint. You can also add pocket holes on the bottom piece of the carcass to screw in the the back back piece for additional strength. I didn’t do this and found the piece to be plenty strong.

These right angle clamps from Kreg are awesome to

Added pocket holes on the back of the seat supports to help secure the back panel to the seat.
Next Step was to add trim to cover up the plywood edges. I was going to be painting this piece so I decided to go with Select Pine. Select Pine is pine, but just the straighter, clearer (no knots) and a little more pricier version. I thought it would give the frame a cleaner modern look and save on sanding and clean up, so to me worth the little extra money.

With the trim I also recommend waiting until the carcass is assembled to cut each piece that way you can ensure you have a good fit. I also recommend trimming the back and top first, then the sides and lastly the front.

Start trim on back.

Then sides
Once the carcass is all trimmed you can fill any knots holes, sand and paint to your desired color. My client and I choose to go with Tricorn Black. It is a Sherwin Williams color, but I used a Behr Satin Alkyd Paint that is made for cabinets.

All ready for paint!
Also, before paint I measured and cut all the slat pieces that would be going in the recesses. Since I cut these individually to fit in a specific spot I numbered them so that after staining everything they would fit back into the piece without any struggling. For this I used rough sawn pine because it has one side that is smooth and one rough side. The rough side is fun to give the look of barn wood or more rustic of a look. You can sand as much or as little of the marks out of it to get your desired look.

I use Timbermate wood filler. And dry fit the planks before finishing.

I numbered the planks so I knew how they went back for a perfect fit.
For the slats we also stained them in a variety of colors… Provincial, Weathered Oak and Jacobean by Minwax. I recommend adding a top coat or sealer before installing the slats back into the bench. I didn’t do that it took a steady hand to cut in all the pieces. And if your are curious, one of my favorite sealers is a watered based polyurethane by Varathane in matte.

Love a matte finish, look more natural and lets the wood do the talking.
Now that everything is finished it is time to put it altogether. I did this by using 1 1/4” 18ga brad nails. I also used wood glue and shot the brad nails from inside the cabinet into the side planks. And then on the back I shot the nails from the back into the back planks in order to eliminate nails holes on the front. On the seat I wasn’t able to do this with every piece, but still the nails holes didn’t look that back after it was all said and done.

Used my Pony | Jorgensen bar clamps to hold the planks in place while securing from the back.

I love my new cordless Ryobi 18ga brad nailer and wish I would have gotten it sooner.
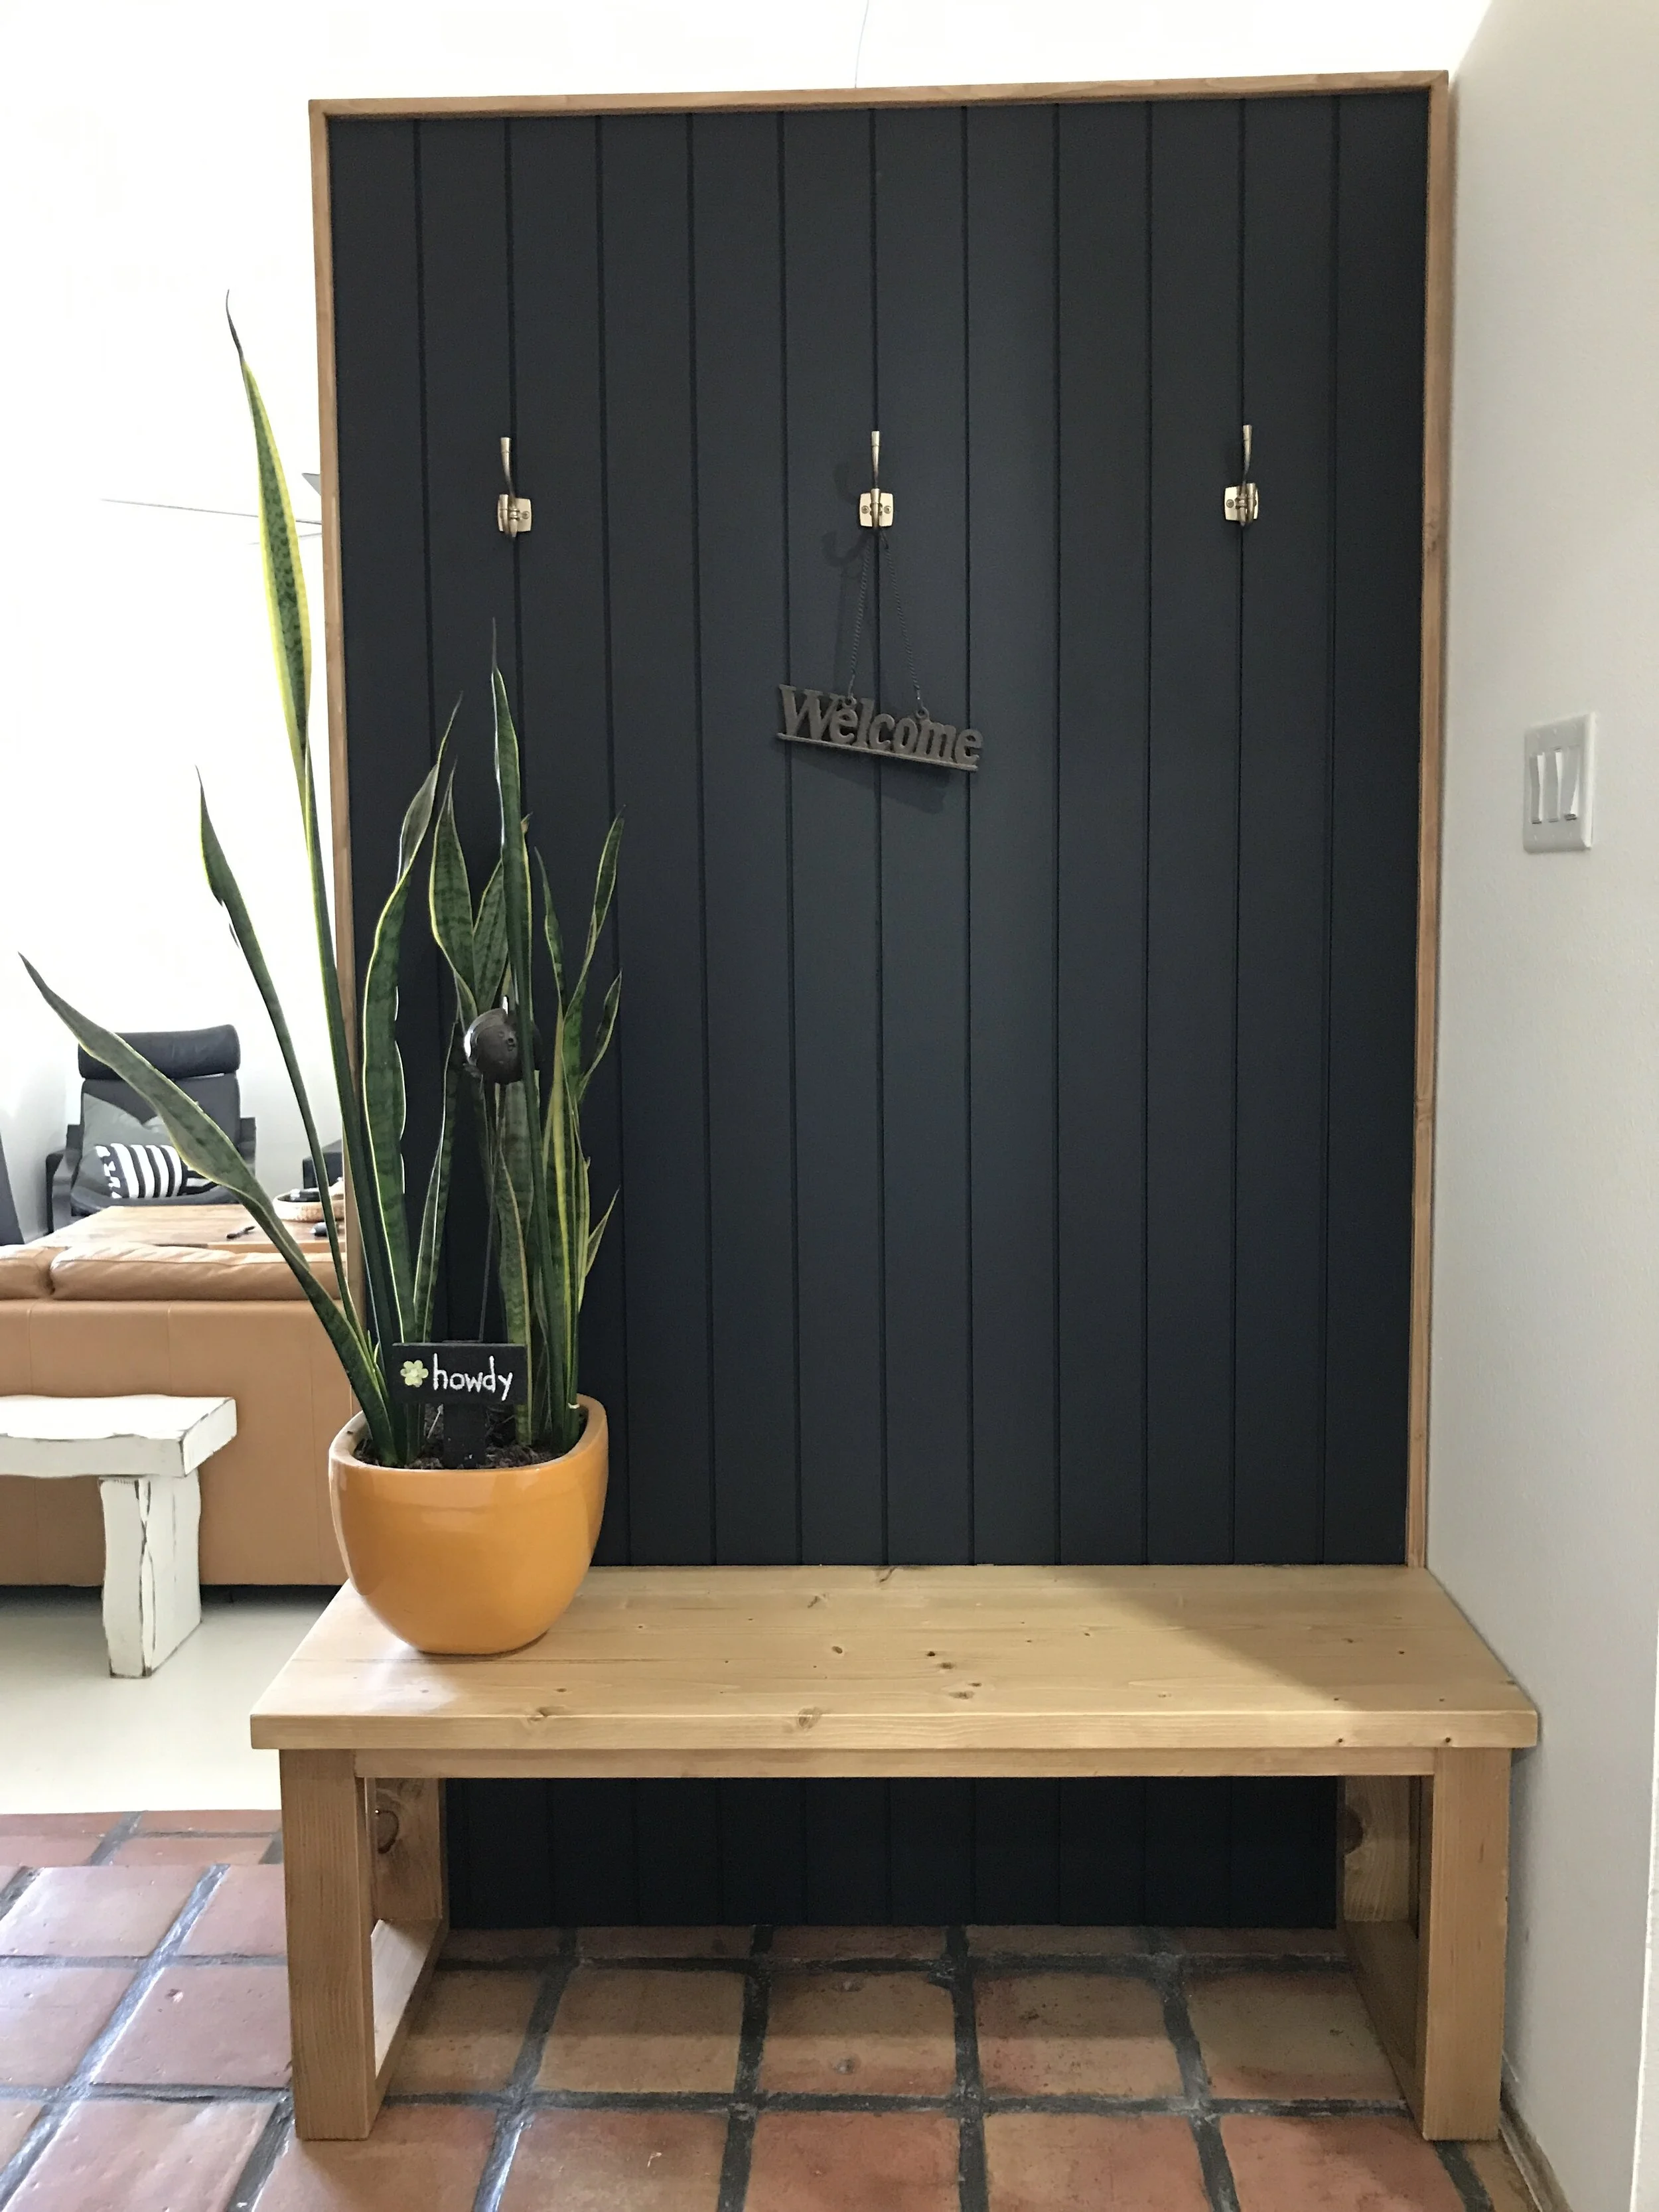
And once those are installed you have a new Highback Mudroom Bench to store all your shoes. My client had a hook rack shelf thing that she was going to put above this bench and that is why we only made it 48”H, but if you didn’t want to add a hook rack shelf thing above yours you could always make the back taller and add hooks directly into the bench back itself.

TA-DA!
I hope this was helpful. If you are wanting the full build plans with shopping/materials list, cut list, dimensions and tool list you can get them here is my shop…. DIY Highback Mudroom Bench.
And if you do end up building one I would love to see it, so please tag me in your build. Thanks for following my building journey. Have an AWESOME day and keep #BuildingAwesome!
Sadie Mae