DIY Thick Adjustable Shelves - No Fancy Hardware
I live in a 1970’s ranch style house that has a sunken living room and it has been a challenge to figure out the layout. Once I figured out where to put the couch and TV that didn’t interfere with the window or walkways, I was left with an awkward and narrow corner. This corner backs up to my entryway that has this old metal railing. So many challenges…

BEFORE - Was an awkward wasted space!
This post IS sponsored by Simpson Strong-Tie. All opinions are my own. This post DOES contain affiliate links. For more information on my affiliate programs, see my DISCLOSURES page.
But I finally figured out a solution… to build an L-shaped bookcase. It will act as a back to the entryway, bye bye ugly metal railing, and it will add a feature and functional to an unusable space. And I say unusable because this space won’t fit any piece of furniture I have tried… it is just too small of a space.

So happy to see that railing go!
And since the bookcase is only 9” wide it won’t impede into the walkway. Plus, with it sleek modern design and thick shelves, It actually looks intentional for the space and totally custom for the house.
So let me show you how I made it!
Building the Frame
First step in this build was to mill and assemble the frame. I am using 2x10’s, construction grade lumber, for the frame. I did run the boards through my thickness planer to smooth out the surface and make sanding much easier. Then I also ripped the rounded over edges off at my table saw to give the boards a square and more modern look. And that brought them down to 9” wide from the stock 9 1/4” wide.
Now with the boards looking pretty I need to miter the corner where the L-shaped was going to come together. To do this, I used my miter saw sled on the table saw. It was super easy to set up to 45 degrees and chop off the corner. I did that to all four (4) pieces that would make up the top and bottom of the bookcase frame. The longer sections were a little tricky on the table saw, but I aware to put enough downward force on the sled that it wasn’t an issue.

This miter sled for my table saw makes these cuts easy.
Then to join the corners and to make the L-shape of the. bookcase frame I used my dowel jig and 3/8” dowels to attach them with some wood glue. The dowel jig I have it simple to use and it self centers on the wood, so all you have to do is to make sure and line up the holes on each board in the same spot.

Mark, line up jig and drill!
Once I had the top and bottom section assembled I moved inside and did a test fit at the location. Measurements looked good, so next I attached the uprights to the top and bottom pieces using Simpson Strong-Tie’s 2 1/2” CVS Interior Wood Screws.

Love these Simpson Strong-Tie Screws!
Since I was attaching them at the ends of the boards I went ahead and pre-drilled the locations and then countersunk the screws so that I could fill them in later. I have used these Simpson Strong-Tie CVS screws on a lot of my projects and can’t remember one stripping out. Plus, they are designed to easily countersink into the material.

So happy the frame is assembled… it was easy but awkward because of how big it is.
Once the frame was assembled it was time to add the cut and attach the approximate 4” slats to the uprights.
Watch Me Build This!
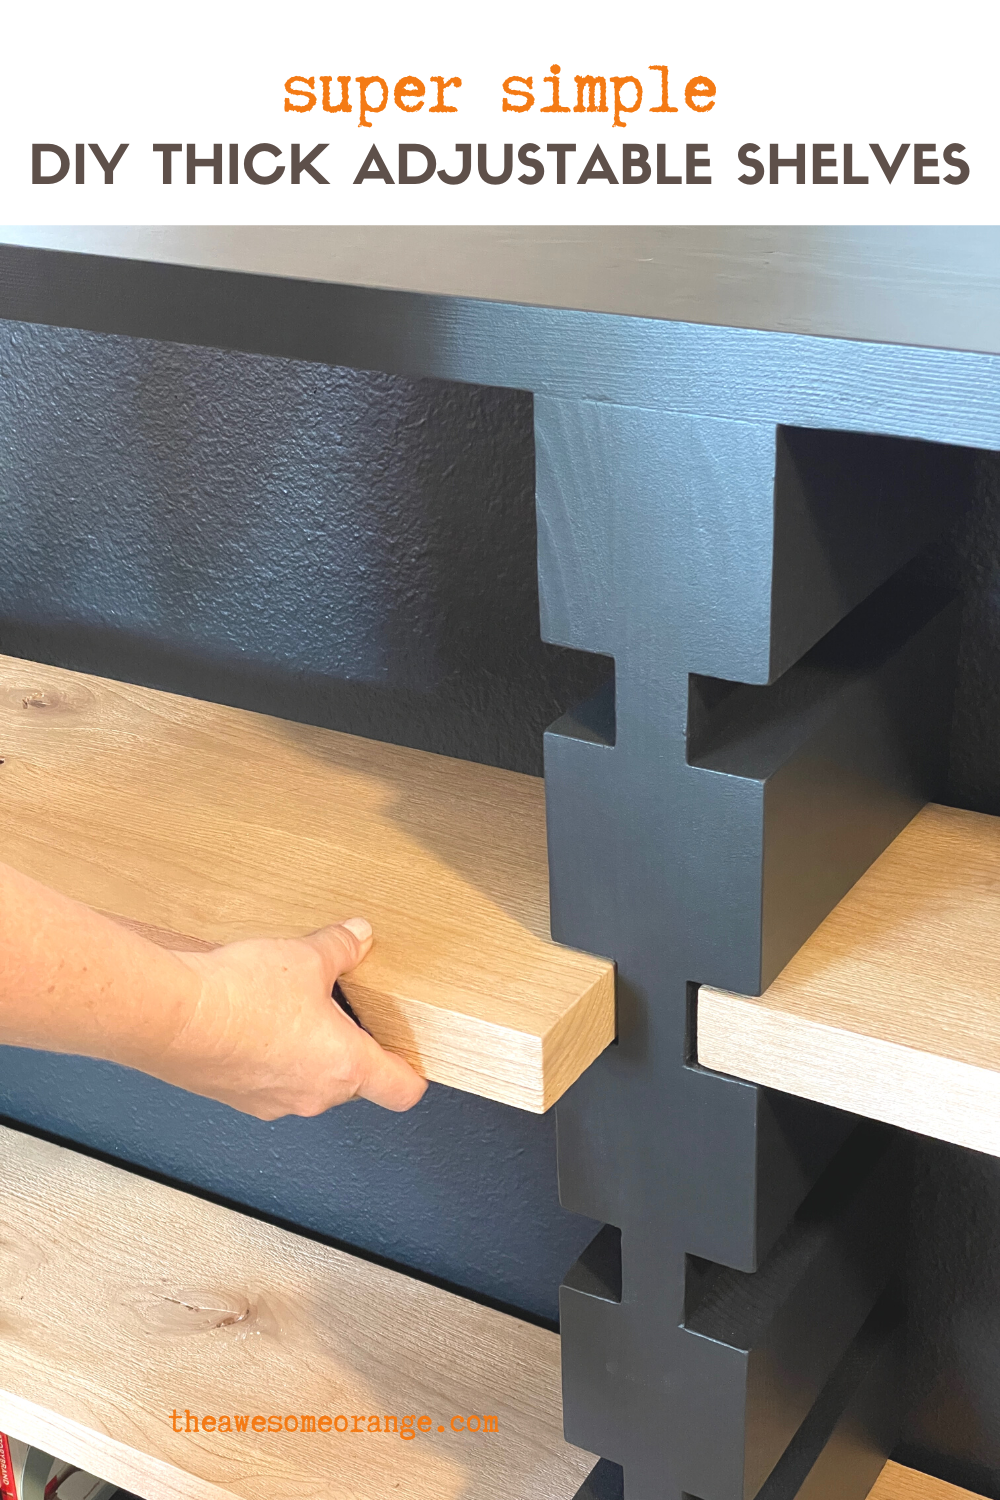
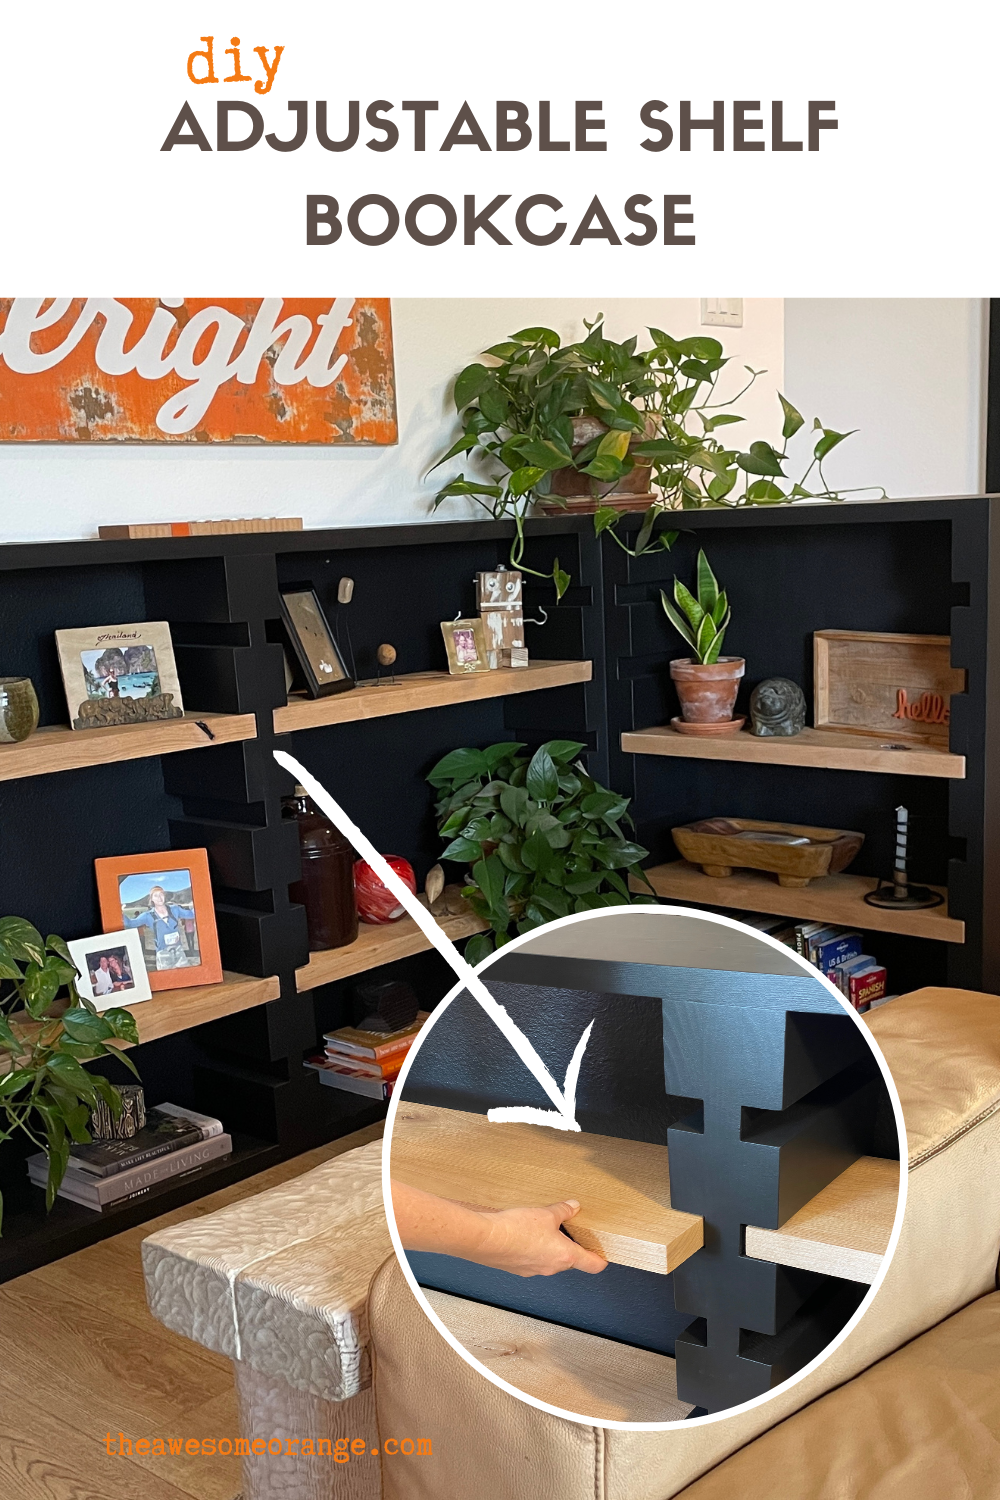
Adjustable Shelves - No Fancy Hardware
So I have two reasons why I wanted no fancy hardware to hold my shelves… I wanted the frame to look thicker than the standard 1 1/2” thick and I didn’t want to see any visible hardware. So I came up with attaching 4” slats to the sides of the uprights with a 1 3/4” space in between. Kinda like making a rabbet in a piece of wood. Doing it this way also allowed me to make thick shelves for a modern rustic look!
So, I set up a stop block at my miter saw and cut out too many to count strips of wood. Depending on the height of your bookcase your slats could be different from mine. Need help with the math… check out my blog post DIY Adjustable Shelf Built-In Bookcase. It walks you through how figure it all out.

I doubled checked after every two cuts to ensure that my stop block hadn’t moved.
Once they were cut and I had cut a spacer block to 1 3/4” it was time to install them. I started at the bottom and worked my way up. Pre-drill holes because these strips were so thin I didn’t want them to crack. Then add wood glue and secure to the frame using the Simpson Strong-Tie CVS wood screws.
After each row was installed, I placed a piece of wood on the blocks and a level to ensure that the blocks stayed in the right place while securing them. Then repeat til the top.

I checked level after installing each block. Black brackets secure the frame to the studs.

Lots of filling and caulking and texture to get everything ready for paint.
Then once those were complete, I attached the bookcase frame to the studs in my wall using Simpson Strong-Ties corner bracket. These will ensure it stays in place.
Filling, Sanding, Caulking, Priming, Painting
Not the most fun part, but this is what is going to make those ugly construction grade boards look good.
I filled all the countersunk holes and any gaps between boards using spackling. Yup, spackling. I like using this on pieces when I am painting them because I find it dries faster than wood filler and sands easier.
I caulked any gaps that were up against the wall to give it that built-in look.
I primed the raw wood to ensure that the paint went on evenly and with a consistent sheen.
I painted using Behr paint in a Sherwin Williams Tricorn black color.

So close to the finish line!
Making the Shelves
For my shelves I used 8/4 (2” thick) Knotty Alder and milled them down to about 1 5/8” thick. If you don’t have the tools for milling you could just use more 2x10’s for the shelves.
Once the shelves were milled and sanded, then I used my Restorer and a wire wheel to texturize the shelves. I did this because I like the look and feel it gives even though it is subtle.
Then I finished them with three coats of General Finishes High Performance Top Coat in Matte.

Love the subtle texture the wire wheel on the Restorer adds.
Styling the Shelves
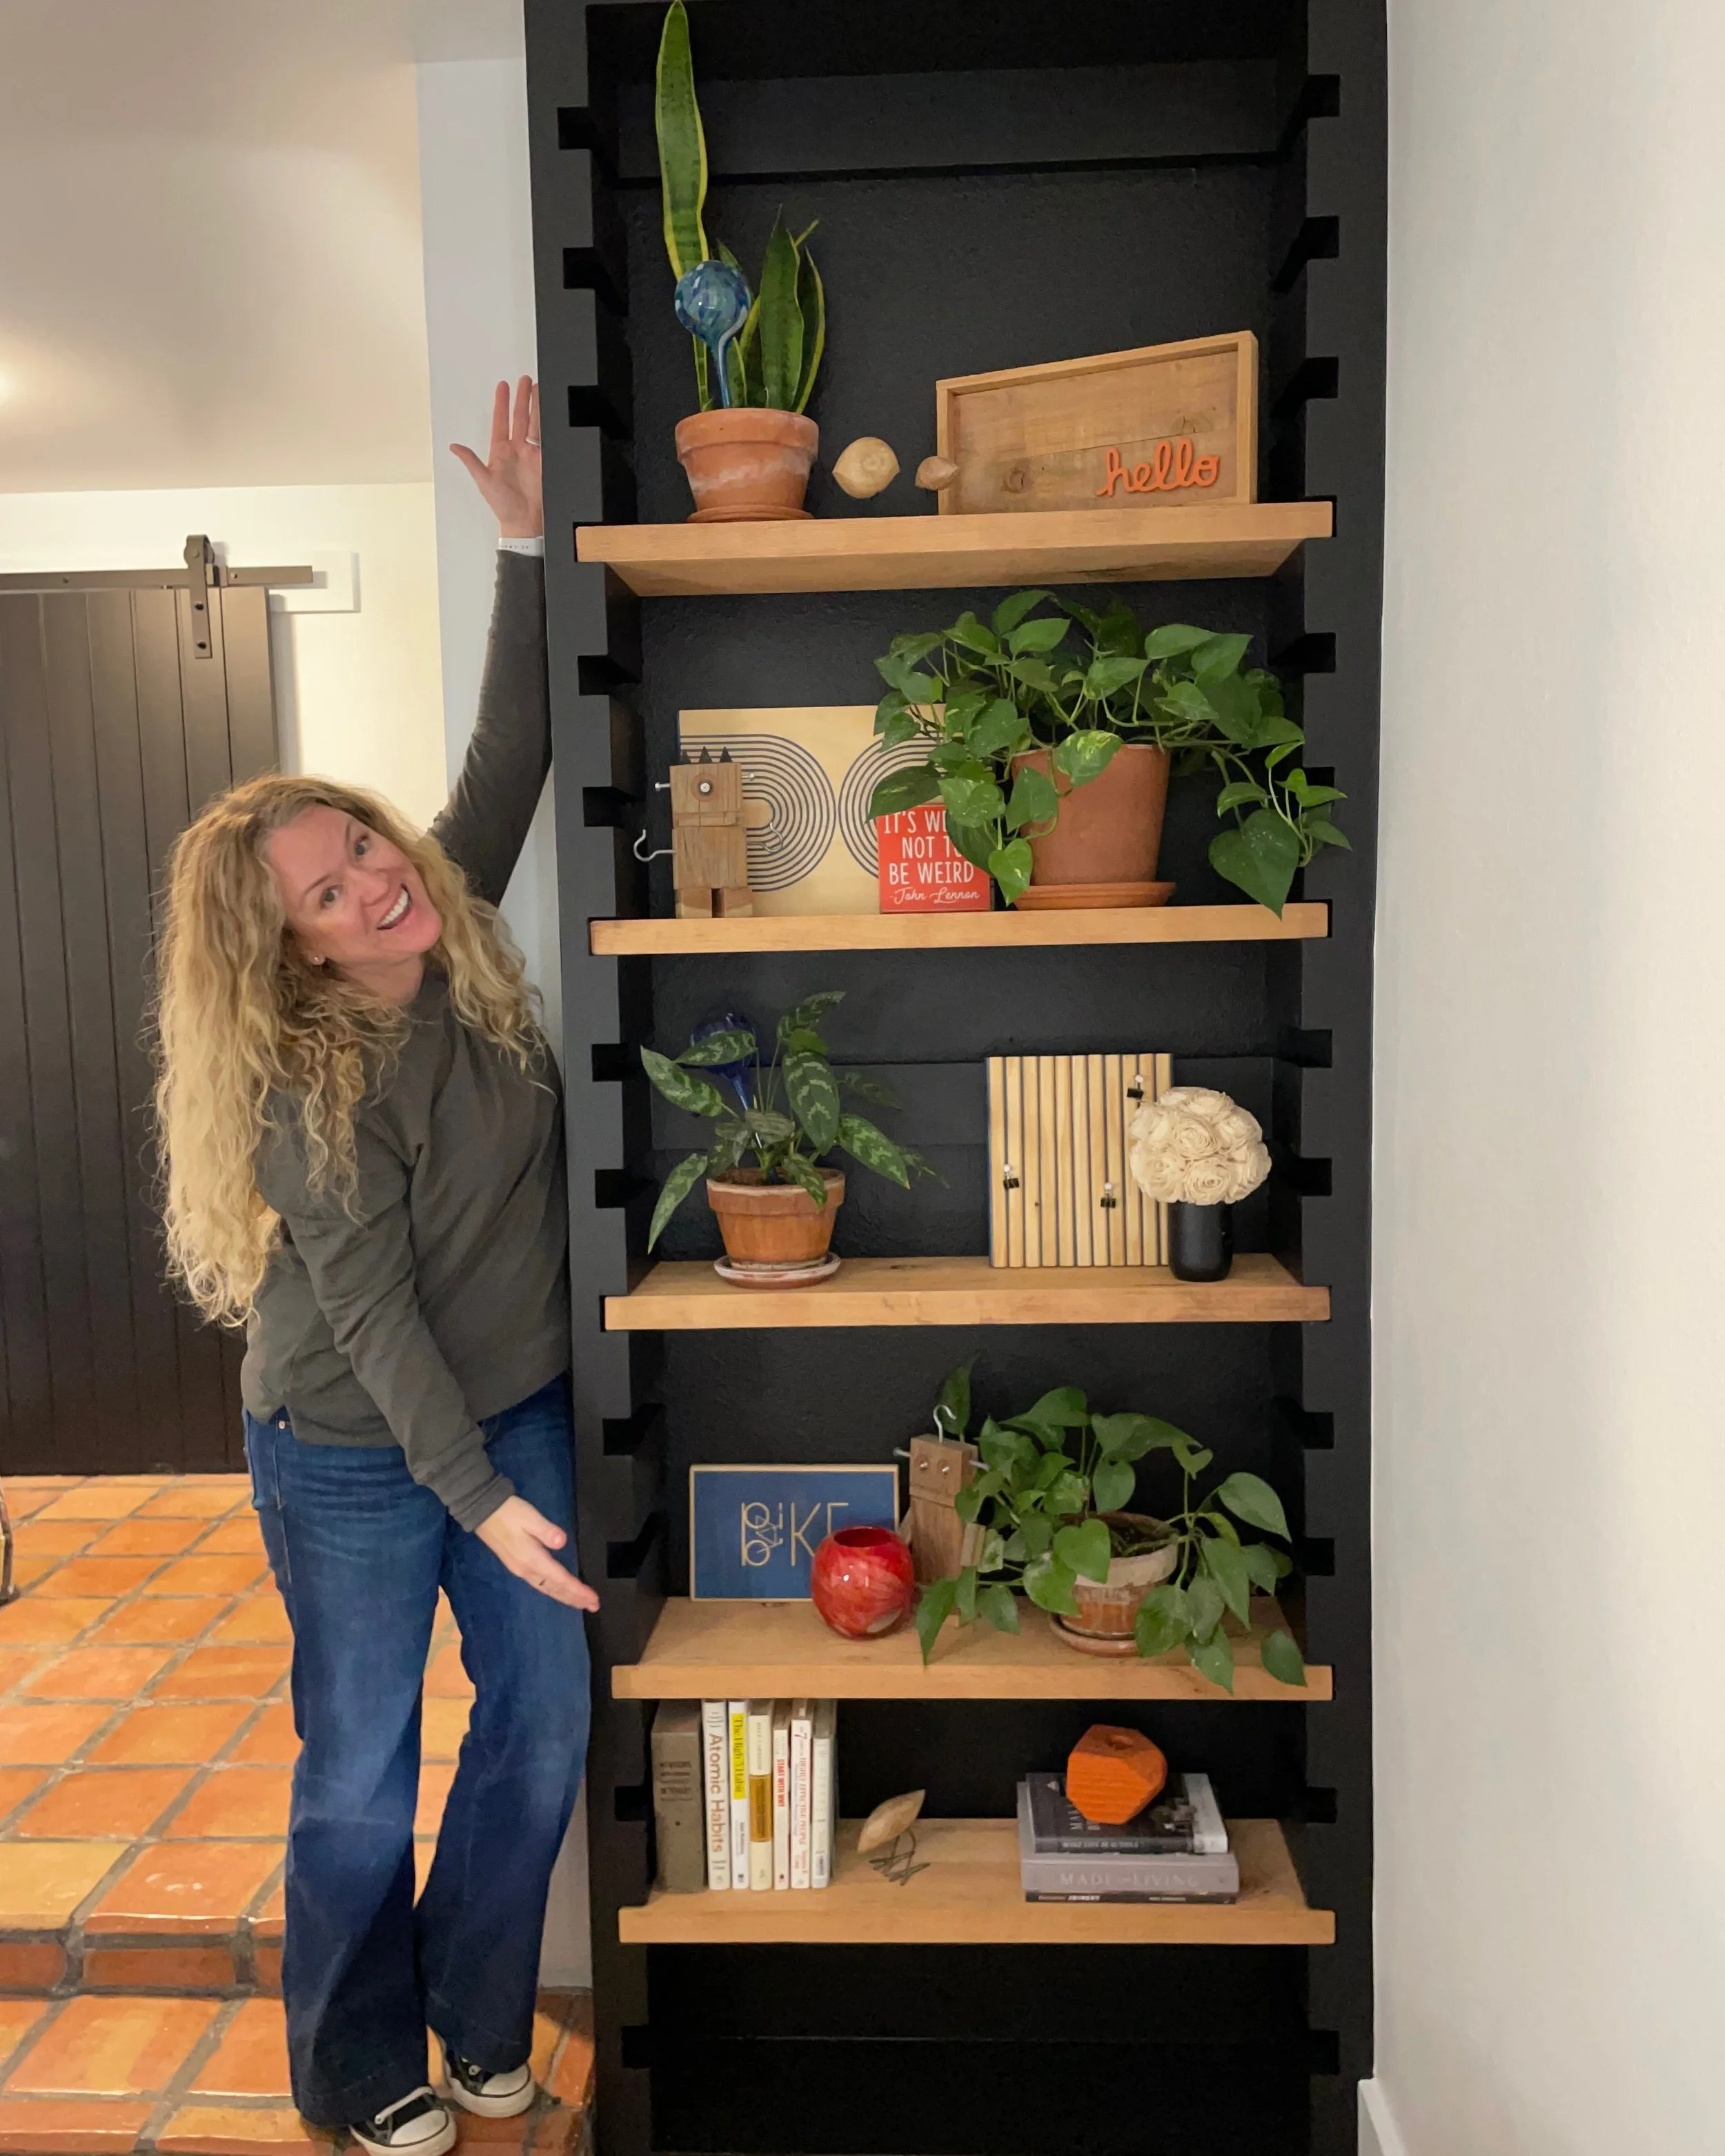
I love the adjustable shelves because they can move up and down depending on my decor. I am not an expert at styling shelves and don’t like buying stuff just to have it, so I gathered stuff from around my hose to fill them…. pictures, plants and books mostly. They aren't exactly styled how I want them, but that is okay. With time and adventures I am sure I will collect some stuff I love that I want to display. And then every time I am sitting on the couch and glance over I will be reminded of a good time!
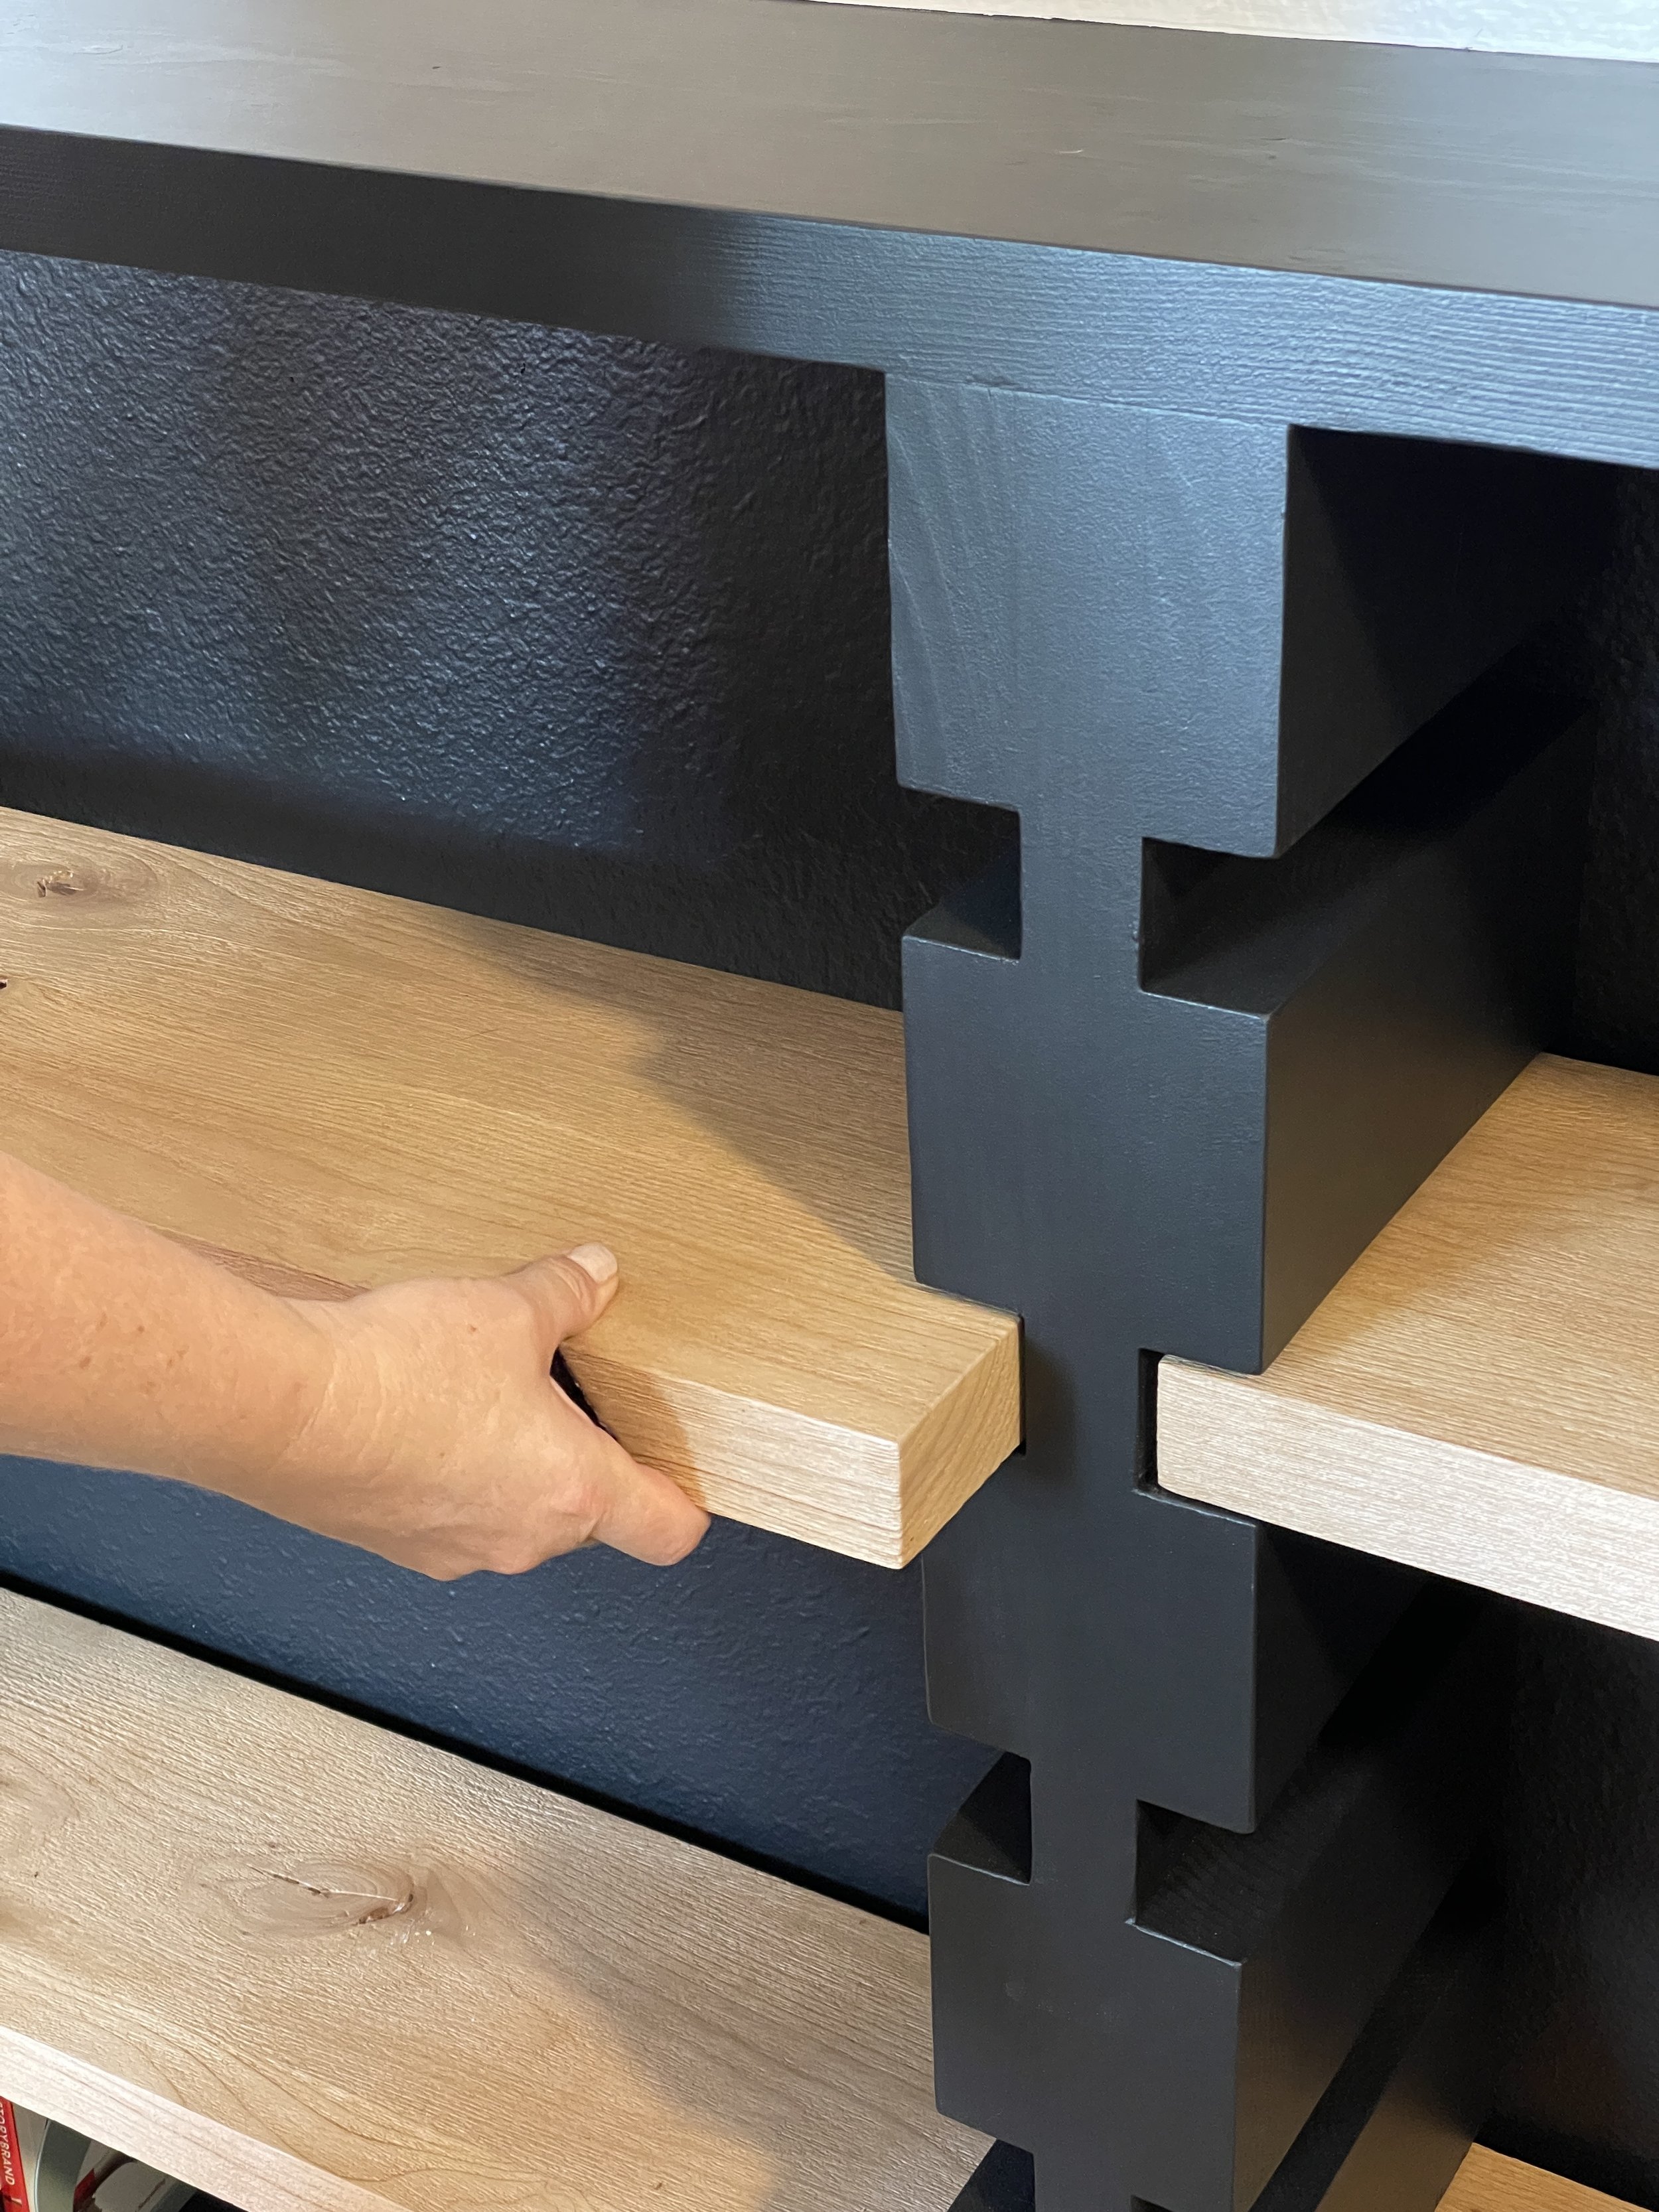
So easy to adjust the shelves depending on your decor.
So, what do you think of my DIY Thick Adjustable Shelves? Where do you want to make some around your house? Tell me below.

Need to fill a couple of picture frames, but this is looking AWESOME!

BEFORE!

AFTER - I can’t believe this is the same space I started with.
Thank you so much for following my building journey. Remember Build LOUD, Build WILD and have an AWESOME day!
Sadie