

DIY Modern Dog House for Oscar!
Howdy guys… today I have a really special build to share. I built Awesome Oscar, my fur baby, a dog house! And not just any dog house… an AWESOME, Modern , Scandinavian inspired and slatted dog house! Oh and I teamed up with my good friends over at Simpson Strong-Tie to ensure that his house was built right, sturdy and would last a long long time! Wanna know how I made it? Well, let’s get started!
This post IS sponsored by Simpson Strong-Tie. All opinions are my own. This post DOES contain affiliate links. For more information on my affiliate programs, please see my DISCLOSURES page.
This is a rather simple build and doesn’t require too many tools. I used:
Table Saw
Miter Saw
Speed Square
Level
Clamp - not necessary, but super handy if you are building by yourself like me.
This build is made with easy to find materials at your local big box store… roughly:
9 - 2x4’s
19 - 5 1/2” Cedar Fence Pickets
And the total cost to build the dog house was roughly $120, not including the paint. And Awesome Oscar is totally worth every penny to try and keep him out of the hot AZ Sun.
DIY Modern Dog House for $120

This is his current spot next to the pool pump. I think he likes the noise that it makes.
Speaking of that it brings me to my design. I wanted something modern, so I gave it a 12/12 roof pitch or a 45 degree angle. And with the house sides being roughly the same length as the roof trusses it give it that traditional house shape that I love.
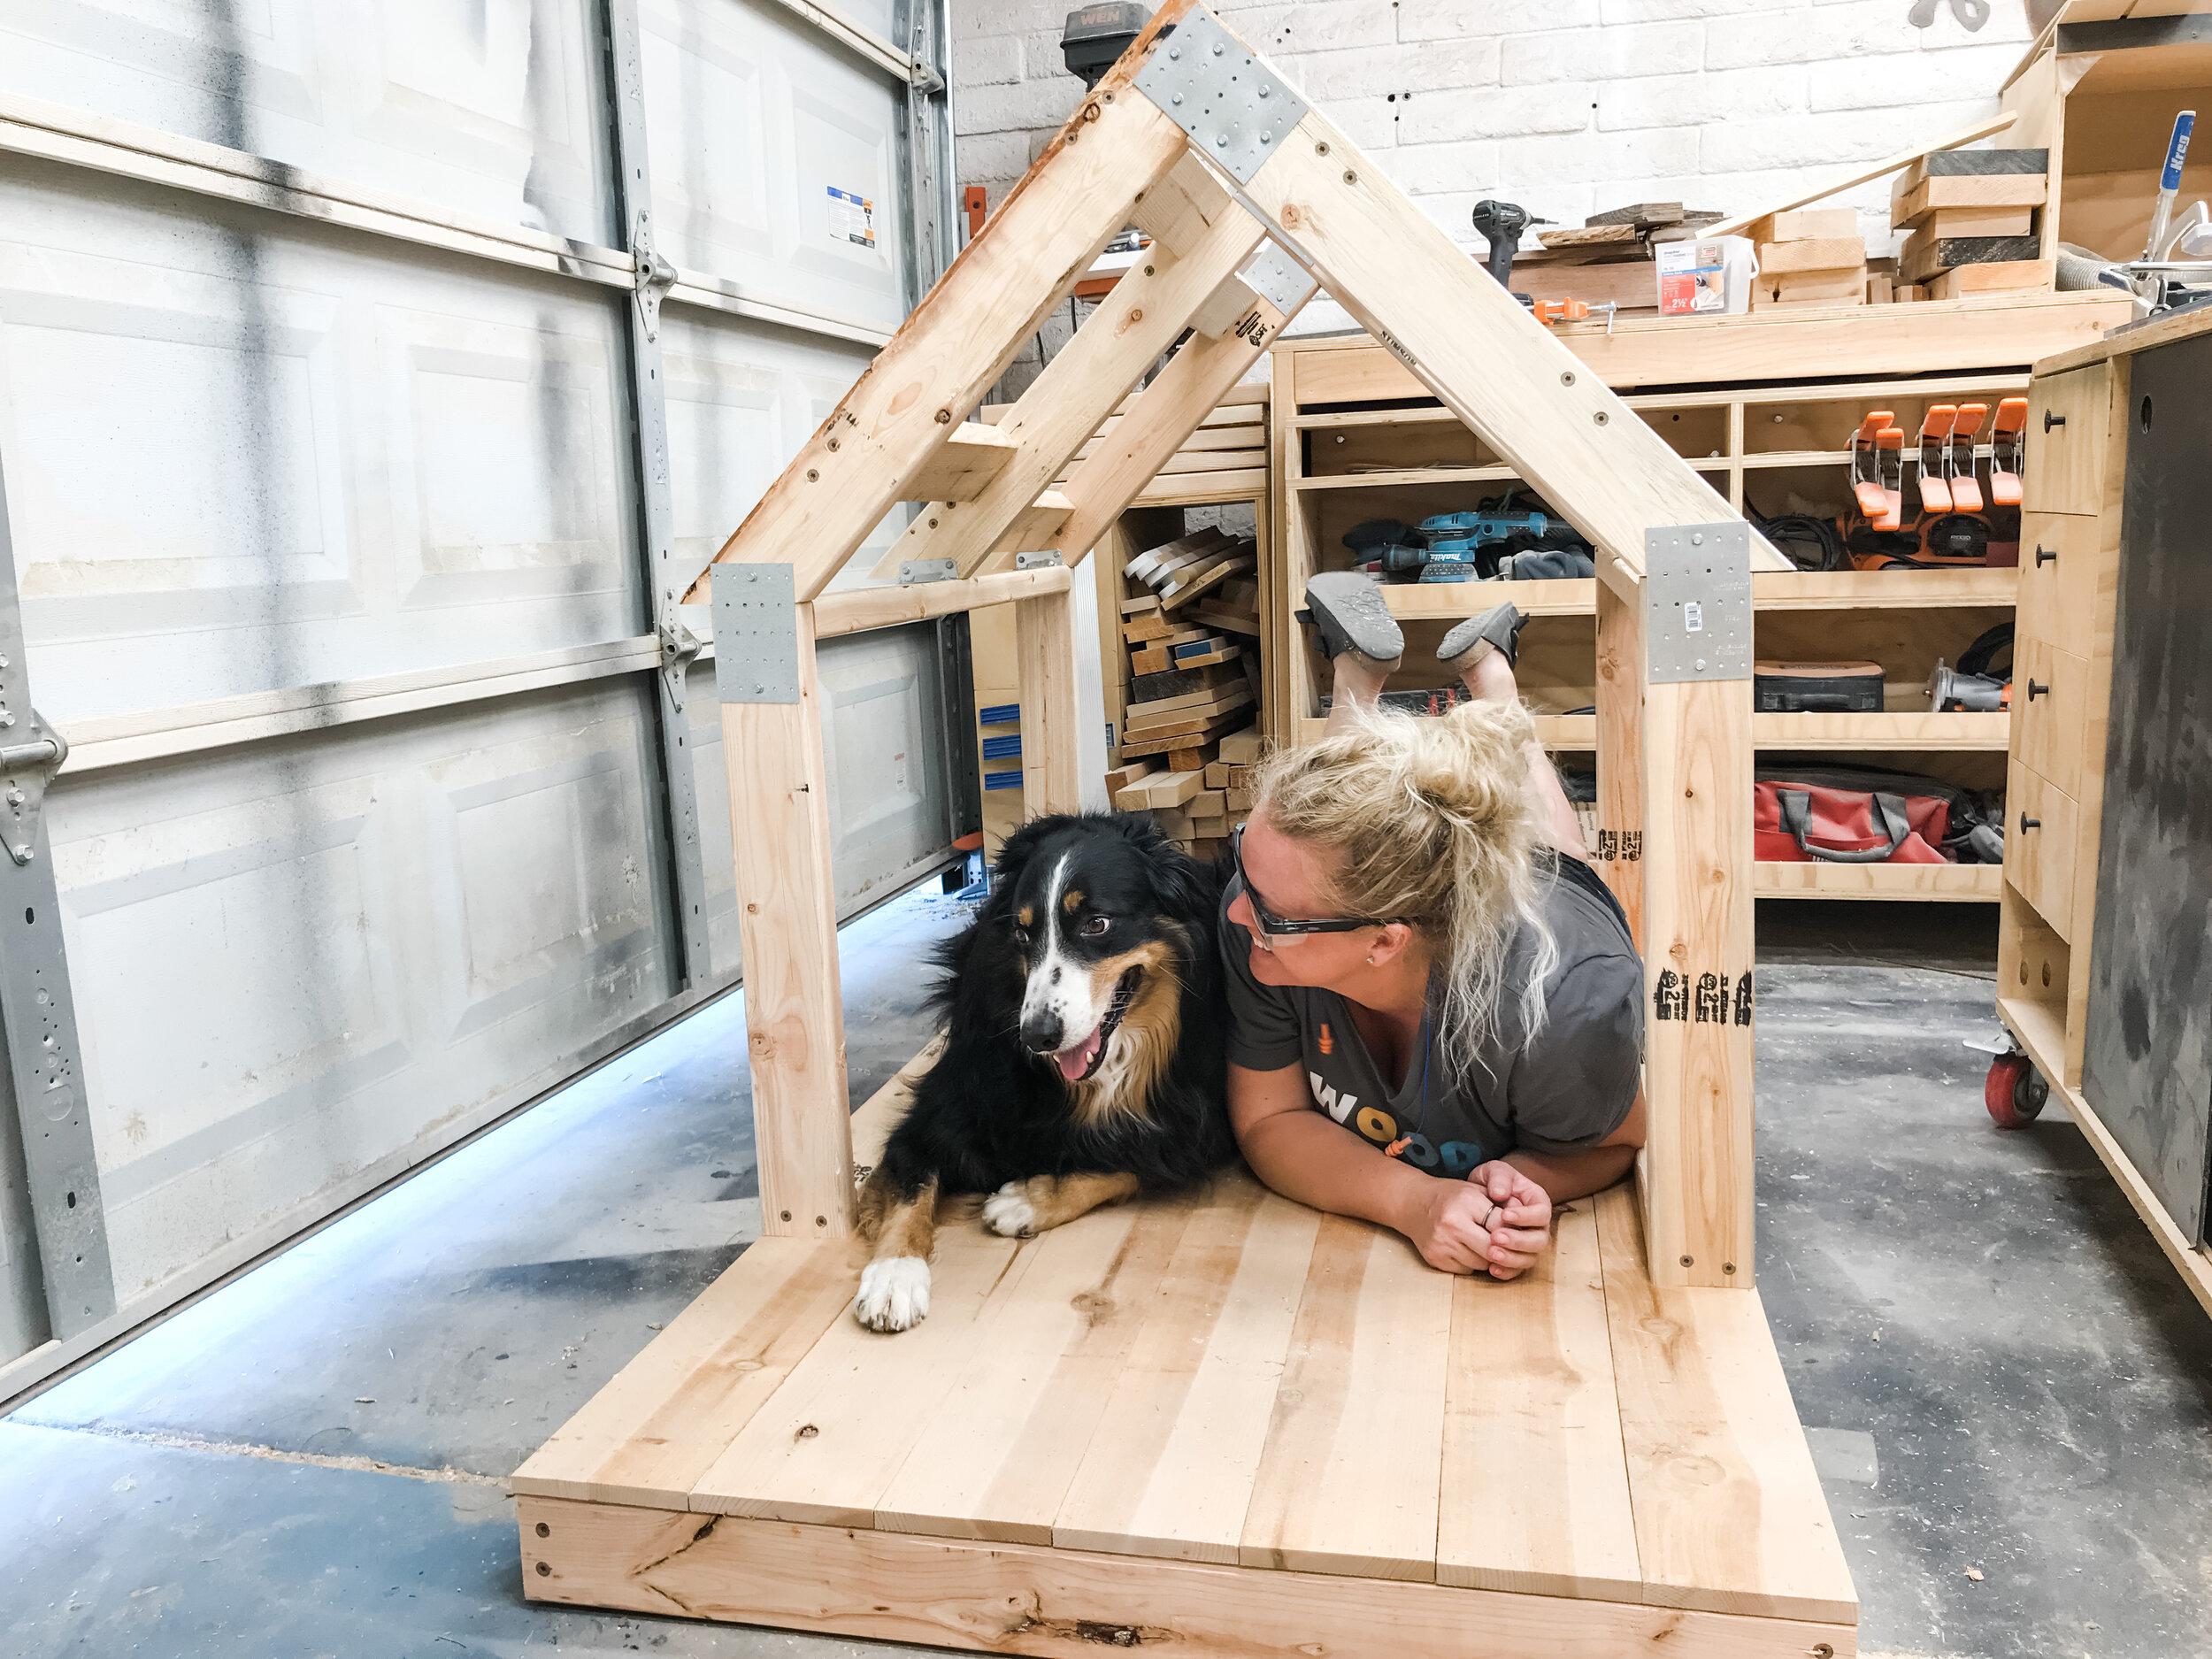
There is enough room for the both of us!
I also wanted to make sure it would protect him when it rains, because sometimes he just won’t come inside even when it is raining. So to ensure that he would have dry space I did a board and batten type roof. Basically overlapped battens across the seams of the roof boards below. Is this water tight, NO. But the boards will swell slightly when wet and should do a good job of keeping most of the water out.

First row of roof boards. They overhang frame 3/4” in front and back and have about 1” gap in between.

Oscar denying me a kiss because I didn’t get his house done when promised!

Battens cover up gap and create channel for water to run down thru.
I also didn’t want to fully enclose the house to allow enough airflow. We live in Arizona and it gets hot!!! That is why I did the slats. There is roughly a 1” gap between each slat. I think he likes the slats too because he can see all around him, but still feel secure inside.

Slats are 1 1/2” wide. You can get 6 slats from one cedar fence picket!
I also am looking into installing a solar power fan for some extra circulation. And in the winter when it does get cold here, Oscar has his fabulous coat to keep him warm. Or he can always come inside… because he is mostly an inside dog, expect when I am working in the garage. He hates the noises I make and always wants to escape to the backyard. And now he will have somewhere to go!
Wanna watch me build Oscar’s DIY Modern Dog House, check out my YouTube video of the build!
Complete build plans available… they include all dimensions, cut list, tool list, materials list, step-by-step instructions and 2D diagrams. Click here to start building your pup a DIY Modern Dog House today!
Here are a few tips you might find helpful when building your own DIY Modern Dog House!
TIP #1
The building process is pretty straight forward. I used Simpson Strong-Tie 2 1/2” exterior framing screws to assemble the base and sides uses standard butt joints. And I gotta say i was impressed with these screws (first time using them), because the drove into the wood super easy, didn’t split the boards and countersink very clean. Also, I the oversized head is suppose to add additional strength to joint.
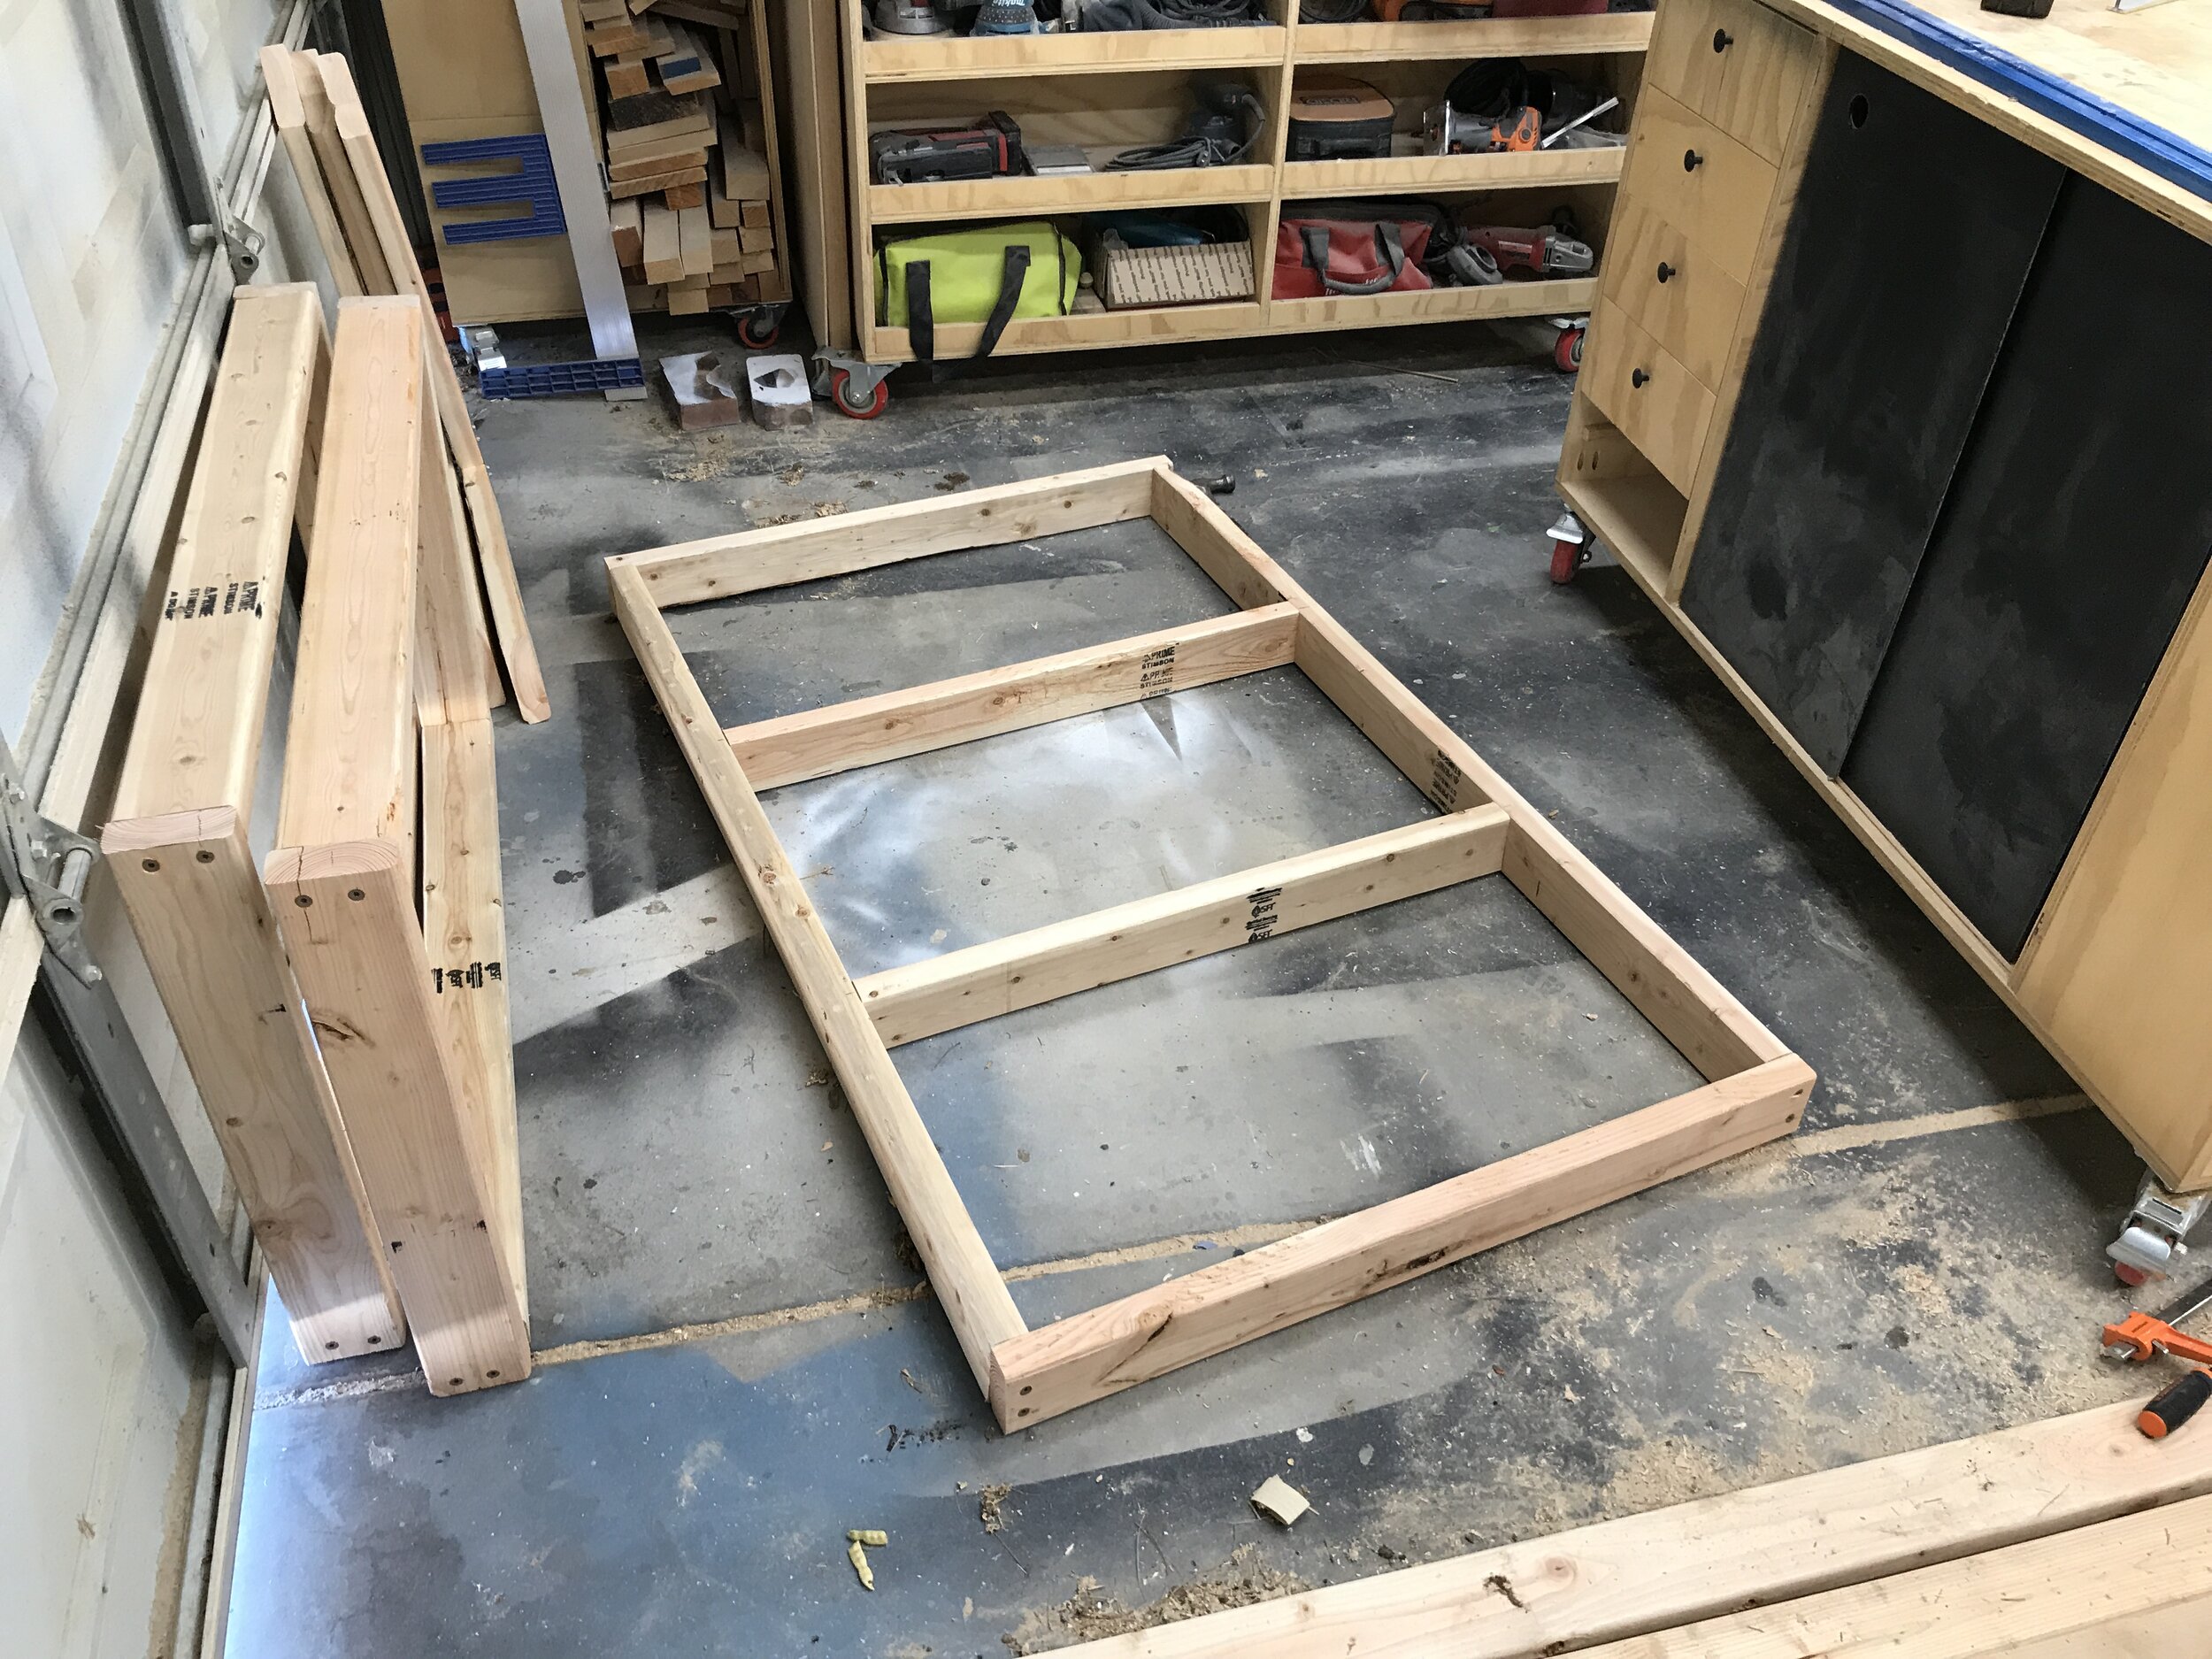
Super easy butt joint assembly for the base/platform.

Testing out what the sides are going to look like.

Love these framing screws from Simpson Strong-Tie.

The drive in easy and countersink perfectly.
TIP #2
When adding the cedar boards to the base, I recommend marking a line were the cross supports are below and securing your boards with galvanized staples on that line. It gives it a really clean look. I used my Ryobi cordless crown stapler to do this. I love this thing because it is cordless and leaves a cleaner look than a screw. Staples are stronger than say a brad nail, but probably not as strong as a screw. You can use screws to do this if you don’t have a stapler, just be sure that all the screws are countersunk so puppy toes are harmed!

I used staples around the perimeter and across the cross sections.
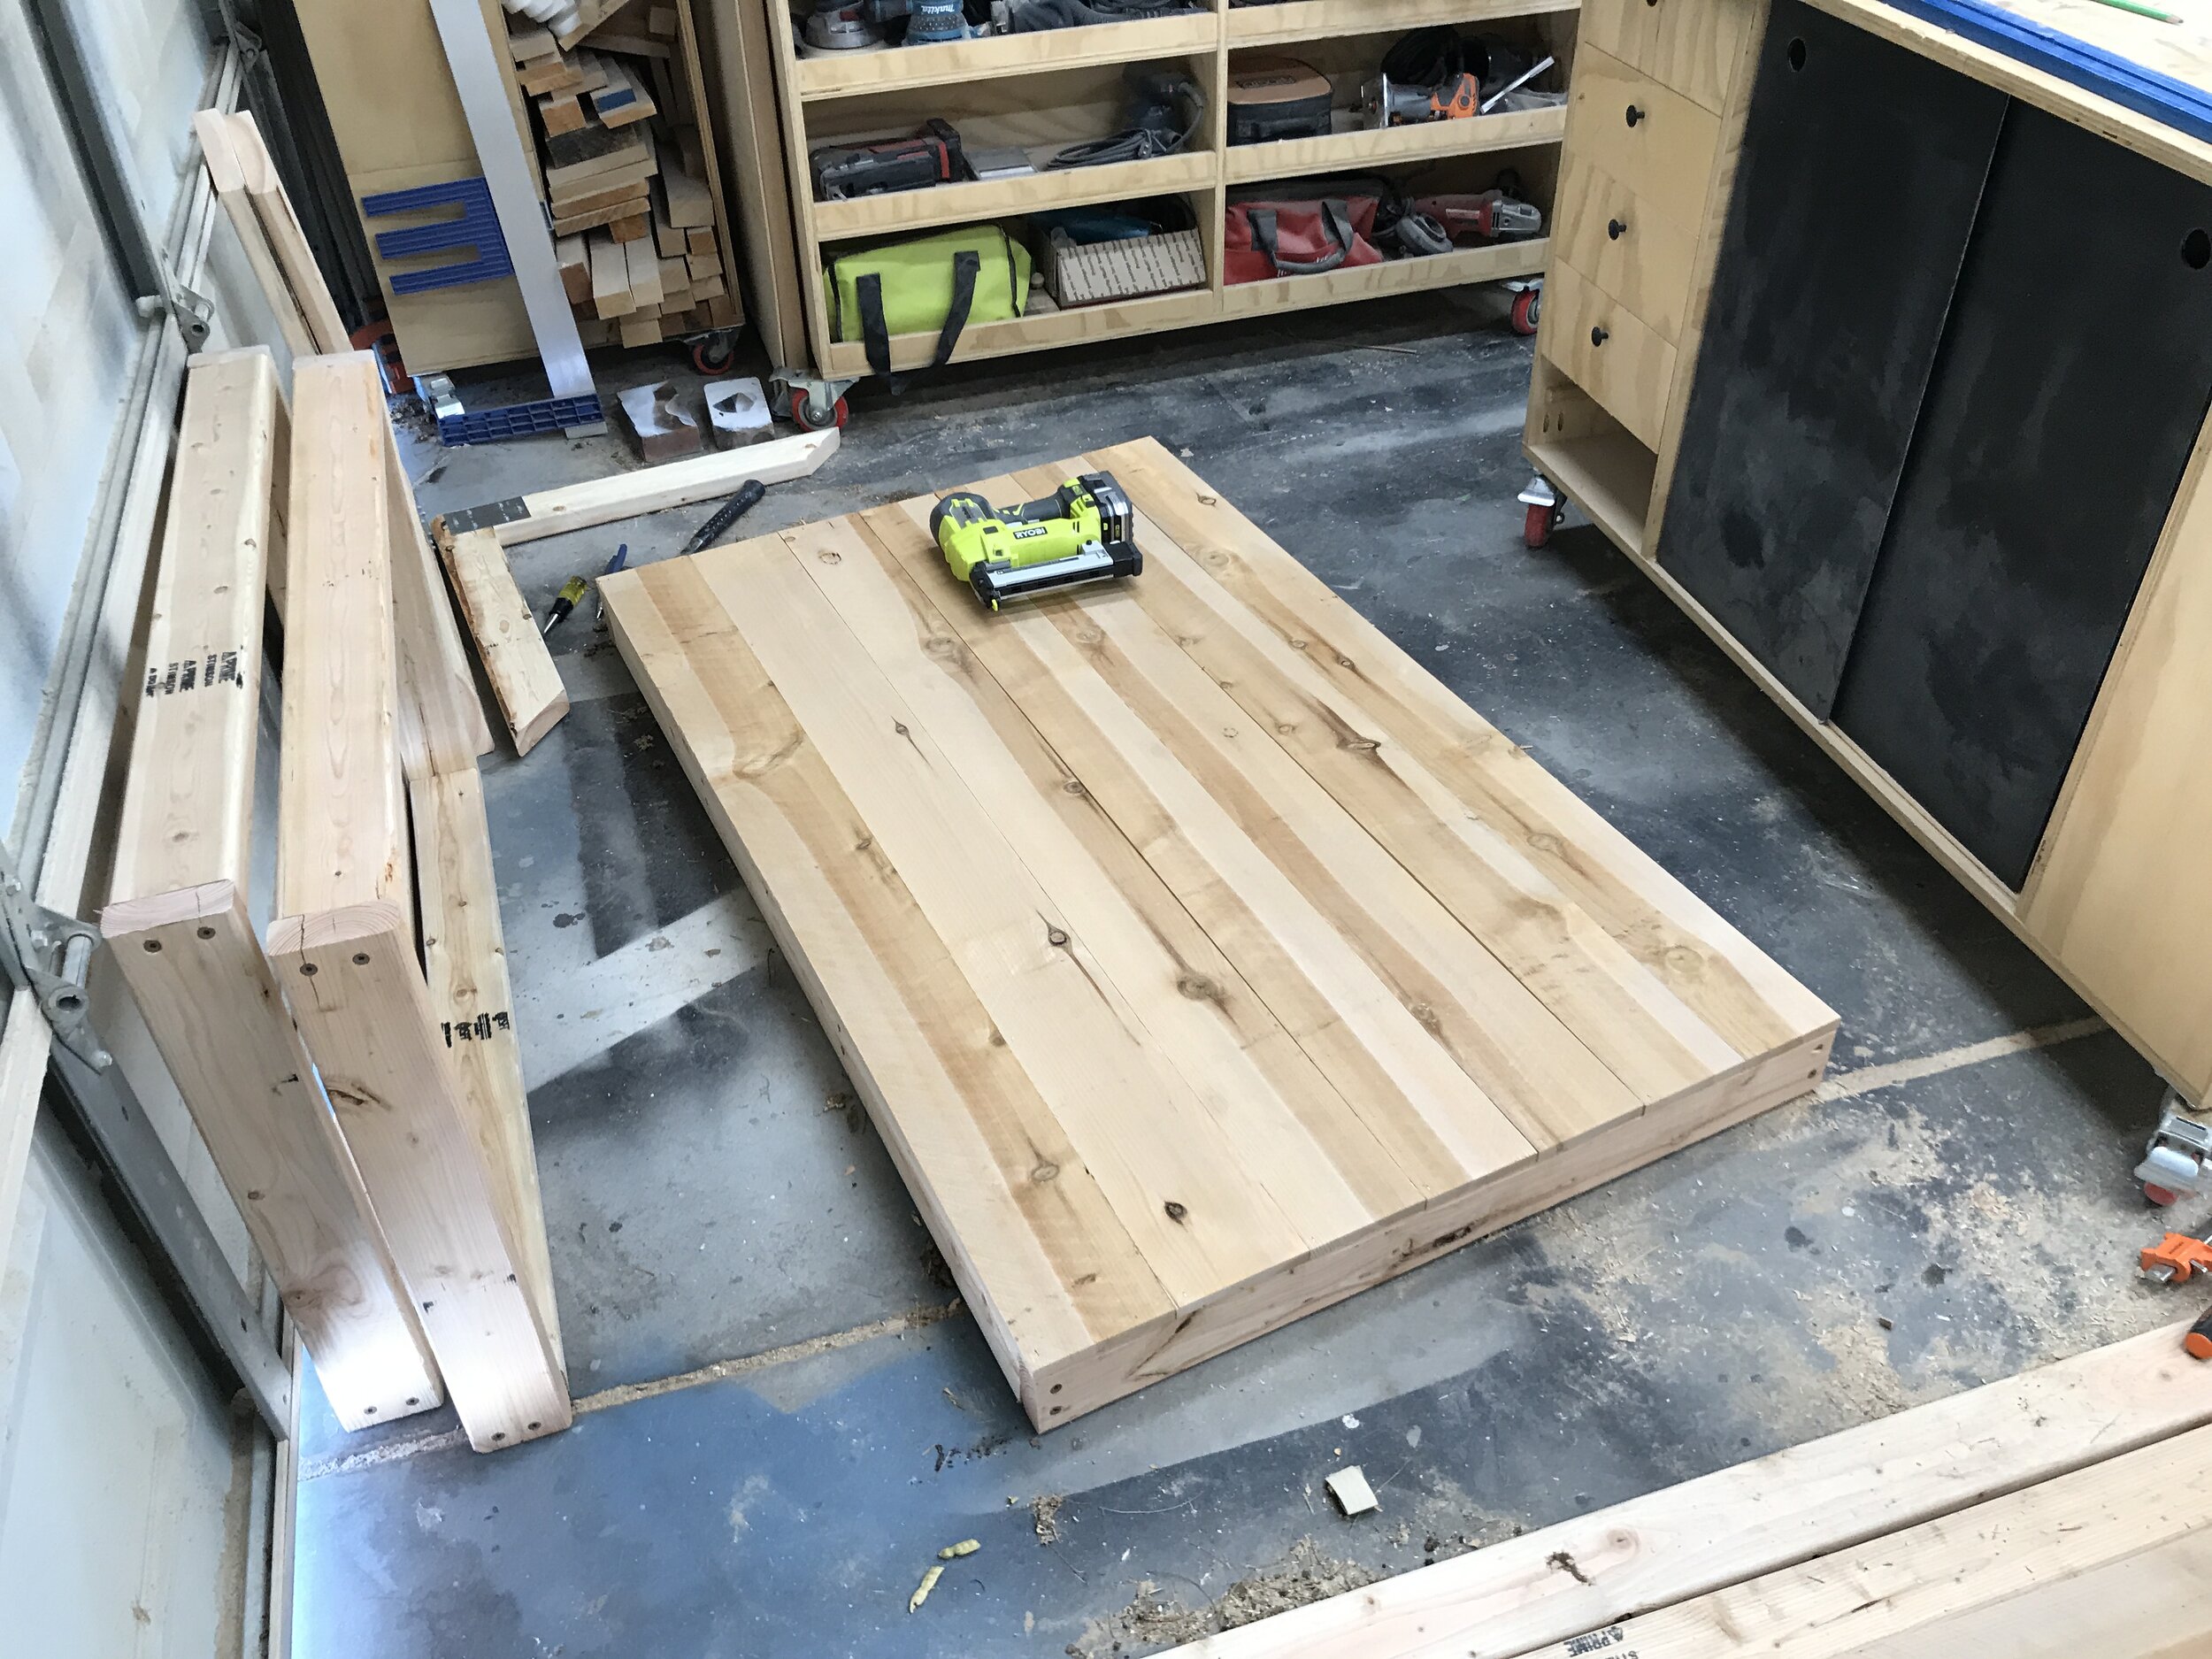
Love my cordless Ryboi crown stapler!
TIP #3
Attach sides to base using the 2 1/2 framing screws, assemble trusses and then attach trusses.

The Simpson Strong-Tie hex head screws comes with its own bit! Super handy! Also shown, tie plates.

End of trusses are cut at a 45 degree angle.

A Simpson Strong-Tie TP35 Tie Plate goes on both sides of truss to hold it together.
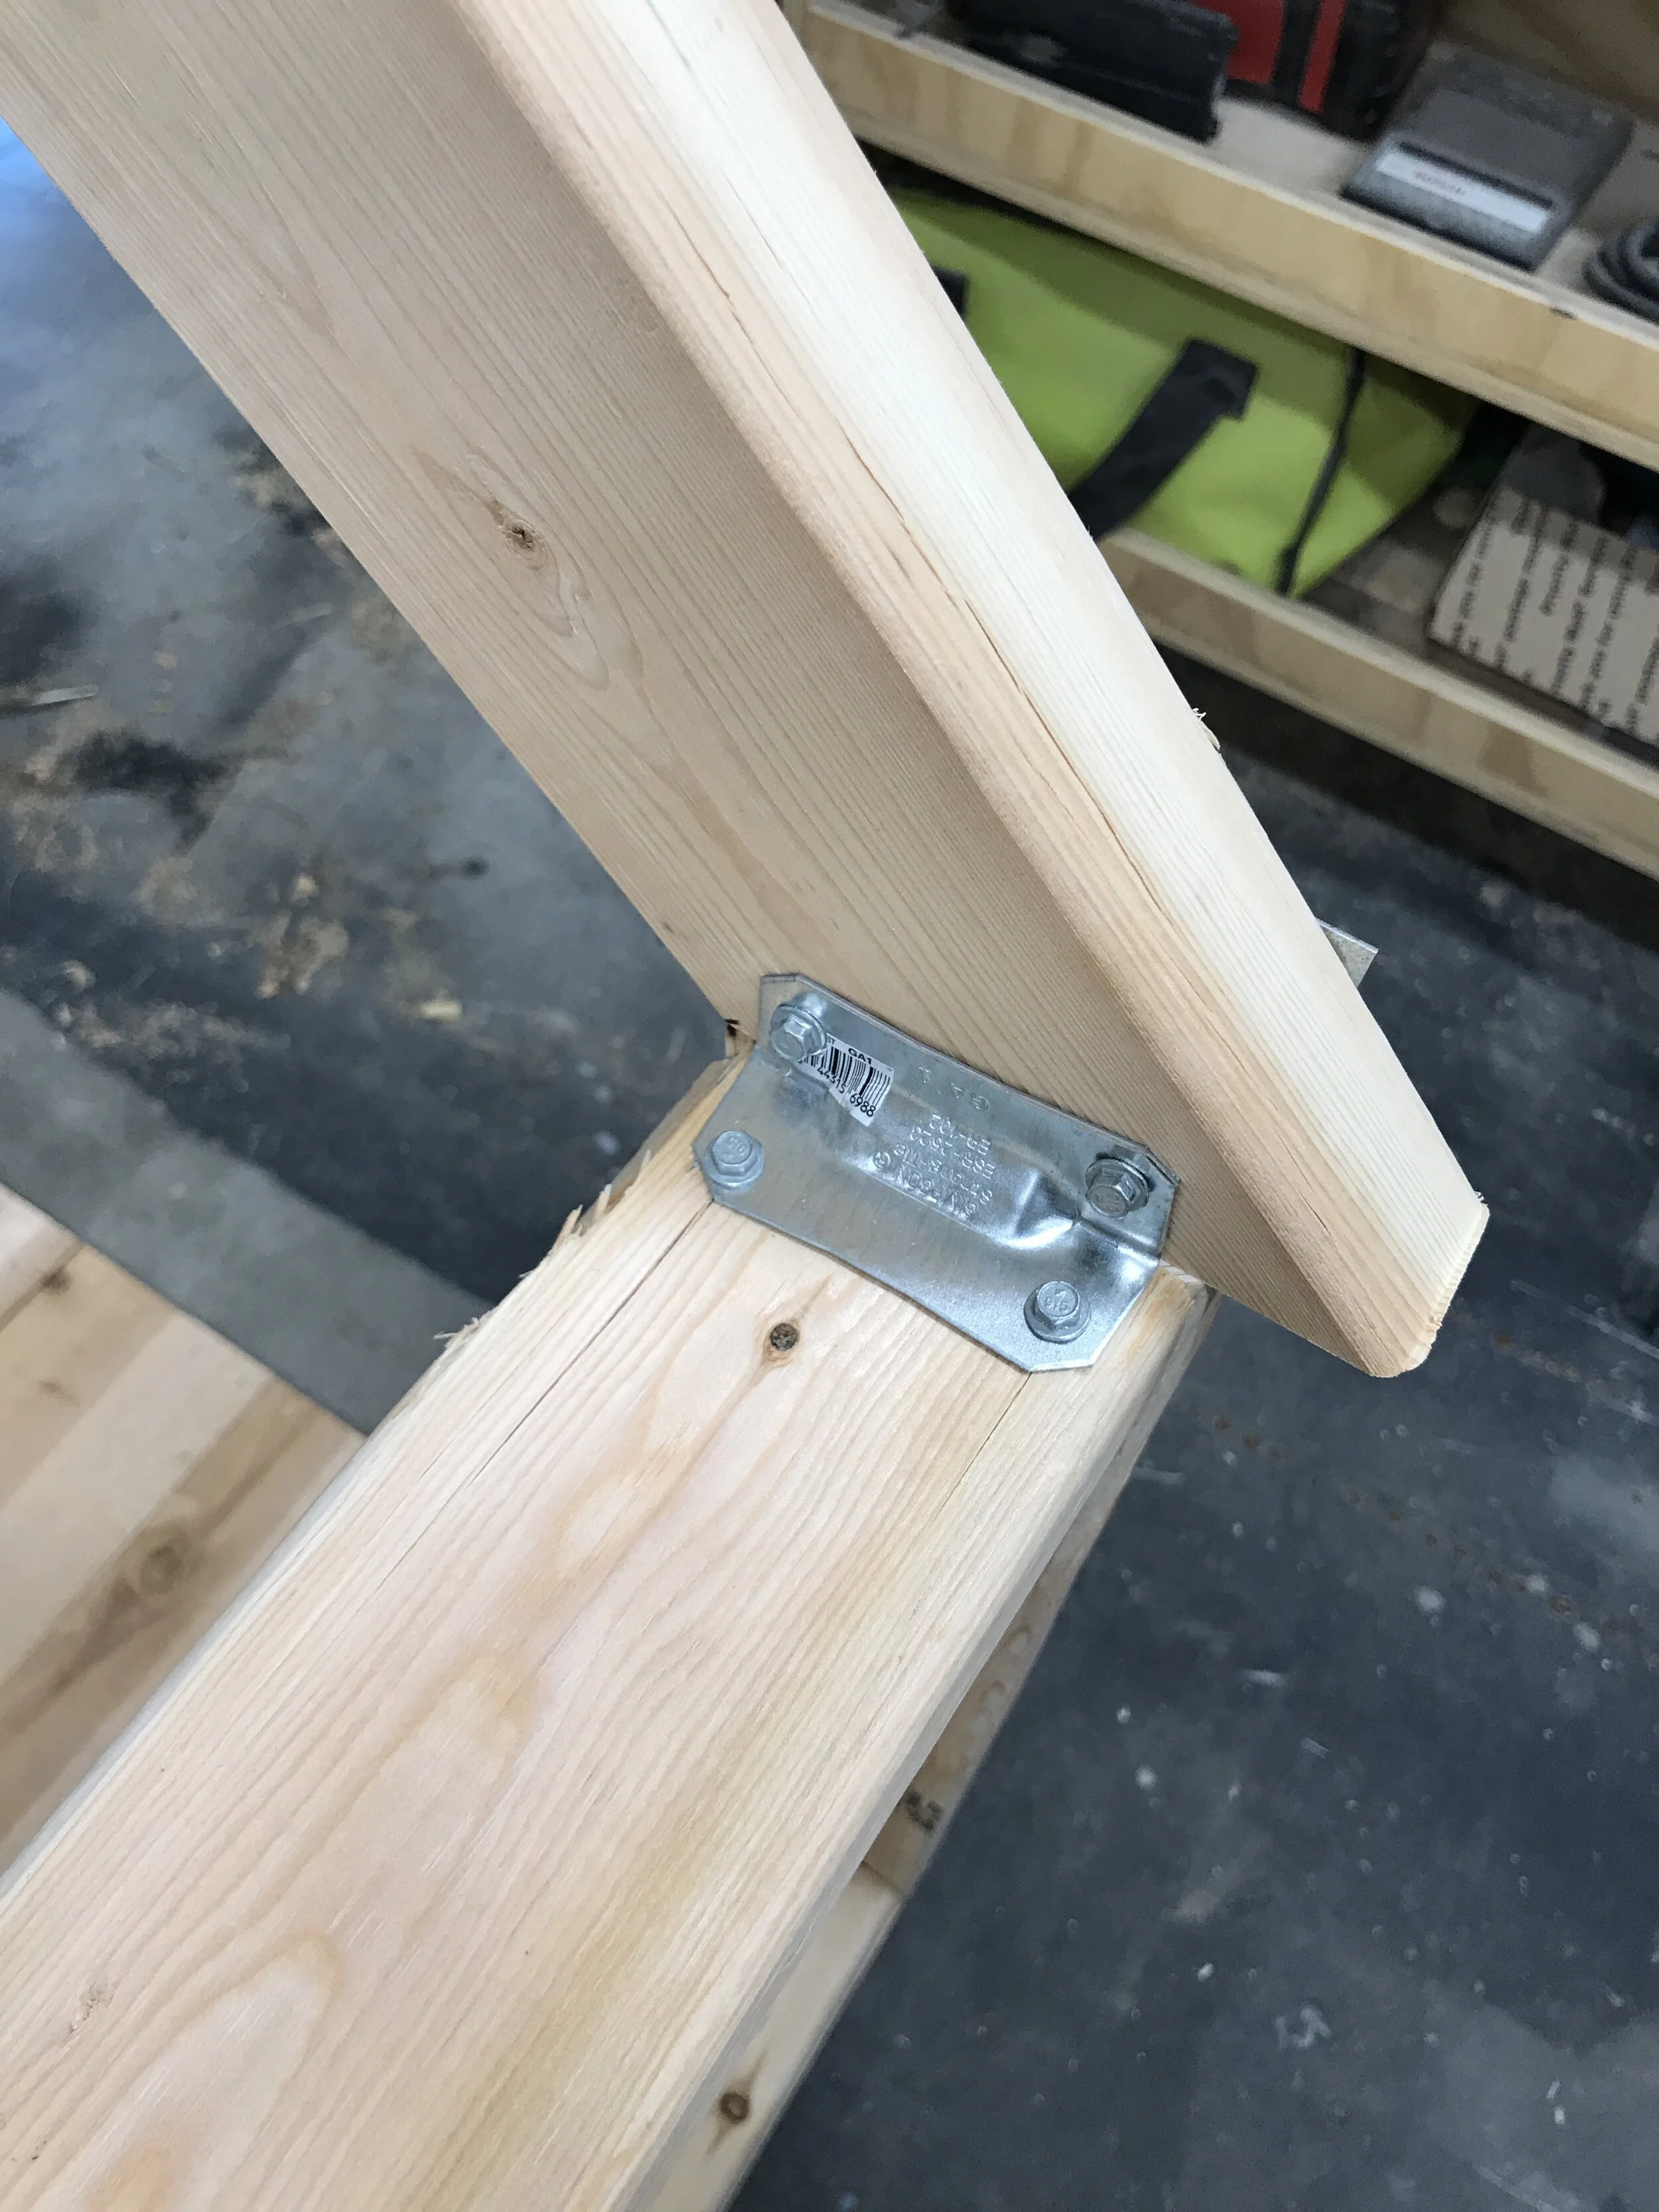
Simpson Strong-Tie GA1’s & #9 x 1 1/2” Hex Head Screws hold the trusses to the sides.
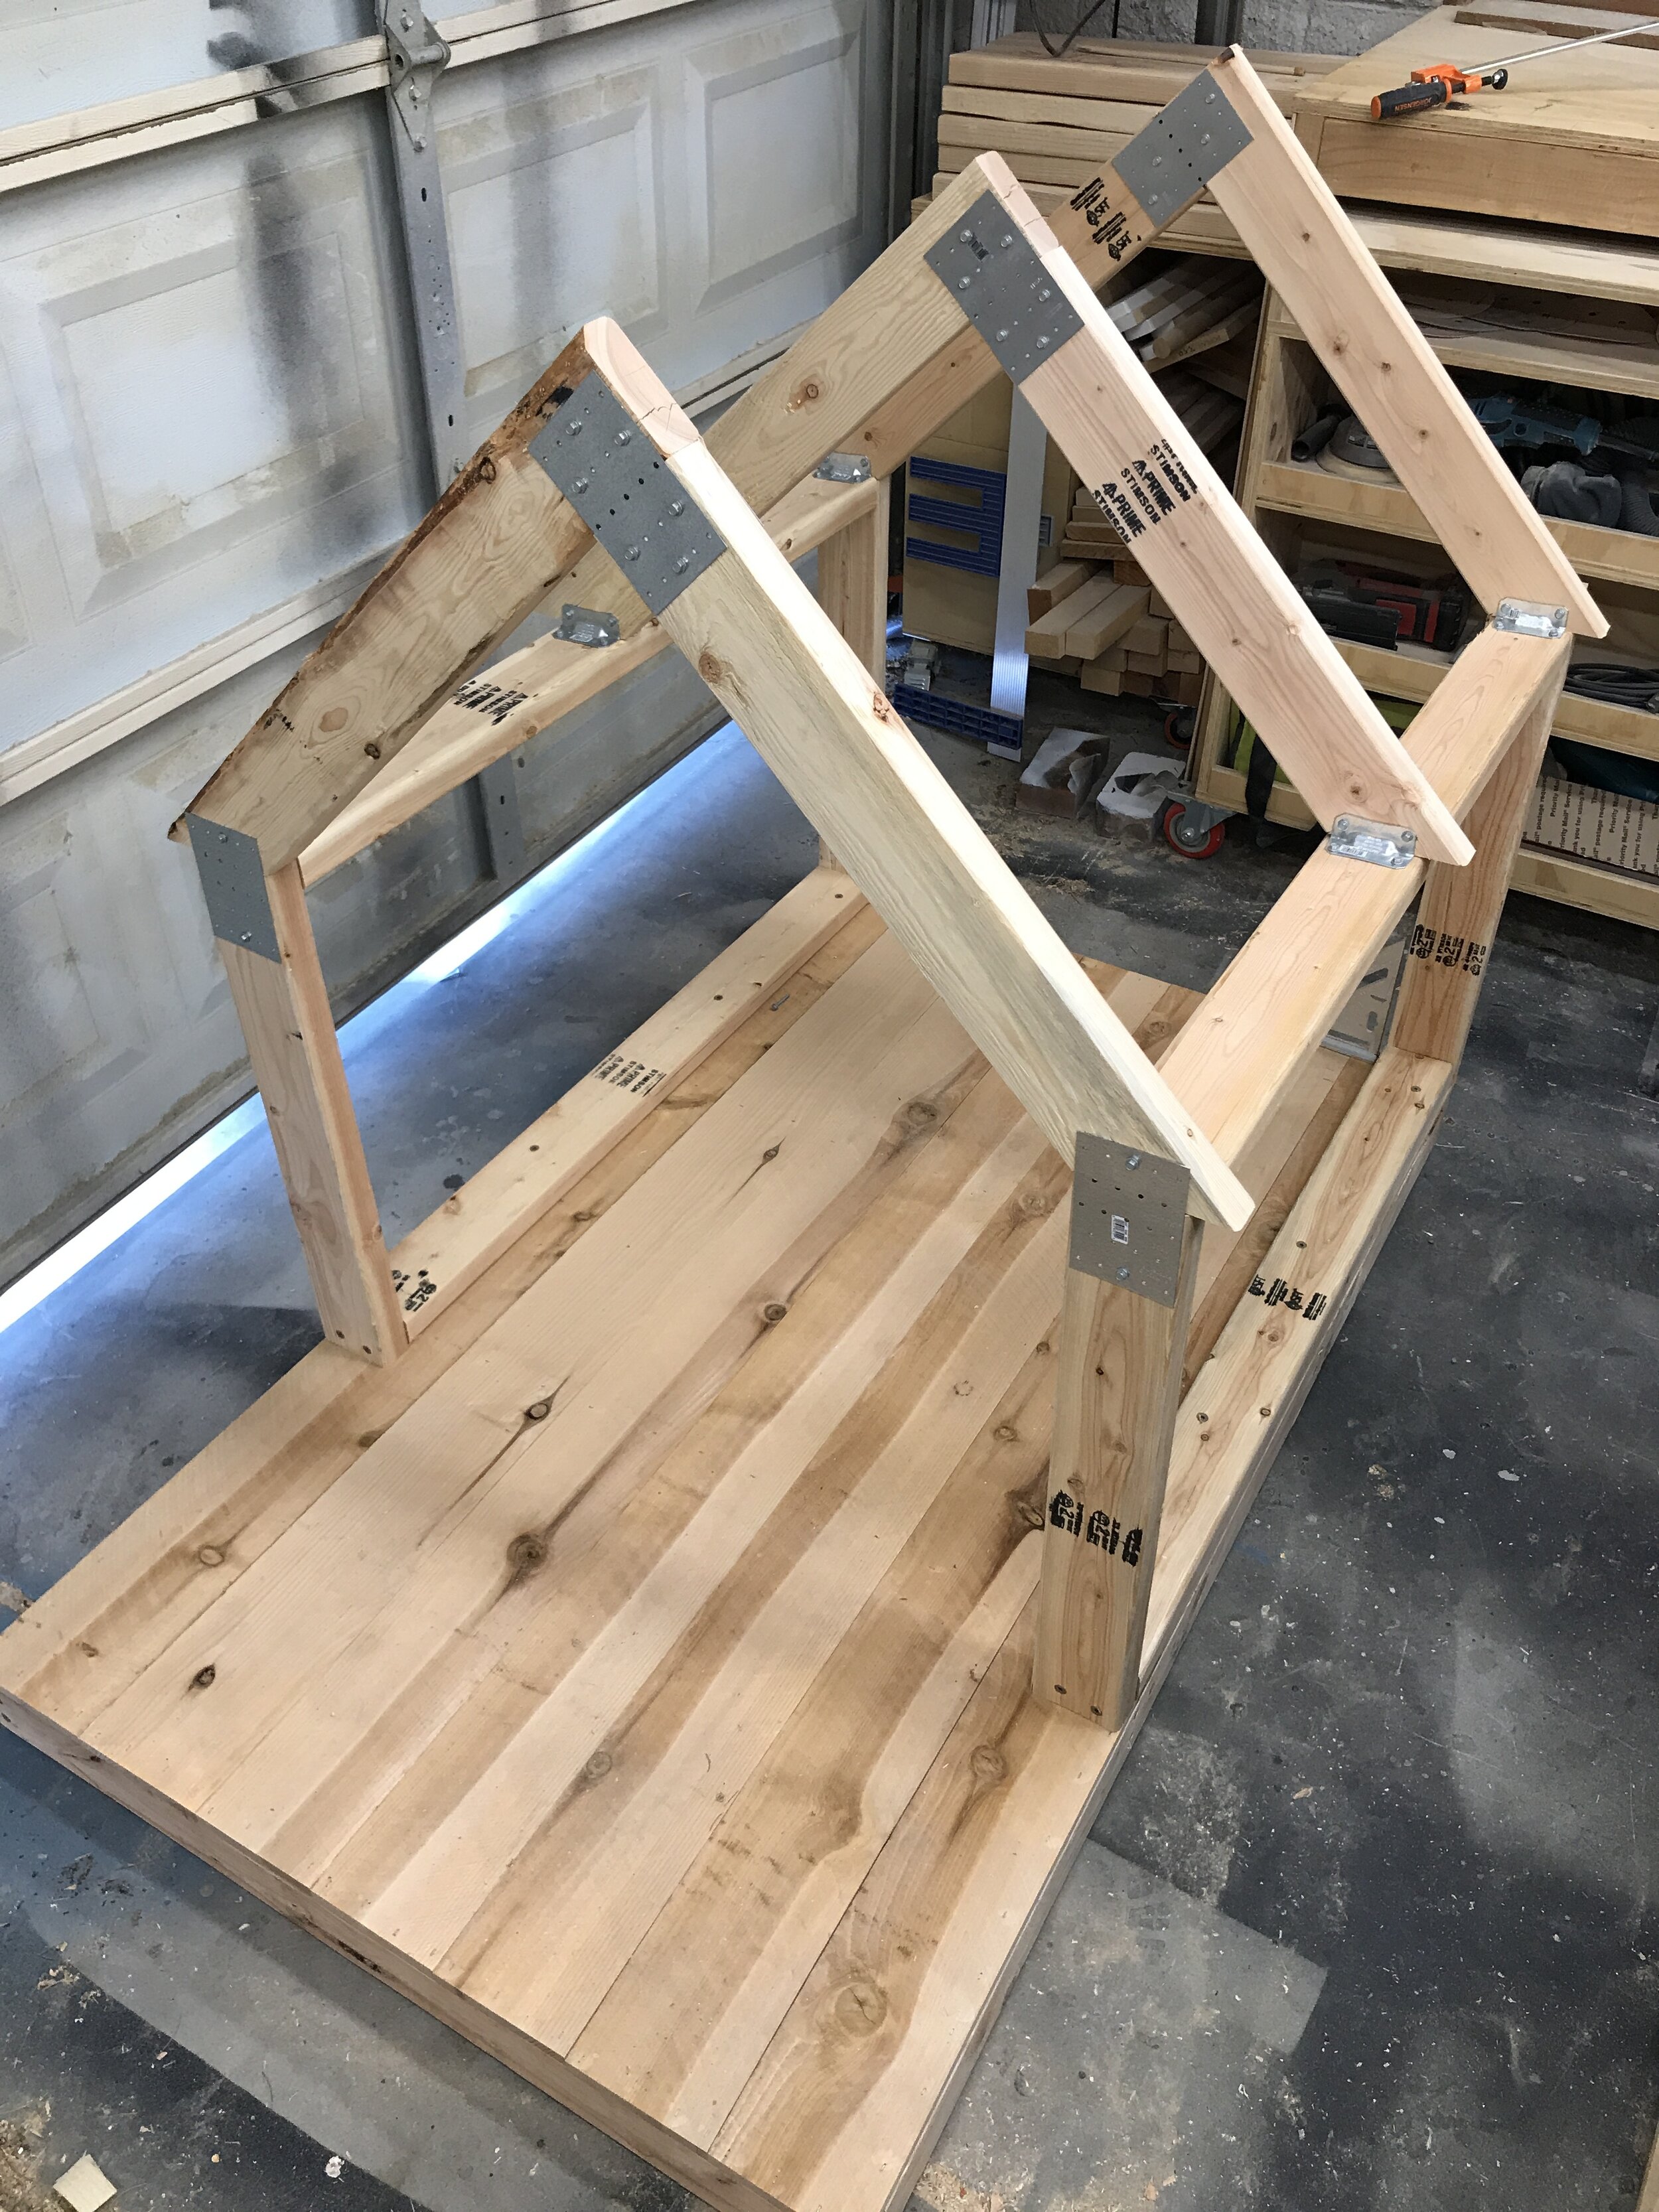
The tie plates hold the very front and very back sides of the trusses to the frame.

I attached the purlins with random spacing using the 2 1/2” framing screws.
Tip #4
After attaching the sides to the base, be sure to check for square before setting the trusses. I had to use one of my Pony | Jorgensen parallel clamps as a spreader because a couple of my 2x4’s were wonky and needed a little convincing on getting square.

I used all the speed squares!
TIP #5
When attaching the tie plates to the support the back truss on the back, only use the screws holes in the middle or else they will interfere when adding the slats later on.

You can barely see here I only used two screws on the back tie plates so they don’t interfere with slats.
TIP #6
If you are doing the two-tone look for the finish like I did, paint the base/frame before installing the roof or slats!
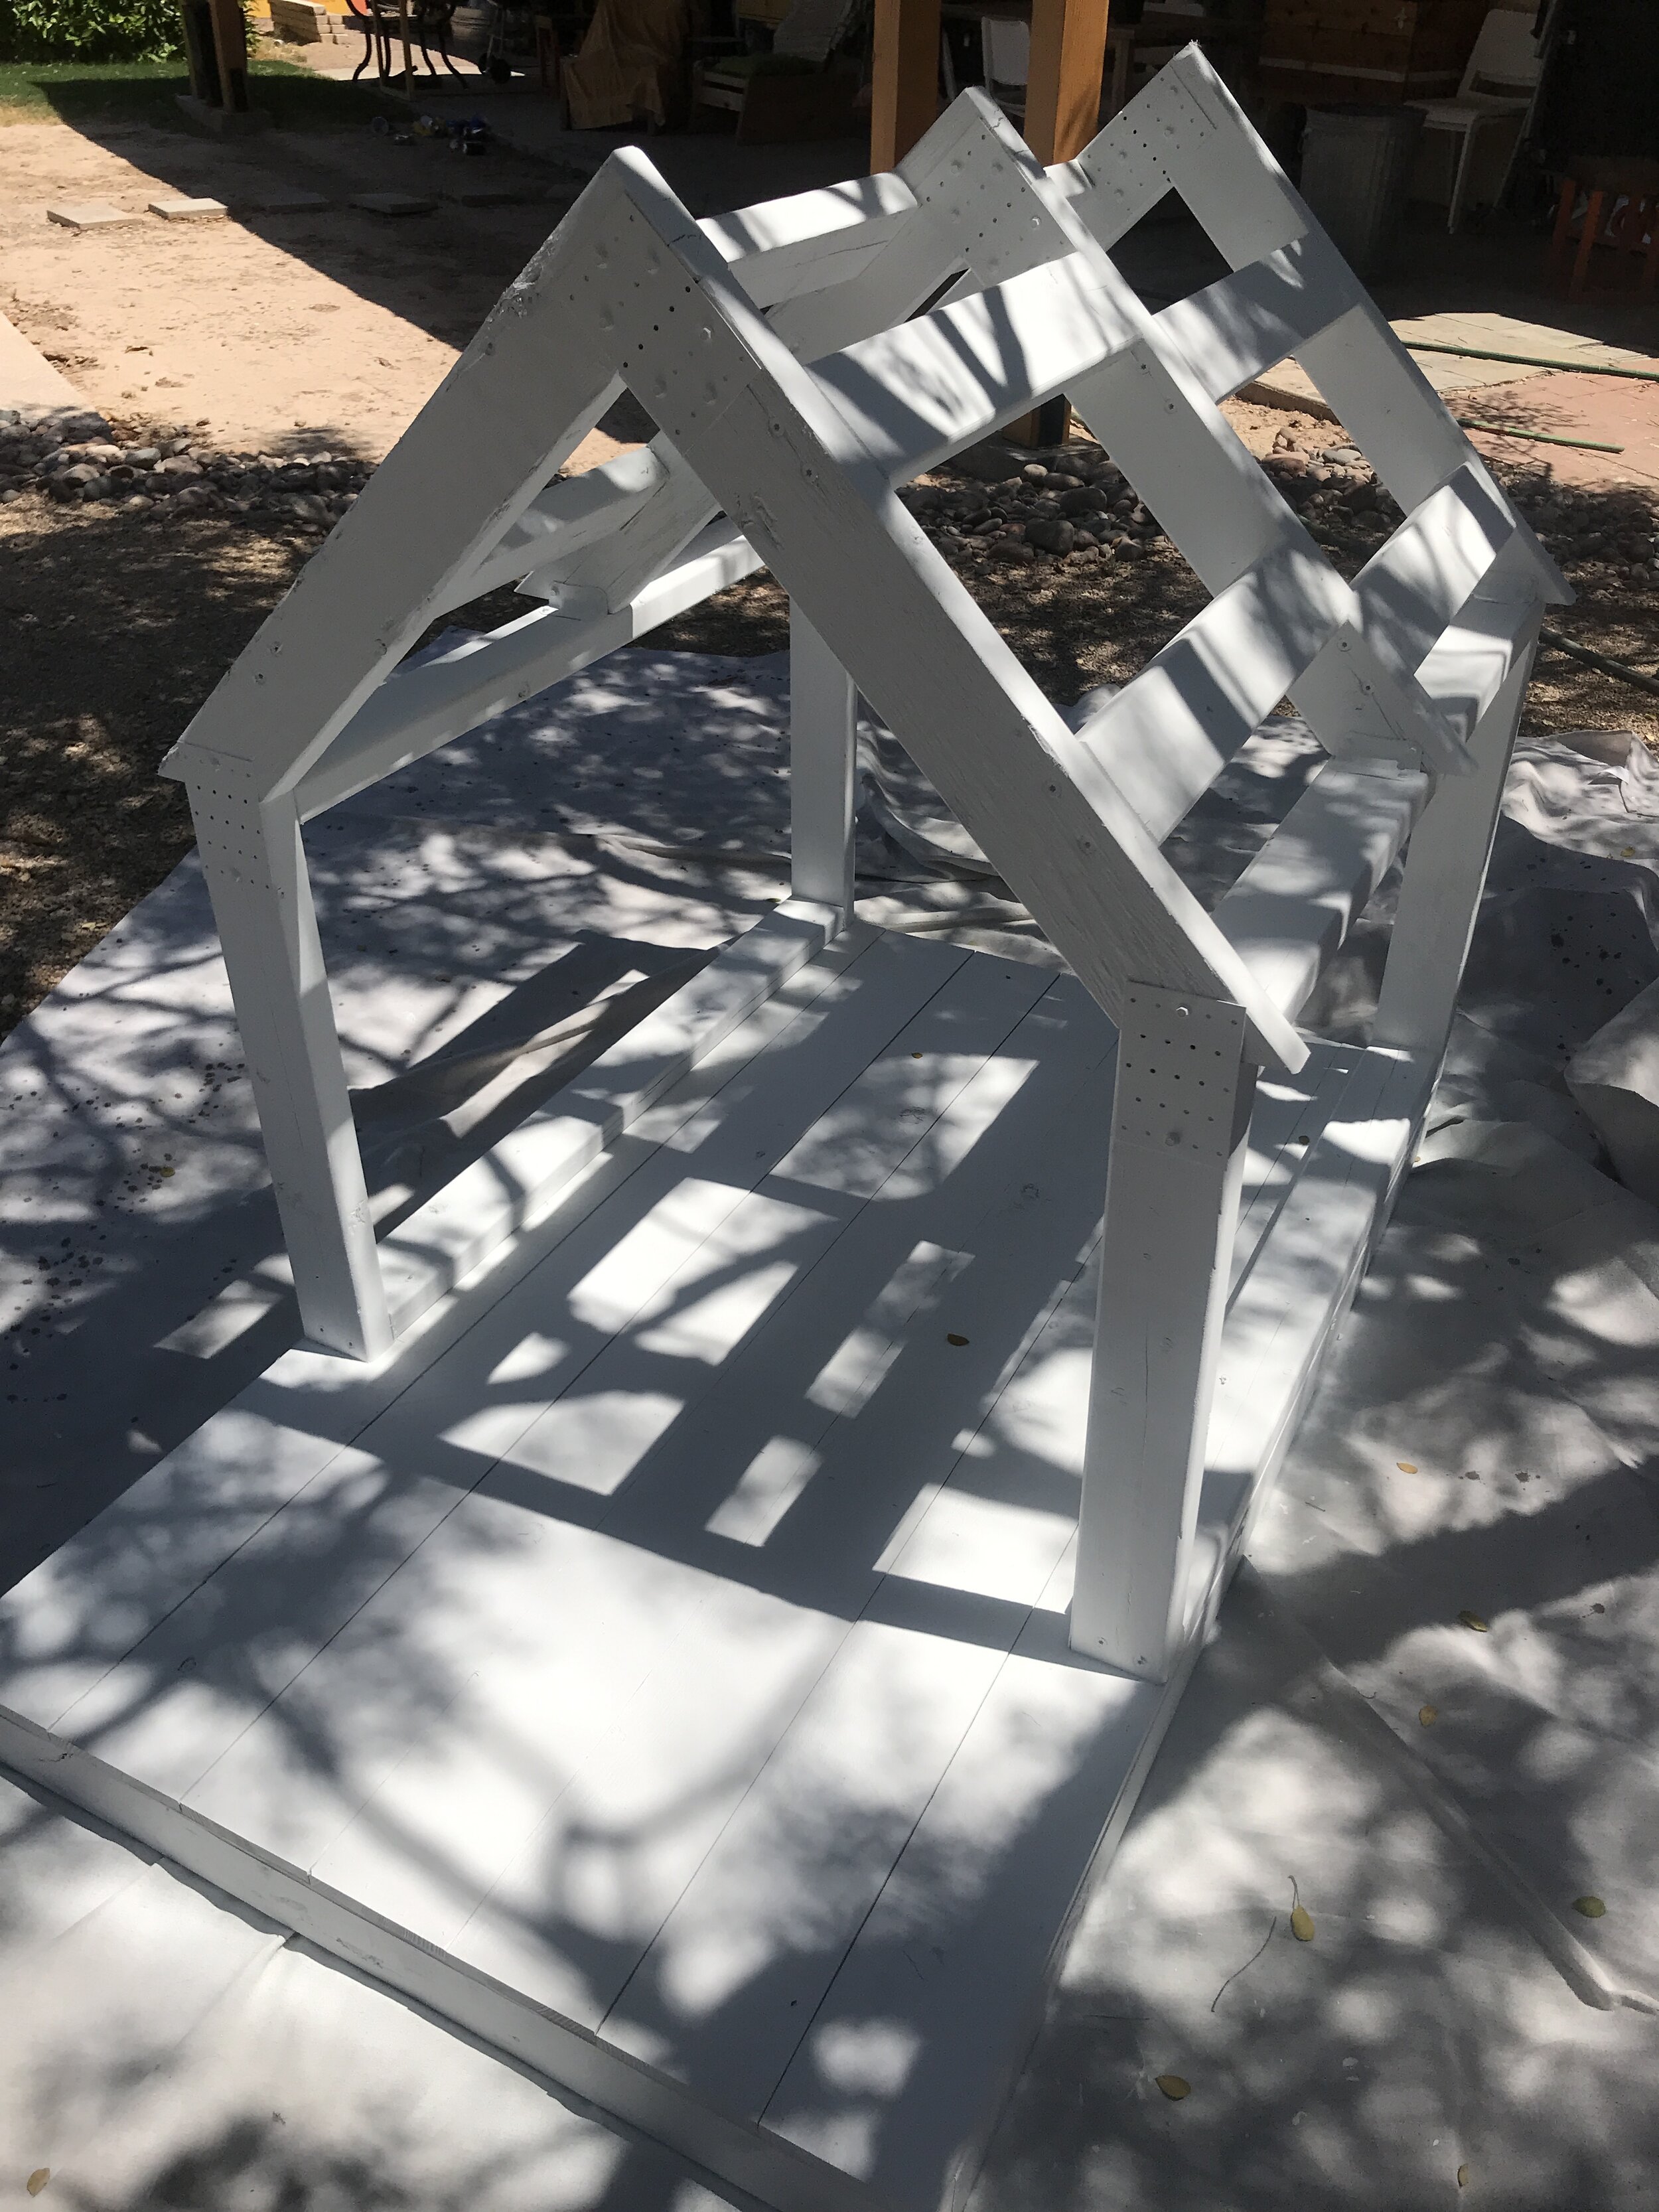
I used bright white exterior paint from Behr and used my cordless Graco to spray it.
TIP #7
I used a level to help line up the roofing boards before installing. And then used 1 1/4” 18 ga crown staples to attach roofing boards to purlins and trusses.

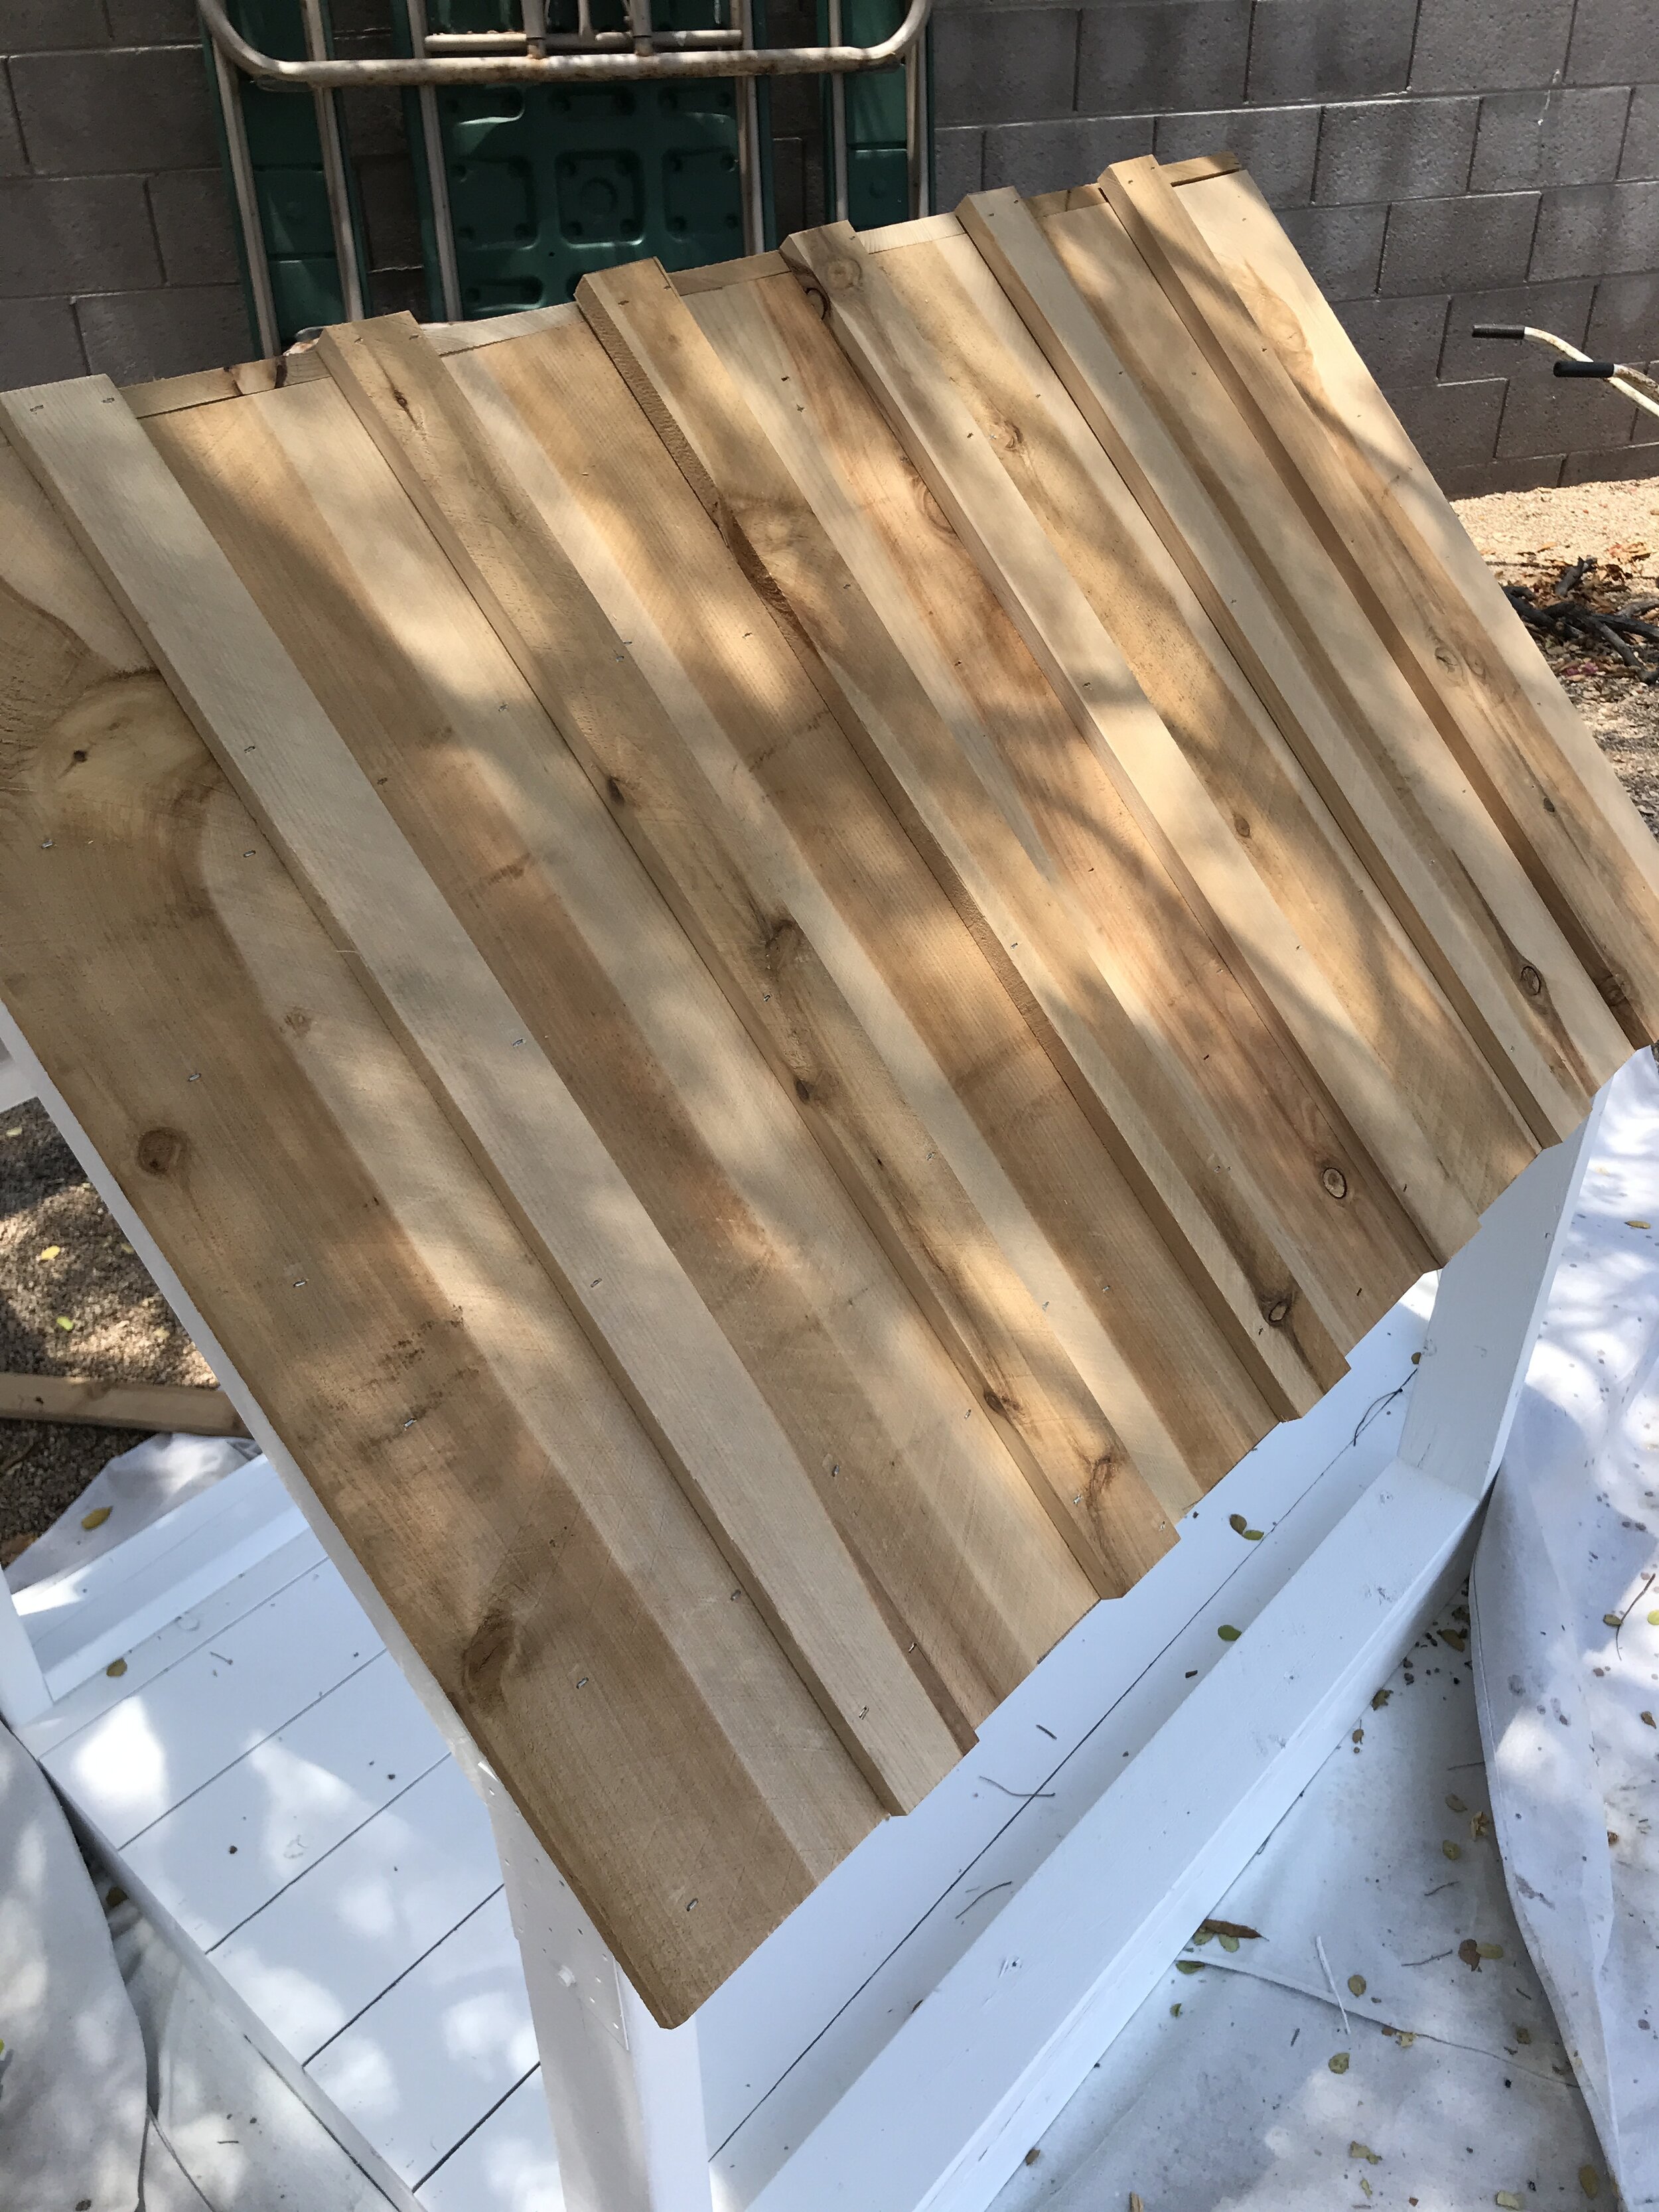
One side of roofing boards is longer than the other, so that they overlap at the top and not leave a gap.
TIP #8
When spacing the slats on the sides and back, I always install the two outside ones first and then the middle one and then eye ball the rest. This gives you approximately 1” in between each slat. The back has the same number of slats as the sides so the gaps are slightly less than 1”.

Outside ends first, then measure and install middle and I eyeballed the rest.

One side done.

Love that the slats over airflow for AZ, but you could put them closer if you live in a cooler climate.

I added this strip across the back to be able to add slats across the back. Originally I thought about leaving it backless and then changed my mind. This worked well.

I love that the back is open! And yes this pic reminds me I need to fix that one staple!

Only time will tell if he likes it, but he did good for our little photo shoot.
Complete build plans available… they include all dimensions, cut list, tool list, materials list, step-by-step instructions and 2D diagrams. Click here to start building your pup a DIY Modern Dog House today!
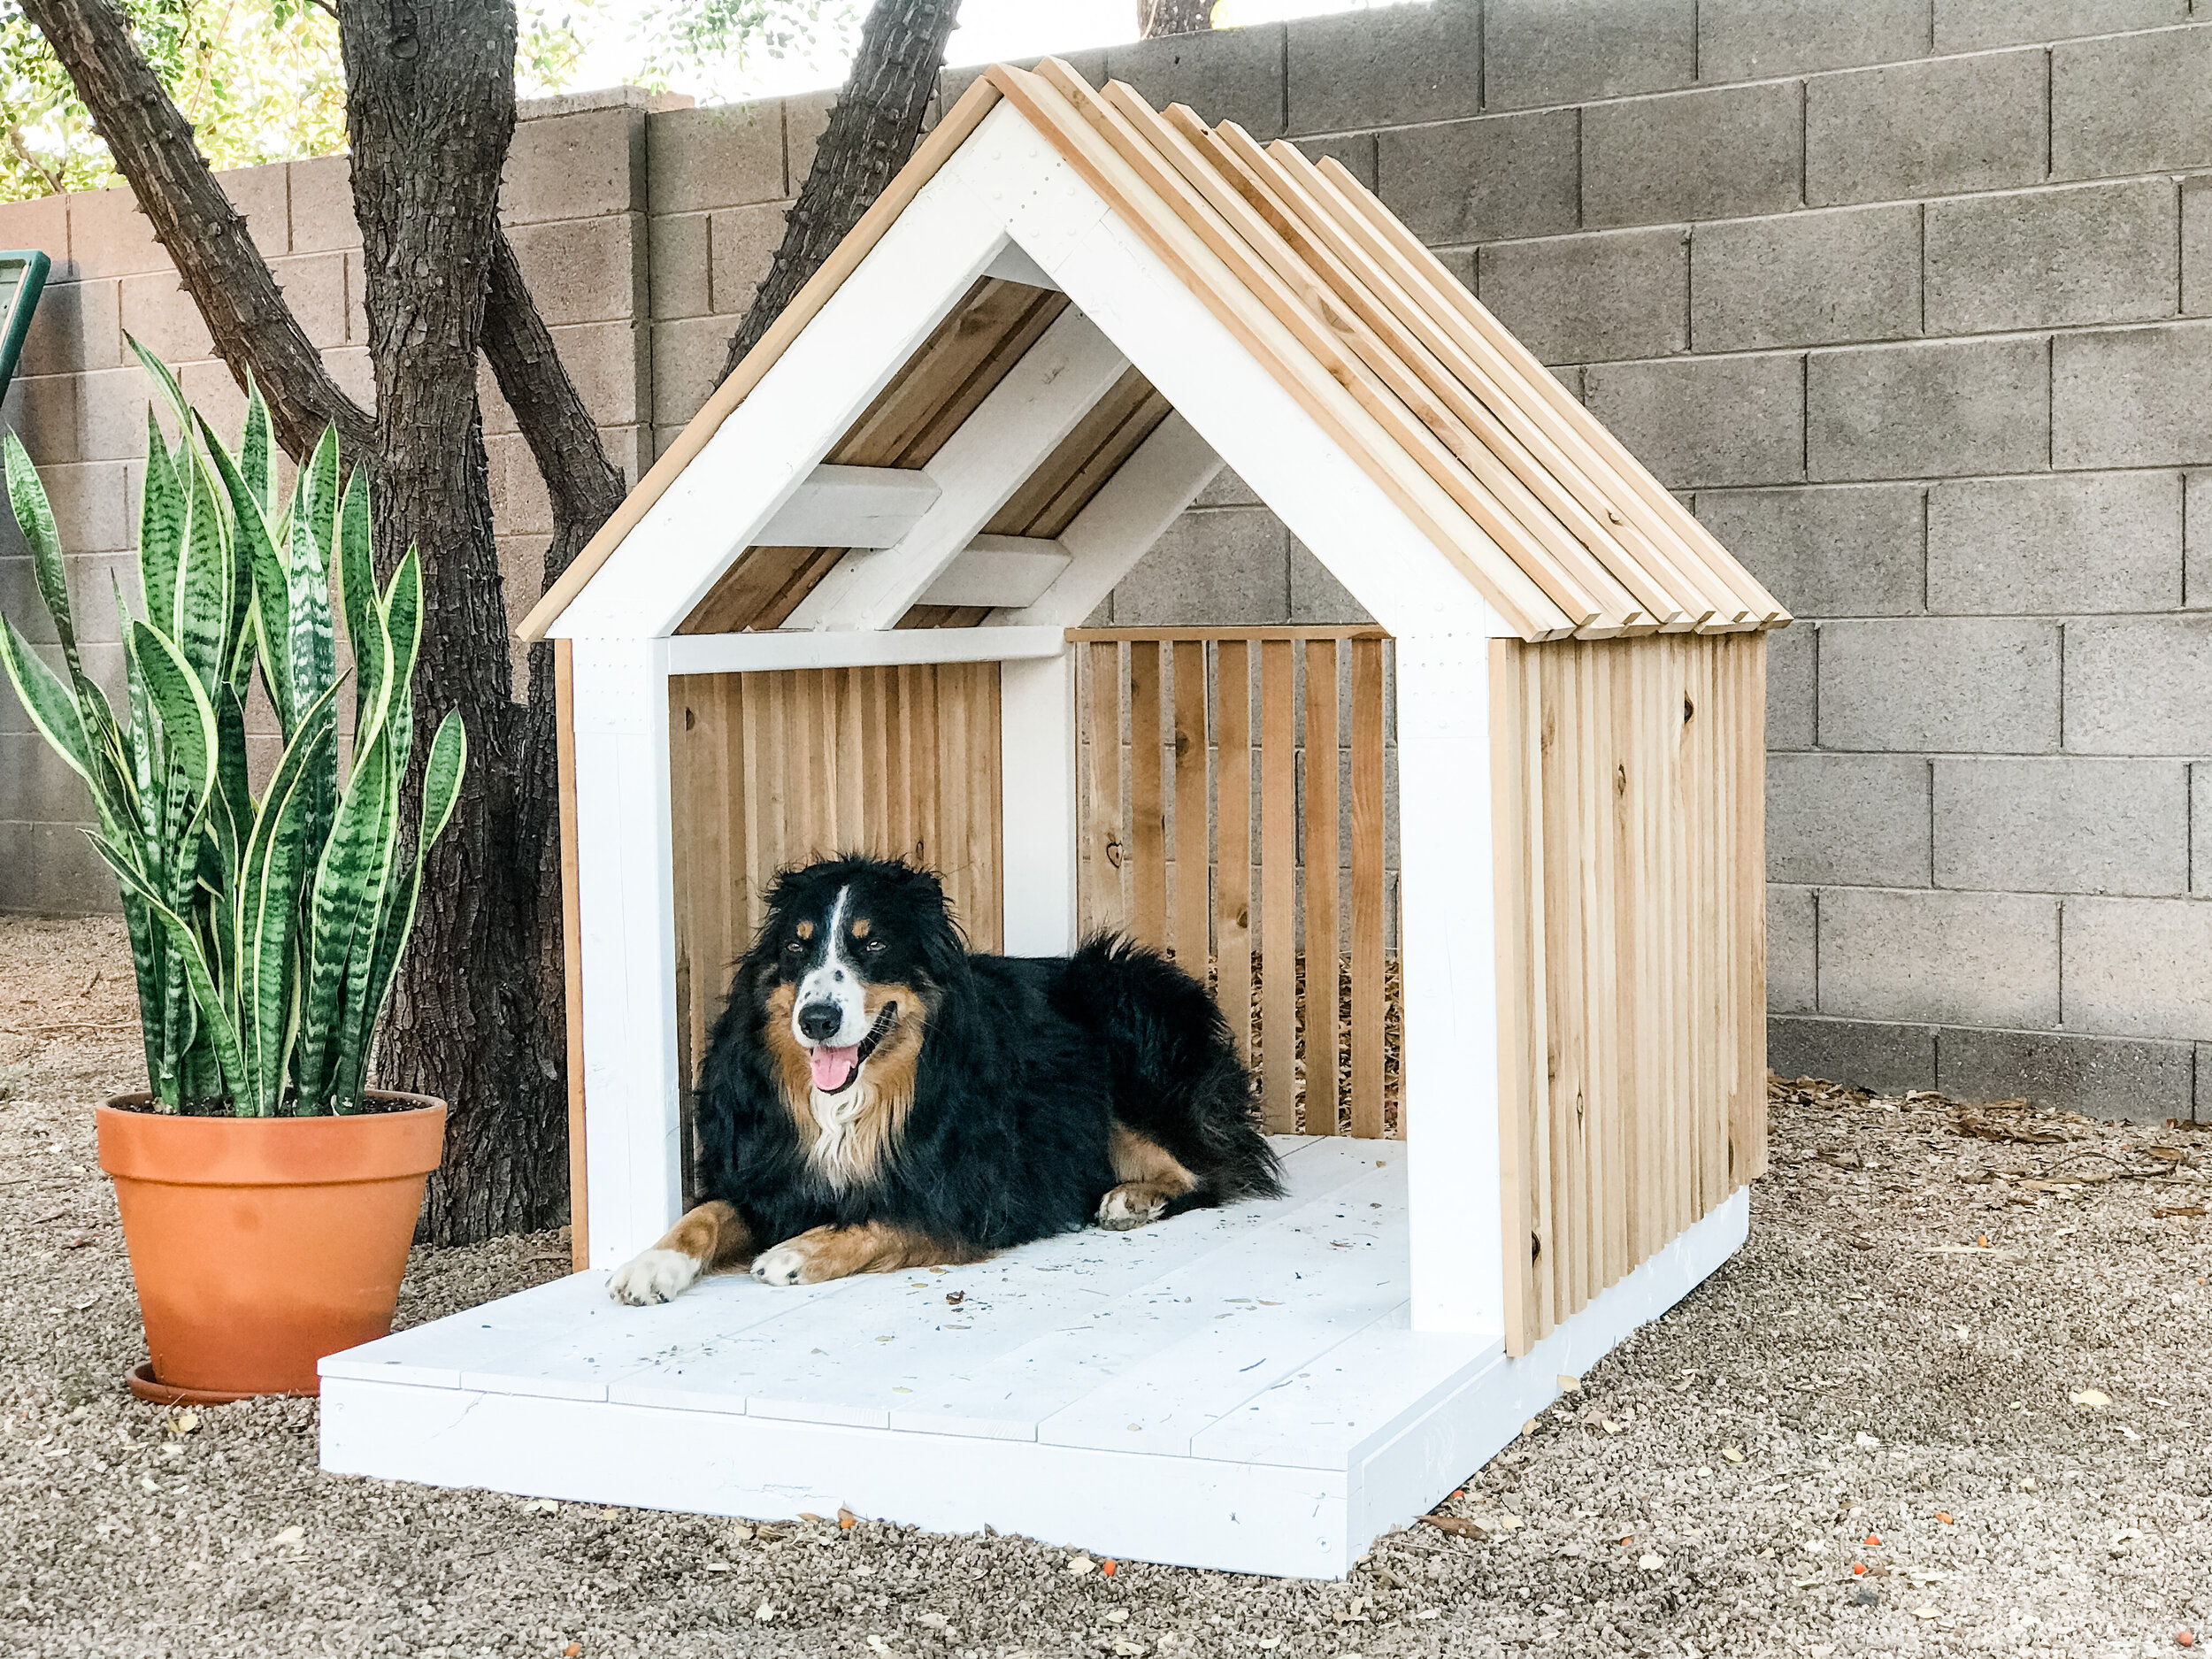
Awesome Oscar’s DIY Modern Dog House
And that is really it! A simple straight forward and AWESOME build! I am in love with how this turned out, now only time will tell if Awesome Oscar actually uses it. I have my fingers crossed. And thanks again to Simpson Strong-Tie for helping me build Oscar a dog house that is sure to last!
I would love to know what you think of this build, please leave me a comment below. And you end up building a DIY Modern Dog House for you puppy please tag me in the build, I’d love to see it! And as always, thank you for following my building journey. Remember Build LOUD, Build Wild… just go for it and have fun! Oh… and have an AWESOME day!
Sadie Mae
Can’t build it now? PIN it and save it for later!


