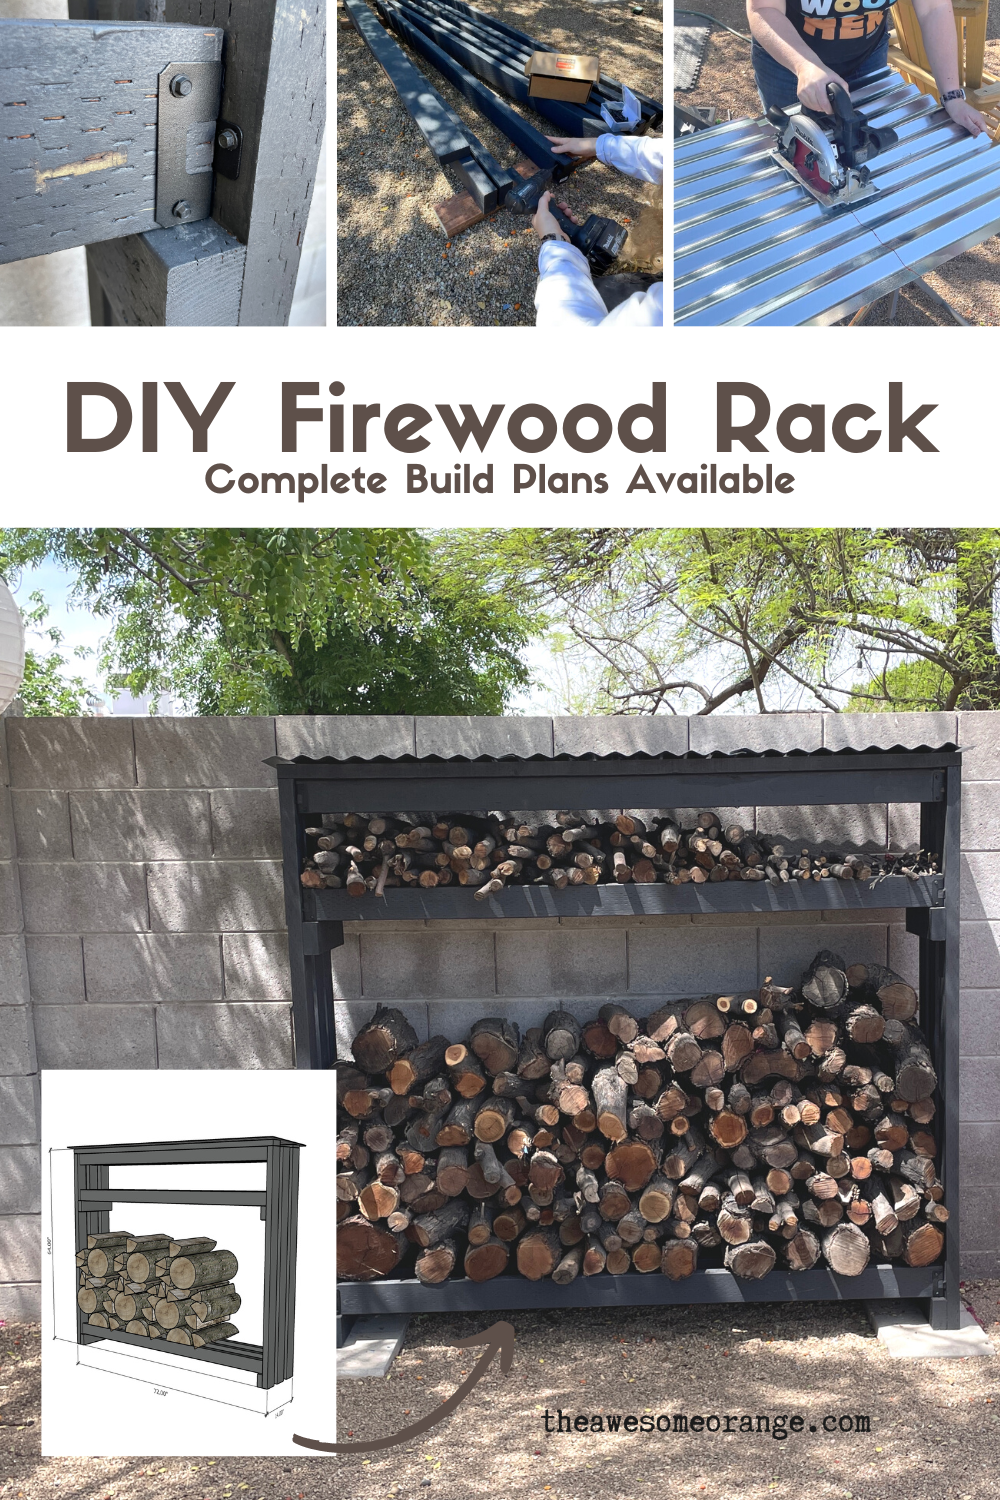
DIY Outdoor Firewood Rack
So this is my side yard! Ugh… I know. So today I am going to show you how to make a DIY Firewood Rack. That way I can attempt to tame my side yard.

All the wood is either scraps from projects or trimmings from our giant Mesquite tree in our front yard.
This post IS sponsored by Simpson Strong-Tie. All opinions are my own. This post DOES contain affiliate links. See Disclosures page for more details.
This is a super simple project. You will only need a drill and a circular saw to build it.
For complete build plans including material list, cut list, tool list and step-by-step instructions, click here.
And what really makes this such an easy and super sturdy project is that I am using Simpson Strong-Tie APRTR Ridge Tie Rail Connectors. These are the same ones I used to make my DIY Privacy Fence.
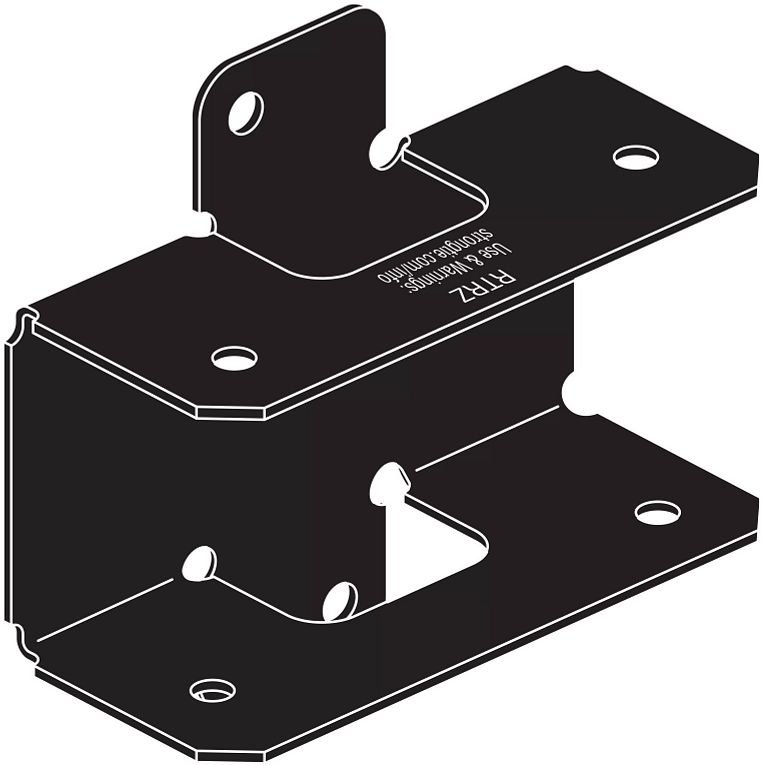
You can get them in the traditional galvanized finish or a decorative powder coated black finish like I did.
After cutting out all the pieces per my cut list, I assembled the two (2) side panels or legs of the firewood rack using some 2 1/2” outdoor wood screws. These hold the three (3) slats of the legs together, reinforce the footprint and will give added strength for the all the weight of lumber going on the rack.

Measuring the spacing I want between the boards… went with 1 1/2”.

Securing the side supports using 2 1/2” outdoor wood screws.
WATCH ME BUILD THIS ON YOUTUBE!

One side legs assembled and on to the other one.
Then I painted all the parts black. I did this before assembly because the connectors I am using were powder coated black and I don’t want to cut in around them. Nor did I want to paint over the powder coat.

Painting everything black before assembly!

This color is Tricorn Black.

Painting before complete assembly so I don’t get paint on the powder coated connectors.
Next, I installed the Simpson Strong-Tie APRTR’s to the end of each of the cross supports using Simpson Strong-Tie #10 x 1 1/2” Black Connector Screws. I made sure that the connector was flush on the same edge of the board on each end.
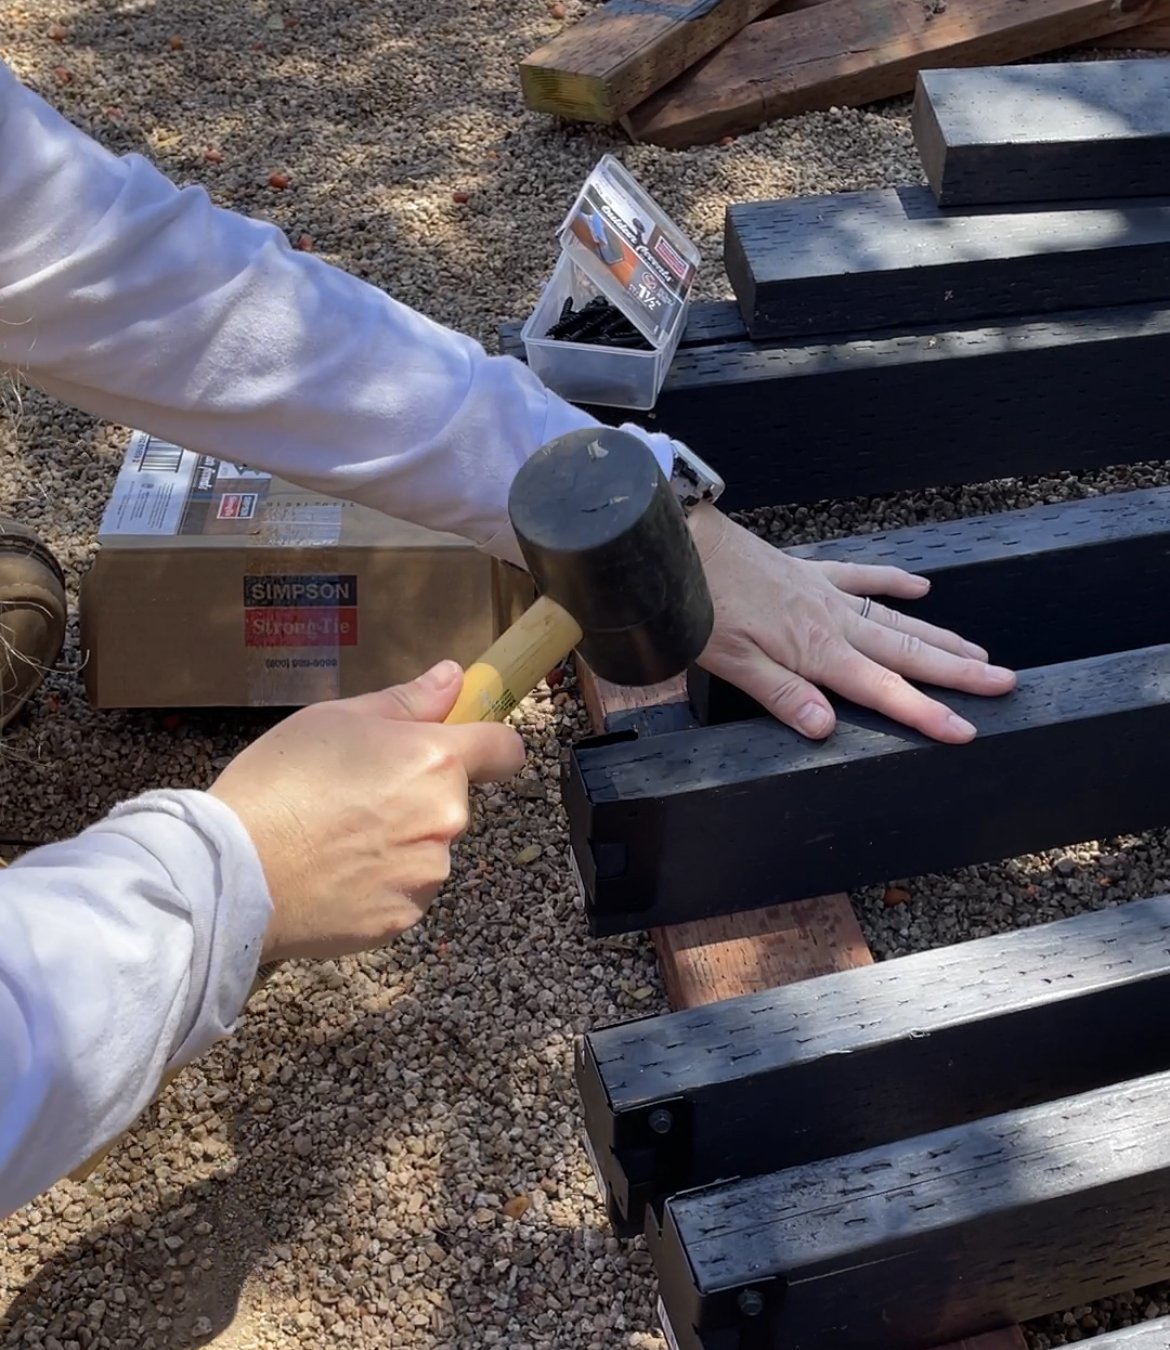
The connectors were a tight fit on the pressure treated wood, so the rubber mallet helped.

Installing these on the cross support is easier than installing them on the legs first. Makita Drill.
Then I leveled a couple of stepping stones for the rack to seat on. Not necessary if you are using ground contact pressure treated wood like I did. But I wanted the extra protection and keep the rack as level as possible.

Awesome Oscar inspecting my work and making sure the pavers are level.
Now for assembly! This would be easier to get started if you have two people, but you can make it work like me if you get a little creative with your scraps.

I might have knocked the legs over a couple of times before I got them balanced just right to be secured.
I started my installing the cross support on the back bottom. Just set it on the side cross support centered on the back side 2x4 and installed using the Simpson Strong-Tie #10 x 1 1/2” Connector Screws. I then installed the front cross support the same way and then move on to install a cross support on the shelf support the same way.

Success!
Once I had four (4) cross supports installed I ensured everything was square and made any necessary adjustments before installing the rest of the cross supports.

Installed two of the bottom cross supports first. KEEN Utility Women’s Cincinnati Work Boots.

And then two of the shelf cross supports.
When it came to installing the top cross supports they didn’t have a side support to sit on, so I used one of my clamps to hold it in place while securing it. It should look like this once all the cross supports are installed.

Bad picture, because the top rail isn’t flush with the top of leg… but it shows you how I used the clamp to help.

Almost finished! This frame is sturdy!
Next up is to install a top cap on the front. This runs across the front and give it a finished look, matches my Privacy Fence, and gives me something to attach the roof too.

Added the top rail using those 2 1/2” outdoor wood screws.
Yup, I am installing a roof. So, we need it to be slanted so the water will run off. So, since we added the 1 1/2” thick top cap in the front… on the back I added a 3/4” cap. A 3/4” drop in 14” is plenty for rain water to run off of. And seriously unless the rain always falls straight down the wood will still get wet at some point.

Bad picture… but this shows the roof slant and the 3/4” rail across the back.
I want the roof on there for looks more than anything. I want it to match my patio roof. If you haven’t seen my patio, check it out here. It is AWESOME!
So with the corrugated metal you want the ridges to run from front to back, but you can’t buy panels that are only 18” wide. So, I bought a corrugated metal panel that was 72” long and cut 18” strips out of it for the roof.
Did you know you can cut metal with a circular saw? Yup, you just need to make sure it is a wood and metal blade… this is the one I used.


It was loud, but it cut like butter! Makita Sub-Compact Circular Saw.
Once my panels were cut, I installed the corrugated metal roof to the firewood rack using some self-sealing screws. They basically have a rubber washer that prevents water going through the hole you drill.

Self-sealing screws to attach the corrugated metal roofing to the frame.
And now that my firewood rack is built we just need to fill it up!

Woohoo! I tired, but it looks so good!

Time to fill it up!

The Simpson Strong-Tie APRTR connectors made assemble so easy and they look AWESOME!
And while it hold a lot of wood and wight it didn’t make a dent in the wood on my side yard. I guess we need to have more bonfires this year to get rid of some of it.
I love having this finished space in my backyard. I hope you enjoyed this project and if you build yourself one, I would love to see a picture.

Oh Yeah! What do you think?

Oscar still doesn’t like his job as a model. But I think he is cute anyway.
As always, that you for following my building journey. Remember Build LOUD, Build WILD and have an AWESOME day!
Sadie Mae
PIN IT AND SAVE FOR LATER!