

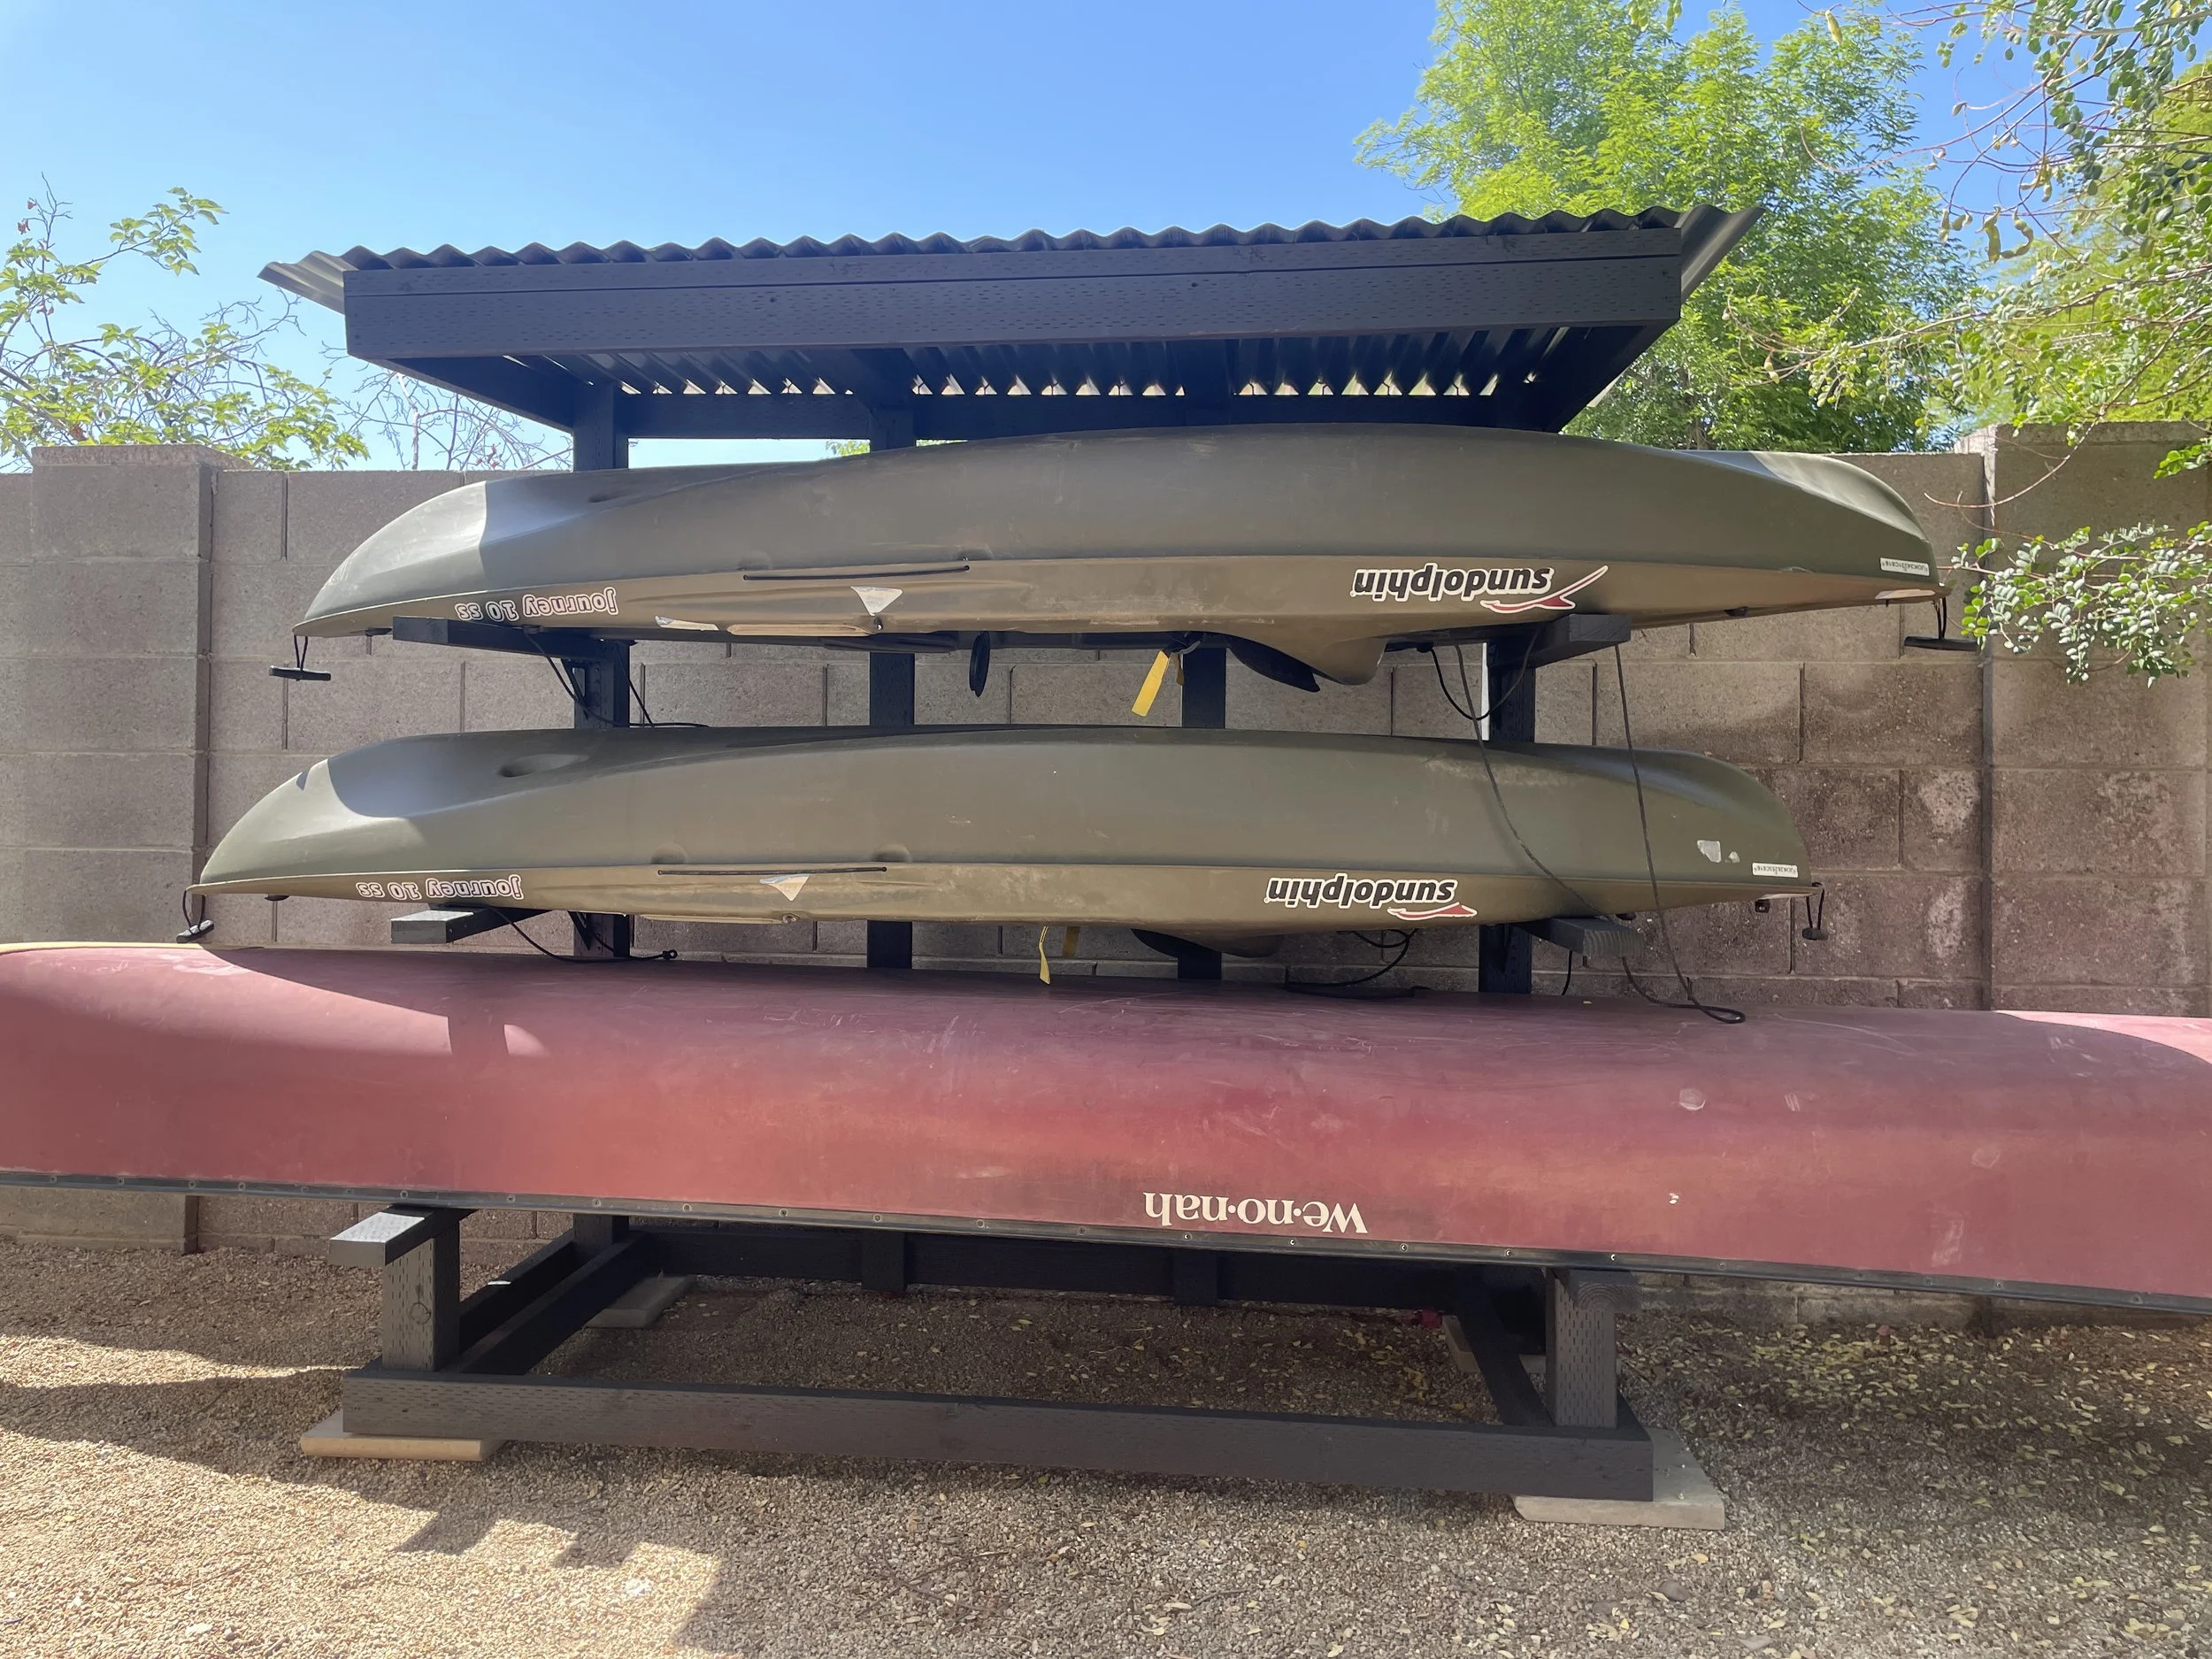
How to Build A Freestanding Kayak/Canoe Rack
We have had our canoe and kayaks just hanging out under our covered patio for the past 2 years ish!!! Eek, I know. But that just means this build has been even more satisfying when it was done. And of course the infamous question was asked… why didn’t I do this sooner?

DIY Floating Pool Cue Holder
It was time to update my pool cue holder (rack) to a more modern look and to get another piece of furniture up off the floor. You see Oscar, my dog, sheds a lot and the more furniture on the floor makes cleaning so much more time consuming. So this pool cue rack is going to be hanging on the wall or floating!

Getting Started With Quickbooks
Next I am going to share benefits of using QuickBooks. I have them separated into three (3) categories… Income, Expenses and Taxes. This was the easiest way I found to help highlight most of the benefits.

Making Rubber Stamps with a Laser | Thunder Nova 35/100
I recently got my Thunder Nova 35/100 CO2 laser and I thought better way to become familiar with it than to create some rubber stamps for my business. In this post, I will share with you how I created a small logo stamp, a business card stamp and a large stamp used to make my own t-shirts. You could also use these stamps to make any of your own packaging. So, let’s get started.

DIY Thick Adjustable Shelves - No Fancy Hardware
I live in a 1970’s ranch style house that has a sunken living room and it has been a challenge to figure out the layout. Once I figured out where to put the couch and TV that didn’t interfere with the window or walkways, I was left with an awkward and narrow corner. This corner backs up to my entryway that has this old metal railing. So many challenges…

Easiest Way to Finish Outdoor Furniture
But since these chairs are made with pressure treated wood we are going to go straight to the penetrating oil. We don’t want to burn pressure treated wood and release any of the chemicals in it.
I like penetrating oil because it soaks into the wood and will never peel or crack… which makes maintenance down the road super easy.

How To Maintain Outdoor Wood Furniture
If you have been following me for a while you might have seen these chairs before… they are my one-board campfire chairs. I made them over three years ago and they have since sat out in the AZ sun, rain and everything in between.
And even though they are in good shape, they could use come sprucing up so that they can last for many more years to come. So, let’s get started.

DIY Outdoor Firewood Rack
And what really makes this such an easy and super sturdy project is that I am using Simpson Strong-Tie APRTR Ridge Tie Rail Connectors. These are the same ones I used to make my DIY Privacy Fence.
You can get them in the traditional galvanized finish or a decorative powder coated black finish like I did.

DIY Workbench | An AWESOME Match for Harvey's G700
I recently got a new dust collector, Harvey’s G700 Dust Processor, and with its low profile I am going to show you how I built an AWESOME workbench around it. Having a small shop, I have to utilize every inch. And with this workbench I gained 10 sq. ft. of work surface and 15 sq. ft. of wall space!!!

How I Insulated My Garage Door
Okay, it is finally time to insulate my garage door. I say finally because I have lived in this house for almost 8 years, I have had a mini-split a/c unit in the garage for about 1 1/2 years and I have had the insulation kit for about 9 months! Nothing like procrastinating.
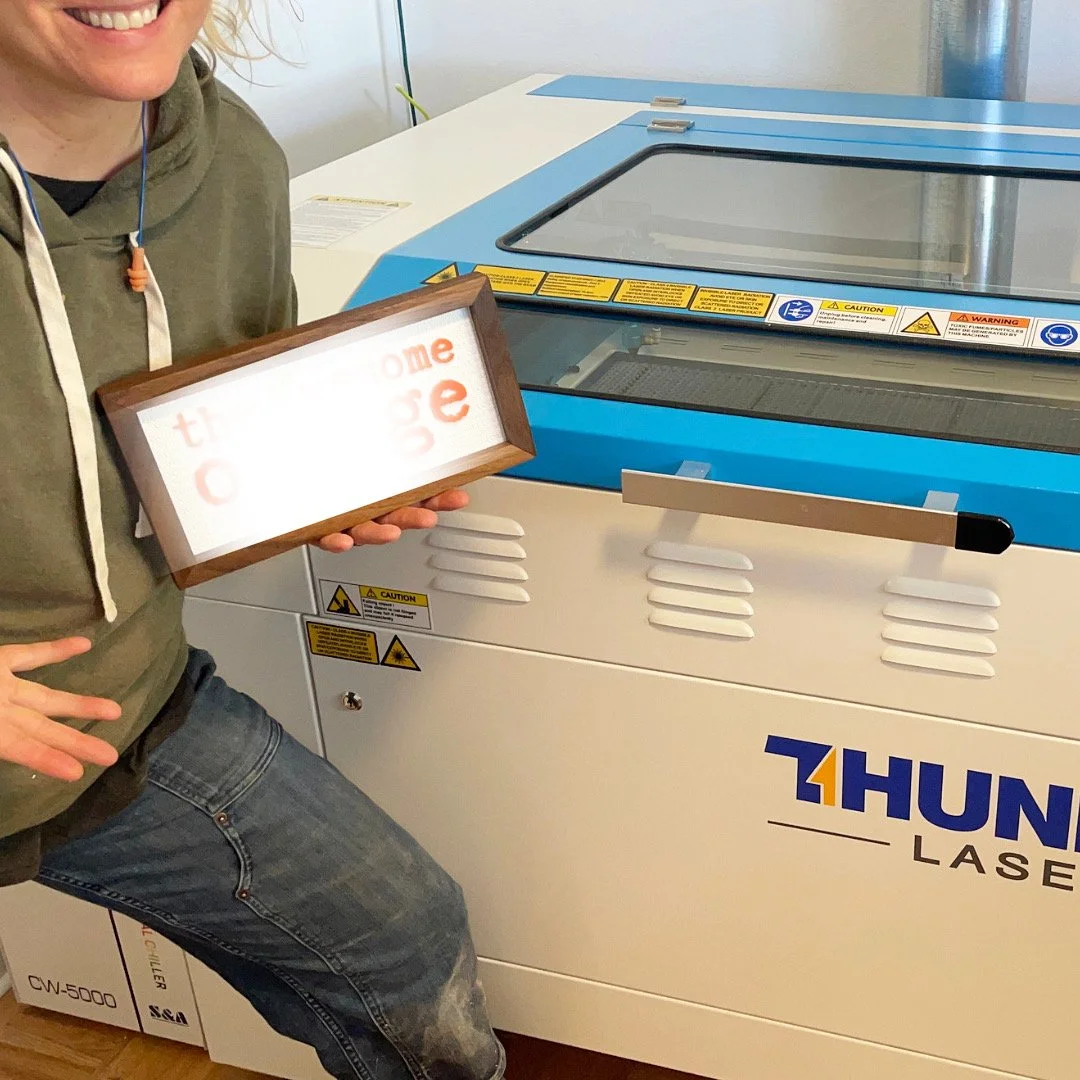
My NEW Thunder Laser | Nova 35/100
And I want to make lots of products, so when Thunder Laser reached out to me I jumped at the chance to team up with them. They ended up sending me the Thunder Laser Nova 35/100… meaning it has a 100 watt CO2 laser with an engraving/cutting area of 35.4” x 23.6”. It also can engrave pieces with a height up to 9”H.
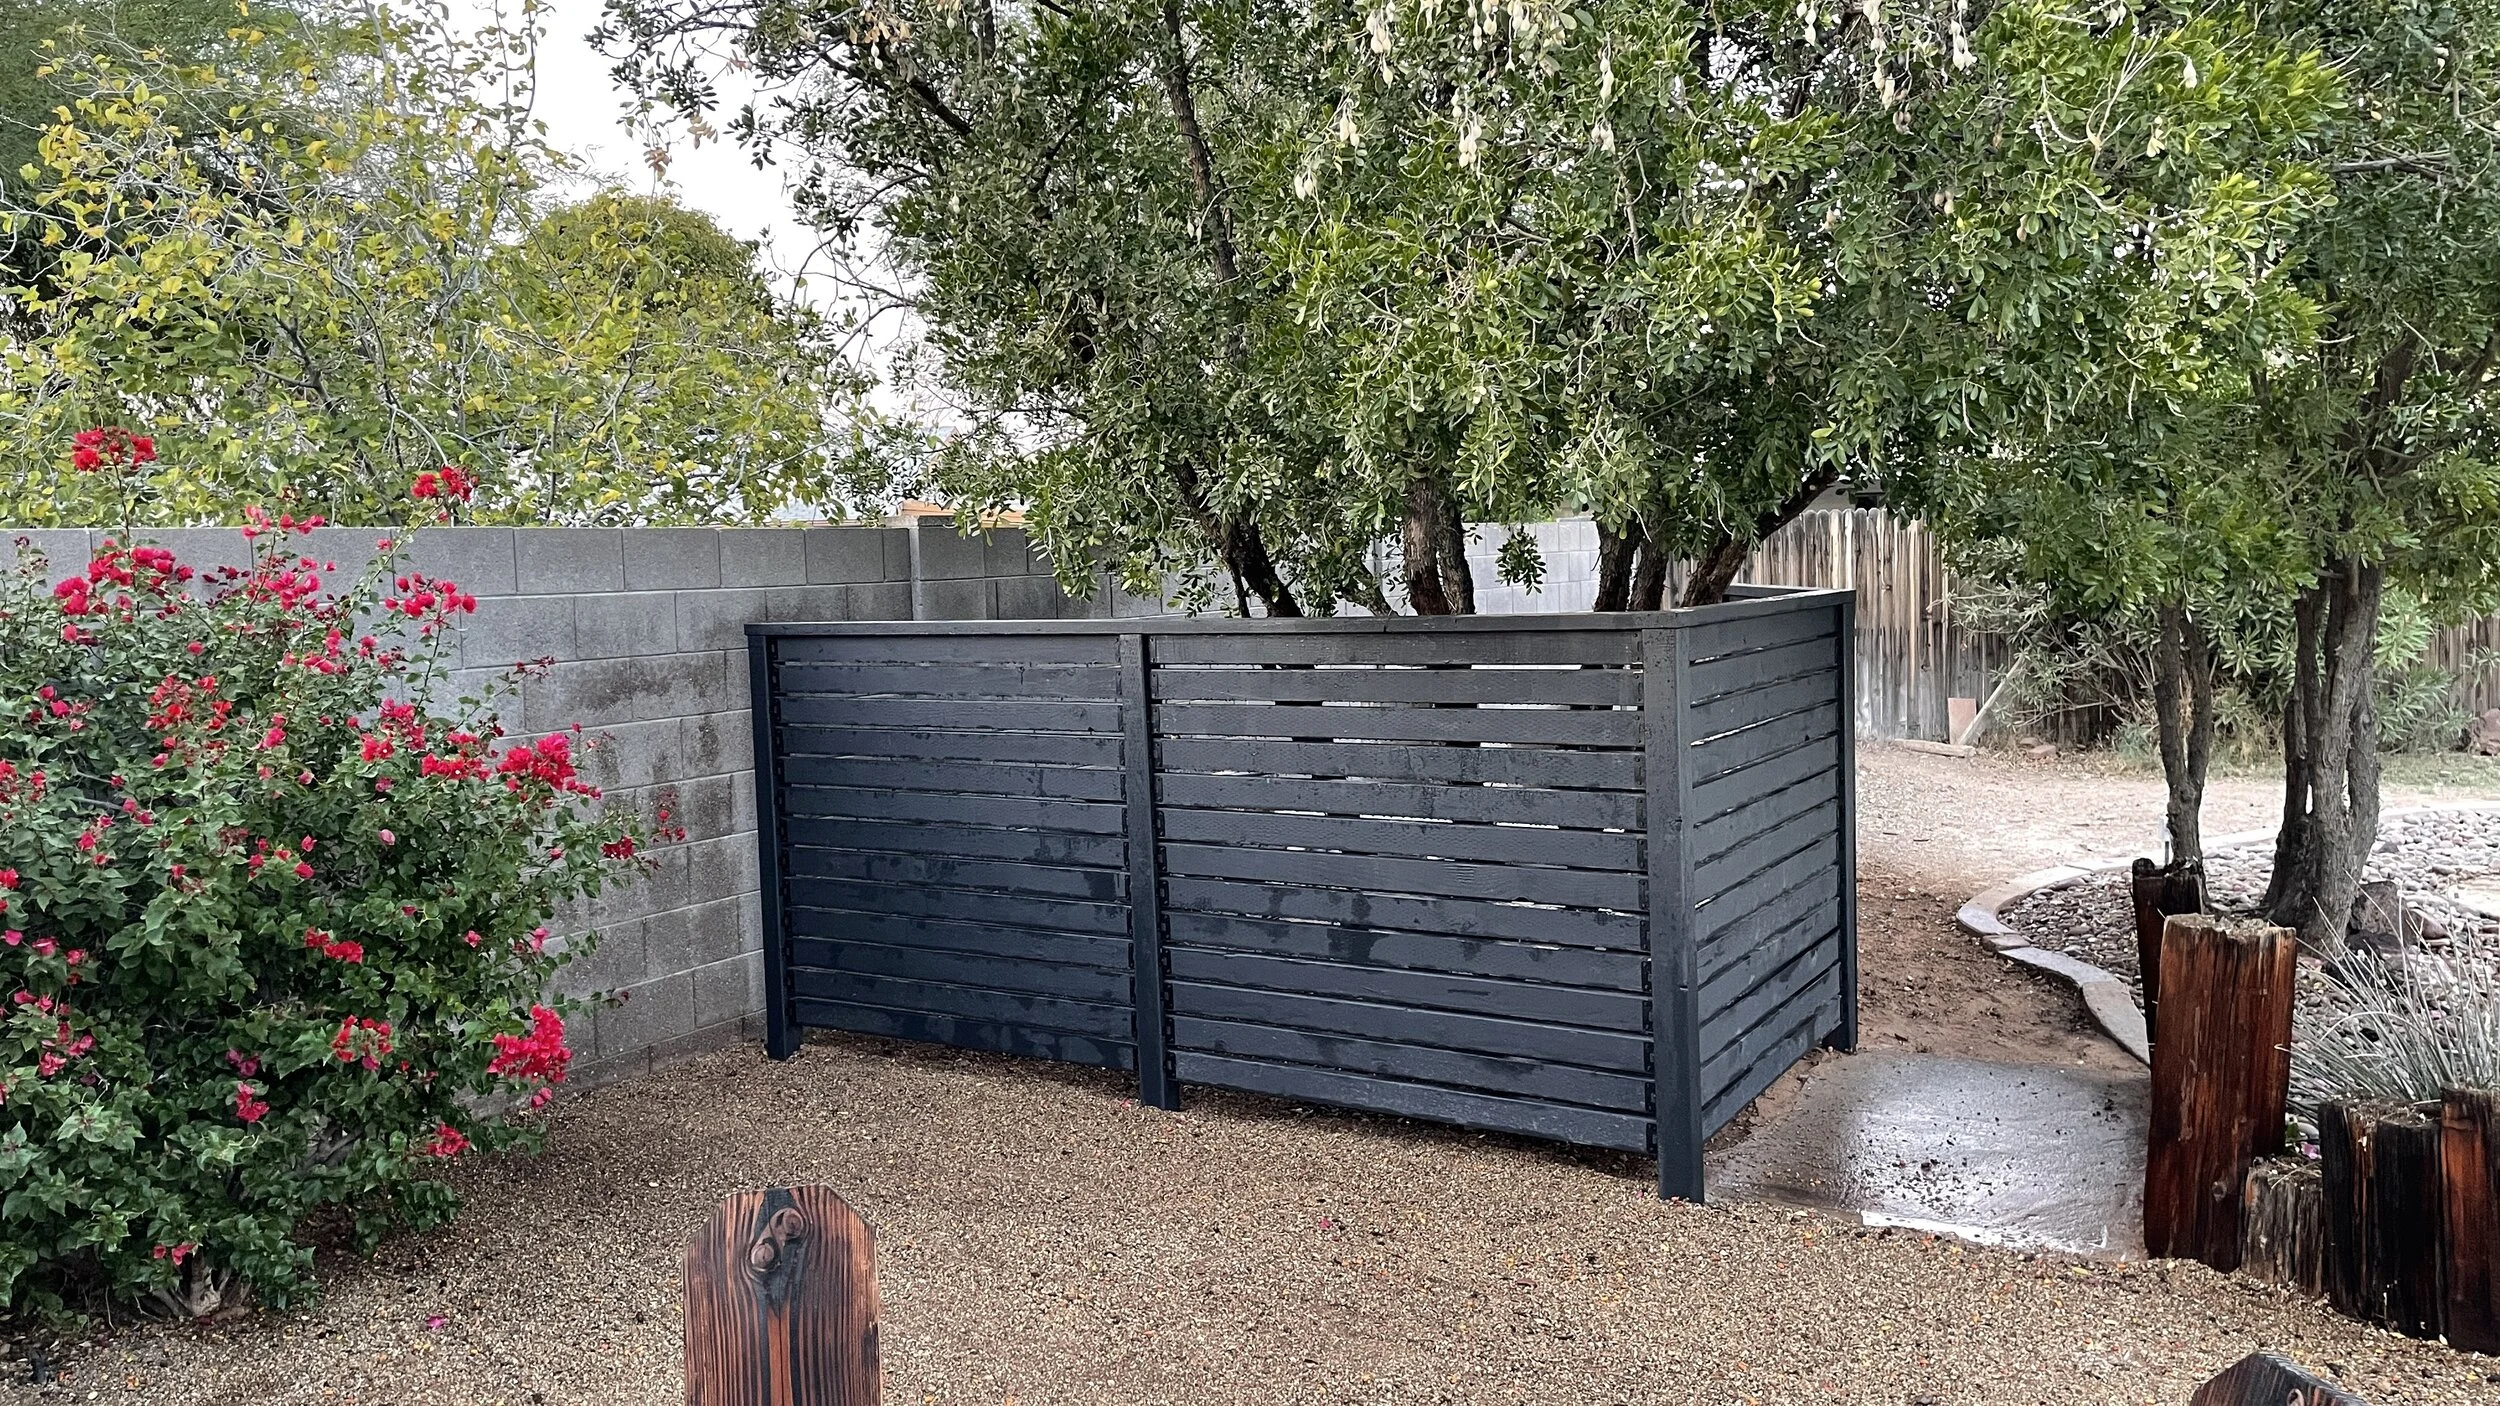
DIY Privacy Fence
Pools are really AWESOME to have in Arizona. But the pool equipment, while it is necessary for a clean pool, it isn’t the prettiest thing to look at. So I decided to hide mine with a DIY Modern Privacy Fence. This fence not only hides the ugly pool equipment, but it also adds some fun character to my backyard. Let me show you how I made it.

Power Carving Ideas | We Make Sawdust Challenge - Round 4
I have 4 AWESOME power carving ideas for you! That’s right it is time again for another round of the We Make Sawdust Challenge. For this challenge I team up with Saburrtooth Power Carving Tools and we challenge 3 other makers to join me in carving one build challenge. This time the challenge was to carve “Something You Can Find in the Kitchen”. We made spoons, a skull candy bowl, three hardwood spice cellars and one margarita platter… let me show you!

Building A Carved Console
Building a nice solid wood piece of furniture is nice, but adding to texture to it really brings it to life and gives it character. And I have been wanting to try a dramatic deep carve on a piece for a while and this was the perfect opportunity.

Refinishing Parquet Floors: Start-to-Finish
From sanding to finishing I am going to show you how I refinished my old worn orange oak parquet floors! I also share what I might do differently if I were to do it all over again.

DIY Outdoor Lounge Chairs
I recently built a floating deck that turned out AWESOME, but it didn’t have anywhere to sit. So, I designed a super simple and AWESOME set of loungers that you can easily make in 1 day.
All you need is some 2x4’s, 2x6’s, hinges, wood glue and outdoor rated wood screws. Oh and a saw and a drill! This is truly a beginner project. Let me show you how to build them.

We Make Sawdust Challenge - Round 3
Saburrtooth and I are back for Round 3 of the We Make Sawdust Challenge!

DIY Dough Bowl With Feet
I recently went to a friends house who has a sawmill… which means he has wood all over the place. While I was there is cut me out some chunks of Indian Rosewood that are perfect for power carving.
This time when I started carving I didn’t really have a plan and just let the piece of wood dictate how I carved it. And well, I turned it into an AWESOME dough bowl with feet! Let me show you how I did it.

Building A Floating Deck with Composite Decking
For any large project like this you always have to start with a plan. Simpson Strong-Tie has some AWESOME deck designer software on there website that I have used when I built my first deck. It helps with knowing how many footers you need, what hardware to use and can give you plans to submit for permit approval if it is needed. You can check it out here.