Building A Carved Console
My husband recently moved into a new office and we got it looking good, but it was missing that little bit of AWESOME! So I designed and built him a console table to go under his TV in the conference room. And I think it will become the new focal point and really start a conversation.

BEFORE - We did a lot of work to get it to this point, but his office was still missing that special piece.
Building a nice solid wood piece of furniture is nice, but adding texture to it really brings it to life and gives it character. And I have been wanting to try a dramatic deep carve on a piece for a while and this was the perfect opportunity.
This post IS sponsored by Saburrtooth. All opinions are my own. This post DOES contain affiliate links. For more information on my affiliate programs, please see my DISCLOSURES page.
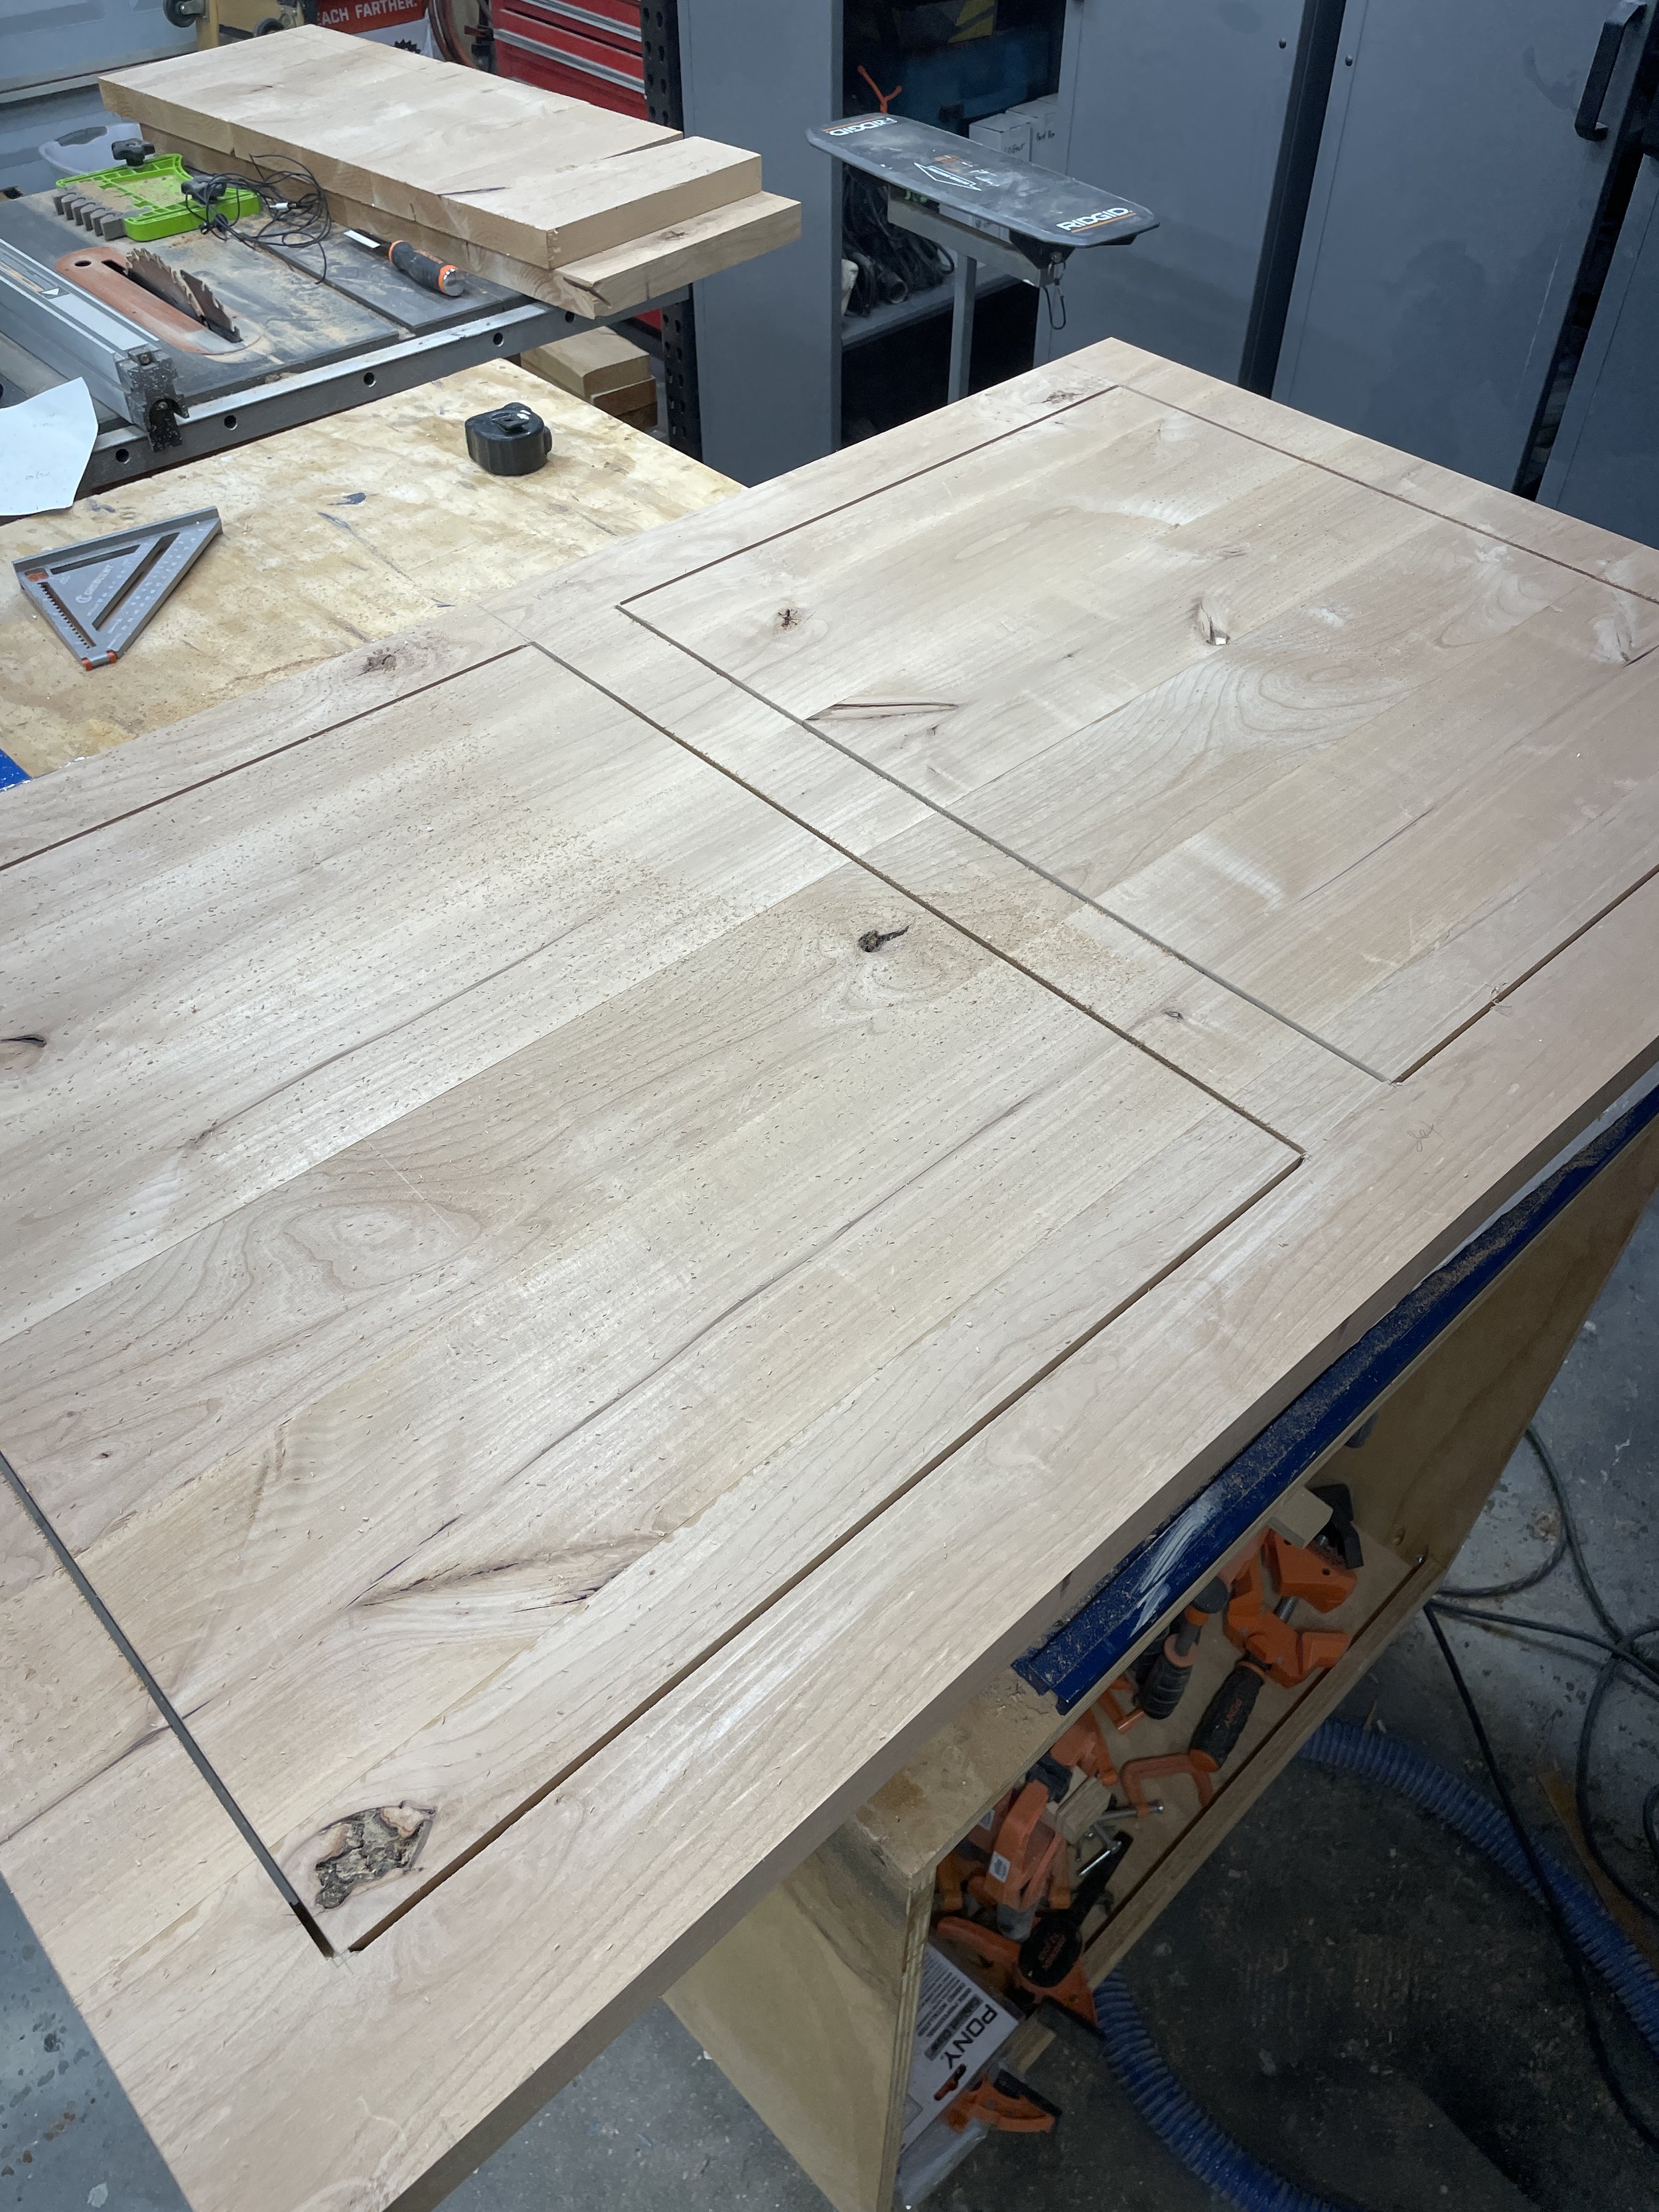
So I started by milling up some rough knotty alder and glued up one large panel, exactly how I would do if I was building a table top. I am building it this way so that I can keep continuous grain around the piece.

Panel milled, glued up, laid out and ready to be cut…. let’s go!
Once the glue was dry I removed it from the clamps and started cutting the sides off with my track saw. I had originally planned on mitering the corners from the from to the sides but quickly realized that my track saw can only cut to the depth of 1 1/2” at a 45 degree angle. If I would have remembered this before glueing up the panel I would have planned the planks down to 1 1/2” first. But build and learn. So butt joints will have to do.

Okay miters aren’t going to work this time, but we will just count this as a learning experience.
Then I laid out where the doors were going on the front leaving a 3” face frame all around them. If I had to do this again I might make it a little wider so that the doors weren’t so heavy, but that comes down to personal preference.

The track saw makes it so easy to plunge cut the doors out of the panel.
To cut the doors out I used my Kreg Plunge Saw or track saw. I just laid the track down, taking into consideration the thickness of the blade and plunged the blade in and cut the majority of the line. Since the saw blade is round you can go all the way to the corners on both the tops and bottom.
I thought this was so cool, because it is cool but also because it is the first time I’ve done this.
So to finish the cuts I used my Japanese pull saw. This saw is sharp and cuts so smoothly. Just remember to use the side with less teeth for rip cuts (with the grain) and the side with more teeth for cross cuts (against the grain).

Pull saws are AWESOME!
Since the kerf of the Japanese pull saw is less than the 1/8” of the track saw I did end up having to trim the little nibs off the door after cutting them out. That and a little sanding cleaned them up well.

I cleaned these nibs up with the pull saw.
Next, I took the sides that I cut off the panel earlier and trimmed them to width at the table so to ensure that both sides were the exact same width.

Cutting the side panels to width at the table saw.
Now that we have all our pieces it was time to assemble. I used my Kreg 520Pro Pocket Hole Jig for the joinery. I like this jig because it is portable and easy to bring to large pieces like this one. I did also use wood glue for added strength. And my PONY clamps with these Rockler Clamp-It Squares help hold everything in place with securing them with pocket holes screws.
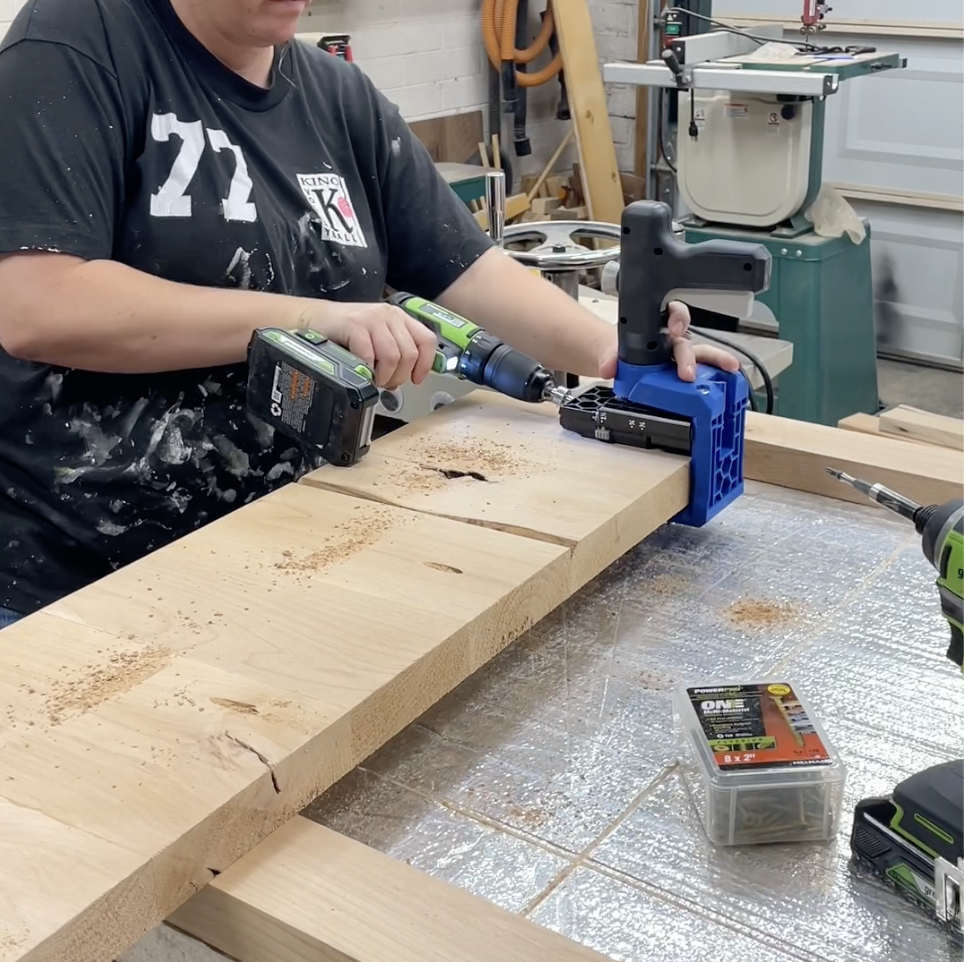
Using my Kreg 520PRO for joinery.

Securing the two pieces with clamps and clamp it squares.
Watch me build this piece here!
So, now with have the face frame, two sides, the top and the bottom assembled it was time for some texture!

BEFORE Texture!

AFTER Texture!
To add the texture I used my die grinder and Saburrtooth’s 1” Sphere burr in Ex-Coarse Grit or Orange. I did plan out and put guide lines on the piece to ensure that my lines stayed straight. The orange burr was just the right amount of coarse to quickly remove the material without leaving a ton of aggressive marks. I would start on one line and hollow out half the line and then move my body to the other side to clear out the rest of the material. This was the best way I found to keep the curved finish.
Once I had both sides of the carcass carved, I decided that I should install the doors so that I can make sure the lines across the front of the piece are level all the way across the piece no matter how that are installed.

I recess the hinges to the gap around the doors was the same all the way around.
I found these heavy duty narrow hinges on Amazon that worked great. I did end up recessing them on the door side so that I could keep the spacing around the door the same all the way around. To Crete the recess I just marked where I wanted them, scored the wood with a razor, removed majority of the material with my trim router and then cleaned them up with a chisel.

Doors installed and ready to carve the front!
And with the doors installed it was on to more carving. Standing the piece on end in my shop made the most comfortable carving position for me. It was a lot of repetitive movement so I didn’t want to be stretchy out across the piece if I didn’t have to.

This piece is a beast, but carving it standing up was the most comfortable.
Setting the piece up on my workbench also allowed for me to clamp my dust hood to my workbench to help suck up as much of the sawdust as possible. And this did help tremendously, but when it was all over my shop was still covered in sawdust! I am really good at making sawdust… haha.
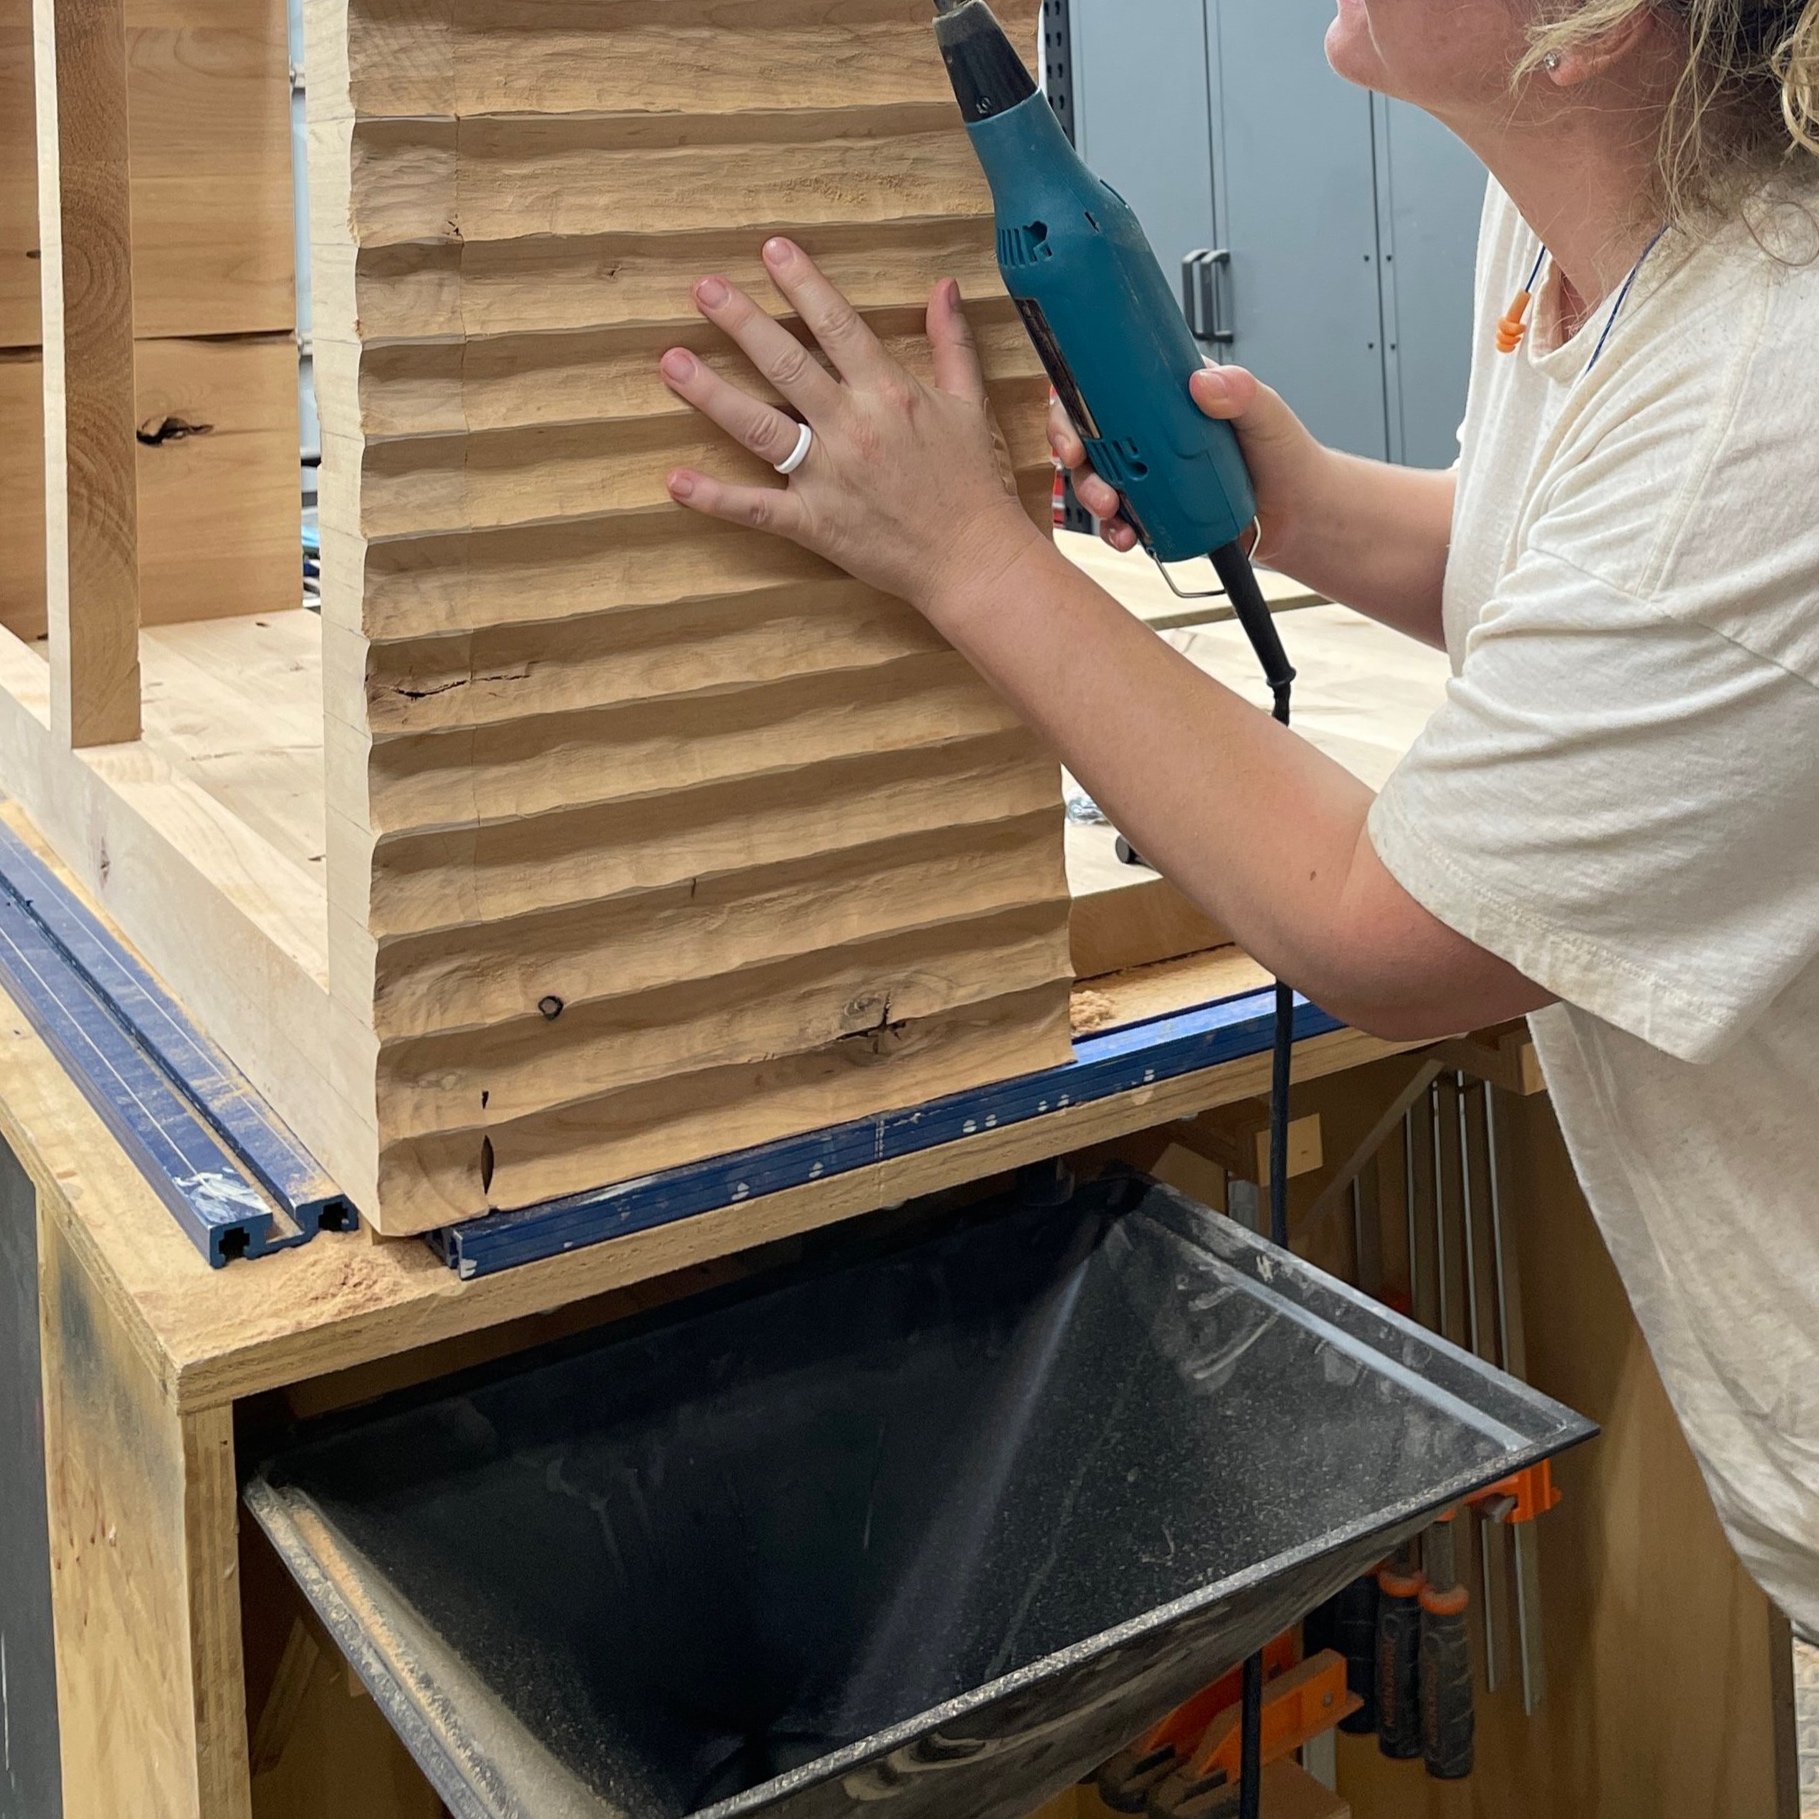
Dust hood helps control the dust!

But this was still a messy project!
With the doors on I wasn’t able to carve all the way to the hinges, so with the majority of the carving done I took the doors back off finished carving and then started sanding and sanding and sanding!

Carved with the doors on…

And then cleaned up around the hinges with them off.
I tried several different ways to sand this piece but it was still a lot. I am searching out some different tools that will make sanding these carved pieces easier. Once I find some that I like I will be sure to share them with you.

Lots of different sanding tools I tired… I didn’t love any of them and am still in search of the best tool to sand texture.
So now that sanding it down it was time for finish. I decided to got with General Finishes High Performance Topcoat in Flat. I believe this is a water based polyurethane. If it isn’t it acts just like one. Leaves a very clear finish and builds up on the piece. I like using this finish on carving pieces because even if the sanding isn’t perfect you can sand in between each coat of the top coat and make the final piece super smooth.

Oh yeah finish time!
Lastly, I added some simple pulls and a magnetic latch and stop for the doors. Oh and I did end up add a rabbet to the back to recess a back panel for a completely finished look. And then this piece was done!

Added recess for back panel with trim router.

Looks so clean!
What do you think? I absolutely love it. It just demands attention and has a super rustic, but also modern quality to it.

I made that! Holy cow… that is AWESOME!
And here is what it look like in my husbands office!

Proud, but hot from moving it to my husband’s office in an Arizona summer.

Those grooves are sexy!

I wish you could feel this piece… so smooth and awesome!
If you would like to try power carving for yourself, use code AWESOMEORANGE10 on Saburrtooth’s website to get 10% off all your carving burrs.
Thanks for following my building journey… remember Build LOUD, Build WILD and have an AWESOME day!
Sadie Mae
Can’t build this now? PIN it and Save for Later!