

Building A Deck For The First Time
I always wanted to build a deck, so when my friend asked for some help, I knew we could figure it out… mind you non of us have ever built a deck before.

BEFORE

EXISTING COVERED DECK WAS A LITTLE SMALL, SO WE EXTENDED IT.
This post IS sponsored by Simpson Strong-Tie. All opinions are my own.
So we started with Simpson Strong-Tie’s Deck Planner Software. It is a free program available to everyone on their website. You create a log-in and then start designing and it is super easy to use. It prompts you for the shape, size, if its going to be freestanding or not, type of material you are going to use, style of railing, do you want/need stairs etc.

And then once you have all those variable in there, it will generate a materials list for you including wood, fasteners and connectors. It also generates a report or plans for your project showing you how many footers you need and where… descriptions of the fasteners/connectors, some building considerations and tools required. You could even use this report to submit for any permits that might be needed in your area.

Sneak peak into the report (plans) the software generates for you.
Since my friend lives about 3 hours away we ending up doing our planning over the phone… and once the plans were set, we ordered materials and set a start date! Here goes nothing.
Before I was able to go up there and help with deck, our friend and my husband got the footers dug and poured. He lives in a very rocky terrain so he had to rent an auger to help dig the holes. A lot of hard work, but doable… the hardest part or most time consuming part is layout and making sure you have everything where it needs to be.

Digging in rocky terrain called for renting an auger!

String lines everywhere to make sure things are in line and level.
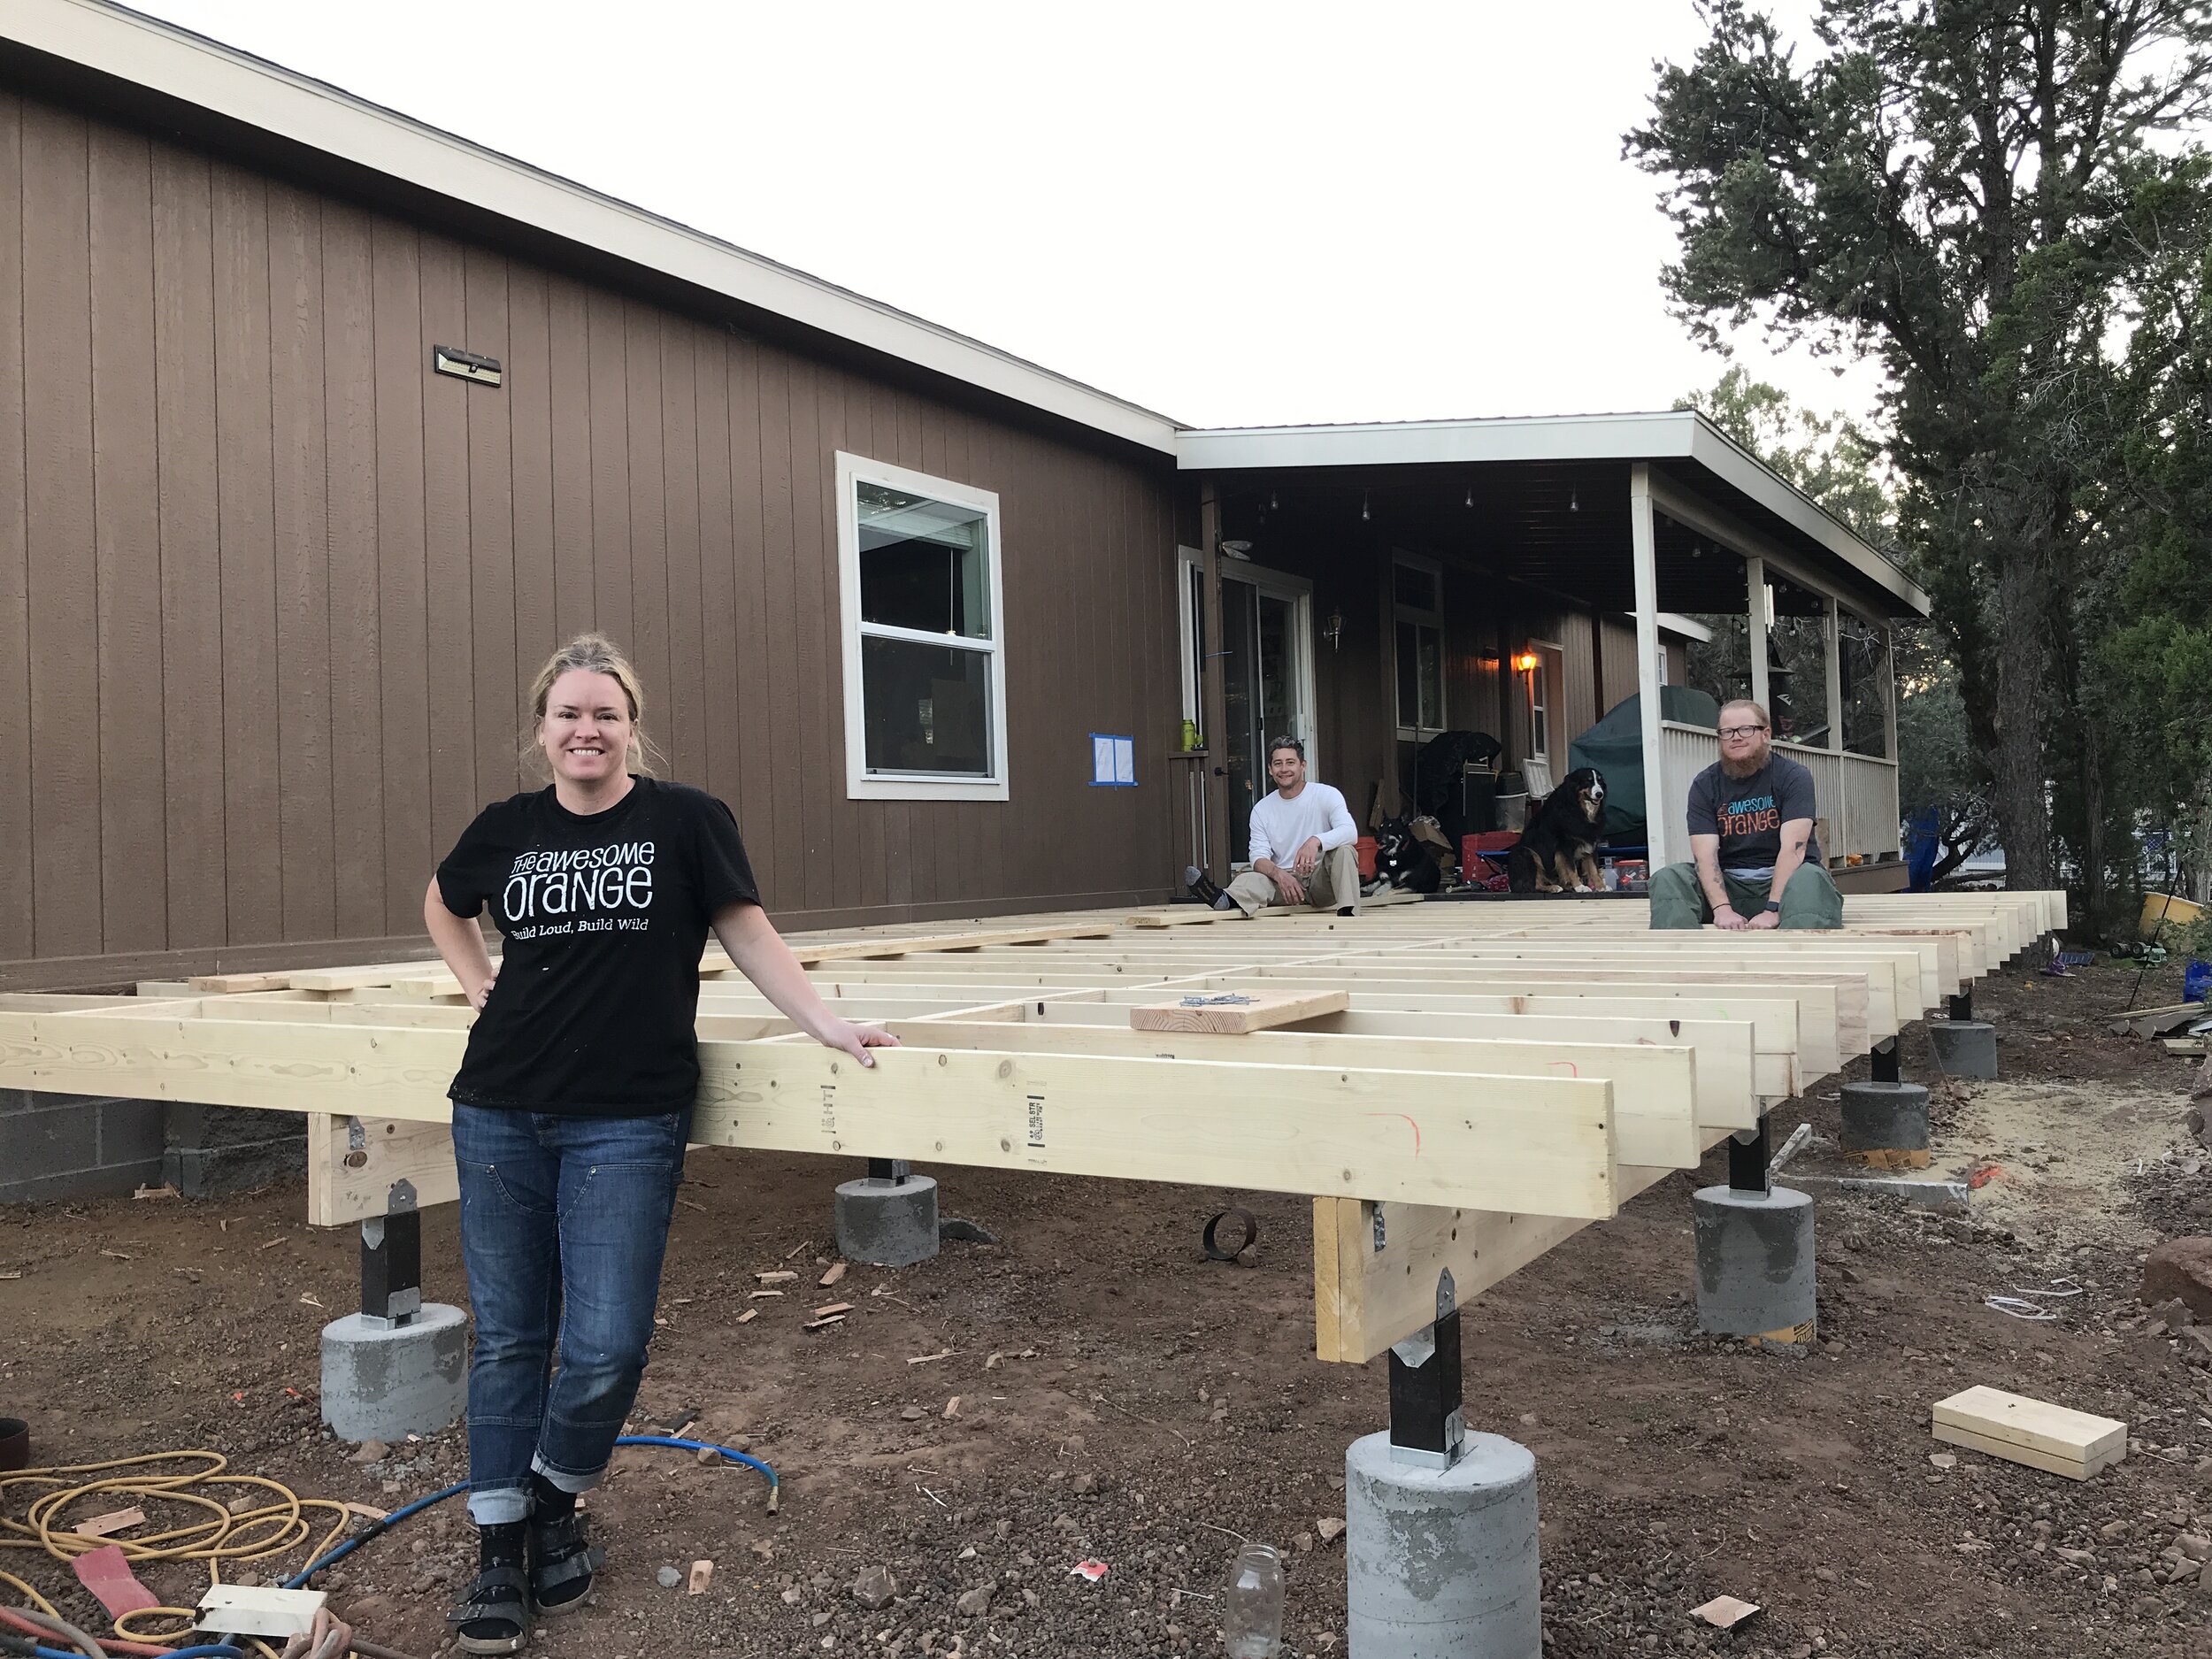
Then with all that out of the way and the wood delivered I showed up to get the building party started!

There is a deck in there somewhere!
We started by drilling holes in the footers so that we could attach the brackets for the posts. We made sure to blow out the excess concrete dust so we got a nice clean fit when attaching the brackets.
Since every deck is going to be different and have different fasteners, I am not going to give you exact details on everything we used. If you are wanting to build yourself a deck, I highly recommend using Simpson Strong-Tie’s Deck Planner software and it will let you know what are the best fasteners and connectors to use for your specific project.
We then added one by one the posts… we had everything string lines to make sure that we got the correct height and that everything was level. These posts are what the main beams are going to be sitting on so this is an important step.

Posts are up!
Since I was still recovering from surgery at this time, I let the boys do the heavy lifting of installing the beams and I got busy staining the decks boards. Out friend opted to not use treated lumber, so we wanted to make sure the underside was protected as much as possible as well.

Beams are up… getting to this part was the hardest due to layout, measuring and making sure everything was level.
This next step is where the deck really comes to life… cutting and attaching the joists and blocking. The joists are what run in the opposite direction of the deck boards and what we will be securing the deck boards to down the road. The blocking are pieces of wood that goes in between the joists to help keep them straight or from bowing and offer extra shear strength of the overall deck.
It’s starting to take shape!
We used hurricane ties to attach the joists to the beams and I got to use a palm nailer for the first time… and it was AWESOME! Hopefully it won’t be the last. It reminded me of how excited I got the first time I use a brad nailer… I guess overall all nailers are AWESOME!
The next day we started by attaching the rim joist. It is the joist that goes across the front of the deck and attaches to the end of all the other joists. We made a fancy (okay, not fancy) jig, made from scraps, to help line up the joist just right on the rim joist before securing with the appropriate fasteners.
Prefer watching the deck come to life? Check out the build video on my YouTube Channel!
Then it was time to attach the rail posts…. laying this out so that they were spaced evenly or as close to even as possible probably took longer than actually installing them. Again kinda like most of the deck build layout was the most time consuming part! We installed these using some blocking between the joists and 8” timber screws… those posts aren’t going anywhere!

Blocking and 8” Timber Screws to secure the railing posts.
Next up were the stairs… we bought some precut stringers from the store and used the connectors and fasteners the plans called for. I thought this was gonna be a difficult step, but in the end it was one of the easier parts.

Oscar likes to be in the middle of everything when we are working.
Then the next day it was all about decking. Measure, cut, install and repeat! We started at the fronton the deck and worked our way towards the house, that way if we had to rip a board down to allow everything to fit it would be in the most inconspicuous place.

Teamwork!
We used our speed squares to create an even gap between each row of the boards. The gap allows room for the boards to expand and contract during different weather. Plus, it allows for drainage after it rains or snow melts. For the decking we also used a jig to help us with the warped boards. It basically uses leverage to hold the board in place while it is getting screwed into the joists. Some fo the deck boards were definitely a two person job to get straight. And I think we used something like 2000 screws!

So much drilling!
The last day we were going to be there we divided and conquered… out friend worked on finishing up the railing on the steps and my husband and I added the railing around the deck and the the spindles. This all took some time, but was also the easiest part… probably because it is the part I am most familiar with… building!

This was my favorite part…. railings, spindles.

We toe nailed the railings to the posts. These holes will be covered by spindles or top cap.

Spindles! We spaced those using a 2x4 and secured them using 2” 16 ga nails.
And the last last step was stain!
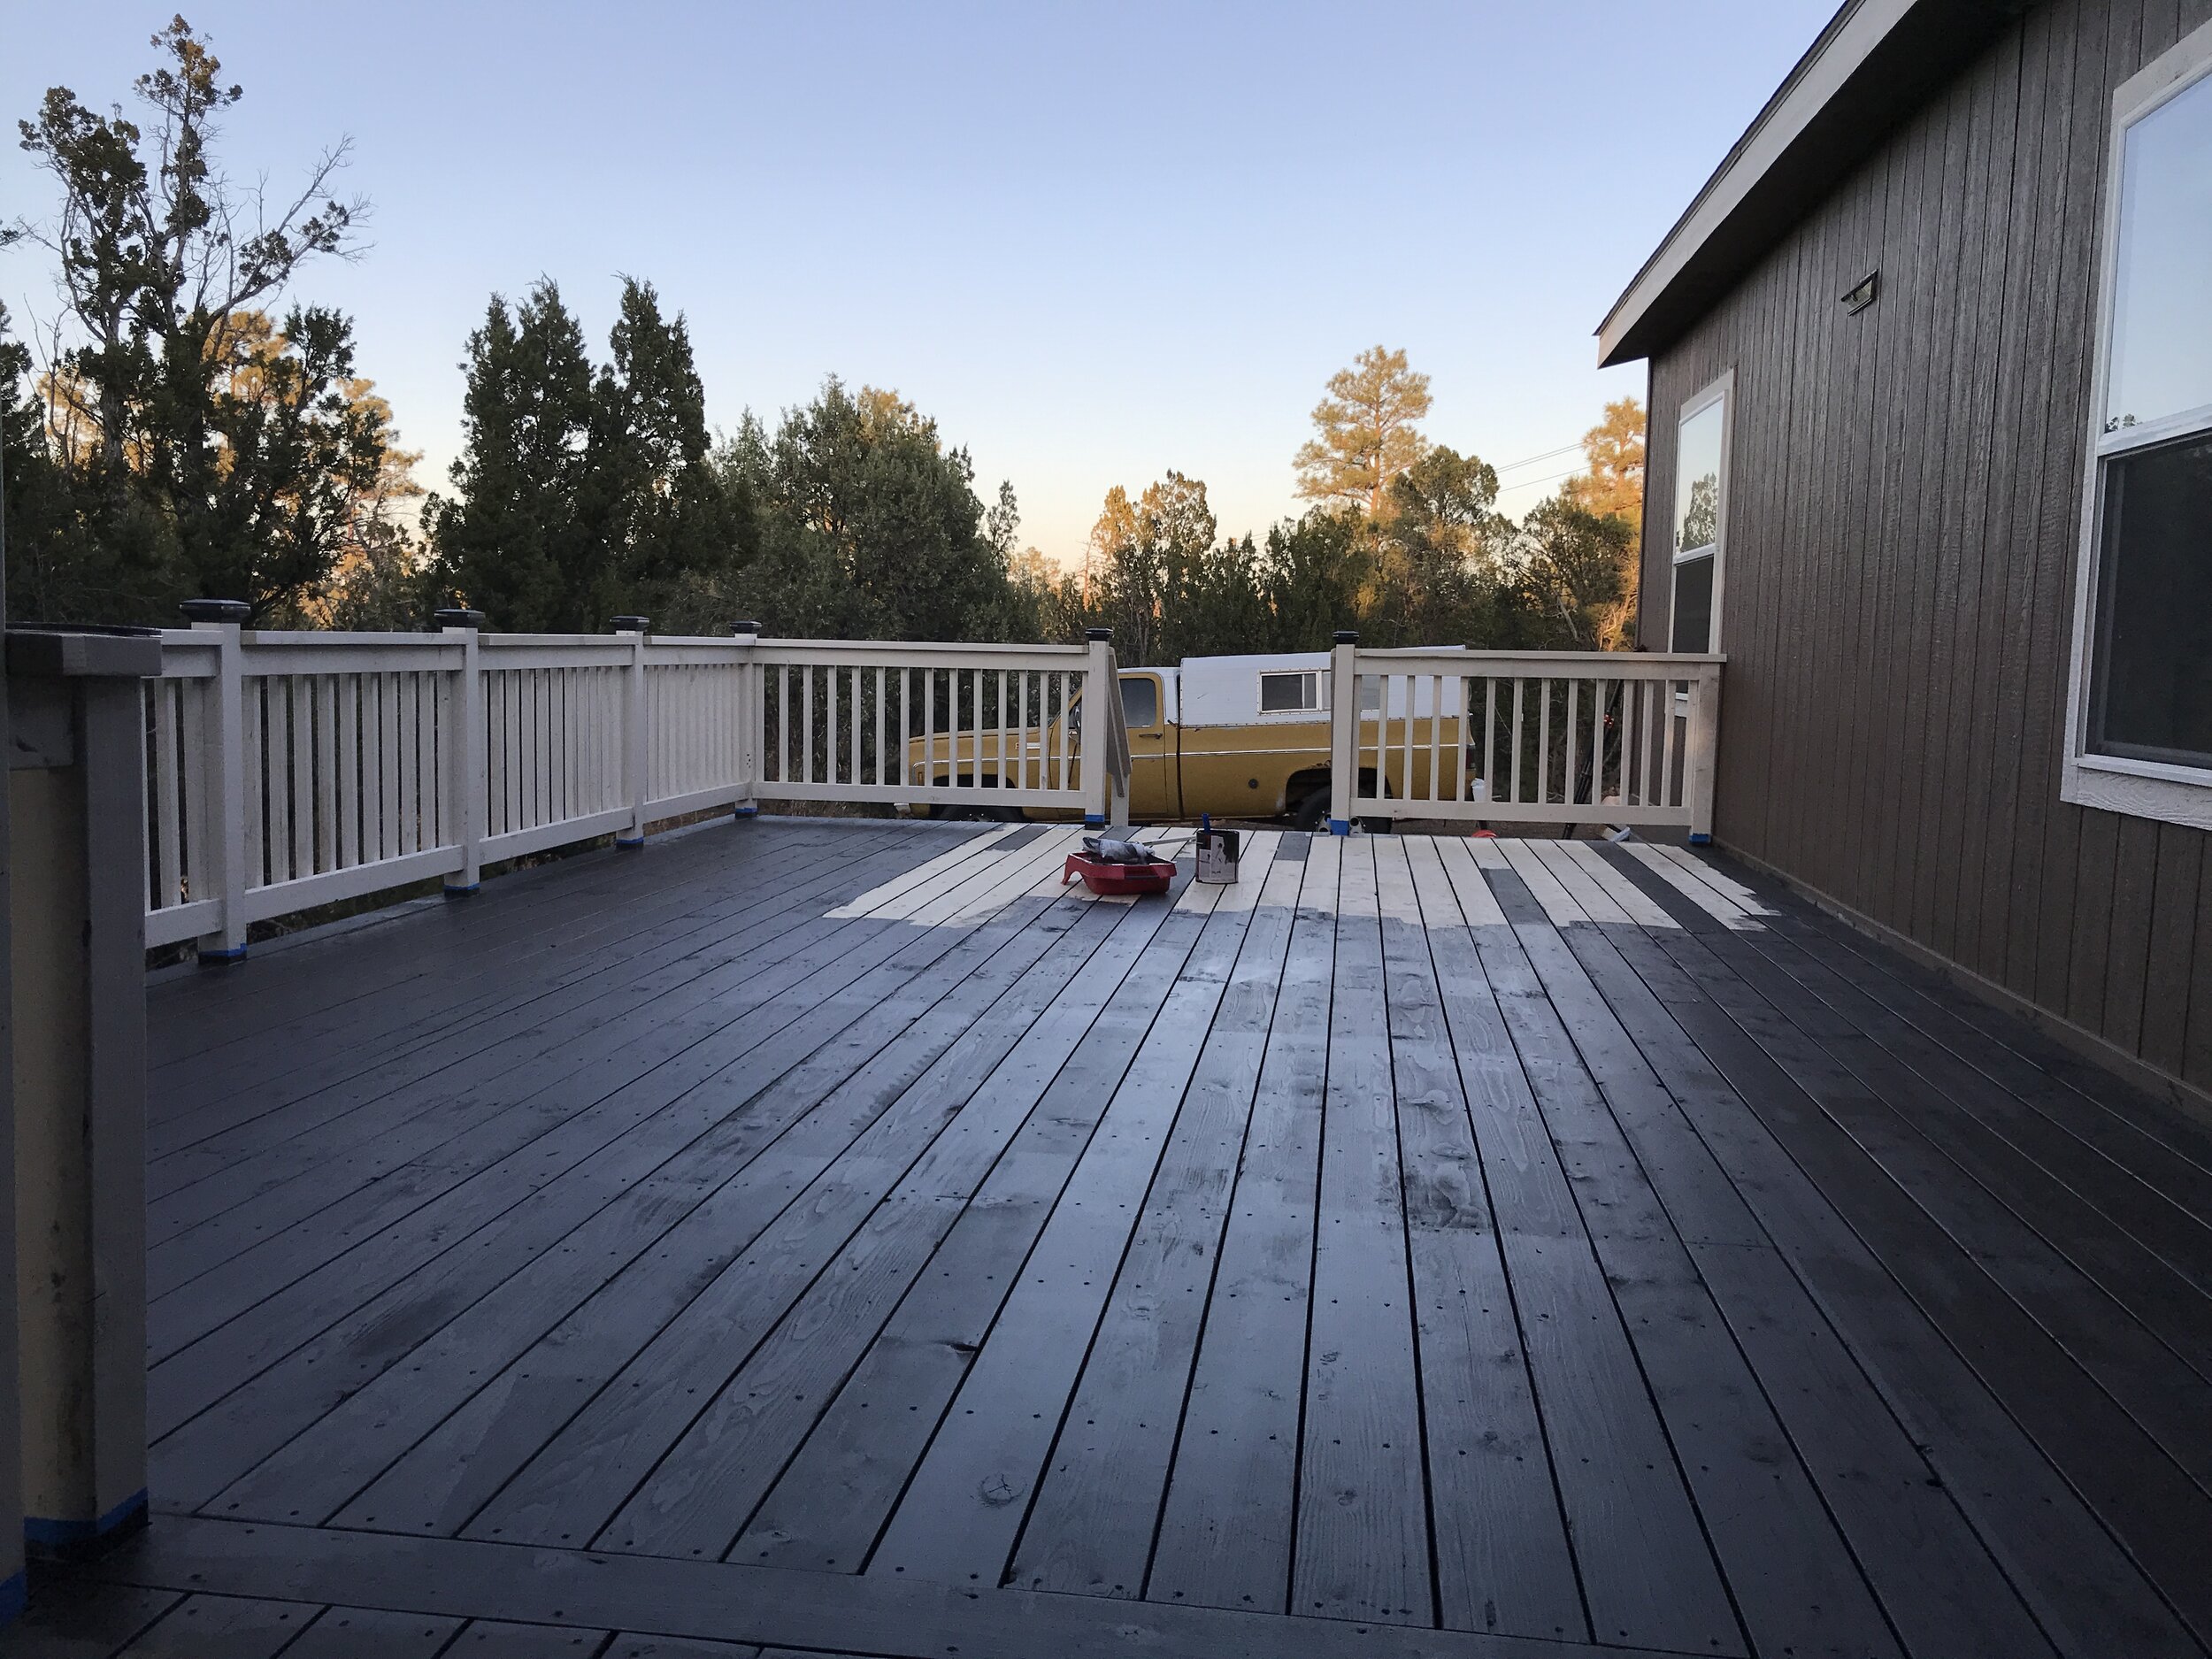
Almost finished.
After about four extra long weekends (2 - three day weekends working on footers and 2 - four day weekends building) we were done! Or well at least my part was done. Our friend still has some touch up paint to do and needs to add some spindles to the stair railing (we ran out of wood on the last day).
But we did it! We built a deck… and our friend and his family has an AWESOME need deck to enjoy. So much room for activities!

We did it!

So much room for activities.

Nice view from the deck!
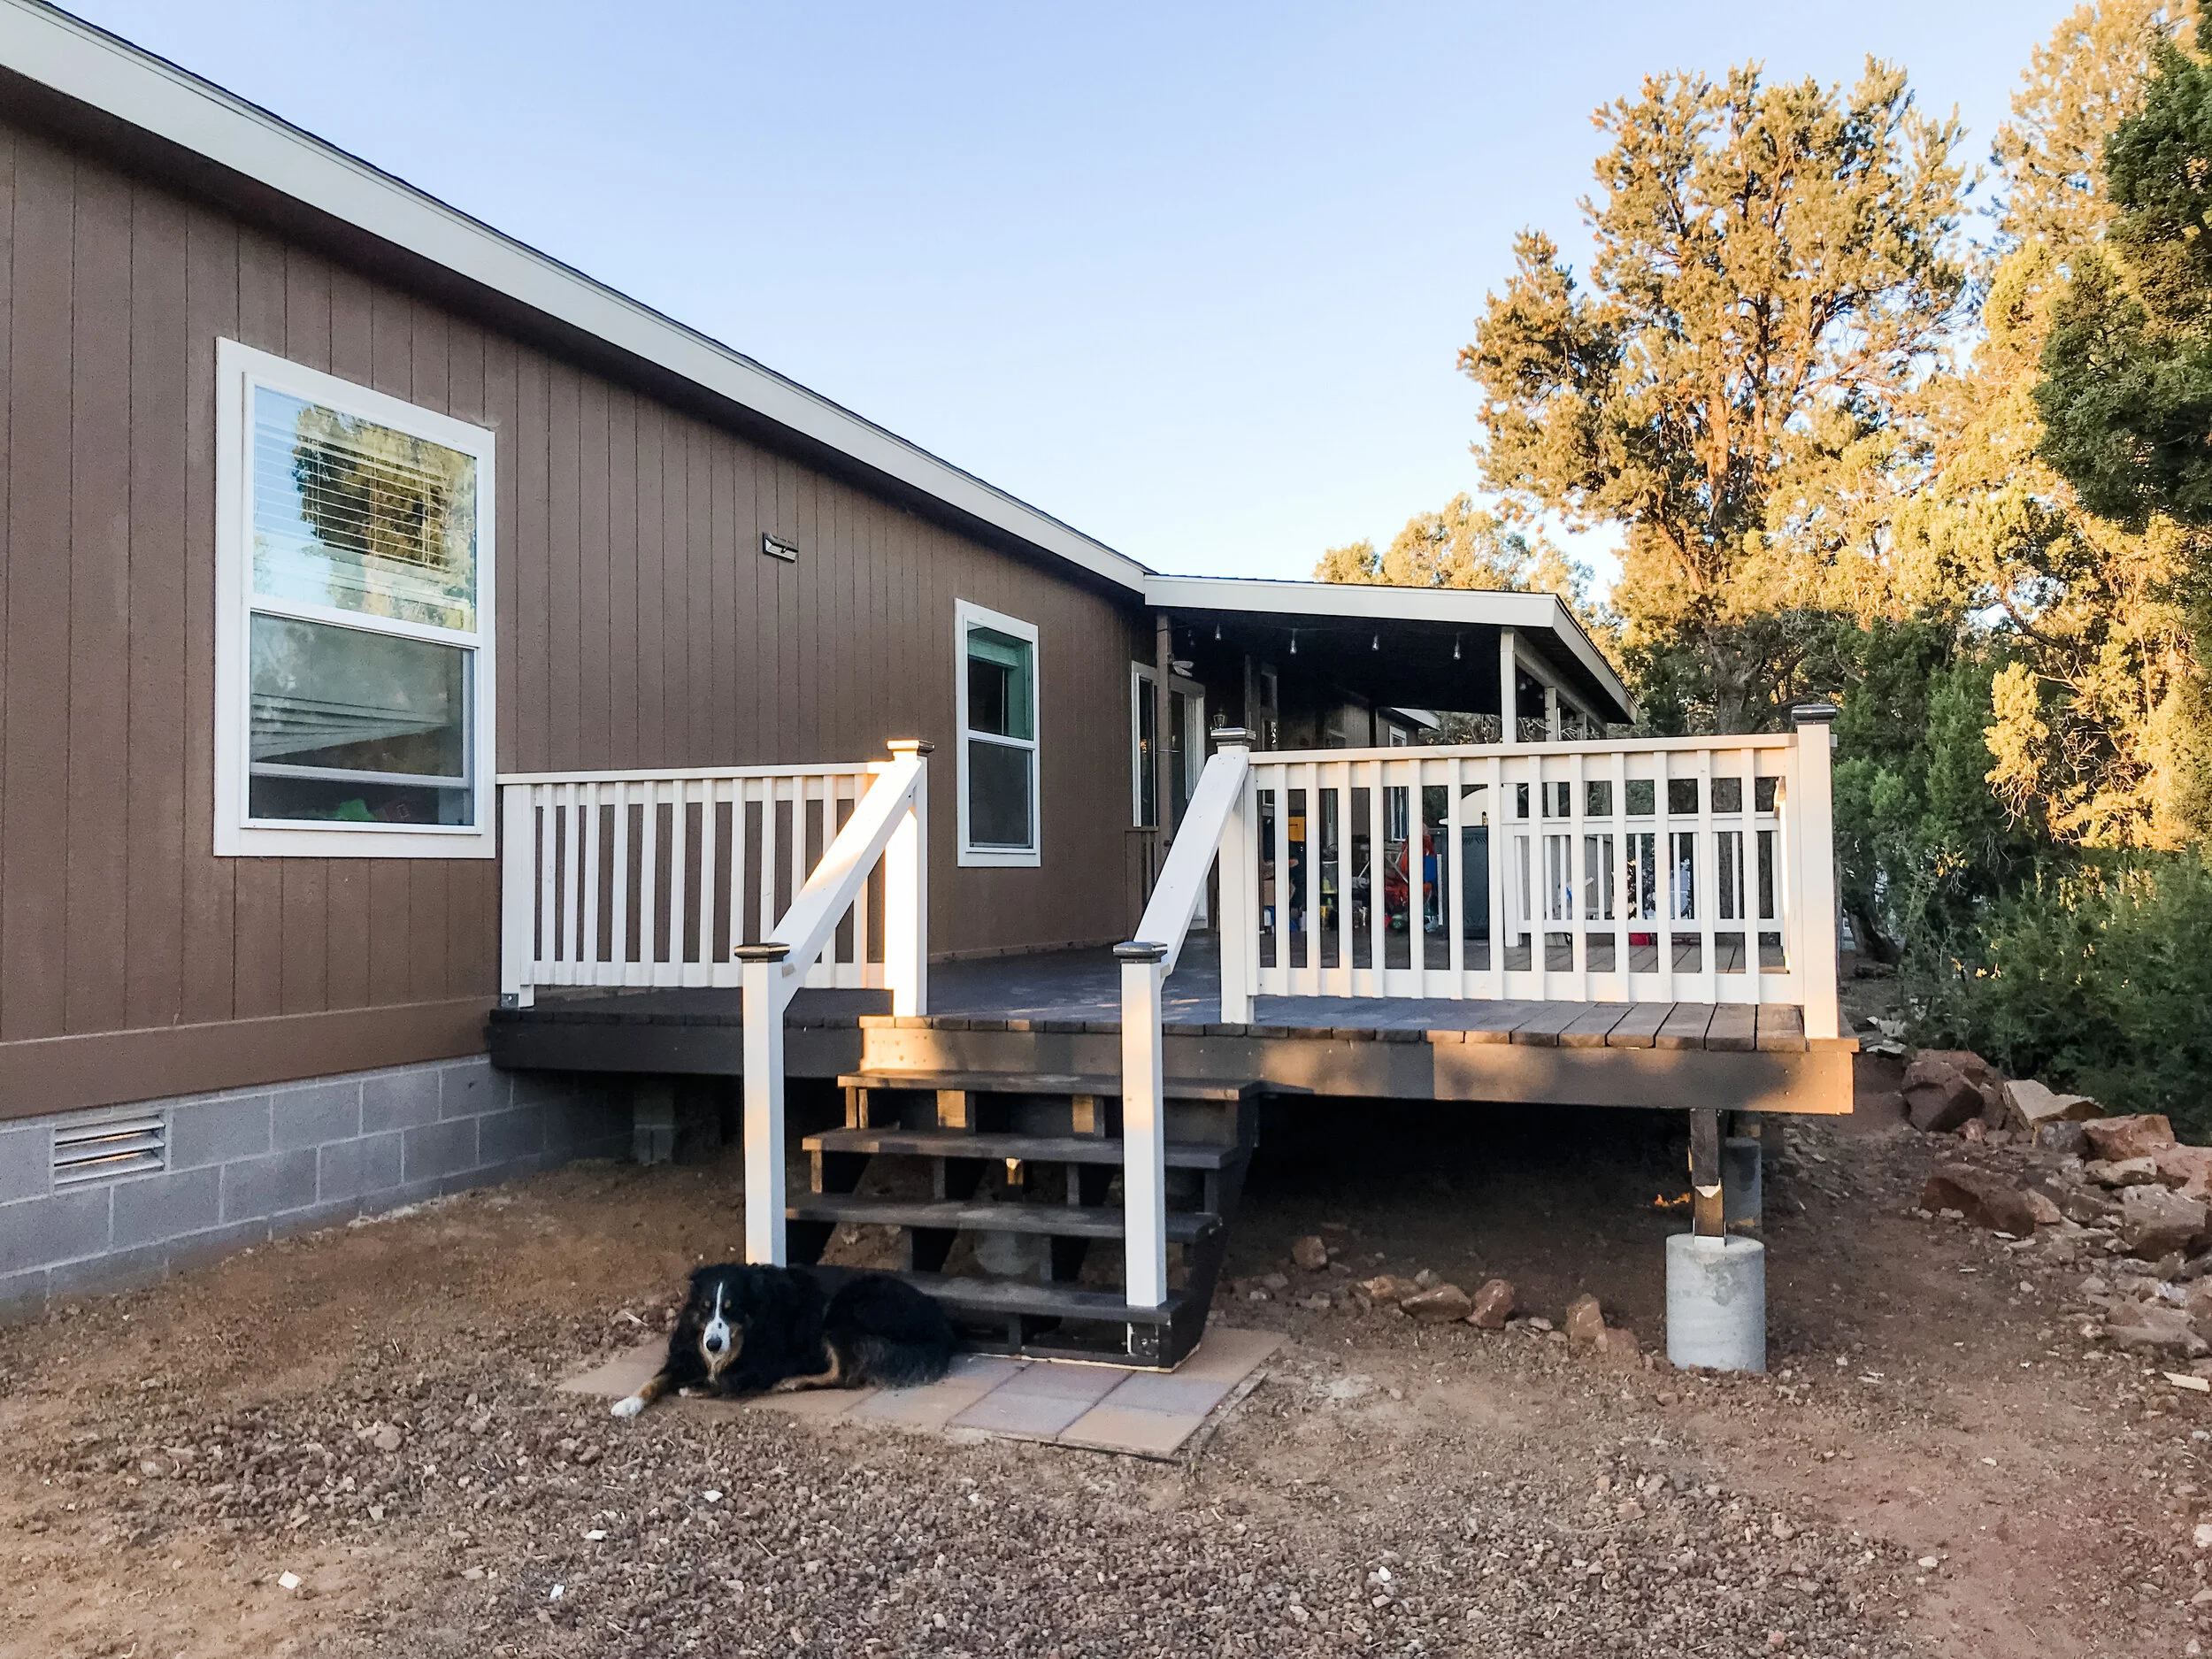
A few touch ups still needed, but we built a deck!
This was a big learning process for all of us… mistakes were made… but in the end with the help of Simpson Strong-Tie’s we built a deck!
I hope you enjoyed this build and it has taken some of the fear out of you building a deck for yourself. With the right tools and proper planning you can totally build yourself an AWESOME deck.
Til next time… Build LOUD, Build WILD and have an AWESOME day!
Sadie Mae


