How to Build A Freestanding Kayak/Canoe Rack
We have had our canoe and kayaks just hanging out under our covered patio for the past 2 years ish!!! Eek, I know. But that just means this build has been even more satisfying when it was done. And of course the infamous question was asked… why didn’t I do this sooner?

BEFORE - Canoe and kayaks were just hanging out half covered half not.
This project is a simple build. Just need a saw, a drill and some Simpsons Strong-Tie connectors!
This post IS sponsored by Simpson Strong-Tie. All opinions are my own. This post DOES contain affiliate links. For more information on my affiliate programs, see my DISCLOSURES page.
Simpson Strong-Tie connectors and screws are my go-to for my outdoor projects. They can withstand the elements (they come with a ZMAX galvanized finish) and create strong connections, so my projects last for years to come. Here is all the hardware that I used on this project:
Hardware Needed:
2 - RTR Rigid Tie Rail Connectors*
10 - RTA Rigid Tie Angle Connectors*
2 Boxes - SD9112 #9 1 1/2” 1/4 Hex Head Connector Screws*
1 Box - SDWS16212 2 1/2” Strong Drive Framing Screws
1 Box - SDWS16300 3” Strong Drive Framing Screws
*these also come with a black powered coated finish for added corrosion resistance and to match more of Simpson Strong-Ties Outdoor Accent Line
WATCH HOW EASY THIS BUILD COMES TOGETHER!

Simpson Strong-Tie RTR - Rigid Tie Connectors also come in a black powder coated option. APRTR

When using Simpson Strong-Tie connectors you want to make sure to install a screw in each hole.

I used Simpson Strong-Tie Strong Drive Framing Screws in 3” lengths when drilling into the 4×4 posts.
For the lumber I used pressure treated 2x4’s and 4x4’s because this is going to be stored outdoors. The additional cost upfront is well worth it in the long run.

All the pressure treated wood cut and ready for assembly.
For the roof I used 2 galvanized sheet of corrugated metal roofing. I cut it using my circular saw and a metal cutting blade. Using a circular saw to cut the metal makes it so easy. Then to attached the metal to the kayak rack frame I used metal roofing screws that have a washer head on them to seal them from leaks.

These metal roofing screws come with a rubber washer to help prevent leaks where attached.
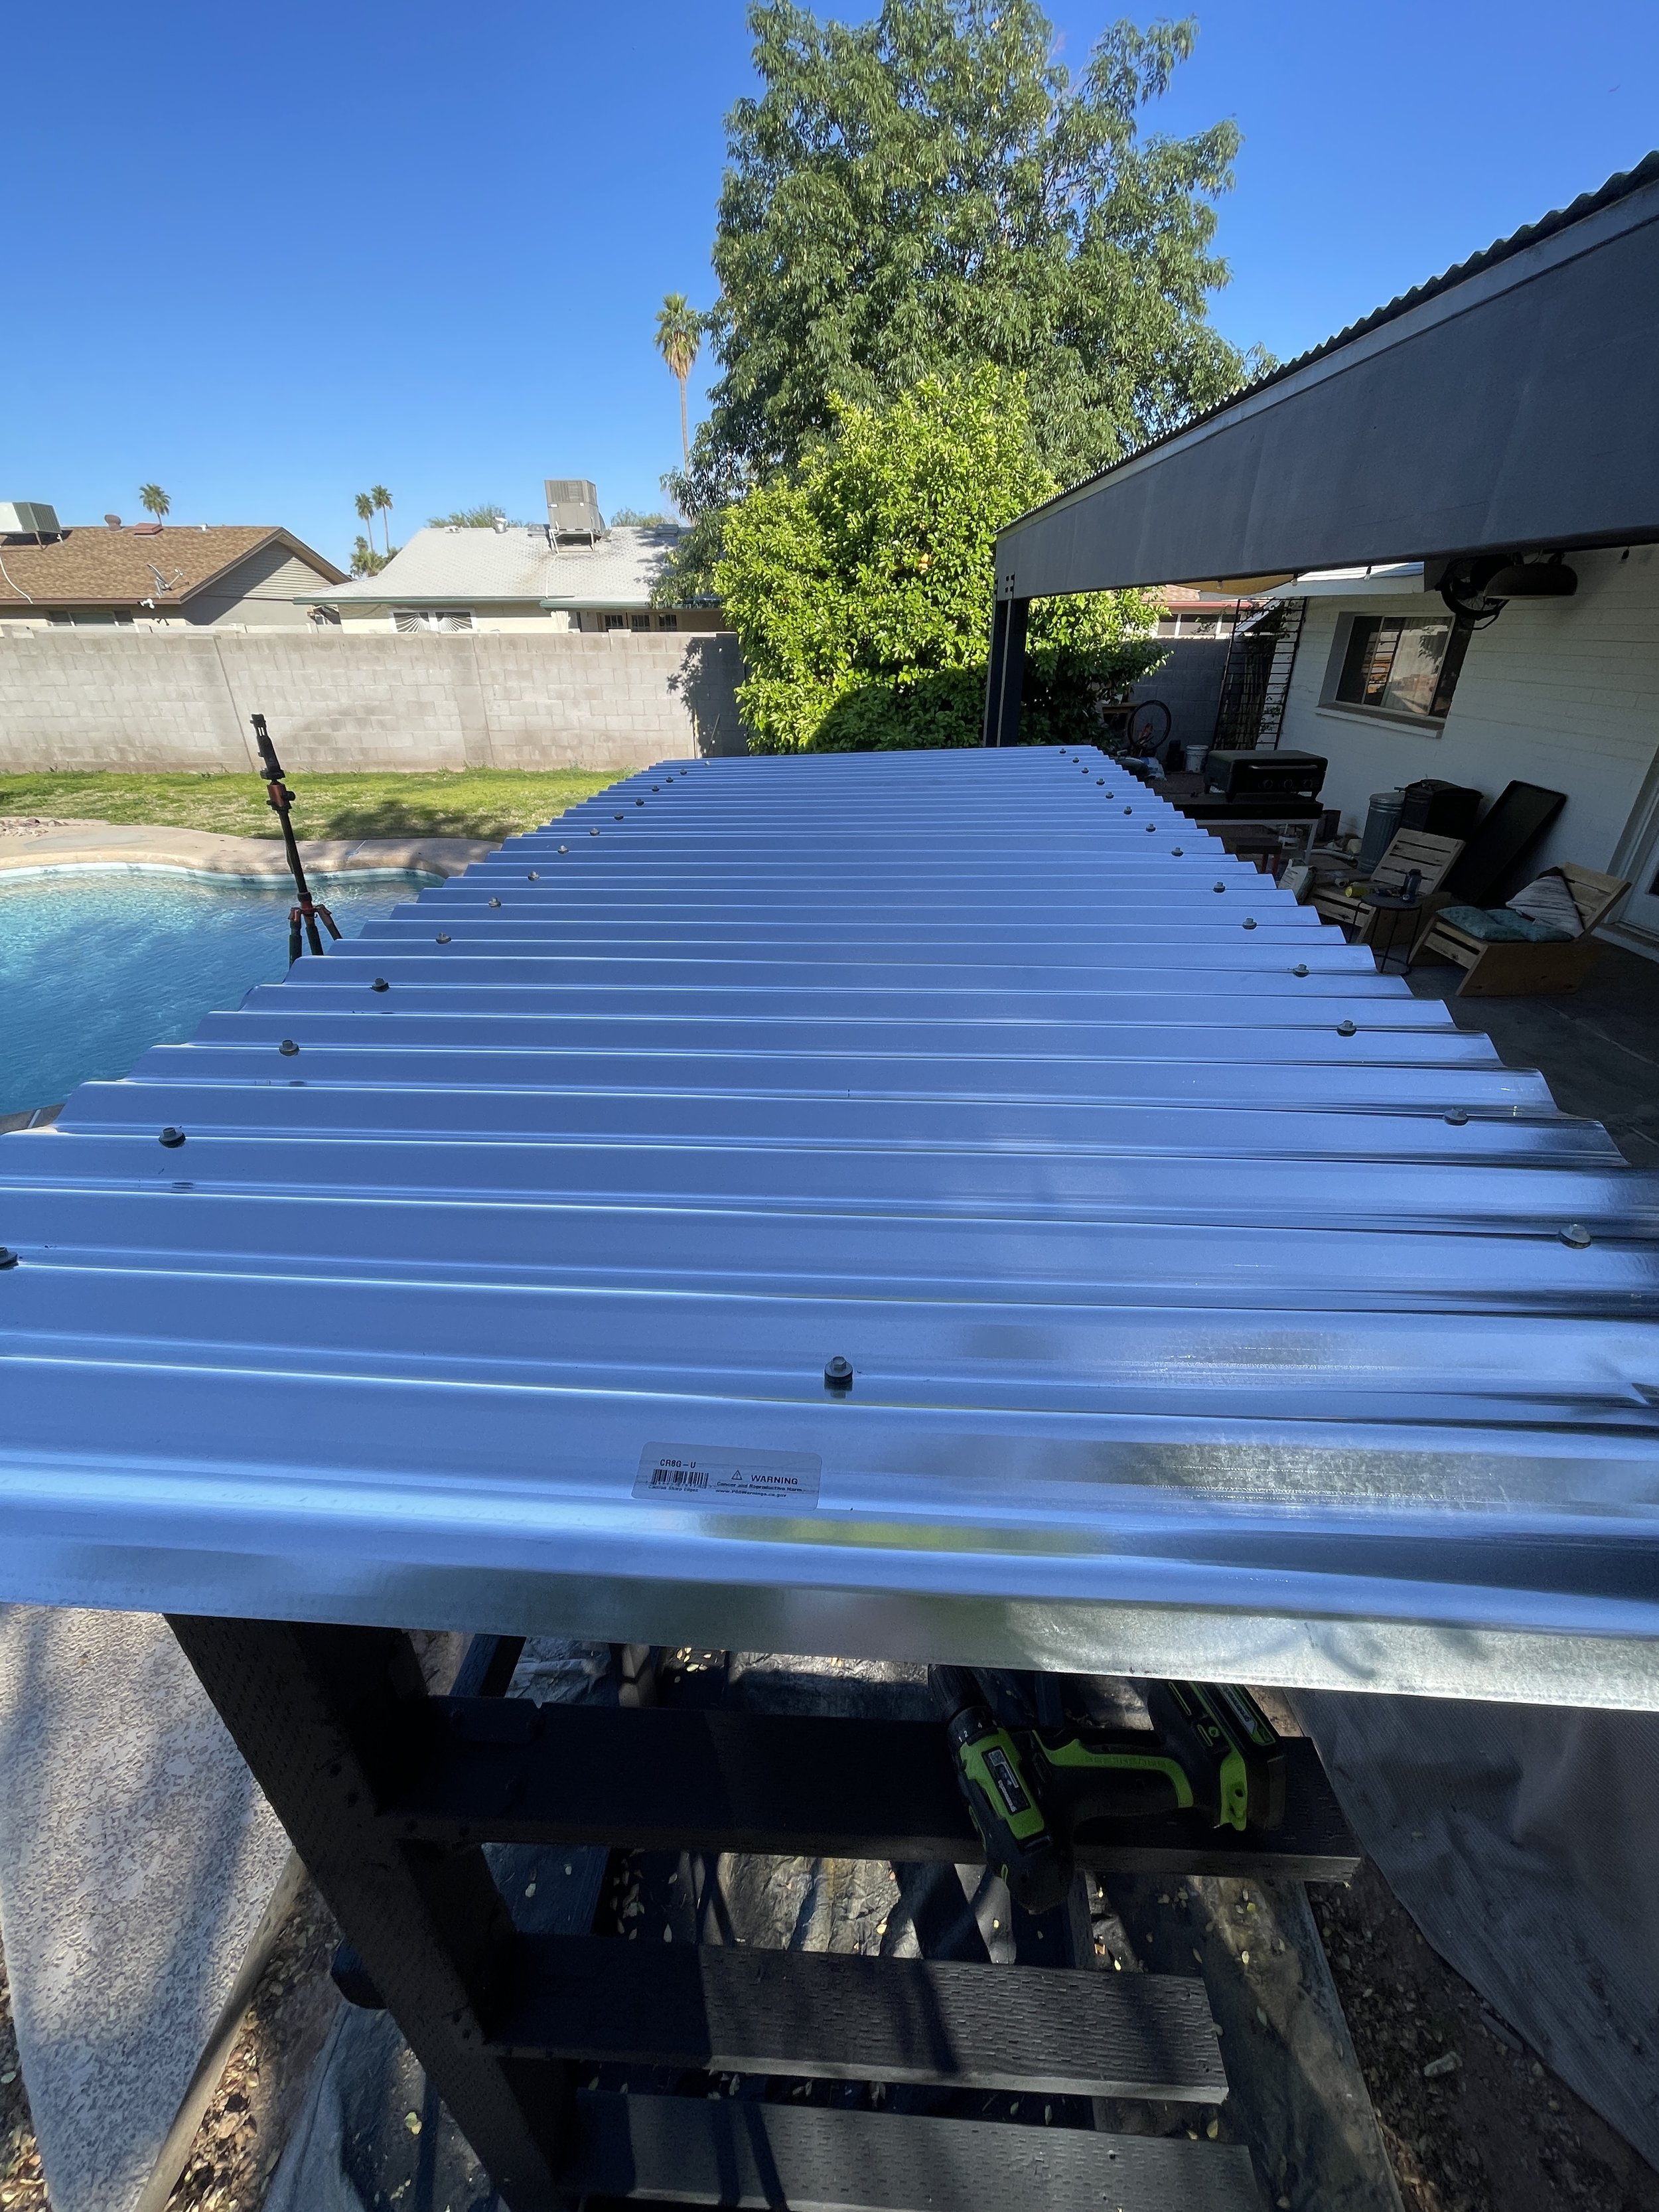
Install the screws on the peaks so less likely to have a leak in the roof.
To paint the kayak/canoe rack I used my Graco Cordless Ultra Sprayer. I love this sprayer because it is cordless and I don’t have to thin the paint. Plus, as fas as sprayers go this one is pretty easy to clean up.

My Graco Cordless Airless Sprayer has seen lots of use. Love it for all my outdoor projects.
And it was that easy to build an AWESOME kayak rack or canoe rack or both!

Step 1: Create a solid base.

Step 2: Add arm supports using Simpson Strong-Tie connectors and test it out!

Step 3: Install roof framing and take a picture to appreciate your hard work.

Step 4: Add the roof and put kayaks and canoe in their new home!

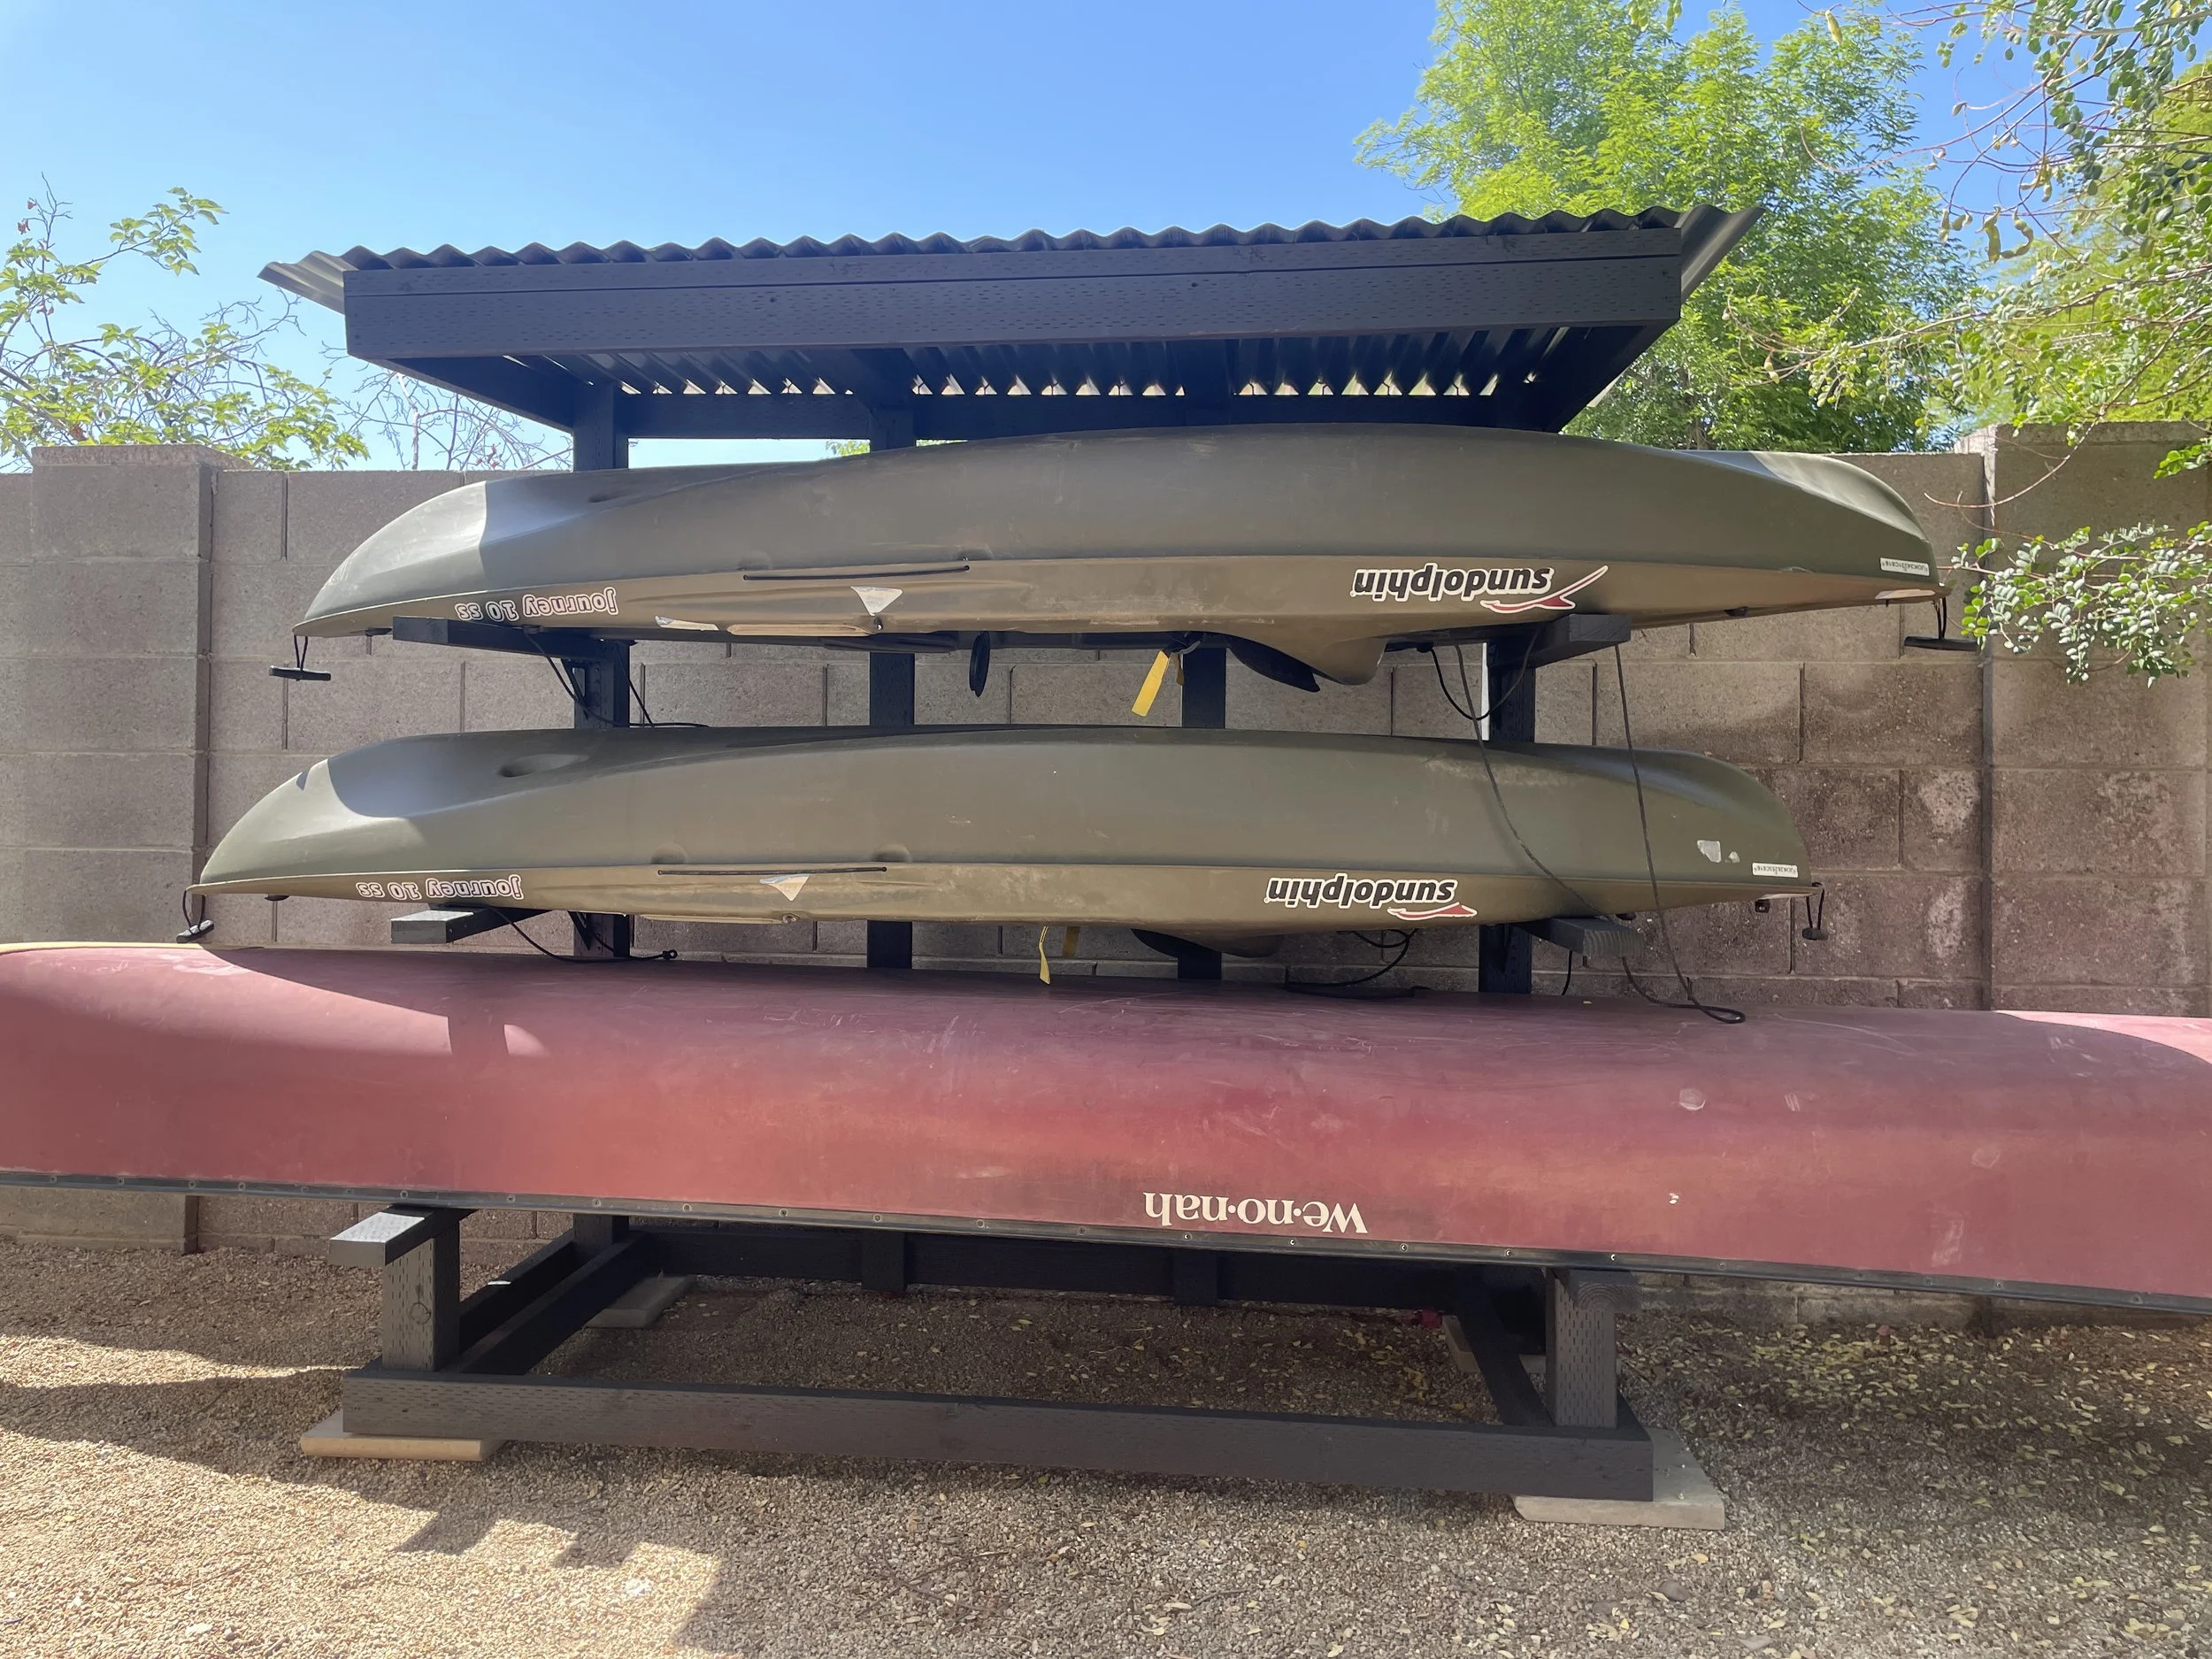
Love that the canoe and kayaks have their own place up and out of the dirt.

The roof adds a lot of shade depending on the time up day, but I still might cover them with some screen.
I only needed a spot for two kayaks and one canoe, but I did design an option or a double sided rack that would hold 2 canoes and 4 kayaks or your mix of boats. Those plans are COMING SOON!
So stoked to finally have these off my patio and and under their own cover. Now time to use them more! And get the rest of the patio updates complete… to check out my patio build, click here!
Thank you for checking out this AWESOME build. Until next time, remember Build LOUD, Build WILD and have an AWESOME day!
-Sadie
PIN IT AND SAVE FOR LATER!