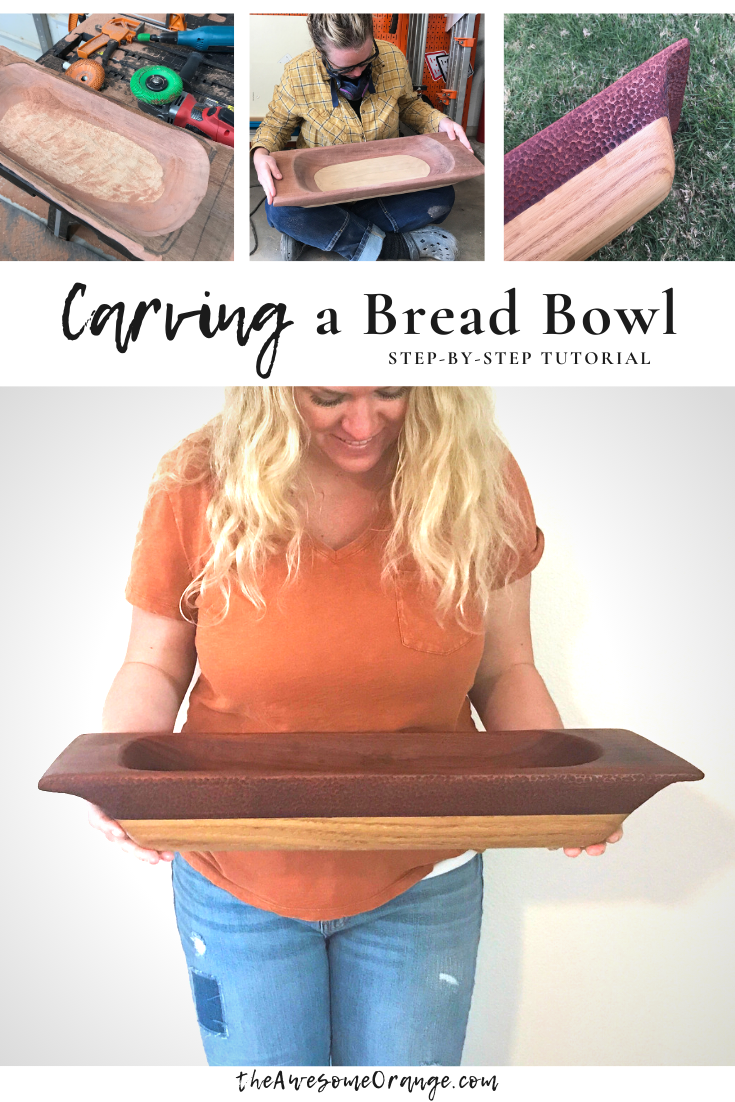
How I Power Carved A Bread Bowl
I have been doing a lot of power carving lately, mostly adding texture to some of the pieces I create. But today I am going to switch it up. You see, I have always wanted a bread bowl so I am going to show you how I completely carved a bread bowl… no lathe required, no special skills! Just a few of my Saburrtooth burrs!

The burrs I thought I was gonna use when I started.
This post is sponsored by Saburrtooth Power Carving Tools. All opinions are my own. This post does contain affiliate links. For more information on my affiliate programs see my disclosure page.
I have tons of scrap wood sitting around my shop, so I decided to dig thru it to find the perfect piece for this bowl. I actually ended up finding two… a piece of mahogany and a piece of white oak. Every bread bowl I have seen before has been one type of wood, so I thought it would be fun to make mine a little different and make it two-tone. So…
Step 1 was to glue these two piece together. Both pieces we really flat so that combined with a ton of glue I was able to get a nice clean strong joint. With the two pieces glued together it was approximately 4” thick and heavy! Mahogany is a super dense hardwood.

My Jorgensen Cabinet Master holding everything together!
Step 2 was to draw or layout my pattern. I wanted my to have handles on the ends and the sides to tapers. So, I made some rough measurements and markings on the board. In hindsight, I could have made the white oak a little shorter than the mahogany to save myself some carving time on the handles down the road. But again this is my first time carving something 3D.

Next up was to start carving. I started with my Saburrtooth 4” Donut Wheel Round Face (Extra Coarse Grit) on my 4” Angle Grinder. I use this to hog out most of the material inside the bowl, blend the sides and carve the handles down. I would recommend, I didn’t do this, to switch to a finer grit disc when you are starting to get close to your desired lines. That way you don’t accidentally take off too much material and leave a gouge mark. I learned this the hard way and made one of my side walls a little thinner than I would have liked.

Carving is super messy! I recommend doing it outside if possible! Worx Pegasus Table is great for this.

I should have switched to a finer grit when getting close to desired shape to avoid divots.
Learn better by watching, check out my YouTube video of this build!
Also, I recommend going back and adding new lines if they get carved off to help keep you on track with your shaping. Since this was my first 3D piece it was a little hard to imagine everything until I got to it.
Next, I used a 1/4” Shank 1” Sphere (Coarse Grit) with my Makita Die Grinder to help shape the inside of the bowl. This worked but on such a big bowl I think I could have gotten away with just staying with the discs. And again, I recommend having a fine grit burr available to smooth out some of the lines. This will help save on sanding time down the road.

Once I was satisfied with the shape I used my random orbital sander and sanded for what felt like forever! Dang mahogany is hard! I used 60 grit, 120 grit and then 220 grit. After sanding I still had some divots or carving mistakes, but I think almost every bread bowl I have seen in the past wasn’t perfect. And so I decided that this would work.

To texture or not to texture!?!
But to cover up some of the divots and give the piece a little more character and really showcase the two tone look I decided to add a hammered effect on the outside mahogany portion. To do this I used a 1/8” Shank 1/4” Sphere (Coarse Grit) with my Ryobi Rotary tool. I started at the line or intersection where the mahogany and white oak met and the proceed to work my way around. Making the divots/dimples I recommend coming at it from different angles to give the cuts a different look in the light. I did also go back over some of the divots with a Saburrtooth 1/8” Shank 1/4” Sphere (Ex-Fine Grit) to help clean up some of my carving marks.

Then a little more sanding and I was ready for finish. Since we are in semi-lockdown for the Covid-19 virus I decided to use a finish that I had on hand, Danish Oil. It is food safe once cured and leaves a nice matte finish like I like. Plus, it was super easy to apply. Simply wipe on, let sit, wipe off, apply again, let sit and wipe off any excess and you are done.

Love how the texture highlights the mahogany!

Imperfectly AWESOME!
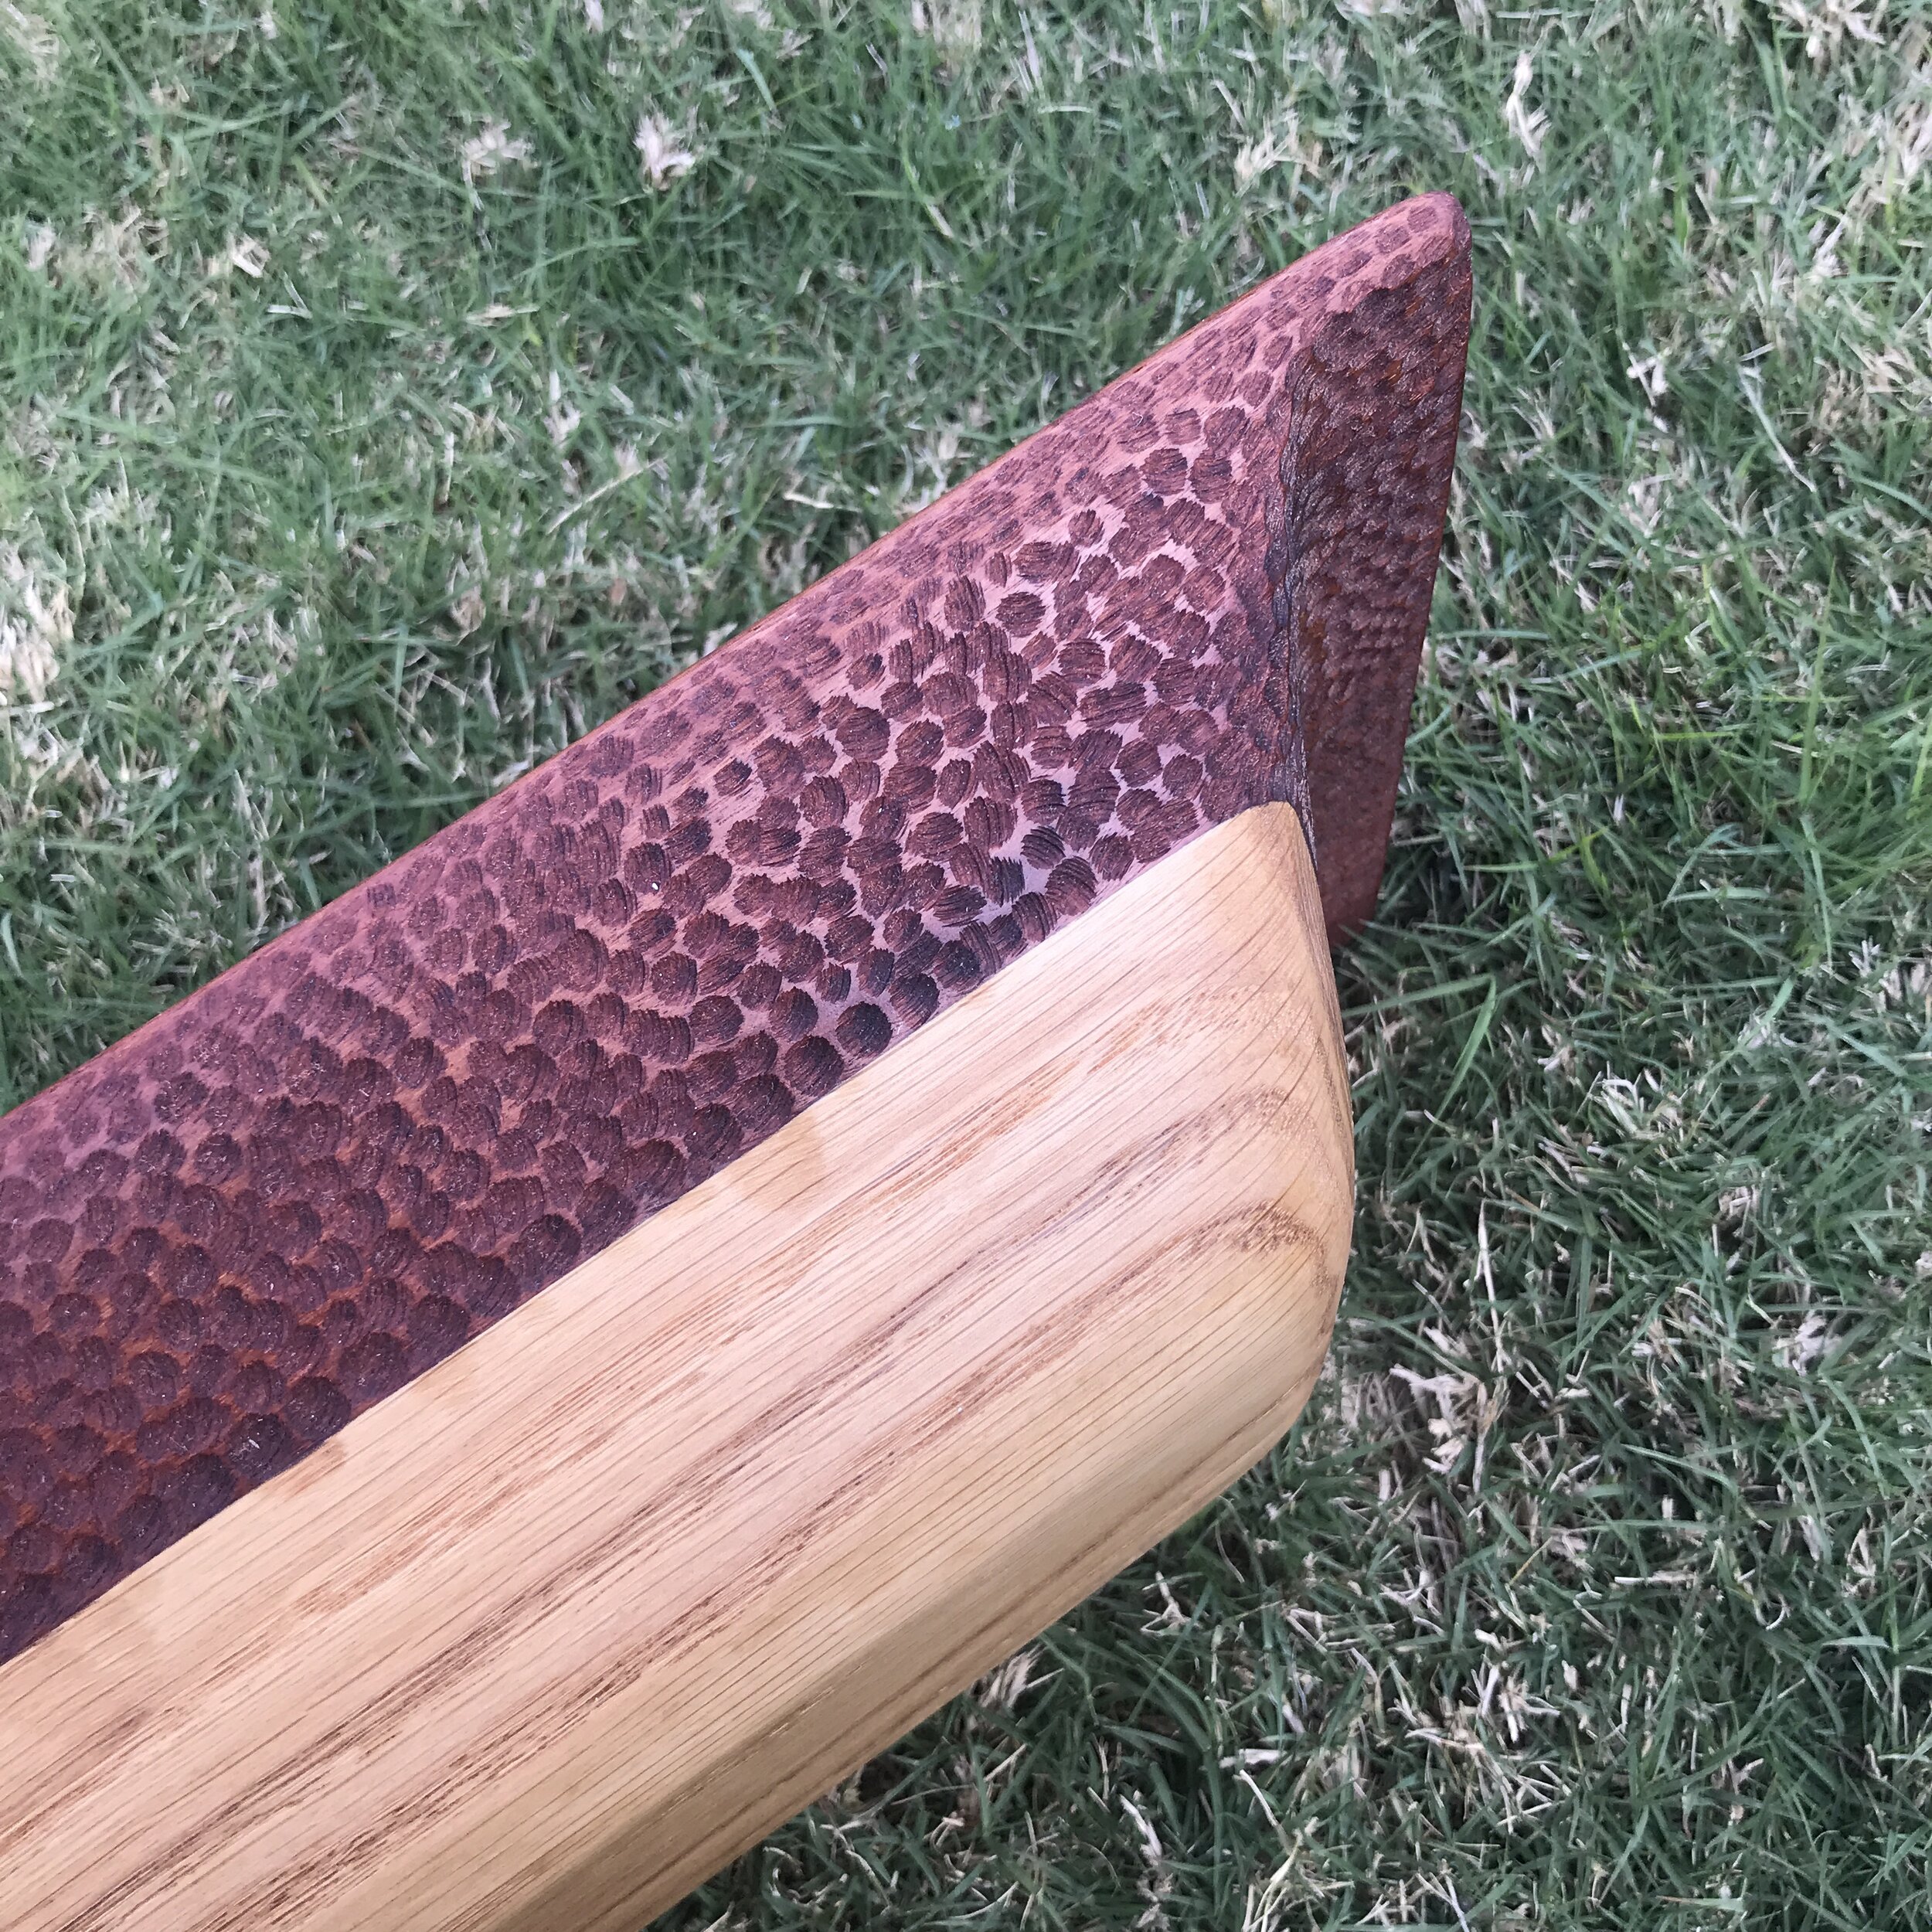
You can see some mistake divots on the white oak…. or let’s just call it character!
Super happy with how my first power carved bowl turned out. I learned a lot, especially to be patient in the carving process and its better to take off not enough at first than too much. I hope you found this tutorial helpful and if you did please leave a comment below. And if you carve a bread bowl for yourself I would love to see it, so please tag me or use the hashtag #BuildingAwesome!

Thanks for following my journey, happy building, stay safe and have an AWESOME day!
Sadie Mae