DIY Power Carved Pendant Light
I am turning into a crazy plant lady and it’s tough going because my house is so dark! My house is north south facing with only one window on the west side of the house in my guest bathroom. On top of that I have a giant mesquite tree in my front yard (south side) and a giant 16’ deep patio on the back (north side). So, needless to say I have needed plants that are tolerant of low light and by tolerant I mean can survive in low light because all plants need light.
This post IS sponsored by Saburrtooth Power Carving Tools. All opinions are my own. This post DOES contain affiliate links. For more information on my affiliates programs see my DISCLOSURES page.

My Living Room is slowly coming together and I think more plants and home decor will do the trick!
Okay, okay, okay… with that being said I have a corner in my living room that would look great with more plants in it. So when I heard of these light bulbs you can get that simulate the same rays of the sun…. I knew I needed them!

Only time will tell on how these bulbs work, but they have to be better than what my plants are currently getting.
I don’t currently have a light fixture in this corner, so I thought it would be fun to build a pendant light that I can plug-in because I do have an outlet nearby. So that is where this build starts!
I bought a light kit off of amazon that you can easily attach to any pendant light. It has a hemp rope type covered cord and an on/off switch that will plug-in to that outlet nearby. It also came with anchors and hooks to install the in ceiling.

This light kit worked perfect for this project.
I have a lot of straight lines in my house and have been slowly added in some curves so I figured this would be a great opportunity for that.
I glued up a couple of 4/4 (1” thick) knotty alder scraps I had on hand. And once that was dry I used my trim router with a straight bit and my circle jig to cut out a 12” diameter circle.

I love this circle jig… you can make small 12” circles and really big circles.
From there I marked the center and used 1 5/8” forstner bit to drill a hole all the way through. At this point I test fitted the light fixture and found that its shaft wasn’t long enough for the 1” thick wood I was using. I thick it would only work with a 1/2” thick piece. So, I could either plane the wood down to 1/2” or create a recess on one side so that the light fixture part would work… I choose to do the latter.

I used 1 5/8” forstner bit for the light fixture to fit into.
To create the recess I used my 2” hole saw to cut in about 1/2”. If I would have know that I have needed to do this I would have done it before drilling all the way through with my 1 5/8” forstner bit. Because without the soils piece of wood it wants to drift on you until it grabs… hence why my recess is slightly off center. But no worries, I’ll just use that for the top side of the pendant light and since it is hung so high you will never see it.

Using the hole saw to create a recess 1/2” down so that the light fixture can fit.
Then to clear out the waste I used my trim router again with that same bit and set the depth to 1/2” and cleaned out the 2” circle. Again, I did this so that the light fixture could fit on the piece of wood I am using.

I freehand routed out the excess of the second hole down about 1/2” or half of the pieces thickness.
Now that the hardware functions it is time for the fun part… giving this piece some shape!
I decided to go with a wavy pattern. To accomplish this I started by drawing lines in what I call a pizza pattern or the same way you cut a pizza… 8 slices. And then from there I started by hollowing out a section using Saburrtooth’s 1/4” Shank 2” Ballnose Burr in Fine Grit (yellow) and my die grinder. I hollowed it to approximately 1/2” the width of the piece.

This picture is before I cleaned out the bigger circle completely.
Watch Me Carve This Piece on my YouTube Channel.
I found starting on the right side of the wedge and working my way towards the left in a slow dragging pattern worked the best. When power carving I have found less pressure equals more control. I really liked how the length of the 2” Ballnose Burr helped my keep my lines straighter.
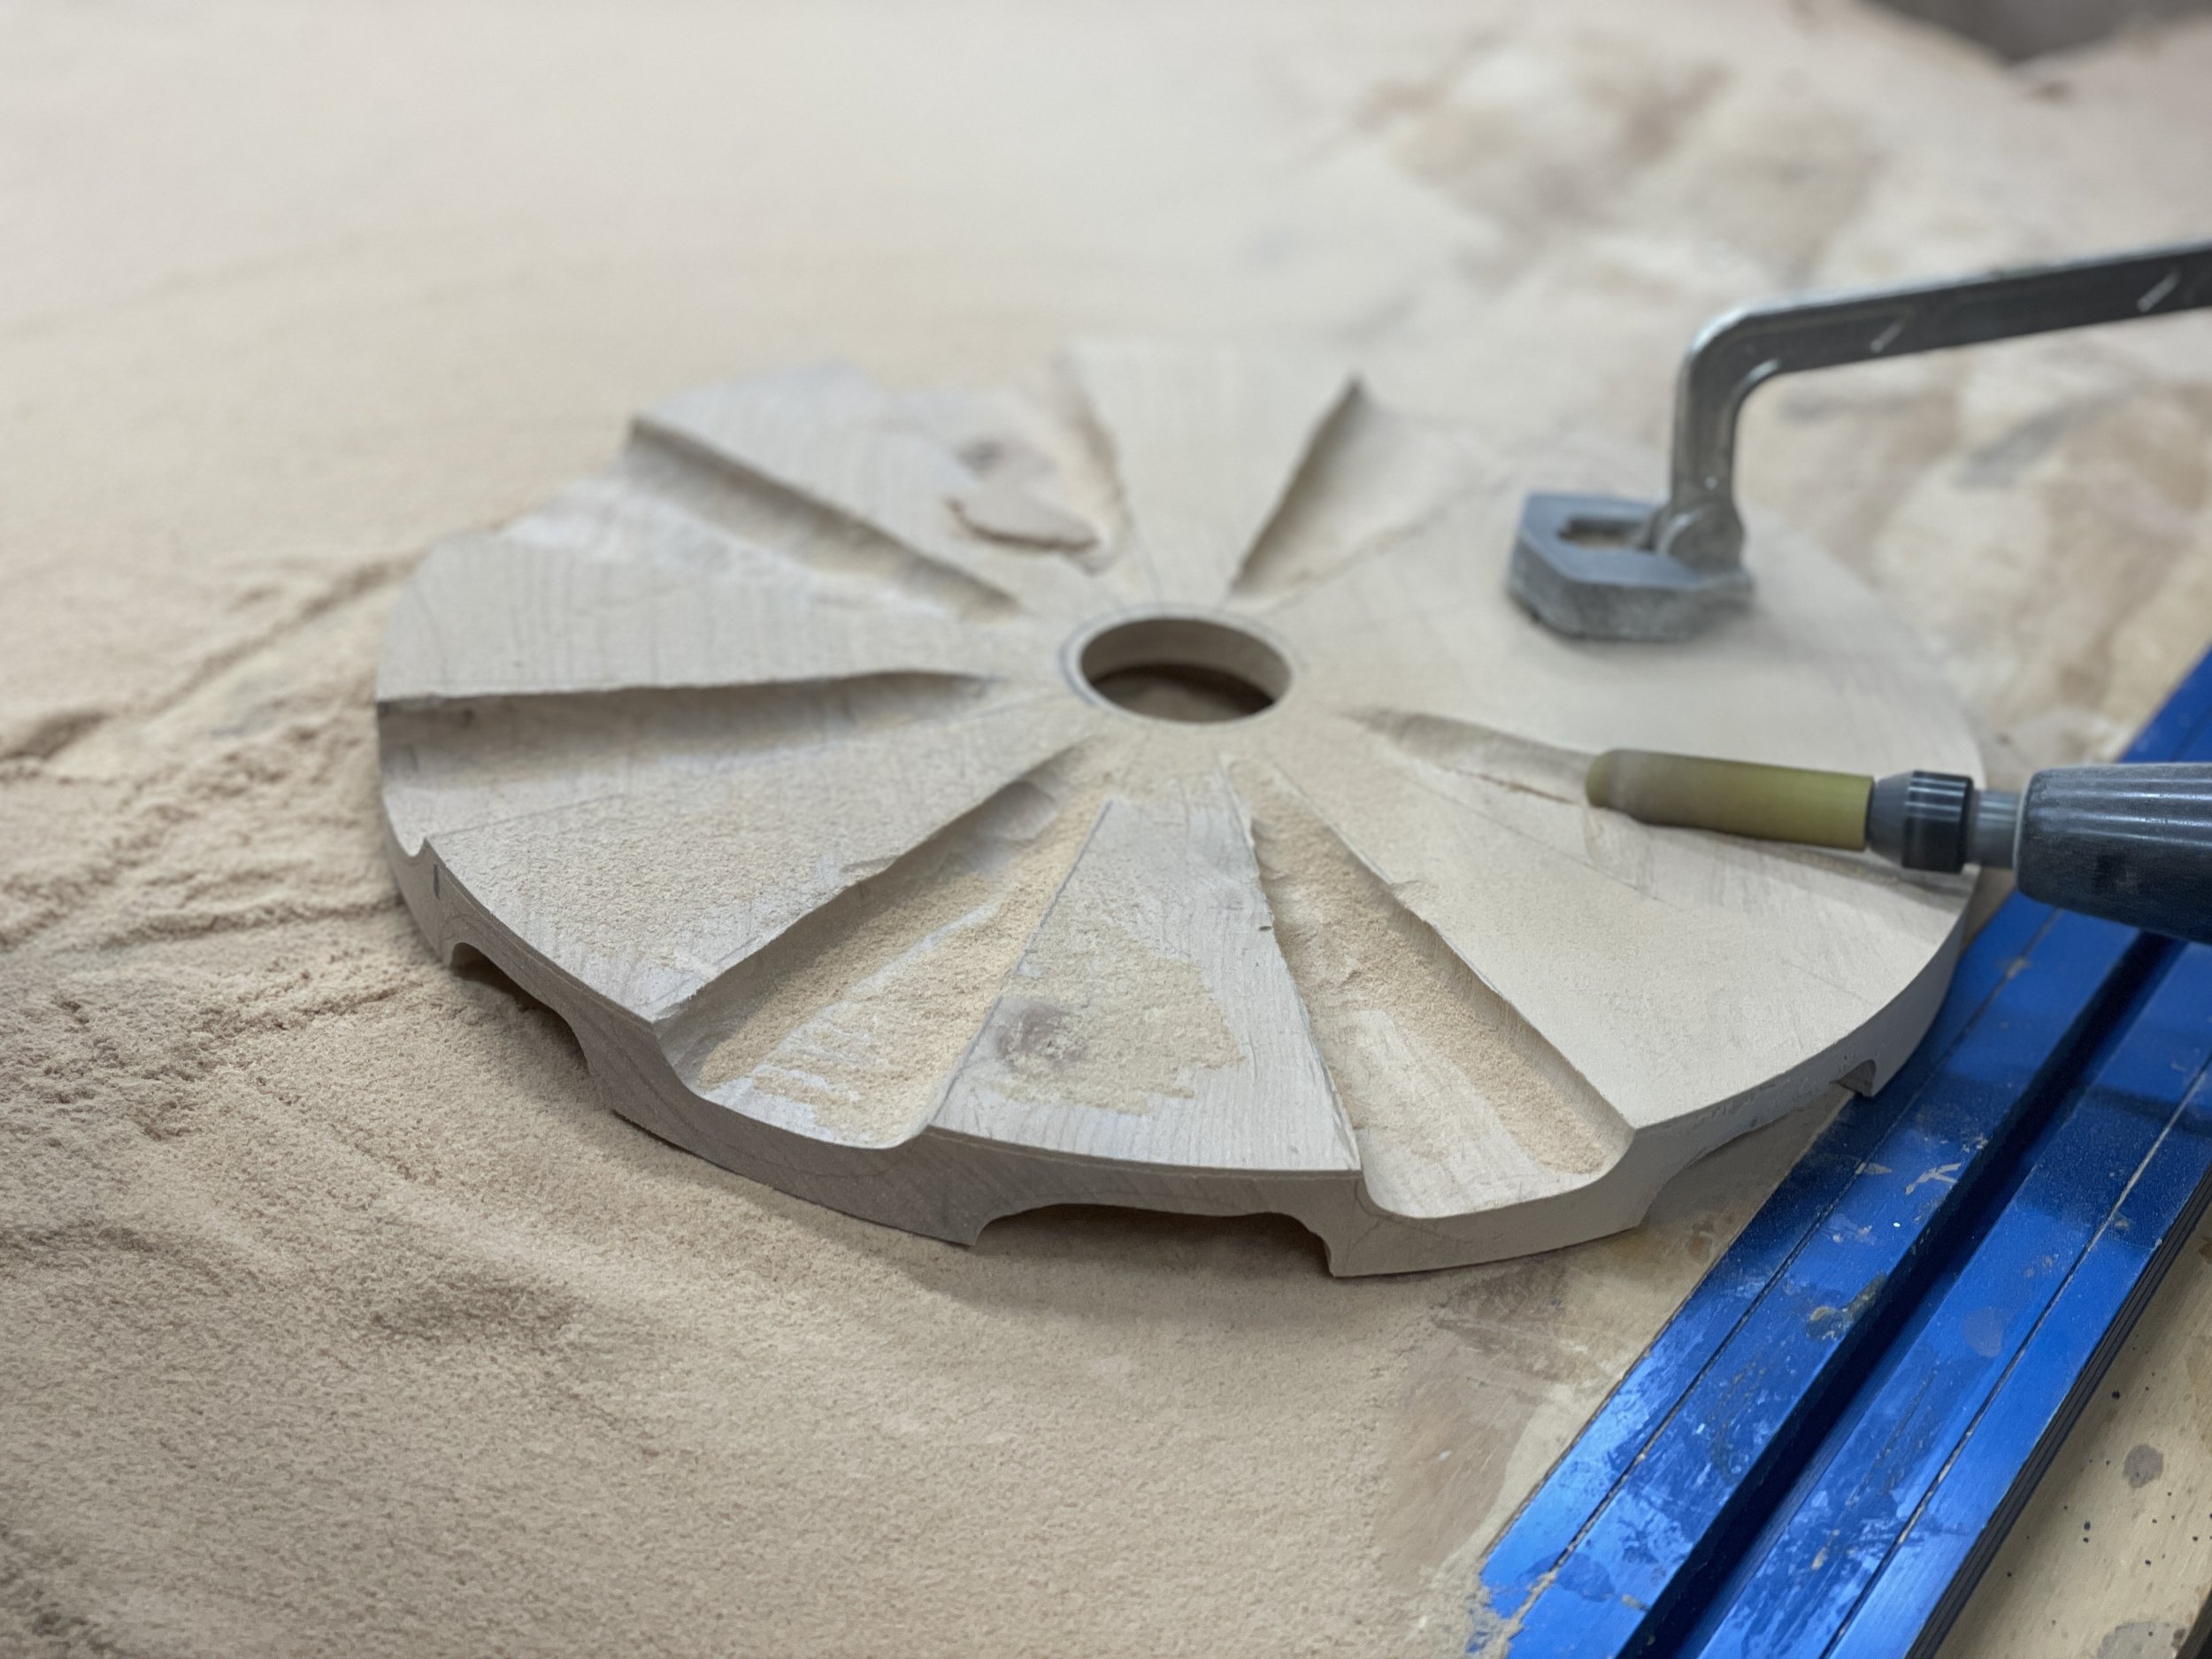
Top, Bottom, Top, Bottom… carving approximately 1/2” way through.
Once I had one wedge rolled out I would then flip the piece and hollow out the two sections next to that one, flip and then repeat. I wasn’t try to keep all the wedges exactly the same and this ensured that if I did go over a line I could compensate for that on the next wedge.
Once all the wedges were rolled out it looked pretty rough, so I went back over all the wedge sections using Saburrtooth’s 1/4” Shank 2” Ballnose Burr in Whisper Grit (white). This is an extra fine grit burr and it helps me refine the edges of each wedge and remove any high spots. And using the second finer grit burr saves me a ton of time sanding!

The whisper burrs cleans up my carving and saves on sanding time.
Then when I was complete with the whisper grit I took to sanding. I was just looking to round over the edges and get ride of any high spots. You could continue to sand and go thru the grits until this was as smooth as ever, but I decided to add some texture using a wire wheel. I had done that on some shelves that are in the same room where this is going so I thought they would compliment each other.

Trying to enjoy sanding by doing it outside with Awesome Oscar!
The wire wheel I was using was just a cheap attachment that I put in my drill. I made sure that I used the wire wheel in the direction of the wedges or coming out from the center towards the edges. I didn’t try going with the grain because it was a circle and found that I ended up having lap marks that way.

Adding the wire wheel texture does save on sanding time and gives a cool rustic look.
And when it was all done I put a coat of clear polyurethane on it and hung it up!

Do you see Awesome Oscar?

The grow light bulbs cast a warmer tone than regular light bulbs.
I absolutely love how it turned out and the character it brings to my space. I hope this build inspires you to try and carve something for yourself. And if it does, I’d love for you to share a picture with me.
If you need some carving burrs to get you started, use my code: AWESOMEORANGE10 to get 10% of all of Saburrtooth’s burrs.

Use Code AWESOMEORANGE10 for 10% OFF Saburrtooth’s website.
Thank you for following my journey! Remember Build LOUD, Build WILD and have an AWESOME day!
Sadie Mae