DIY Dough Bowl With Feet
I recently went to a friends house who has a sawmill… which means he has wood all over the place. While I was there is cut me out some chunks of Indian Rosewood that are perfect for power carving.
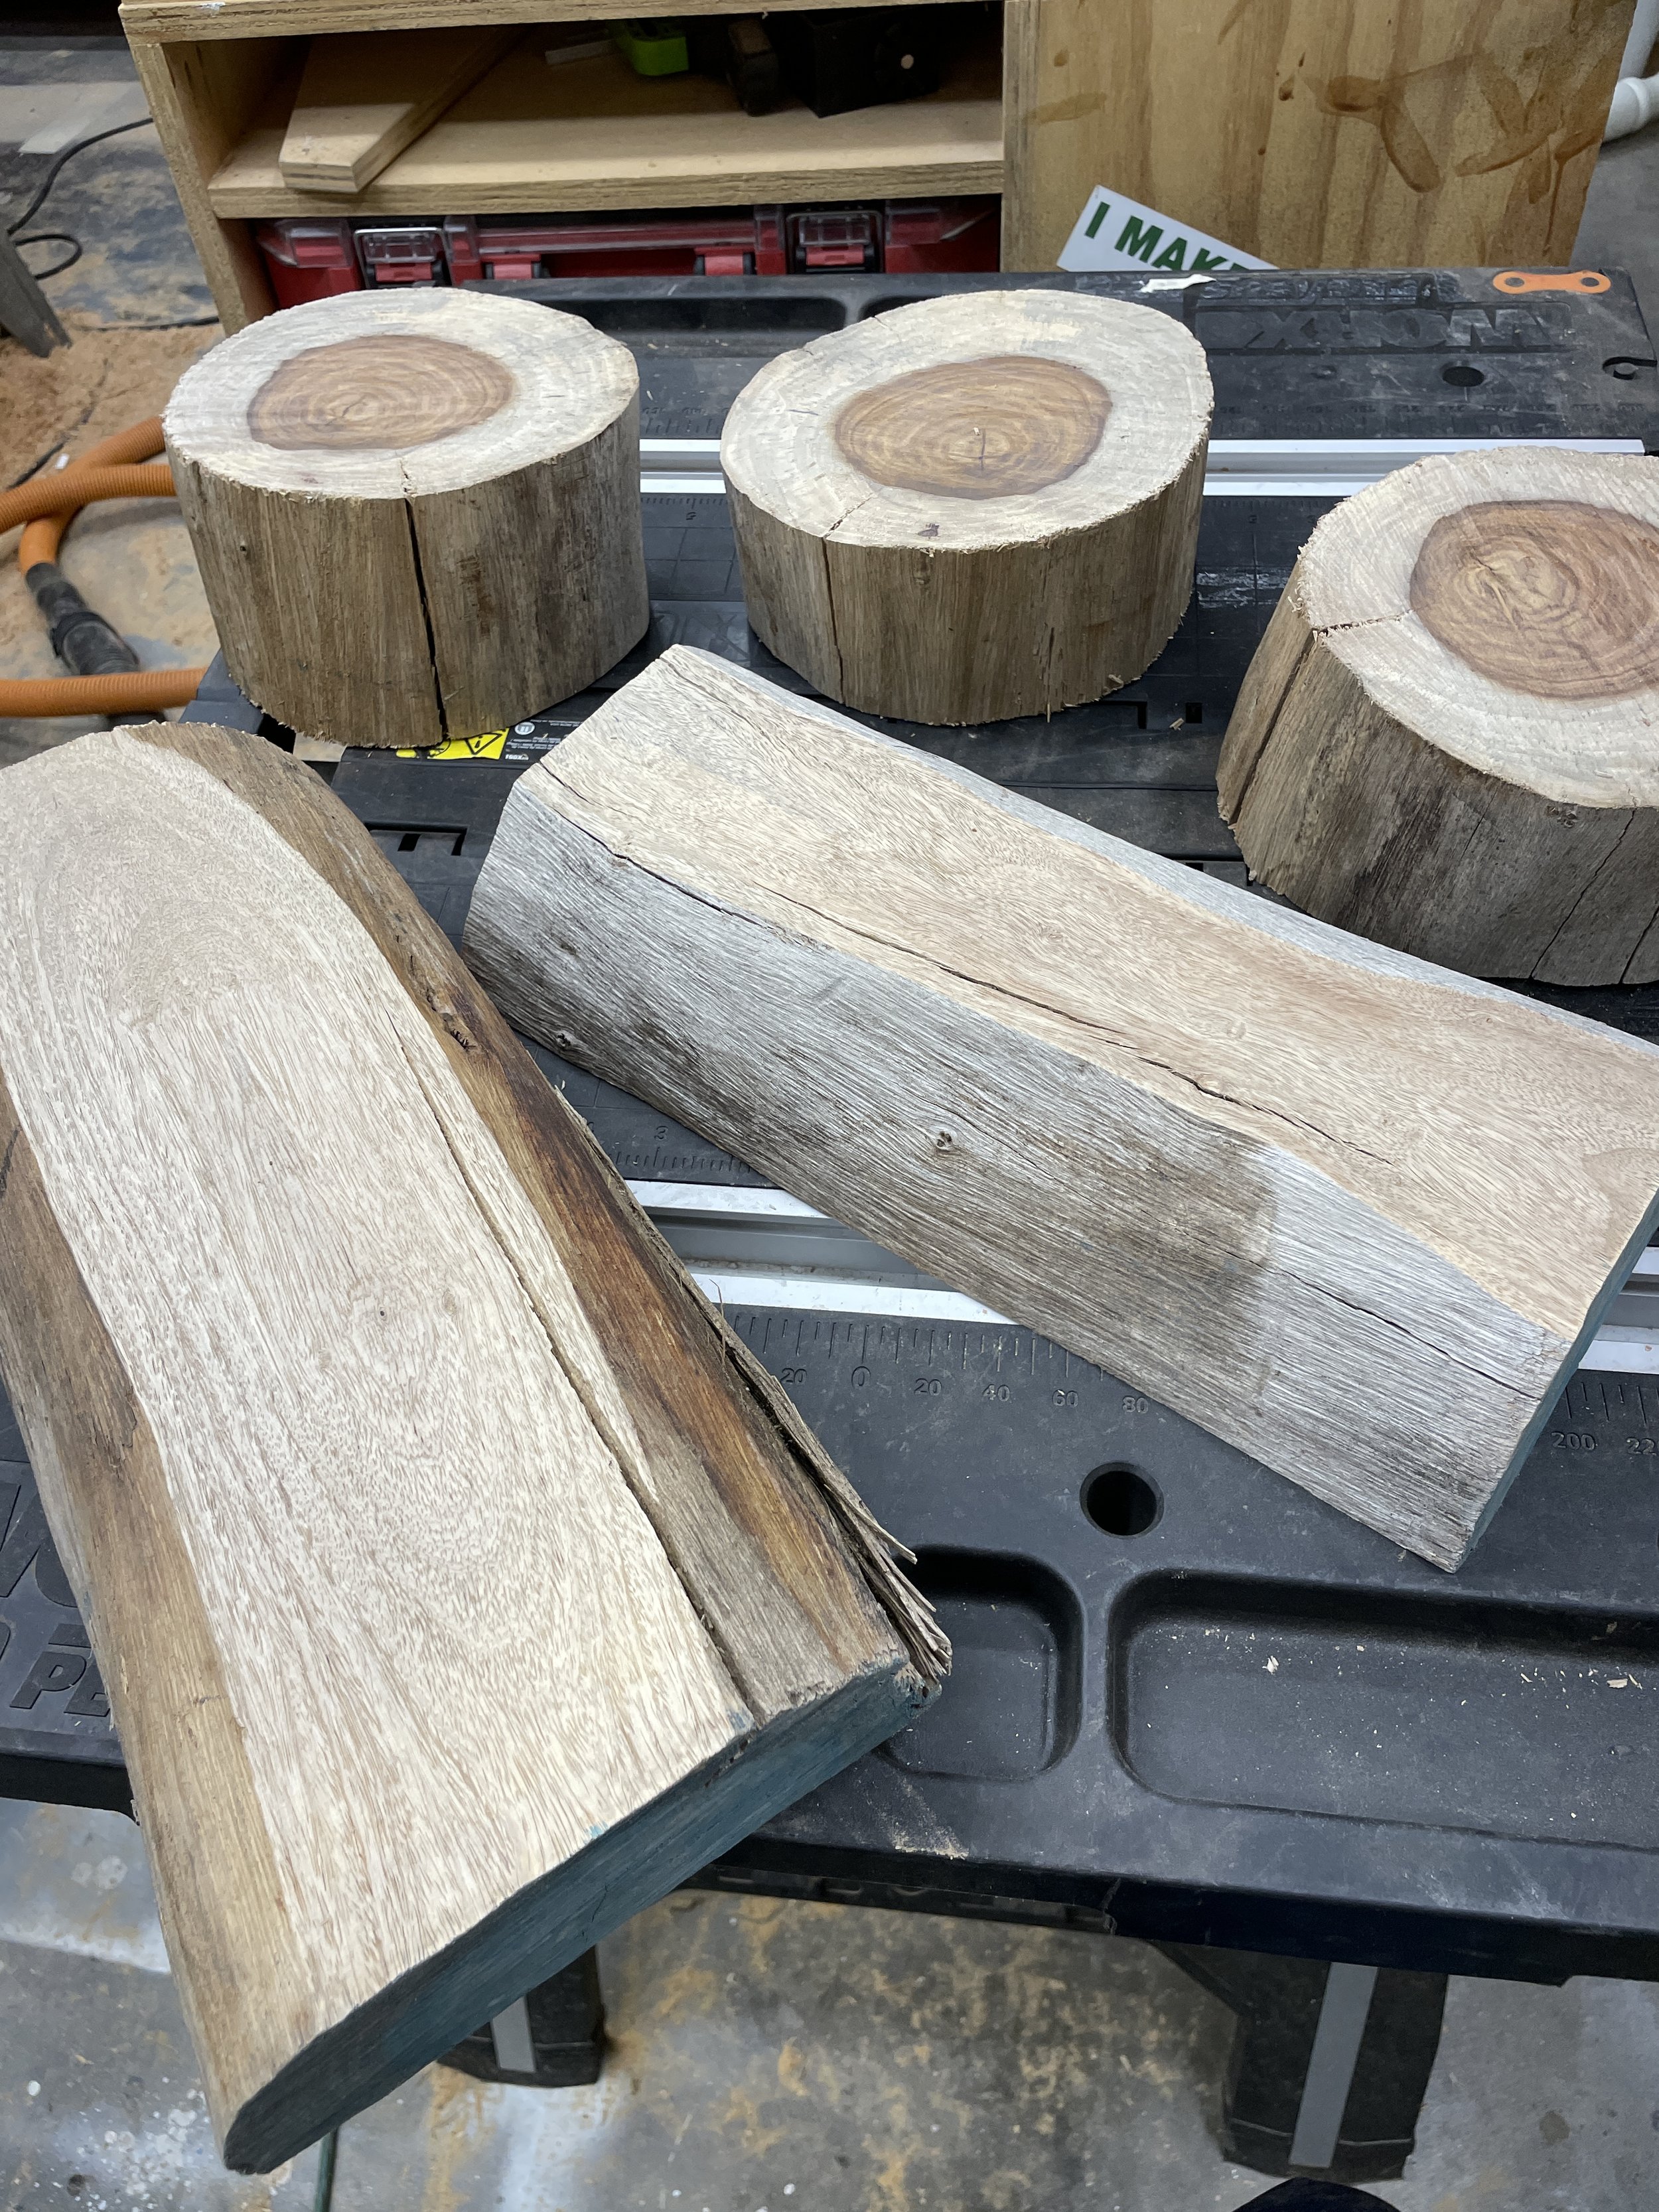
I did run them through the jointer and planter to get two sides flat before carving.
This time when I started carving I didn’t really have a plan and just let the piece of wood dictate how I carved it. And well, I turned it into an AWESOME dough bowl with feet! Let me show you how I did it.
This post IS sponsored by Saburrtooth Power Carving Tools. All opinions are my own. This post DOES contain affiliate links. If you want more information on my affiliate programs, see my DISCLOSURES page.
Watch me carve! Full carving video on YouTube!
Step 1: The Outside
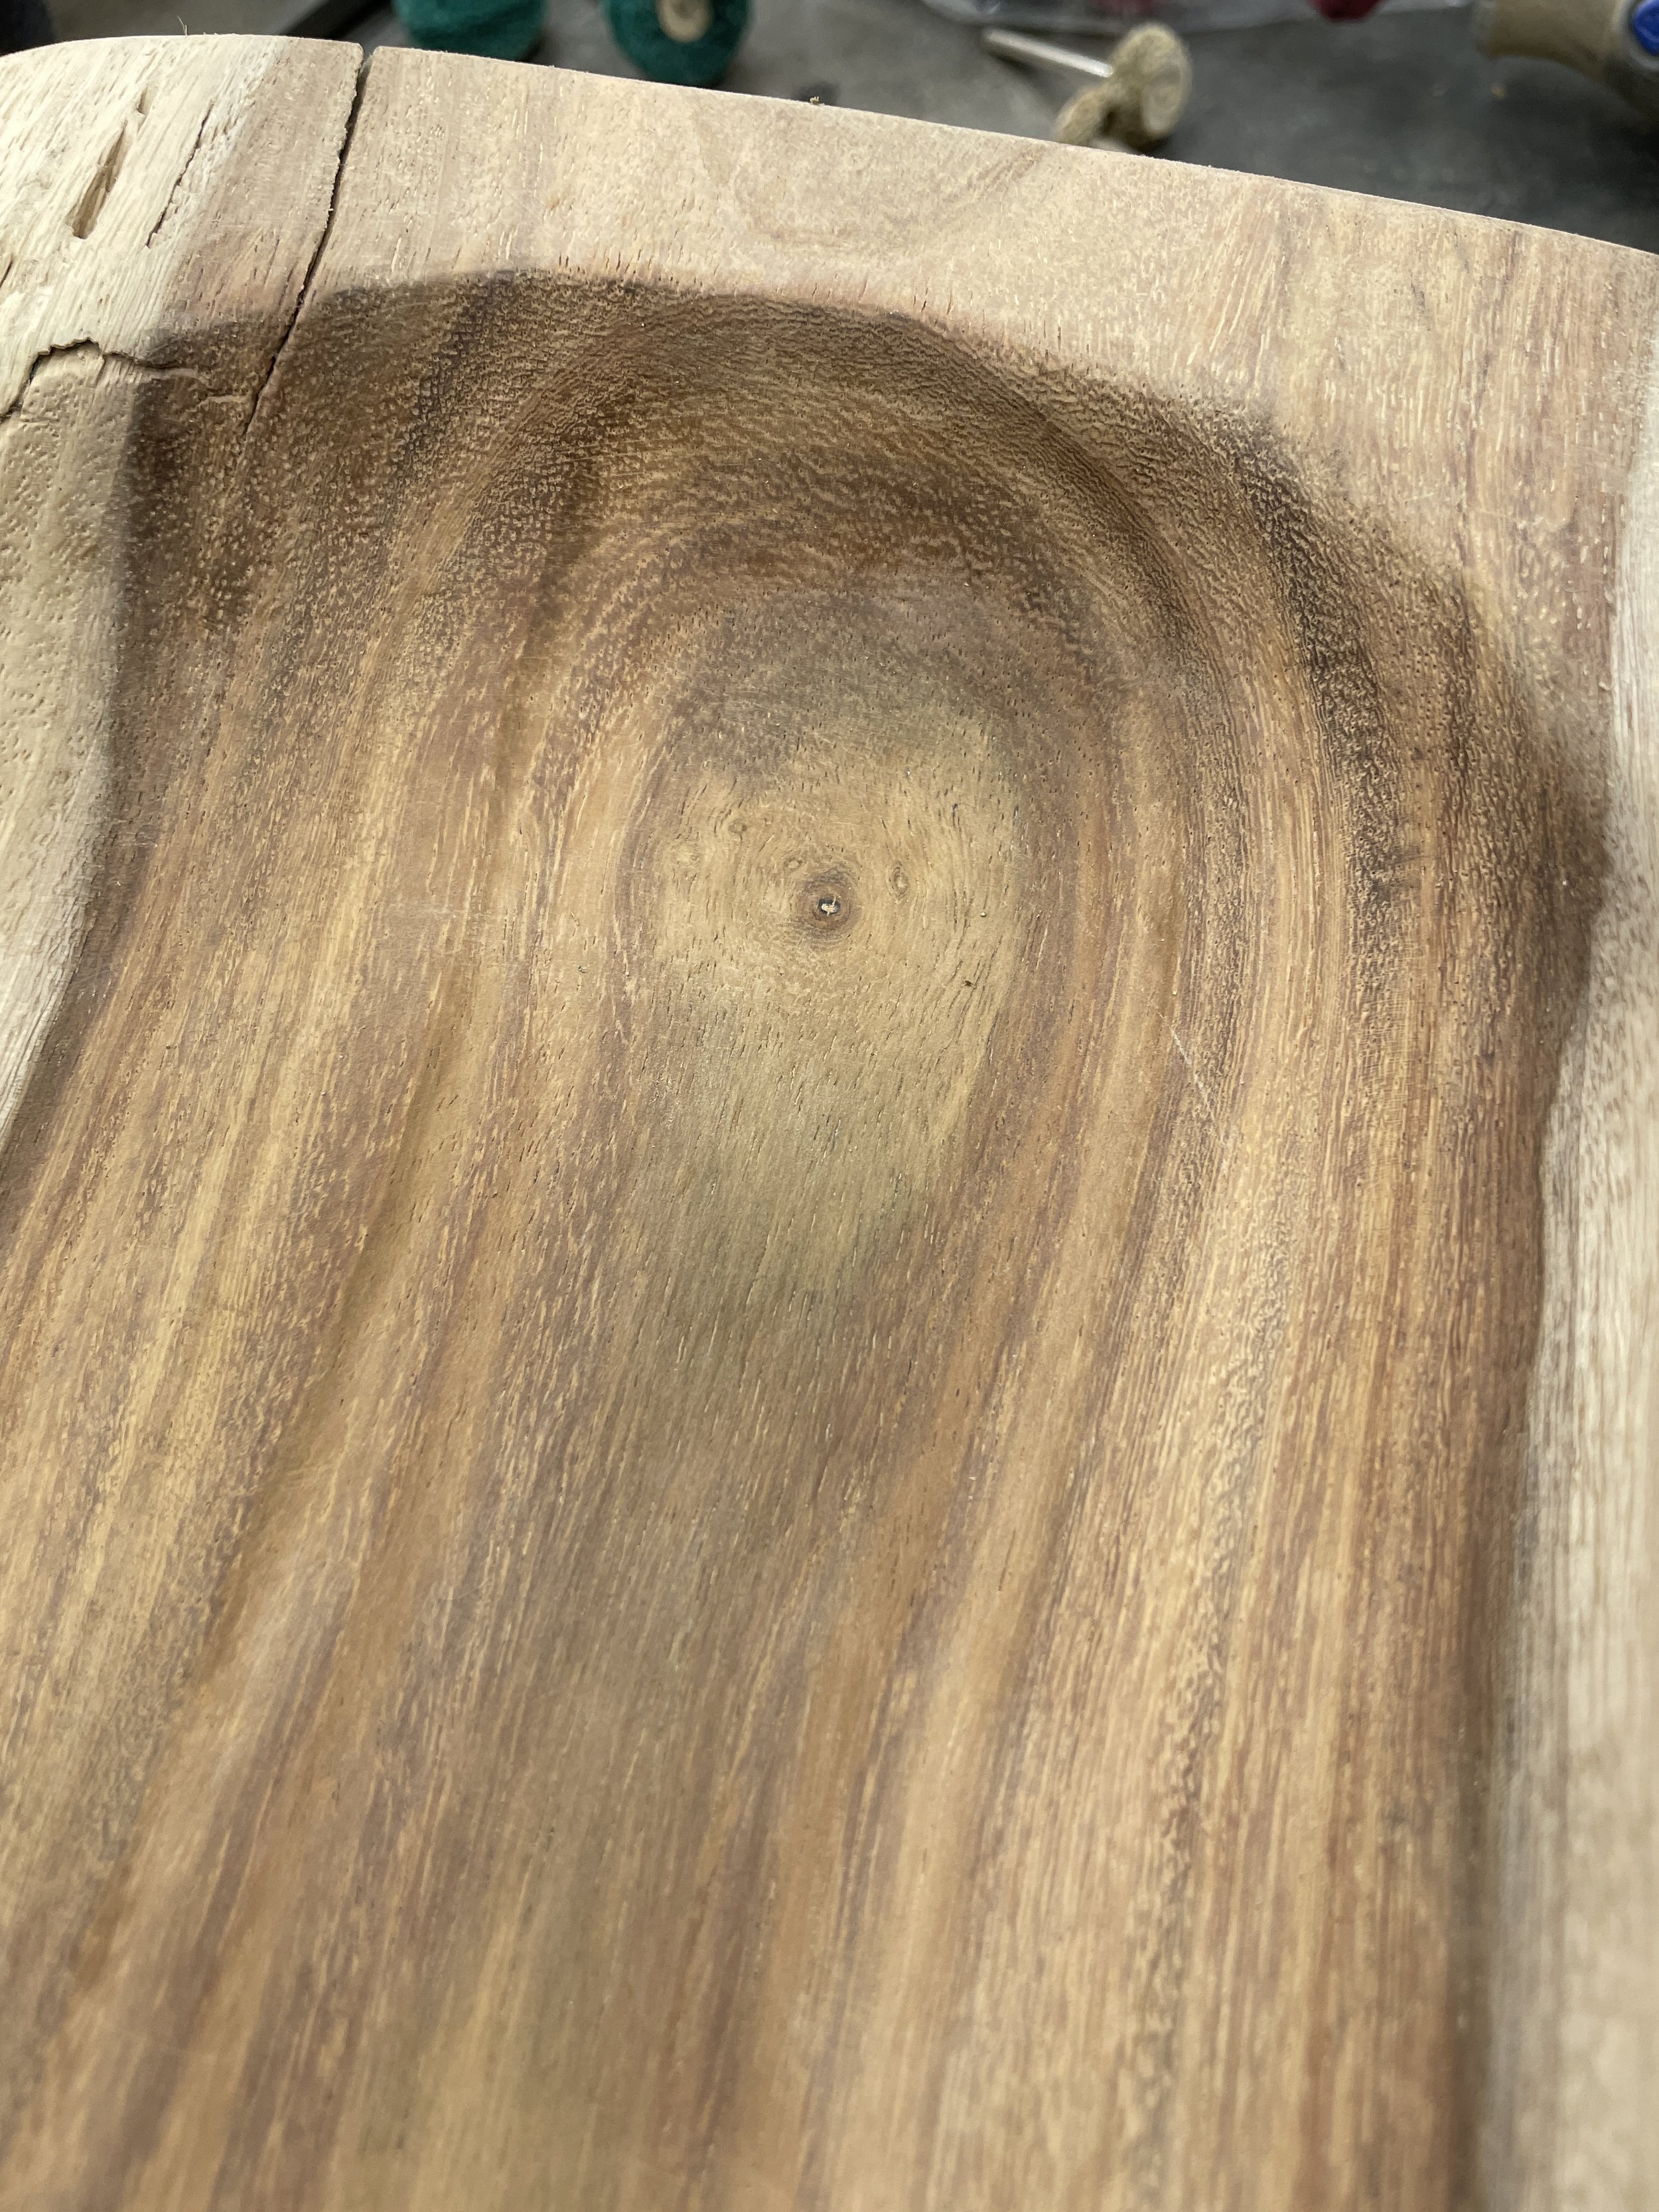
When carving bowl or dish, I like to start with the outside. Since Indian Rosewood is a hardwood I went ahead and started with my Saburrtooth 4” Disc in EX-Coarse Grit or Orange. I didn’t have a shape in mind, but when I saw the darker grain come through I just followed a line that I liked.

Lots of different grit to choose from… plus the have blue and purple for more aggressive carving.

It’s taking shape!
When carving I don’t ever push to hard, I just the disc do all the work. And for the outside most of the motion was pulling or dragging the disc across the wood. I keep the grinder close to my body and move the piece often to make sure I am looking at it from all angles and not taking off too much or too little.
Step 2: The Inside
Once I had the outside where I liked it I drew some guide lines for where I wanted to hollow out the inside. Then I used the same 4” Disc and started hollowing it out. Once I get the bulk of the material out I do like to use soft gentle pushing motions into the corners to refine their shape. I find this to be easier to keep a consistent curve rather than a pulling motion.

This work table is great for carving because it has integrated clamps.
Again, you don’t need a lot of pressure… just the carving disc do all the work.
Step 3: The Feet
Once I got the center hollowed as deep as I wanted it I found that the piece was really heavy. So, I thought lets remove a bunch of the bulk and add feet. I have never carved feet before, but how hard could it be? I drew some more guide lines and used the same 4” Disc in orange to remove the bulk of the material.

Saburrtooth’s 1/4” Shank 1” Sphere Burr in Ex-Coarse Grit to get between the legs.
Between the feet I couldn’t get as deep as the outside and the middle so I ended up switching over to my die grinder and a 1/4” Shank 1” Sphere burr in Ex-Coarse grit (Orange). With that I was able to really get in between the legs and tough up the outside of the legs.
Step 4: Clean-Up and Sanding
Then for the last step in carving I switch to a Saburrtooth 4” Disc in Whisper grit (white) and touched up the outside and the inside. I really like this disc to help remove some of the carving marks which makes for less sanding down the road.
And for the feet I ended up touching them up with a 1/4” shank 2” Bullnose burr in Whisper grit (white). I liked this one for the feet because of the long reach to get between the feet.

I love this shape!
And once I was happy with he shape it was time for sanding. I started with 80 grit on my orbital sander and worked my way up to 180 grit. Since the orbital can’t get in all the conceived sections, I did do a lot of hand sanding. And when I was tired of that I ended up ordering some abrasive polishing wheels from Amazon. They are kinda like a scotch rite pad material. I used them in my Dremel because they have a 1/8” shank. They worked really well at getting into the concave sections, but they did leave a little burning if you don’t move fast enough. Plus, the do discenegrate, so you will go through several of them and need to have a lot on hand.


Step 5: Finish
When I started I didn’t have any idea was I making and although I came up with an AWESOME dough bowl with feet I don’t know where I am going to use it, so I decided to use a food save finish on it. This one is Called Wood Honey. It was my first time using and it and it was super easy to apply and really brought the wood life.

So what do you think of this bowl? Where do you think I should use it? Fruit bowl? Bathroom soap holder, Catch-all tray, Coffee Table? Or Give it as a gift? Let me know in the comments!

Two halves make a whole. The other side of the log… crazy difference.

I love the grain!

And those feet are too cute!
And thank you for following my building journey. If you would like to try power carving… you can get 10% OFF all Saburrtooth burrs using my code: AWESOMEORANGE10.
Happy carving and have an AWESOME day!
Sadie Mae