My NEW Thunder Laser | Nova 35/100
Why did I get a Thunder Laser?
This is NOT a sponsored post, but Thunder Laser did send me the laser in exchange for video content. All opinions are my own. This post DOES contain affiliate links. See DISCLOSURES for more information.
About 1 year ago I jumped into the laser market and bought a Glowforge Pro without much research because I heard of them and saw them in a lot of makers spaces. But I quickly found out it wasn’t the right laser for me.

Save up to $500 off a Glowforge here.
The Glowforge is a great laser… It cut super clean and was easy to use, but it was slow for production. It is nice too because of the smaller footprint and is an excellent starter machine. It can make awesome stuff, it will just take longer.
And I want to make lots of products, so when Thunder Laser reached out to me I jumped at the chance to team up with them. They ended up sending me the Thunder Laser Nova 35/100… meaning it has a 100 watt CO2 laser with an engraving/cutting area of 35.4” x 23.6”. It also can engrave pieces with a height up to 9”H.

They make it really easy to get started because it comes with everything you need right in the shipping container… you get a chiller, compressor and exhaust fan… plus a tool kit, cleaning kit and Lightburn software!
And while that all was AWESOME… I had one little issue… how was I going to get my massive laser safely into my new office space?

So I did what any other responsible YouTuber does and search YouTube for a video on how to get my Thunder Laser through a regular door? And I found this awesome video. It shows step-by-step how easy it is to remove the base and stand the laser on end to fit through a regular doorway.
And while there was plenty of room in my office for the laser, my doorway wasn’t regular. It is in my hallway and with two close turns there was no way we could get it in that way. So, I got creative and asked some friends for help to move my new laser in my office through the window… yup the window!

We used two 8/4 pieces of Alder to help support the laser as it went through the window.

The wood also helped us to easily lower the laser back onto the base without having to support all the weight.

I think Oscar is confused but I am excited to have my new Thunder Nova 35/100 in its new home.
And it worked! And it was actually pretty easy.
Once it was in there…. My husband installed a dedicated 110v 20a circuit outlet for it.
And since out house is block, we cut a hole in the ceiling and ran the exhaust through the ceiling and out the side of the house.

Vented it up through the ceiling…

And out the side of the house.
And then I followed the rest of the instructions provided to hook everything up. Super simple.
Well that is until I needed to learn a new software program…. Lightburn! And I must be getting old because new software is always like learning a new language the first time I use it.
But after some practice…. I was easily able to start creating.

Chiller on left, Compressor underneath, Vent out the back through ceiling and dedicated outlet on right.
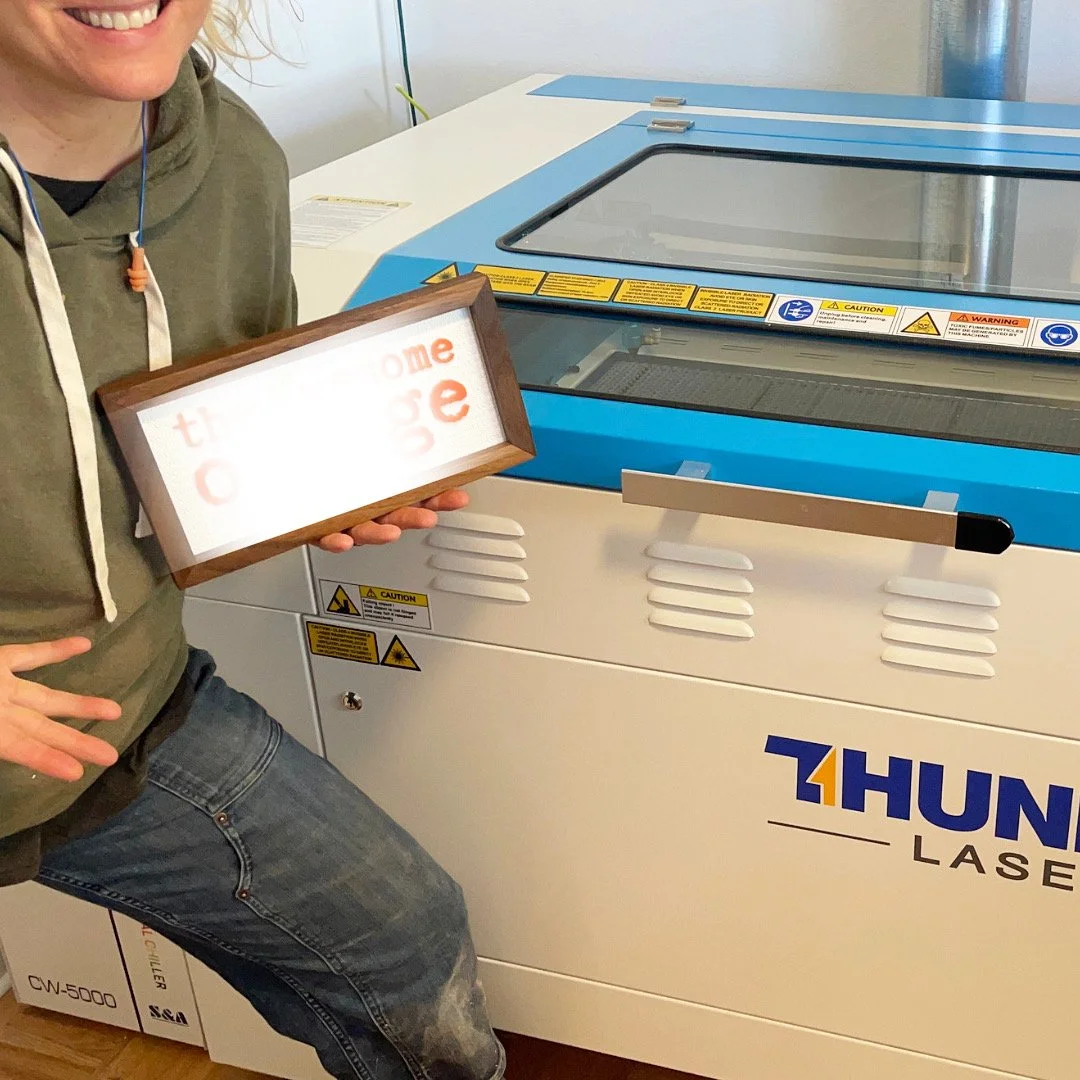
And for this video I thought I what other way to celebrate my new laser than by sharing with you all the first look of my new logo!!!

NEW LOGO - The Awesome Orange
And with a new logo we need to create a logo sign to decorate my office!
For reference… here is my old logo.

OLD LOGO - The Awesome Orange
I am thinking layers and acrylic… to really test this beast out.
So let me show you how I did it.
PREFER VIDEO TUTORIAL? WATCH MY YOUTUBE HERE!
First, I engraved the background layer with my Build LOUD, Build WILD slogan

Left - 500 Speed/40 Power, Right - 500 Speed/20 Power
Ended doing this twice because the first time the engrave wasn’t deep enough because I would be painting the backer, so I ended up using 500 speed & 40 Power setting for this step and it worked perfect.
Then I cut the ¼” mdf backer out using 30 speed and 90 power settings
Then I painted the backer white.

Two coats of primer and two coats of white flat paint.
WHILE THE PAINT WAS DRYING …
Next I added some 3M backer tape to the acrylic I will be using for my logo so I won’t have to use glue when I go to attach the letters to the backer.

This tape makes it so easy when working with layers.

Double sided and super sticky. No messy clean up like glue.
Then I cut the 1/8” orange and green acrylic out in the shape of my new logo using 20 speed & 90 power

If I would have cut the border out I could have used this as a template.
And proceeded to make and assemble a frame. I created a rabet on the back using my palm router and then added a little finish to bring the walnut to life.

Walnut!

I added a recess or rabbit for custom look.
Then peel the stickers off the acrylic and placed my new logo on the backer!

I ended up cutting a cardboard template to help me place the letters exactly on the backer.
And here is my new logo sign…. What do you think?
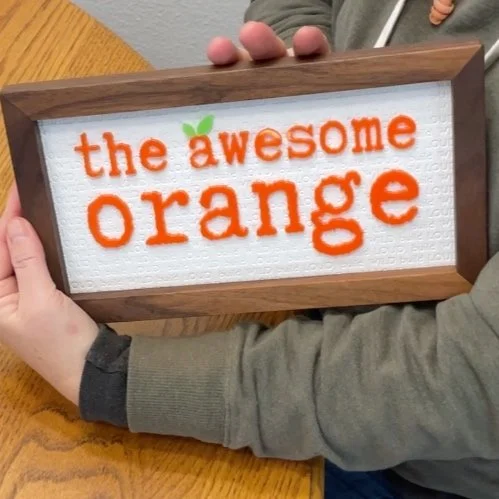
I absolutely love my new logo and my new Thunder laser!

And while I am more of a woodworker or DIYer and really new to the laser side of things… Thunder laser along with their AWESOME customer support made it easy for someone like me to get started with a machine that is more than capable of making some seriously AWESOME stuff.
I can’t wait to start using it more and adding more personal touches to my other woodworking pieces.
To check out Thunder Laser’s entire lineup and find the correct laser for you… check out this link.
Thanks for following my building journey…. remember Build LOUD, Build WILD and have an AWESOME day!
-Sadie Mae
PIN IT AND SAVE FOR LATER!