

All in Build
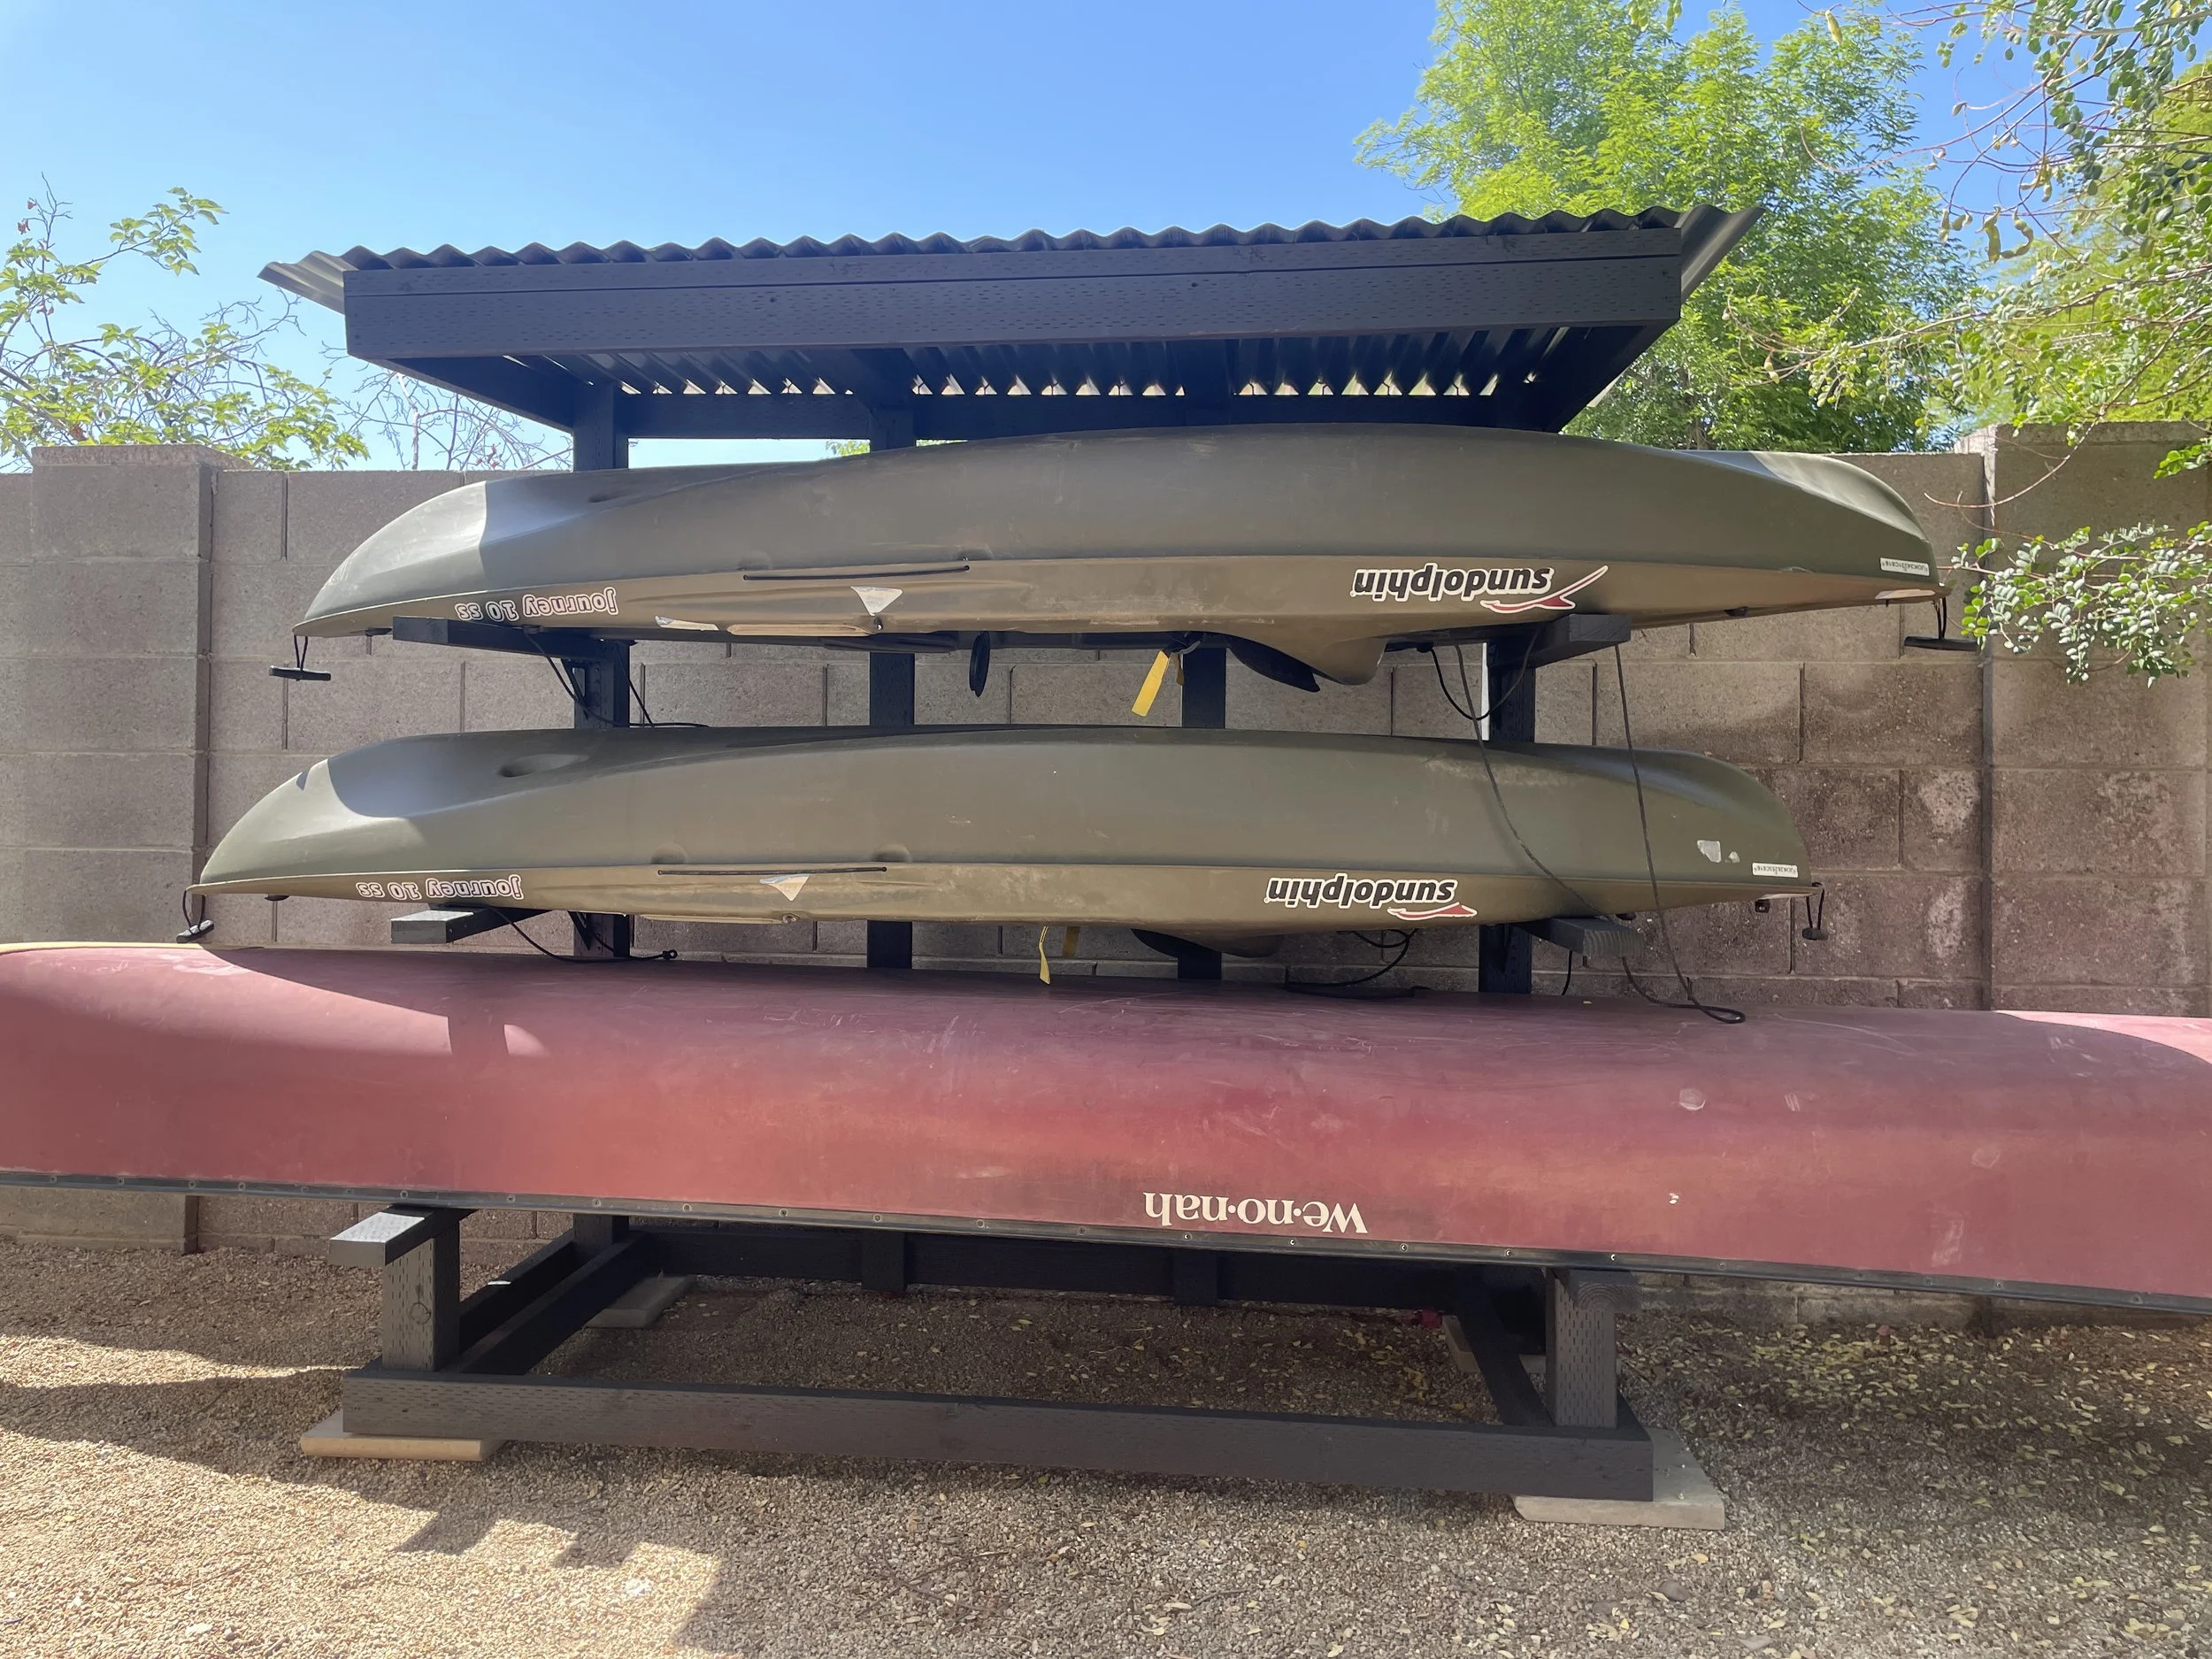
How to Build A Freestanding Kayak/Canoe Rack
We have had our canoe and kayaks just hanging out under our covered patio for the past 2 years ish!!! Eek, I know. But that just means this build has been even more satisfying when it was done. And of course the infamous question was asked… why didn’t I do this sooner?

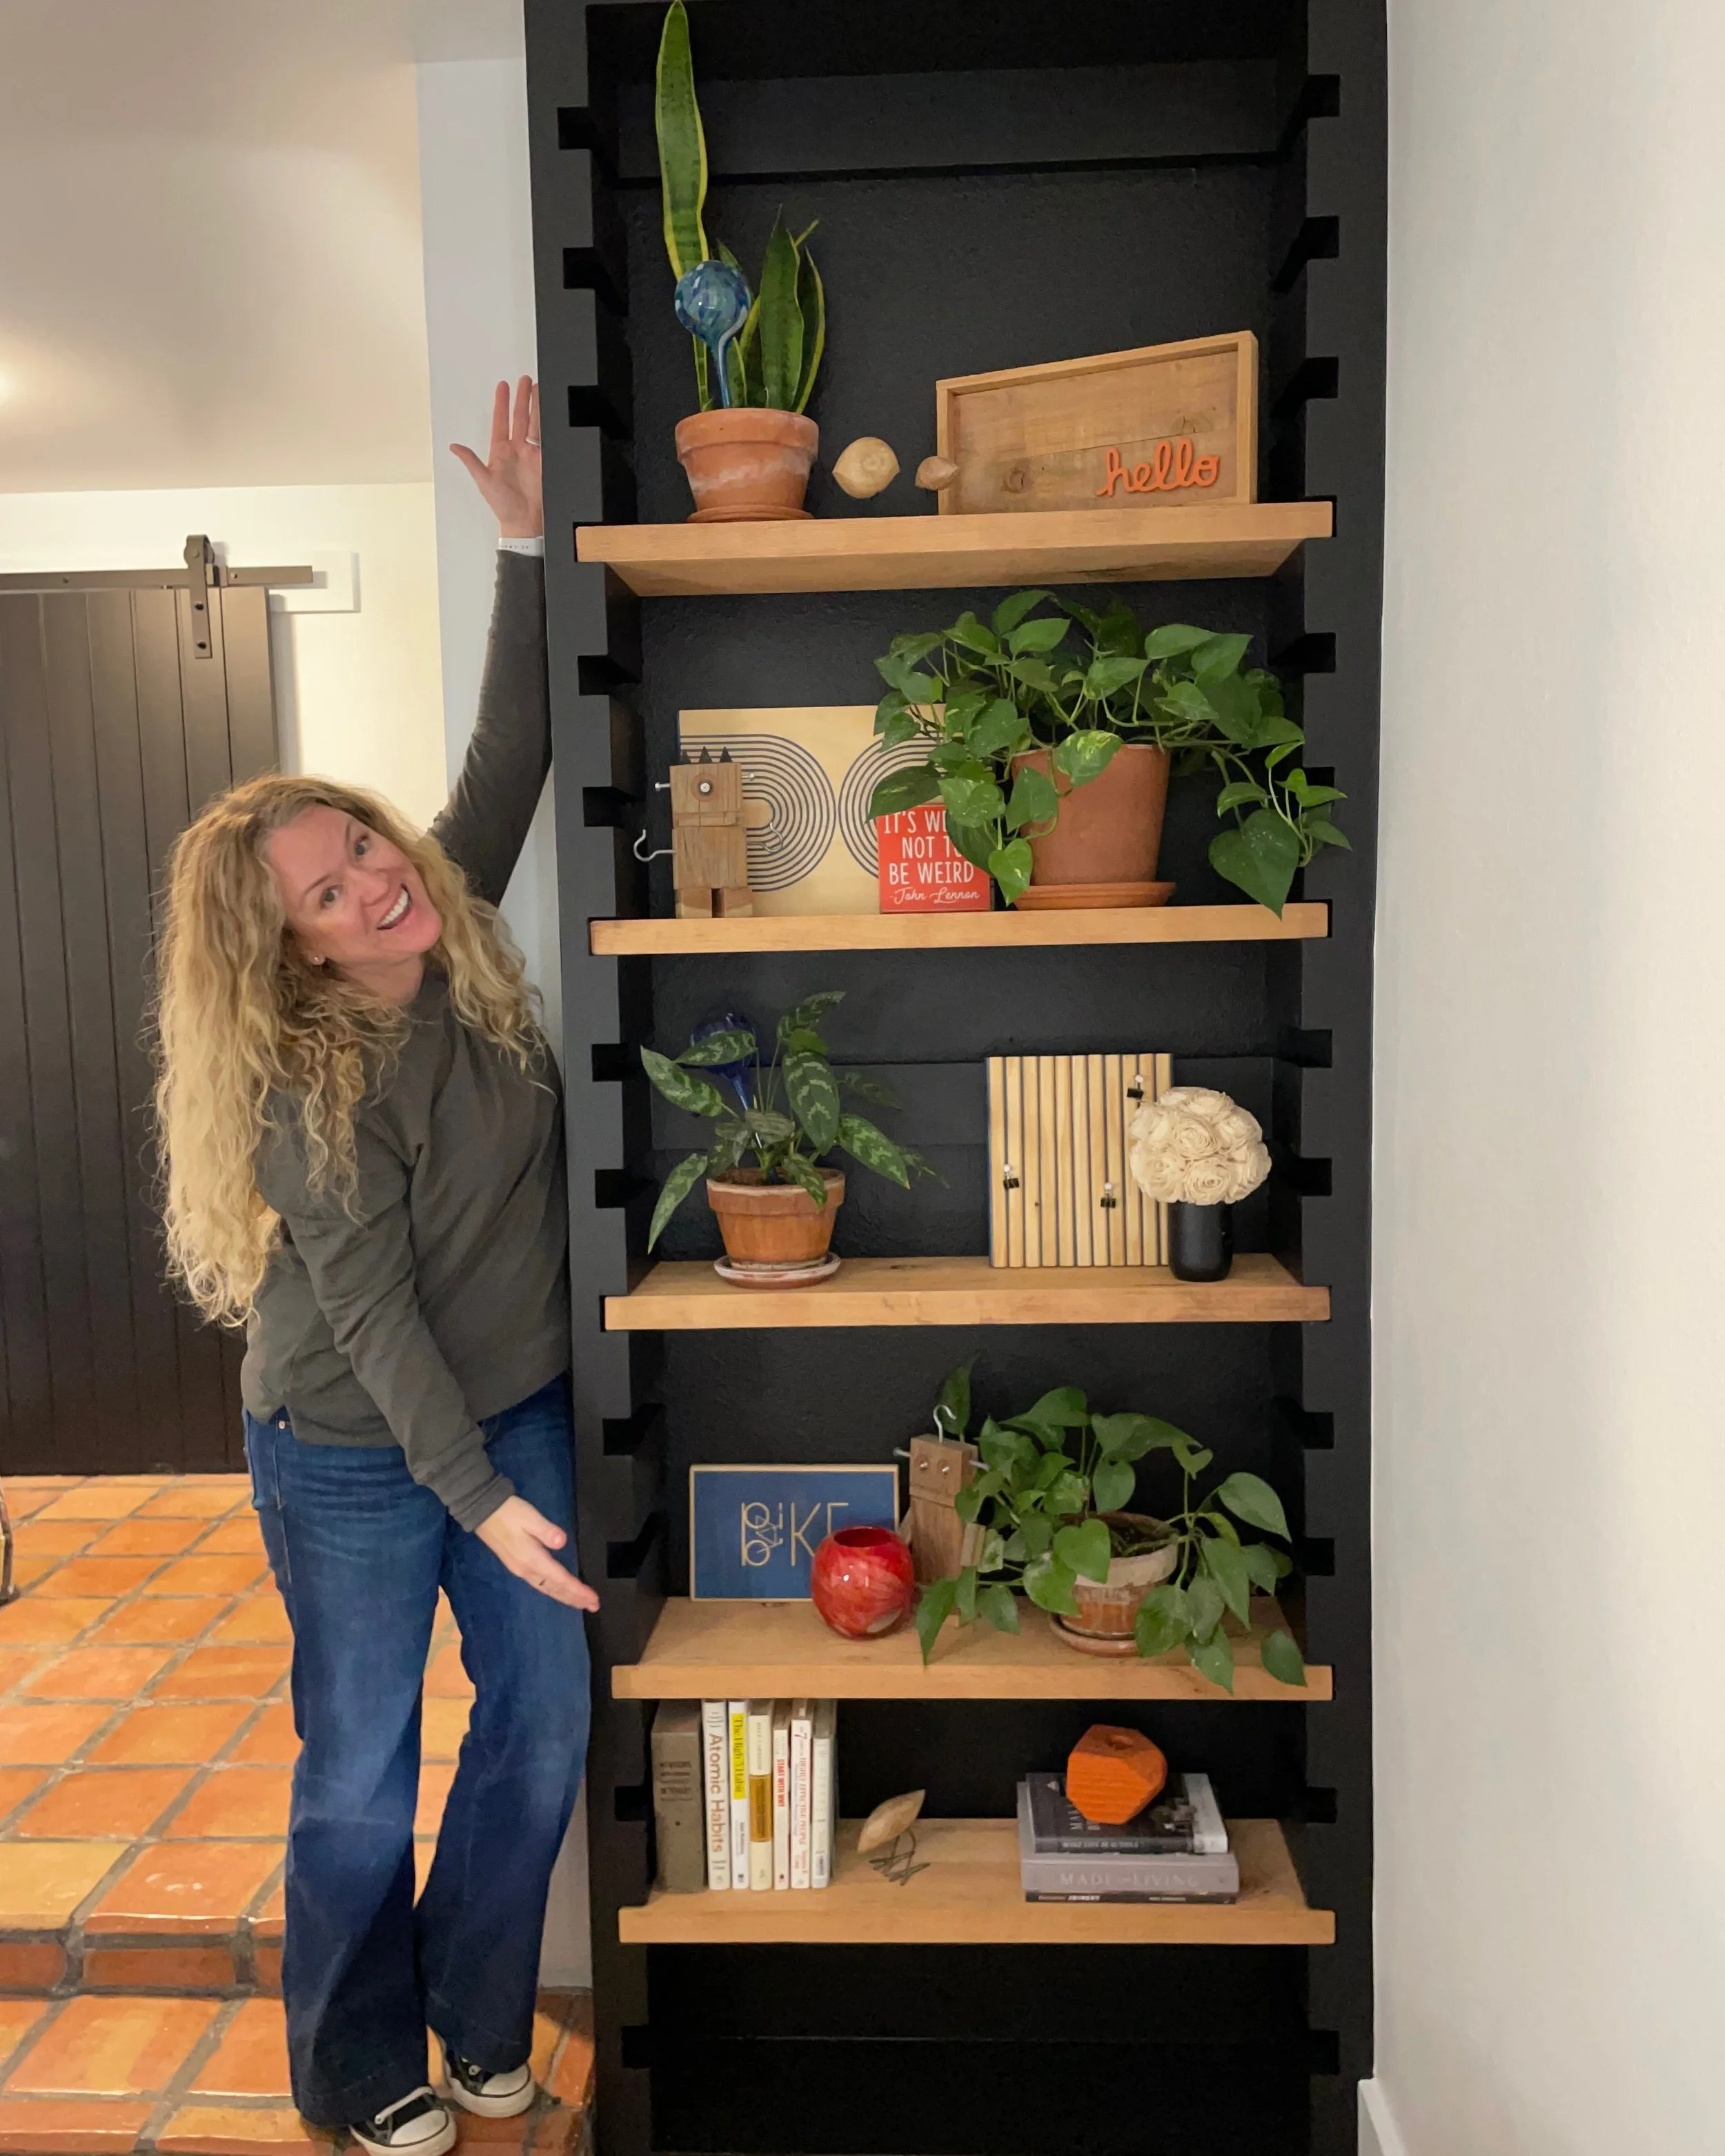
DIY Thick Adjustable Shelves - No Fancy Hardware
I live in a 1970’s ranch style house that has a sunken living room and it has been a challenge to figure out the layout. Once I figured out where to put the couch and TV that didn’t interfere with the window or walkways, I was left with an awkward and narrow corner. This corner backs up to my entryway that has this old metal railing. So many challenges…
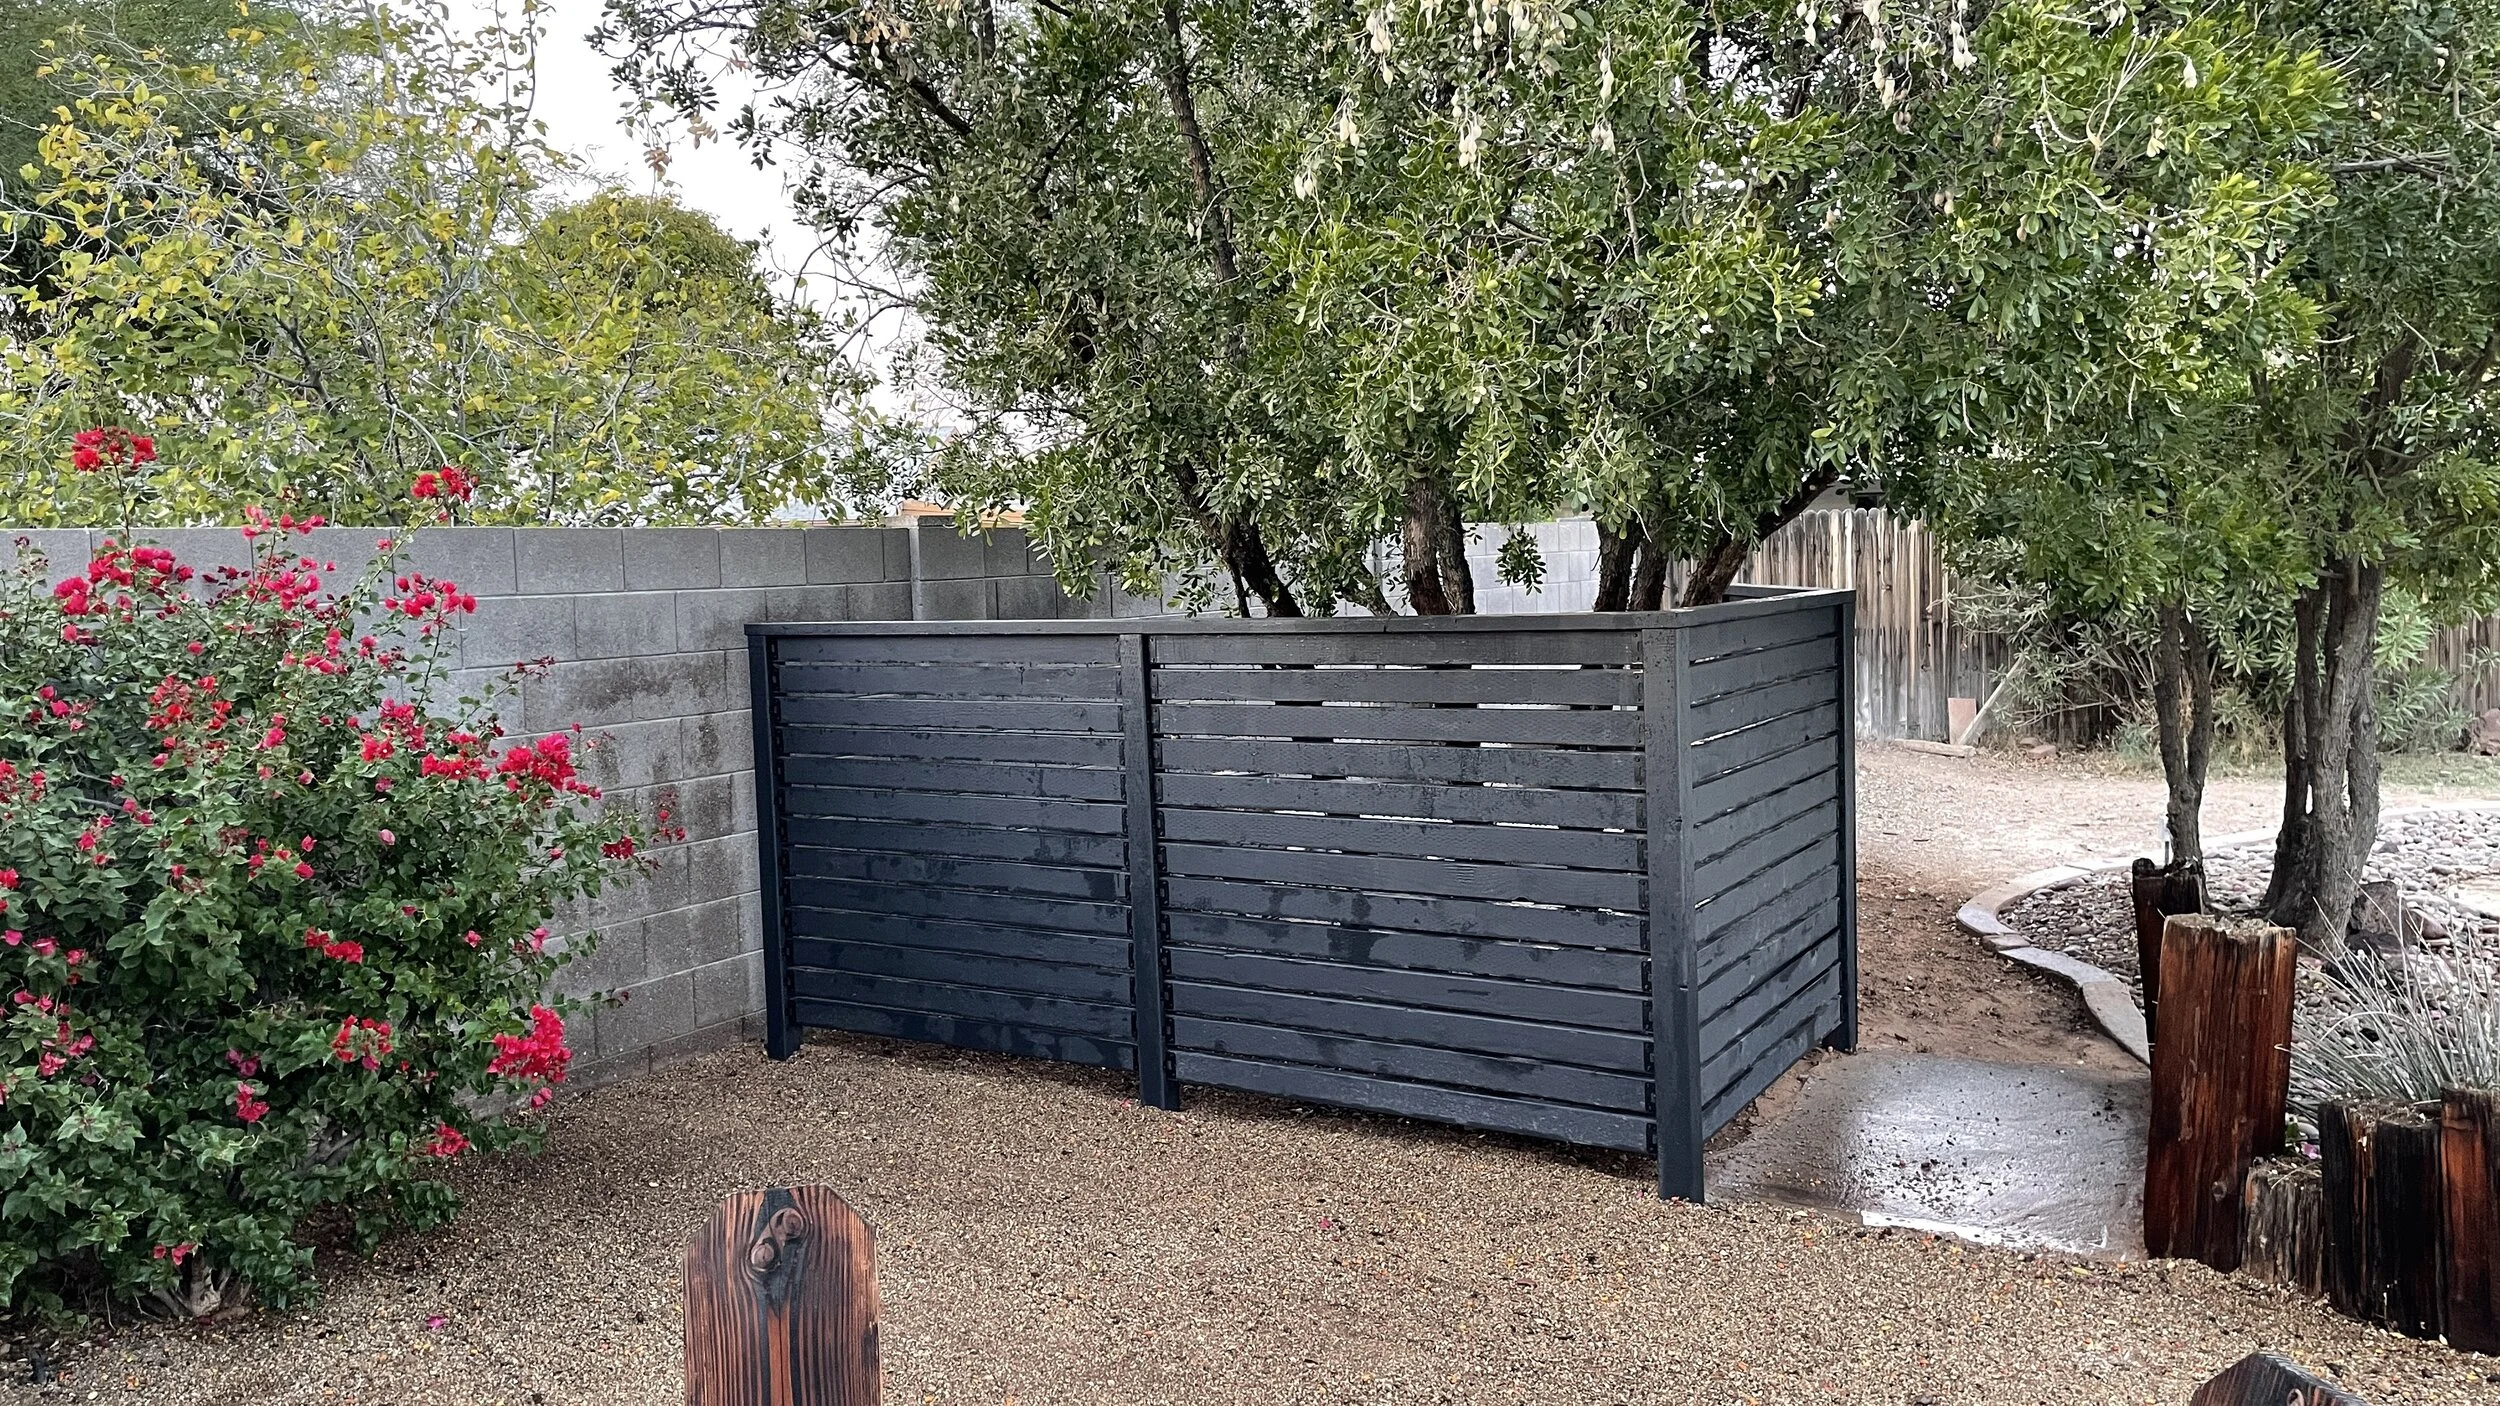
DIY Privacy Fence
Pools are really AWESOME to have in Arizona. But the pool equipment, while it is necessary for a clean pool, it isn’t the prettiest thing to look at. So I decided to hide mine with a DIY Modern Privacy Fence. This fence not only hides the ugly pool equipment, but it also adds some fun character to my backyard. Let me show you how I made it.

Building A Carved Console
Building a nice solid wood piece of furniture is nice, but adding to texture to it really brings it to life and gives it character. And I have been wanting to try a dramatic deep carve on a piece for a while and this was the perfect opportunity.

DIY Outdoor Lounge Chairs
I recently built a floating deck that turned out AWESOME, but it didn’t have anywhere to sit. So, I designed a super simple and AWESOME set of loungers that you can easily make in 1 day.
All you need is some 2x4’s, 2x6’s, hinges, wood glue and outdoor rated wood screws. Oh and a saw and a drill! This is truly a beginner project. Let me show you how to build them.

We Make Sawdust Challenge - Round 3
Saburrtooth and I are back for Round 3 of the We Make Sawdust Challenge!

Building A Floating Deck with Composite Decking
For any large project like this you always have to start with a plan. Simpson Strong-Tie has some AWESOME deck designer software on there website that I have used when I built my first deck. It helps with knowing how many footers you need, what hardware to use and can give you plans to submit for permit approval if it is needed. You can check it out here.

Rebuilding The First Dining Table I Ever Built
But when I attached the table to the base I was at a loss. So I came up with the idea of using wood cleats. These cleats attached to the apron and then to the tabletop using wood screws… no oversized holes and washer and no hardware that allowed the wood to expand and contract… so 7 years later my table was wavy!

DIY Power Carved Pendant Light
Okay, okay, okay… with that being said I have a corner in my living room that would look great with more plants in it. So when I heard of these light bulbs you can get that simulate the same rays of the sun…. I knew I needed them!
I don’t currently have a light fixture in this corner, so I thought it would be fun to build a pendant light that I can plug-in because I do have an outlet nearby. So that is where this build starts!

DIY Modern Counter Height Chairs
Today I am sharing how I made some AWESOME counter height chairs or bar stools! These are for a client and match a dining room table and benches I made for her. I can’t wait to see the complete set altogether.
This design is a simple way to make chairs… the joinery is mostly butt joints and with countersunk screws! So this is a great project if this is your first time making chairs… or stools… not sure what to call them!
DIY Adjustable Shelf Built-In Bookcase
So, I came up with a design for a built-in bookcase or bookshelf that the shelves were adjustable. That way as my plants grow or decor changes the shelves can change with it. Plus, the bookshelf is made from just 2x10’s and wood screws so it is a build that anybody can do!

We Make Sawdust Challenge - Round 2
Saburrtooth and I are back for Round 2 of the We Make Sawdust Challenge!

Mid-Century Modern Pill Shaped Coffee Table
Okay, this just might be my favorite build to date. It was a build that didn’t start with much of a plan and transitioned into something AWESOME!
I recently built myself a IKEA hack floating media console using some reclaimed white oak and since this coffee table is going in the same room I decided to make it out of the same material. So, that is where it started. My house has a little mid-century vibe to it and currently a lot of straight lines. I wanted to change that so I decided to make this table pill shaped!

DIY Concrete Coffee Table
I’m so excited to share this build with you. I have always wanted a concrete coffee table, but lifting all those heavy bags and creating a form and waiting for it to cure was just a little to daunting for me. So when I found this concrete feather finish I knew I wanted to give it a try.

DIY Vertical Address Sign | House Numbers Sign
I couldn’t put the old ugly numbers on my freshly painted house so I decided to get some new ones. These are the ones I used…. Modern Black House Numbers QT Home Decor. But when they arrived I couldn’t find a spot in the wood part of my house that I liked them, so I decided I would build a backer to put the numbers on so that I wouldn’t have to drill a ton of holes in my block wall.

DIY Cooler Deck Box With Cutting Board
Who is ready for a pool party or spending more time in the backyard with friends and family? I know I am! And this week I am sharing the perfect build that will be the life of the party all centered around the drink cooler! Yup, I am building a DIY Cooler Deck Box. It is not only going to look AWESOME and give you an elevated place to keep your drinks cold and hidden, but it also has a cutting board! You know for those snacks or to cut up some limes for your favorite summer beverage. So let’s get started building!

DIY Beaded Floating Console - Ivar Ikea Hack
I sure do love a good Ikea hack and boy do I have an AWESOME one for you today!
You see I had this long wall in my family room that had my Bubbly Bar Cabinet on it and nothing else. I had thought of putting a built-in bench and seating next to it because we have a pool table in that room, but ultimately we need more storage in our house. So, I said goodbye to the Bubbly Bar Cabinet and set out to make something more AWESOME!

DIY Outdoor Bench with Back
It’s that time of year again where I start thinking of all outdoors projects! You see spring is my favorite time of year and I like to spend as much time outside, so having that right bench to hang out on is very important. The bench not only has to look good, but be comfortable and durable to with stand the AZ sun and monsoon season. Well, I teamed up with my friends over at Simpson Strong-Tie and I think I came up with the perfect bench that is easy on the eyes, easy to build, comfortable and is gonna last a long time no matter where you live.

DIY Modern Floating Nightstands featuring Kreg's New 720PRo
And I knew exactly what build I wanted to test it out on… some new floating nightstands. I have had this design on my list for forever and was so excited at the opportunity to bring it to life. I love this design because #1 it is floating… meaning I can actually easily clean up all of Oscar’s dog hair that will definitely find its way underneath it. But I also love this design because the shelf is open to the side of the bed, meaning that you have easy access to your stuff without having to let it clutter up the top of the piece. Oh and lastly it is AWESOME because it has a drawer to hide everything else!!!