Does your kitchen feel a little outdated and in need a refresh? Well, I have 5 Easy DIY’s to Transform Your Kitchen… starting today!

All in DIY Tutorials
Does your kitchen feel a little outdated and in need a refresh? Well, I have 5 Easy DIY’s to Transform Your Kitchen… starting today!
If you follow me on Instagram, you know that I have been in the process of completely transforming a closet in my master bedroom into a built-in closet and office combo. Full details and reveal on that coming soon. Well as part of the makeover I needed a place to hide my printer and my files. I don’t have that many files, so I decided to make a rolling filing printer cabinet. But not just any cabinet, I wanted this one to kinda be hidden… after-all this is in my bedroom and I don’t always want it looking like an office.
Once I found a design I liked I went ahead and laid out a rough sketch of it on the board. The board is made up of glued up pieces of about 2” wide boards, so I decided to use those seams as a natural break in my design. And for the holes I was going to use three (3) different sized forstner bits (1 3/8”, 1” and 1/2”). So as I decided where I wanted them I put a B = Big, M = Medium, and S = Small. That way I would be confused once I got to the cutting process.
I used to be a seasonal plant lady… you know, my plants only lasted a season. But recently I am getting the hang of keeping some plants alive! And when they grow big you need to repot them in bigger pots… who knew. Also, I want to try my hand at propagating some of plants to save money on always buying new ones. And that can get messy, so I decided to build myself a potting bench. A spot dedicated to all my planting tools and it can live outside so any mess won’t matter.
Howdy guys… today I have a really special build to share. I built Awesome Oscar, my fur baby, a dog house! And not just any dog house… an AWESOME, Modern , Scandinavian inspired and slatted dog house! Oh and I teamed up with my good friends over at Simpson Strong-Tie to ensure that his house was built right, sturdy and would last a long long time! Wanna know how I made it? Well, let’s get started!
I have been itching to try and make some abstract art similar to what I have seen Fromaseed make. He is an AWESOME turner, power carver and artist. If you haven’t seen his work you should definitely check it out. Well, when Diablo sent me out some of there new saw blades to try, one being the Rough In/Scrolling Carbide Reciprocating Saw Blade I knew this would be a great time to try my hand at some abstract art, because I don’t have a band saw this blade should help me cut some curves and radius’ using my reciprocating saw… yup you heard that right!
Got scraps? Need gift ideas? Like DIY? Well I have another AWESOME project that will cover all those bases. For this one I teamed up with my friends at Bernzomatic to help me bring the fire and the fire is what truly make these planters AWESOME!
I went thru so many different version of what type of bed I wanted… farmhouse, modern, platform… there are so many awesome options out there. But how I came up with this version started with a recent build, my DIY Textured Storage Bench. I love how it came out and currently have it in my bedroom, so I wanted something that would coordinate with that. It has a bubble hammered texture to it and I thought that would look great on the headboard, so I started my design there.
And I didn’t want just any old barn door, I wanted something special for this door… after all it was the entrance to the Master Suite… and it had big shoes to fill by replacing the pirate flag. I joke, I kid… haha. But in all seriousness I wanted something AWESOME here and I wanted to try a woodworking technique that I hadn’t done before… tongue & groove joinery! But I also wanted this build to be approachable, so I made it from 2x6 fir boards you can get at any big box store.
When I was first starting making I was so curious about how things went together, especially barn doors. I would see all these pretty pictures of barn doors on Instagram, but people would never show the backs. So I always wondered were they just gluing boards together, was there actual joinery in there, what does the back look like, what is this made out of, etc? And now that I have been doing it, woodworking, for a while I can let you know that the answer to the questions…. and the answers are yes, yes, flat and decorated, wood plywood and mdf! So needless to say, there is not one right way or wrong way to build at barn door… at least in my opinion.
This month’s challenge is an UPCYCLE challenge. An upcycle is basically recycling a piece and giving it new life or using it and adding on or taking away from it to give it a new purpose. I used to do a lot of these when I was first starting out. It is a lot of fun to head to a garage sale or thrift store find something that doesn’t look so good and make it AWESOME again. Here are a few pics of some of my favorite past upcycles.
Recently I completely renovated my entryway. See before and afters here. Plus, see how I added a transom window above the door here. But one thing that still wasn’t quite right was my mailbox. It was an old worn metal mailbox that had a fleur de lis on it that wasn’t matching my more modern style and it totally blended in with the new black paint. So it was time for an upgrade. And with this upgrade I wanted to try a new-to-me woodworking joint… finger joints or box joints! So let’s get started.
The world is kinda crazy right now and life as we know it has seen some changes… from social distancing to toilet paper shortages to a lot of people getting sick. And those of us who don’t have an essential job (Thank you 1000% to those who do!) we might be going a little stir crazy. So I teamed up with my friends over at Bernzomatic to create a #STAYHOMESCRAPPROJECT with the hopes of inspiring you to use what you got and make something AWESOME.
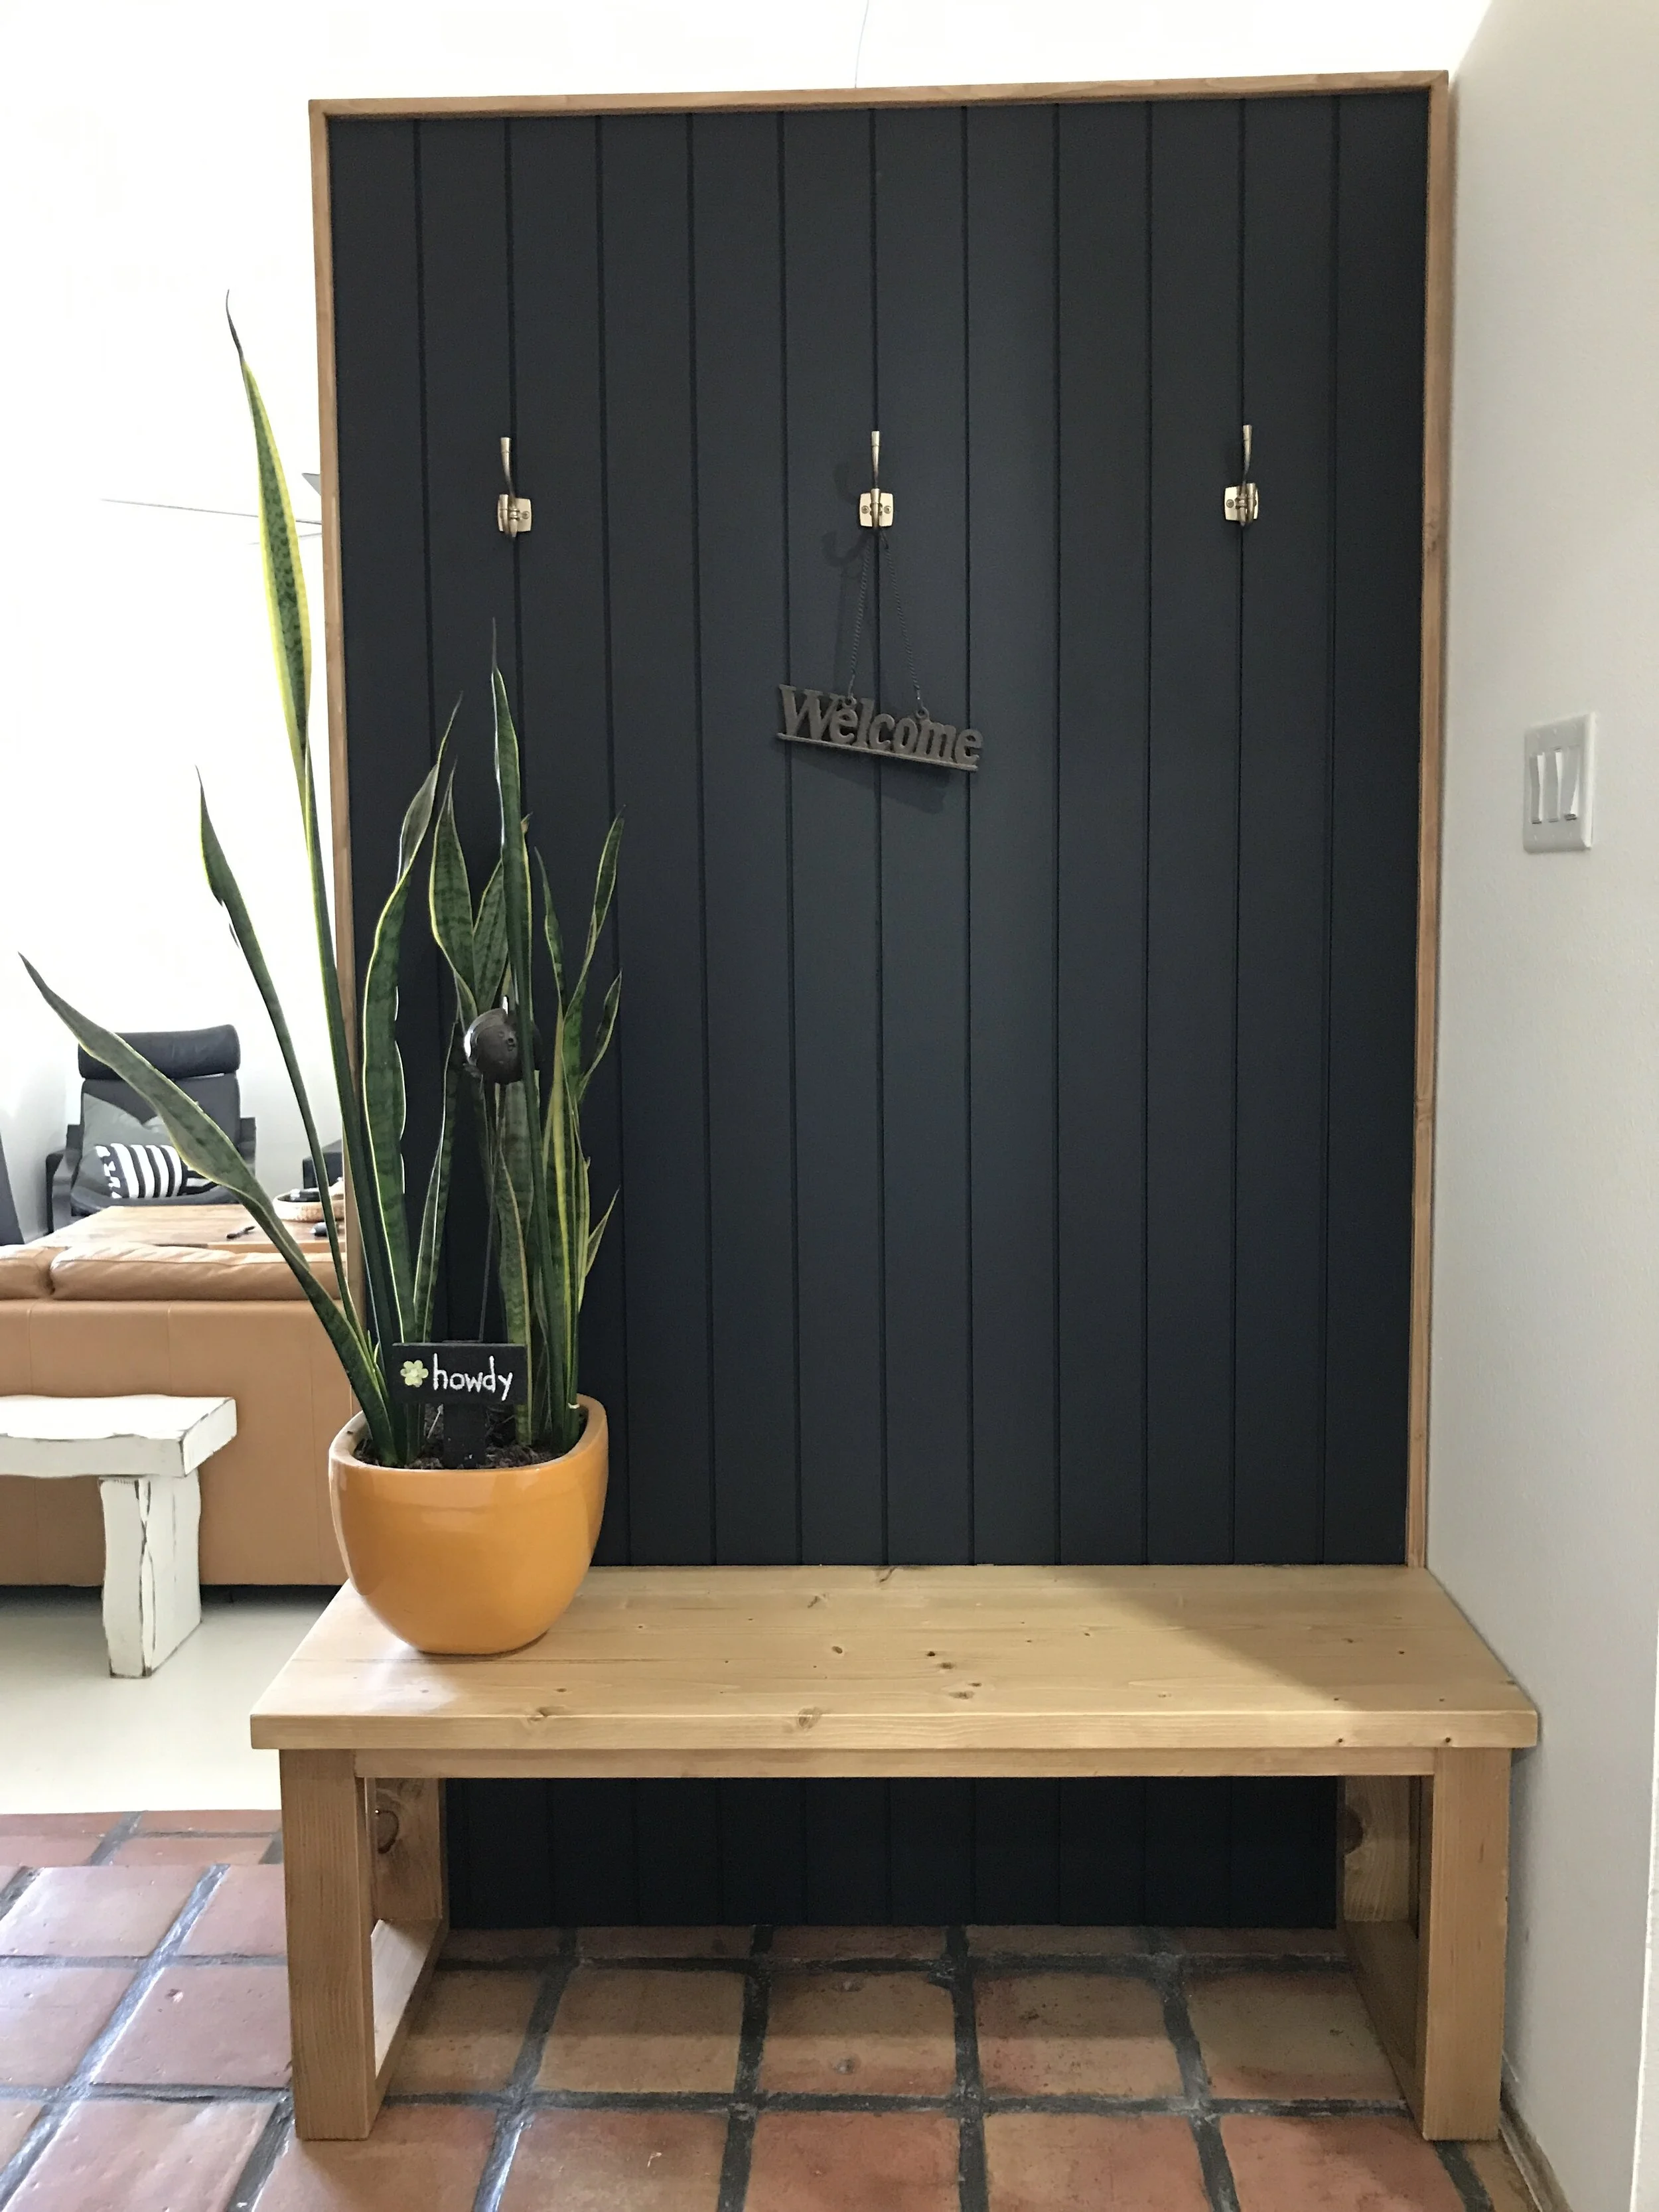
This build is inspired by my most popular build to date… the “OG” Shiplap Hall Tree Bench. In my humble opinion it is an awesome design, but it is more on the farmhouse side. And since like me and a lot of others style is leaning more on the modern side these days I thought it would be fun to design a modern version. Hence the “Modern” Shiplap Hall Tree Bench… think black paint, vertical shiplap, light wood and AWESOME!
I have been doing a lot of power carving lately, mostly adding texture to some of the pieces I create. But today I am going to switch it up. You see, I have always wanted a bread bowl so I am going to show you how I completely carved a bread bowl… no lathe required, no special skills! Just a few of my Saburrtooth burrs!
When a client came to me and asked if I could help build her some privacy screens I knew this would be a great opportunity to partner with my friends at Simpson Strong-Tie and showcase how easy it is to build a fence frame using some of their brackets.
This month my blogger friends and I decided to do a Wall Art Challenge, so I teamed up with my good friends from Bernzomatic to create an AWESOME DIY Tiki Wall Art creation. If you’ve been following along recently you know that I have a couple of new loves… power carving and Shou Sugi Ban and those loves are how I came up with the Tiki idea. I also thought Shou Sugi Ban would be the perfect finish on a power carved piece of wood to really highlight the textures and grain. So let me show you how I did it.
One of my favorite builds in 2019 was my Bubbly Bar Cabinet. It is not only functional, but it looks super awesome and was my introduction into power carving. Ever since that build I knew I wanted to do more of it, so I teamed up with Saburrtooth Powering Carving Tools to create another AWESOME piece. And this time I knew I wanted to add texture to the whole piece. And what better piece to start with than a bench, a storage bench, because everybody could use a bench and a storage bench is even better! So let me start with showing you how I created the bench.
If you are anything like me you struggle with keeping things organized! Well today I am going to share how I organized my growing router bit collection. And it is a simple solution that will work for 1-16 bits, it is mobile and could be easily modified to fit with your space!
Who doesn’t love sitting around a campfire!?! I know I sure do and that is the reason I wanted to build these. But I also didn’t want to spend a ton of money on materials to make them because outdoor furniture can take a beating in the Arizona heat. So I decide to challenge myself to make them each with one (1) board… one 2x12 construction grade board. That along the hardware brought each chair to a cost of $22. Can’t beat that, so let me show you how I did it.