How to Make Modern Shiplap Shutters
Updating Our Ranch Style Fixer Upper
This post is NOT sponsored. This post contains affiliate links.
When we bought our house a little over 2 years ago the exterior needed some much needed updating. It is a slump block house, which is awesome, but the trim is like a reddish orange color with a cream color around the windows and the block on the back of the house. Eek!

As you can see in the picture there is a lot of potential! The fence we actually installed right after we moved in. Hubby wanted them farther out on the yard and wider to get stuff in the back yard. I absolutely love that I went with the horizontal lines on the fence rather than the typical vertical fencing. But we had lots of other stuff to do inside before we could get to changing anything else out side... that is until now.
I decided that I could update the shutters pretty easily and if I did that it might just get me moving faster on getting the exterior painted! So, it was time to come up with a design. And well since I absolutely love shiplap (which I have plans to put on several walls inside) and I love the horizontal lines of the fence, and I love mid-century designs that incorporate a lot of horizontal lines.... I came up with my version of Modern Shiplap Shutters! They are super easy to make.... want to know how? Follow my easy step-by-step plans below!
First I made them out of 1x5 cedar fence pickets. I choose this material because they are inexpensive and are good for outdoors projects because cedar doesn't tend to warp as much as other woods and doesn't attract bugs or rot.
As far as measuring how big to make them, I did a lot of research online and there are a ton of different ways to do it, but in the end I ended up just making the same size as the old ones. There was some overspray of old paint I wanted to make sure got covered and I was worried that the brick underneath the old ones might be slightly darker. The plans are super simple to modify to whatever size you need.
Materials:
1x5 Cedar Fence Pickets
18 Gauge Brad Nails
Titebond III Wood Glue (or one rated for exterior use)
Choice of stain or paint
Top coat for protection - I used water-based poly exterior rated
Tools:
Brad Nailer
Miter Saw
Table Saw
And that is it! So let's get started!
First I started by removing all the staples from the boards, because staples and saw aren't a good combo. Then I squared up the ends of each board to ensure later down then line everything would be square. And then I started cutting them to length. The overall width of my shutters is 24". So to get the measurement for the inside planks I just subtracted the thickness of the frame. So 24" minus 5/8" for each side = 22 3/4". I used my Kreg Precision Trak and Stop to speed up all the repeatable cuts. If you don't have one I highly recommend it. Totally time saver in the shop and improves accuracy of cuts.

Remove Staples!!!

Square Up the Boards

Cut to Length
Next I layed them out to figure out my height. The boards come at 5.5"W, so I was trying to keep all full width boards. It didn't work out perfect for my measurements, so I ripped the top and bottom ones to get my adjusted overall height. I did both the top and bottom because I didn't want one to look way smaller than the others. Once I got that height I ripped another board in half for what I am calling the bands. These are what are going to hold the horizontal planks together.

Awesome Oscar!

Table Saw

Ripped Bands

Almost ready for glue!
Now we can start glueing and brad nailing the pieces together. I recommend using some sort of straight edge when doing this to keep the boards lined up. And since these are going to be outside you need a glue that is rated for that. I used and recommend Titebond III. I clamped mine to make sure I got a good fit.
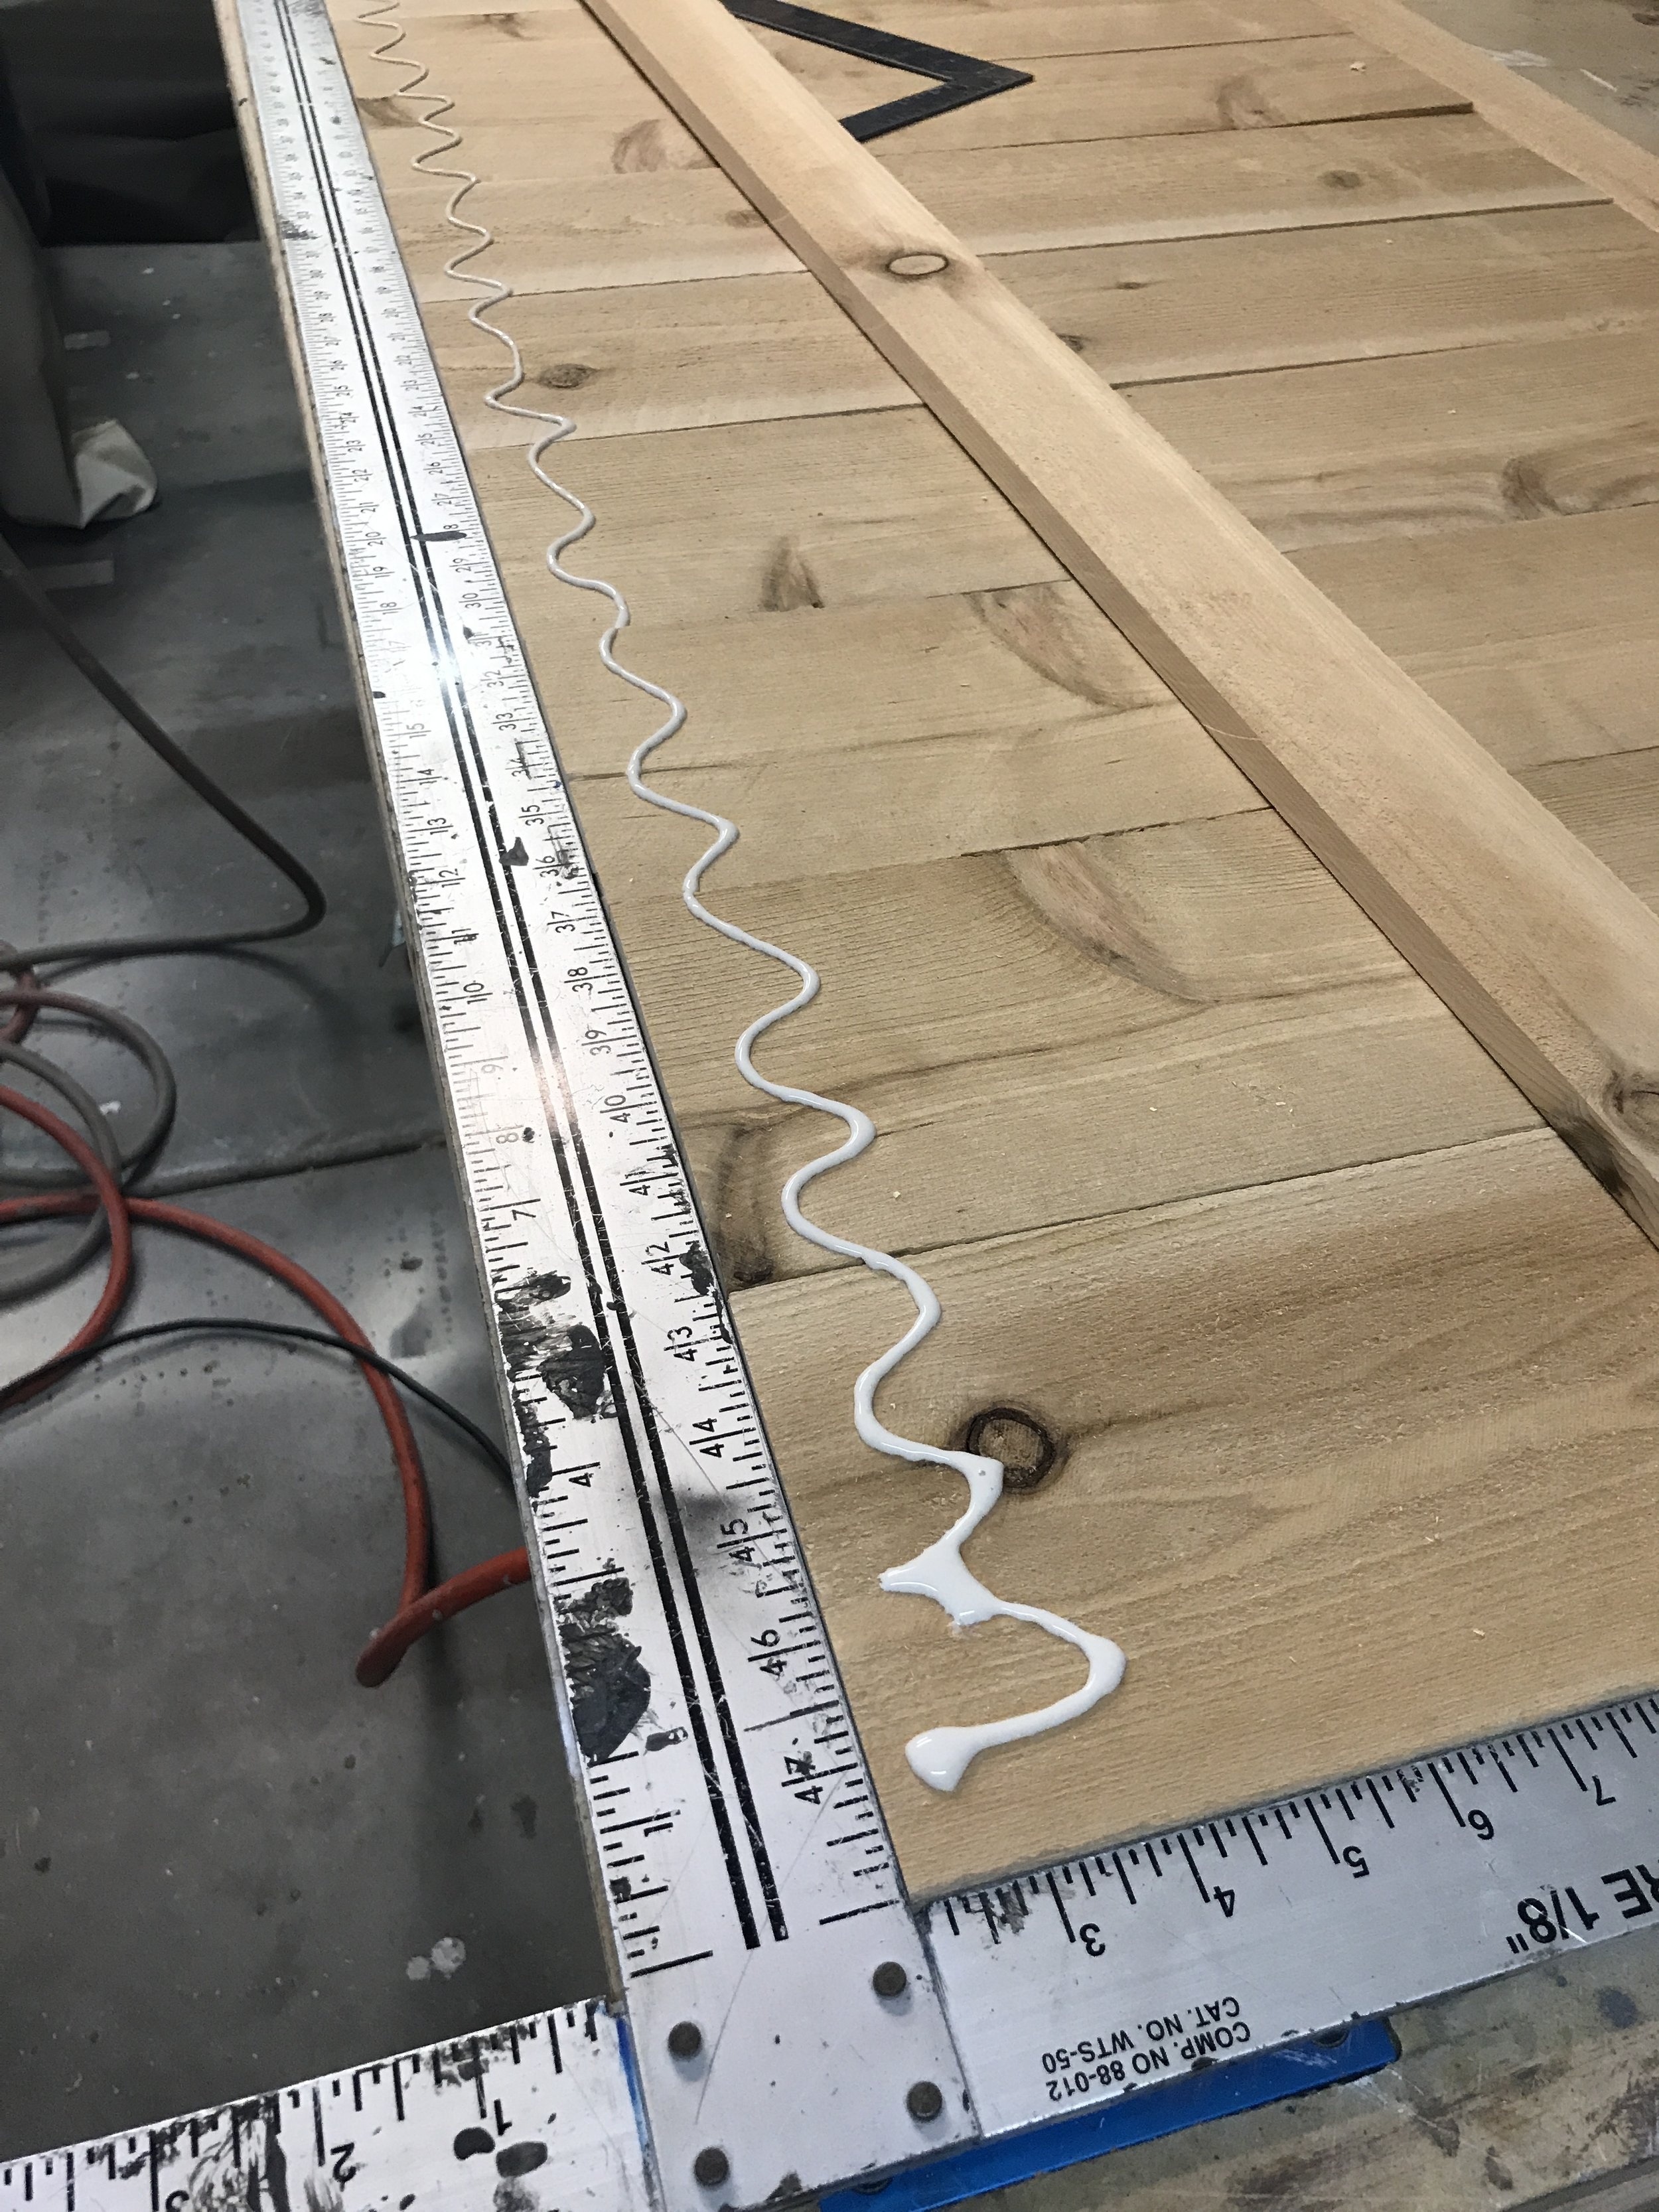
Don't forget the glue!

Brad guns are so much fun!

Rocking the Bessey clamps!
Now to frame it all out! I ripped pieces on the table saw to about 1 5/8" wide. This way it will cover the seams of the horizontal planks and the backing bands and still have a lip on the top. Add more glue and brad nail frame on. I cut my frame oversized and then trimmed the pieces as I went. I did this just in case everything wasn't perfect since I didn't mill all the wood to specific sizes.

Rip Frame to 1 5/8"

Frame Pieces

More Glue!

Trim to exact length!
And then finally sand any rough spots or edges. To be honest, I didn't sand these that much because they were going outside and I liked the texture of the wood.

Hooray! Love how they turned out!
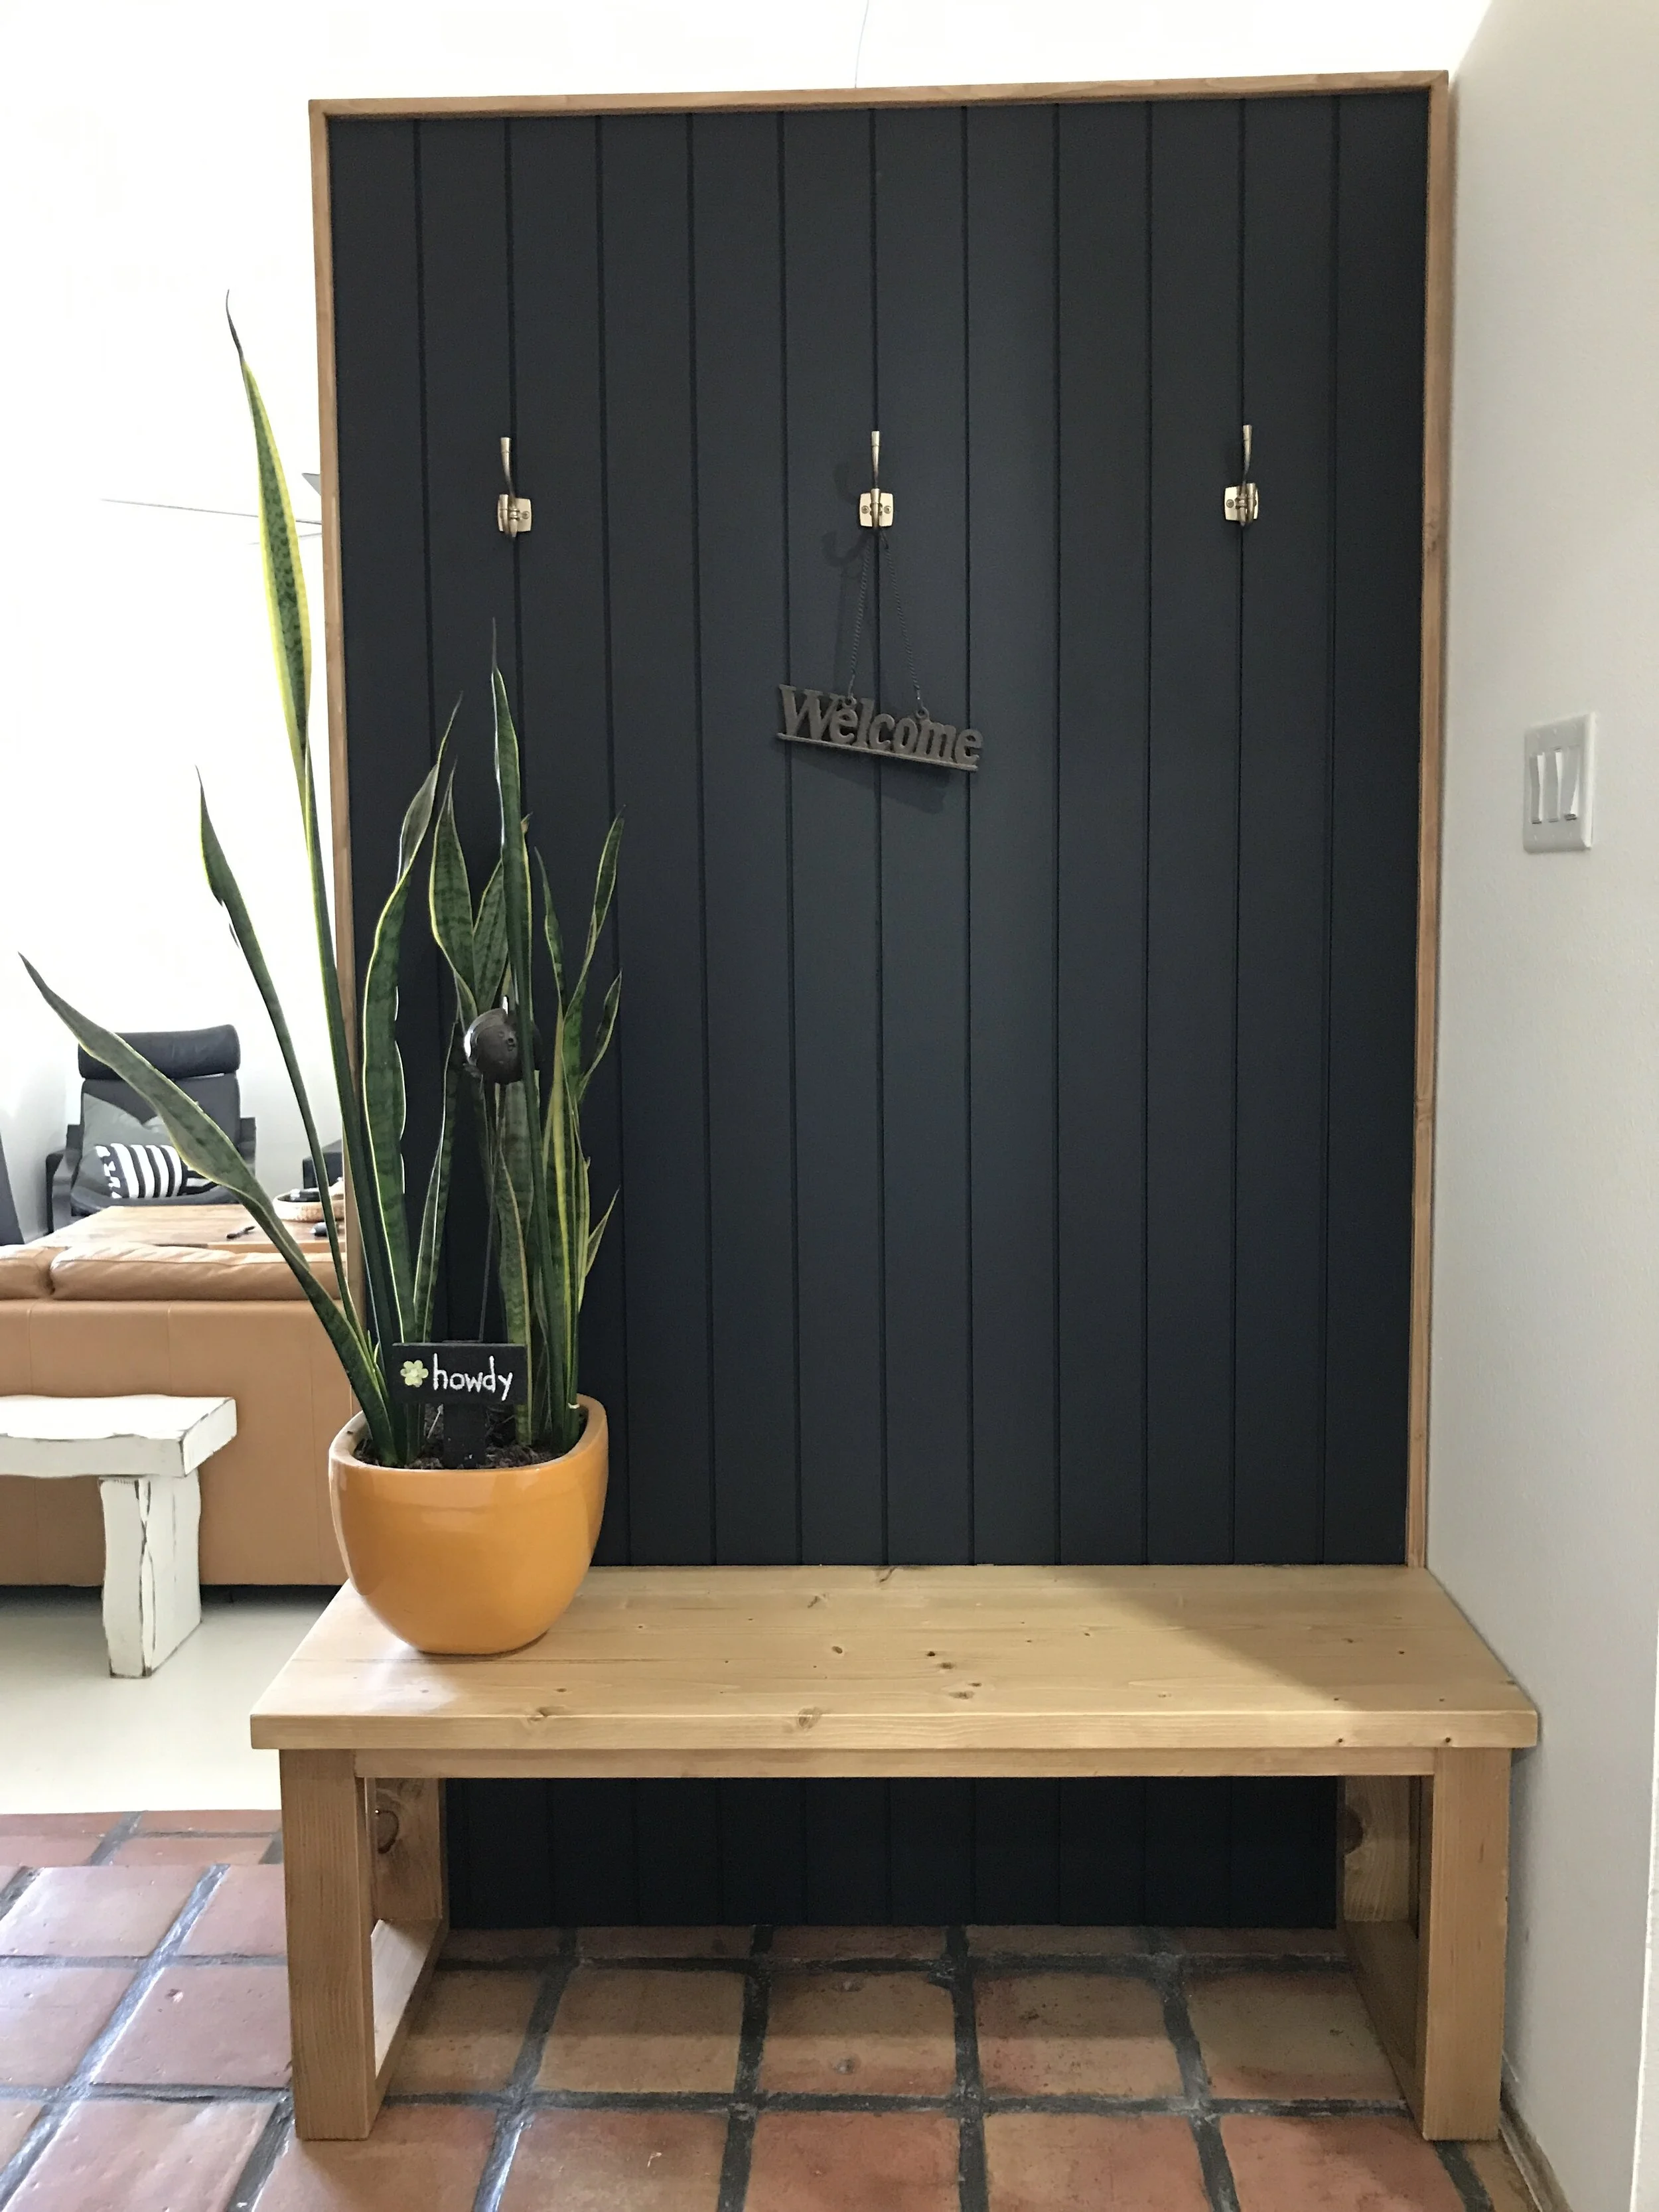
And then the fun part.... you get to decide on how to finish them. I had a tough time deciding between staining them or painting. But with the help of my Instagram family I decided to stain them Ebony!!! And absolutely love how they turned out. And with staining them, if you don't like them you can always paint over, but if you paint them first there is no going back.

So, so pretty!

Stain fronts only, but cleared both front and backs!
And then the final final part of the build was to clear coat them. Be sure to use a poly or top coat that is rated for the outdoors. If you don't they will fade quicker.
I hope this tutorial is helpful in building of your shutters. If you do end up making your own, I'd love to see them. Please tag me in your post or send me pics!!!

Before Stain

After Stain - Ebony by Minwax
And keep #BuildingAwesome
Sadie Mae
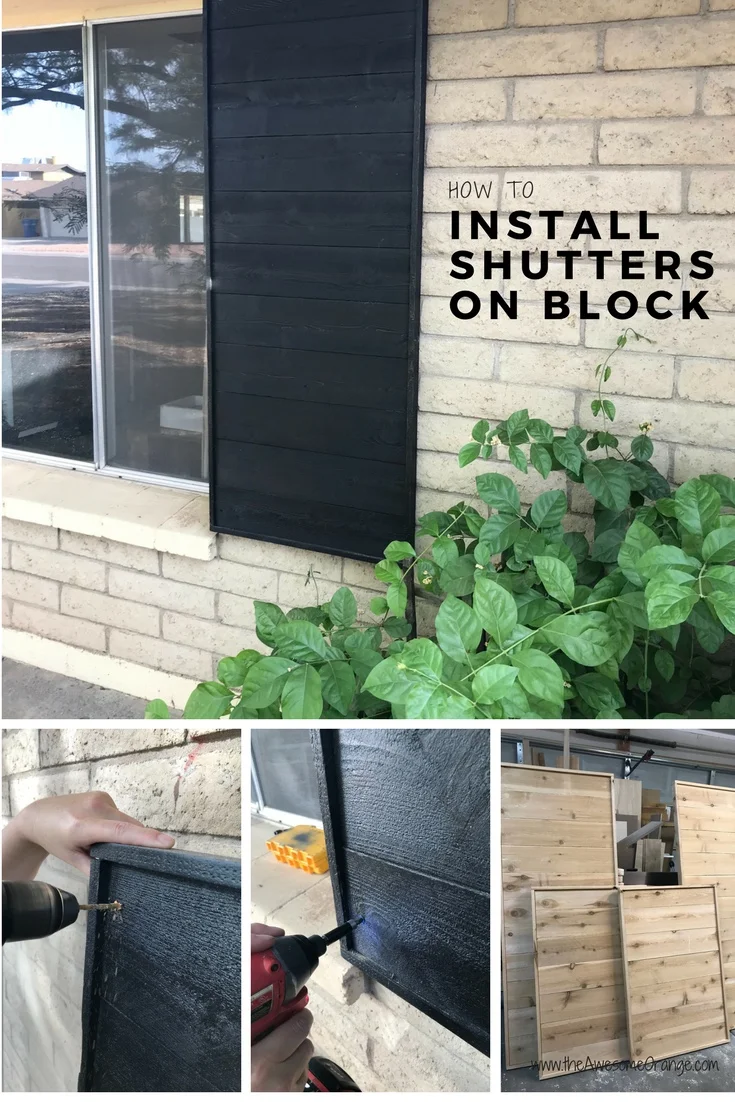
P.S. Coming next week.... I'll show you how I installed these on my block home.... How to Install Shutters on Block! But until then here is a sneak peak!

DIY Modern Shiplap Shutters
Pin It and Save For Later!