Burnt Live Edge Clock Made out of Wood and Epoxy
Most of what I make is all out of wood, occasionally I have mixed in some metal, I’ve used epoxy to fill knot holes and since becoming a Torch Bearer with Bernzomatic I have added fire to my making! So for this next project I thought I would challenge myself and see what I could make using them all! After all making and design is all about pushing ourselves to try new things or incorporate them differently in order to find our style.
This post is sponsored by Bernzomatic. All opinions are my own. This post contains affiliate links.
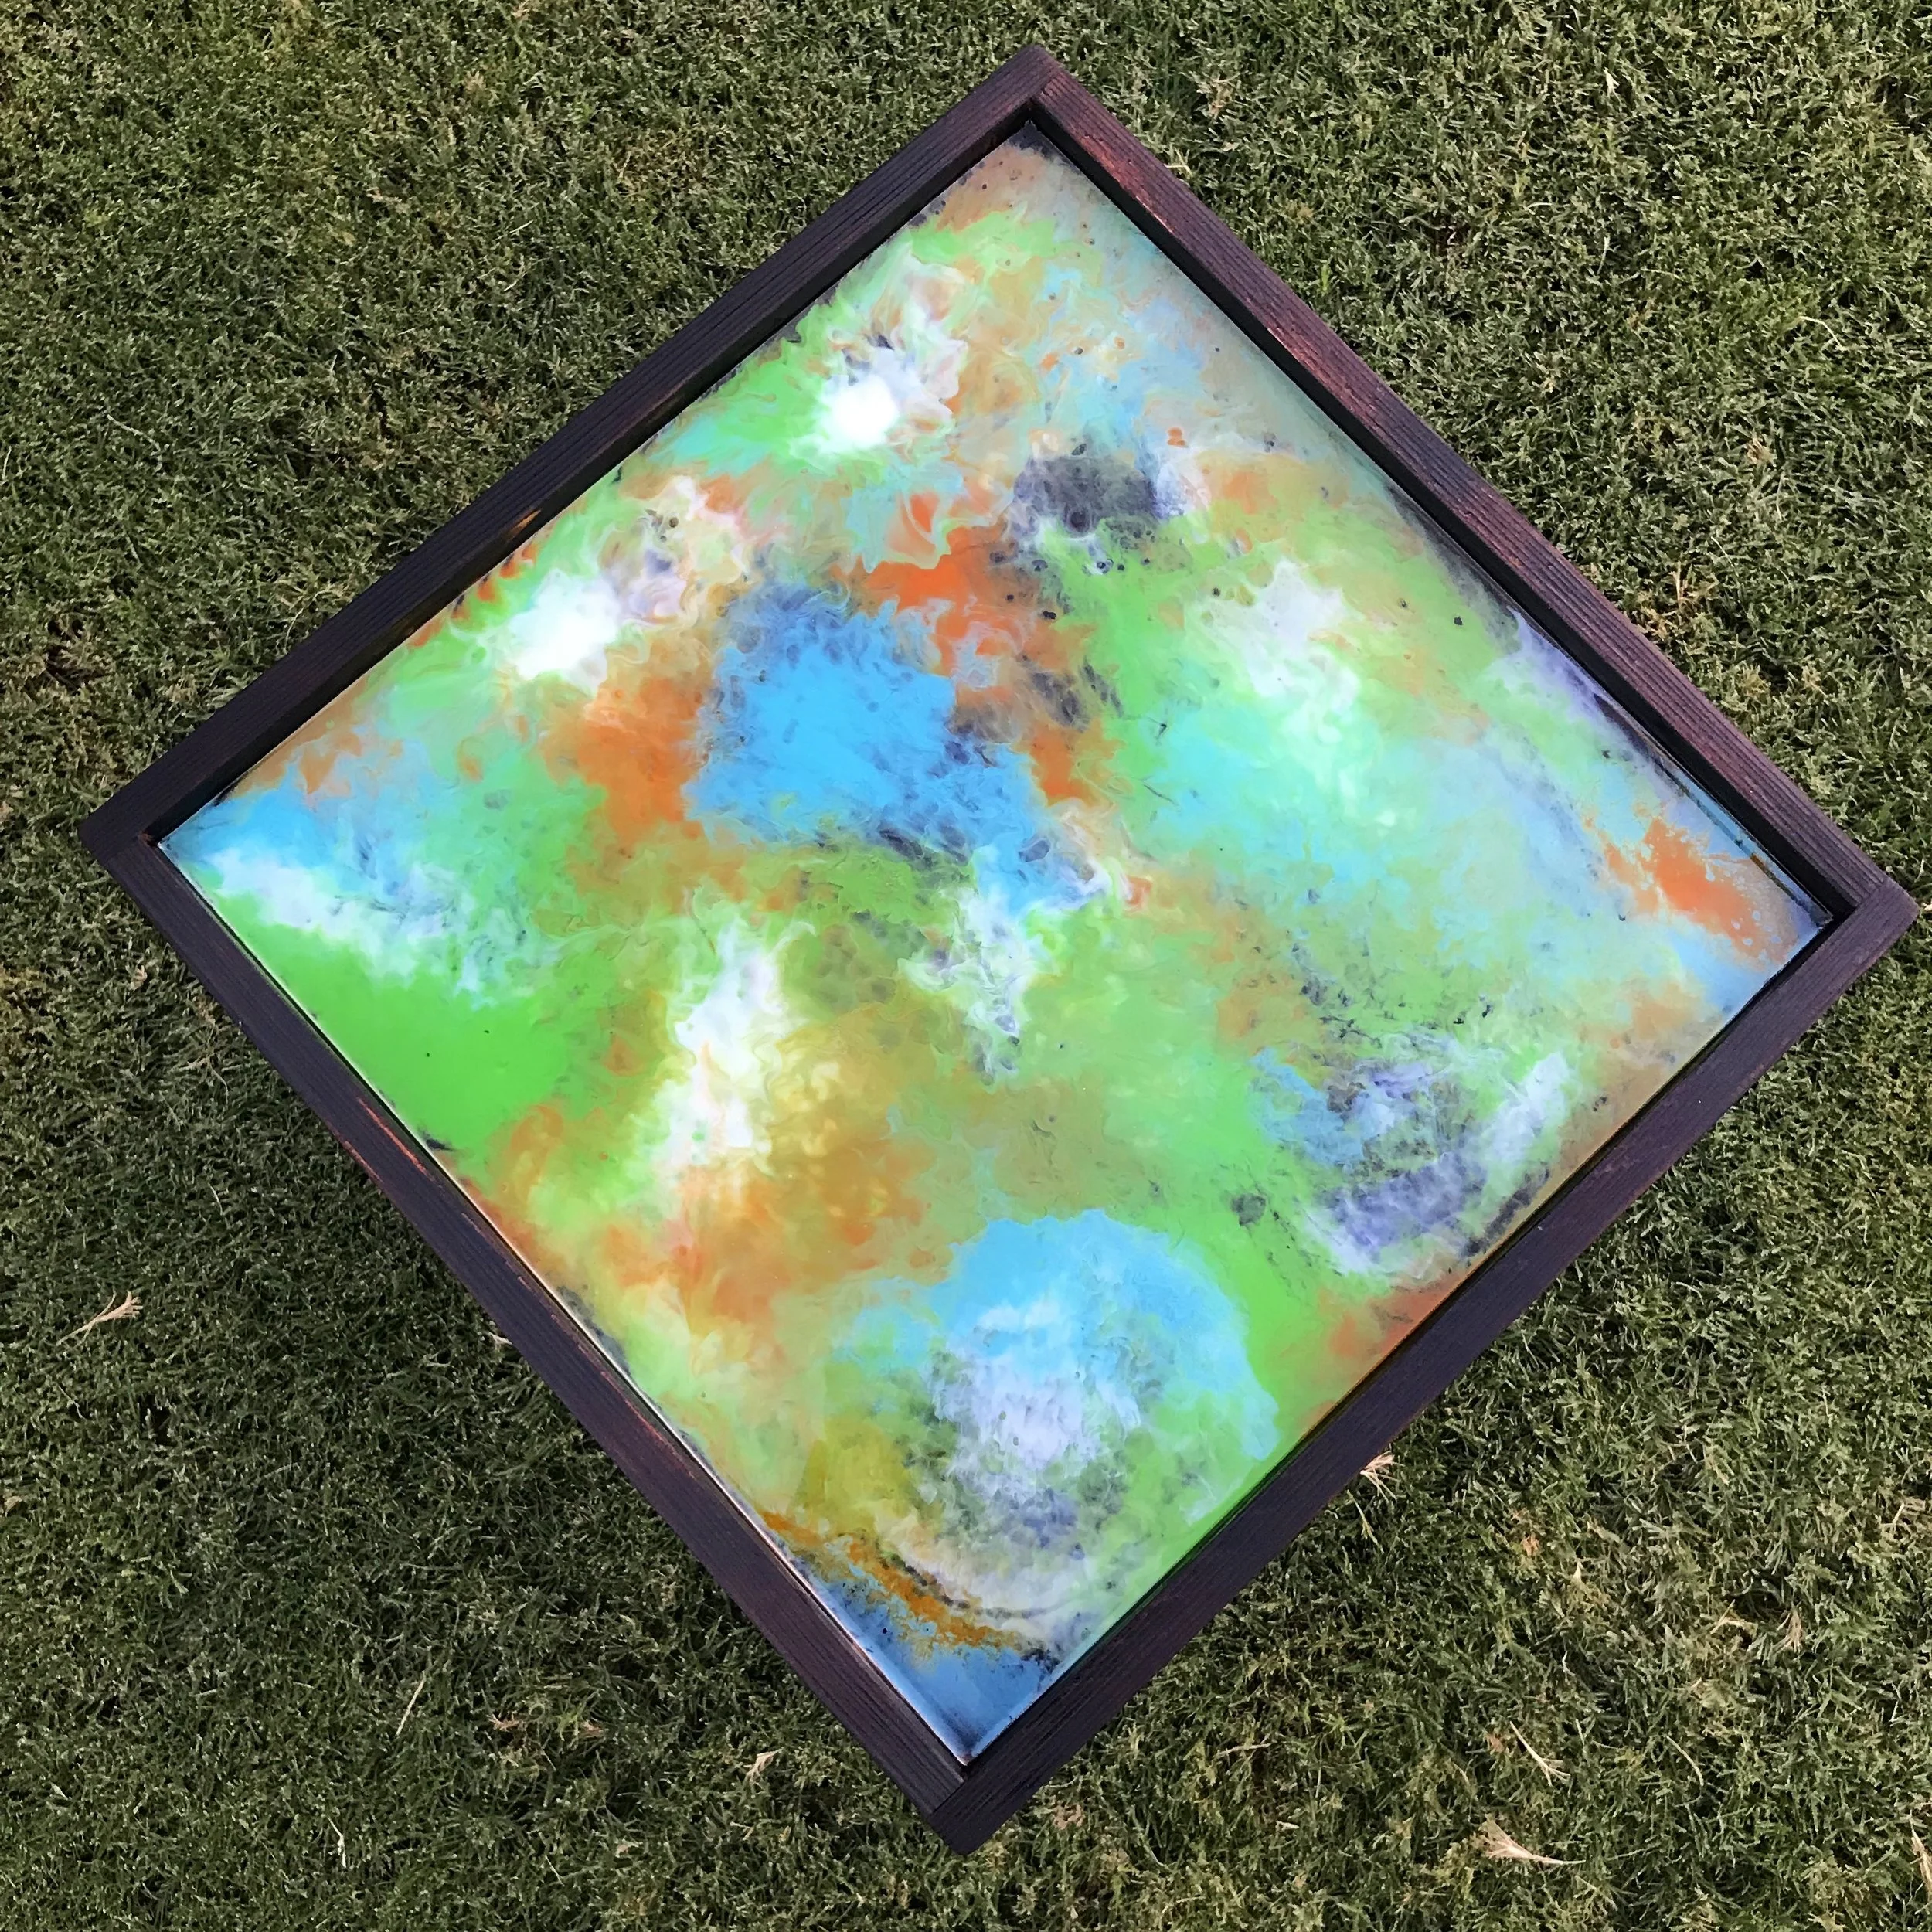
I’ve always wanted to make a clock and figured I should start small with a new design idea, so I thought this was the perfect opportunity to make a Burnt Live Edge Clock out of Wood and Epoxy…. with metal clock components. So I dug thru my scrap pile and found this twisted piece of walnut that I couldn’t bring myself to throwing away or using for firewood and decided it would be the perfect piece. I also decided that I would make my clock 12” round, but you can buy the clock components in several different sizes to fit your project.

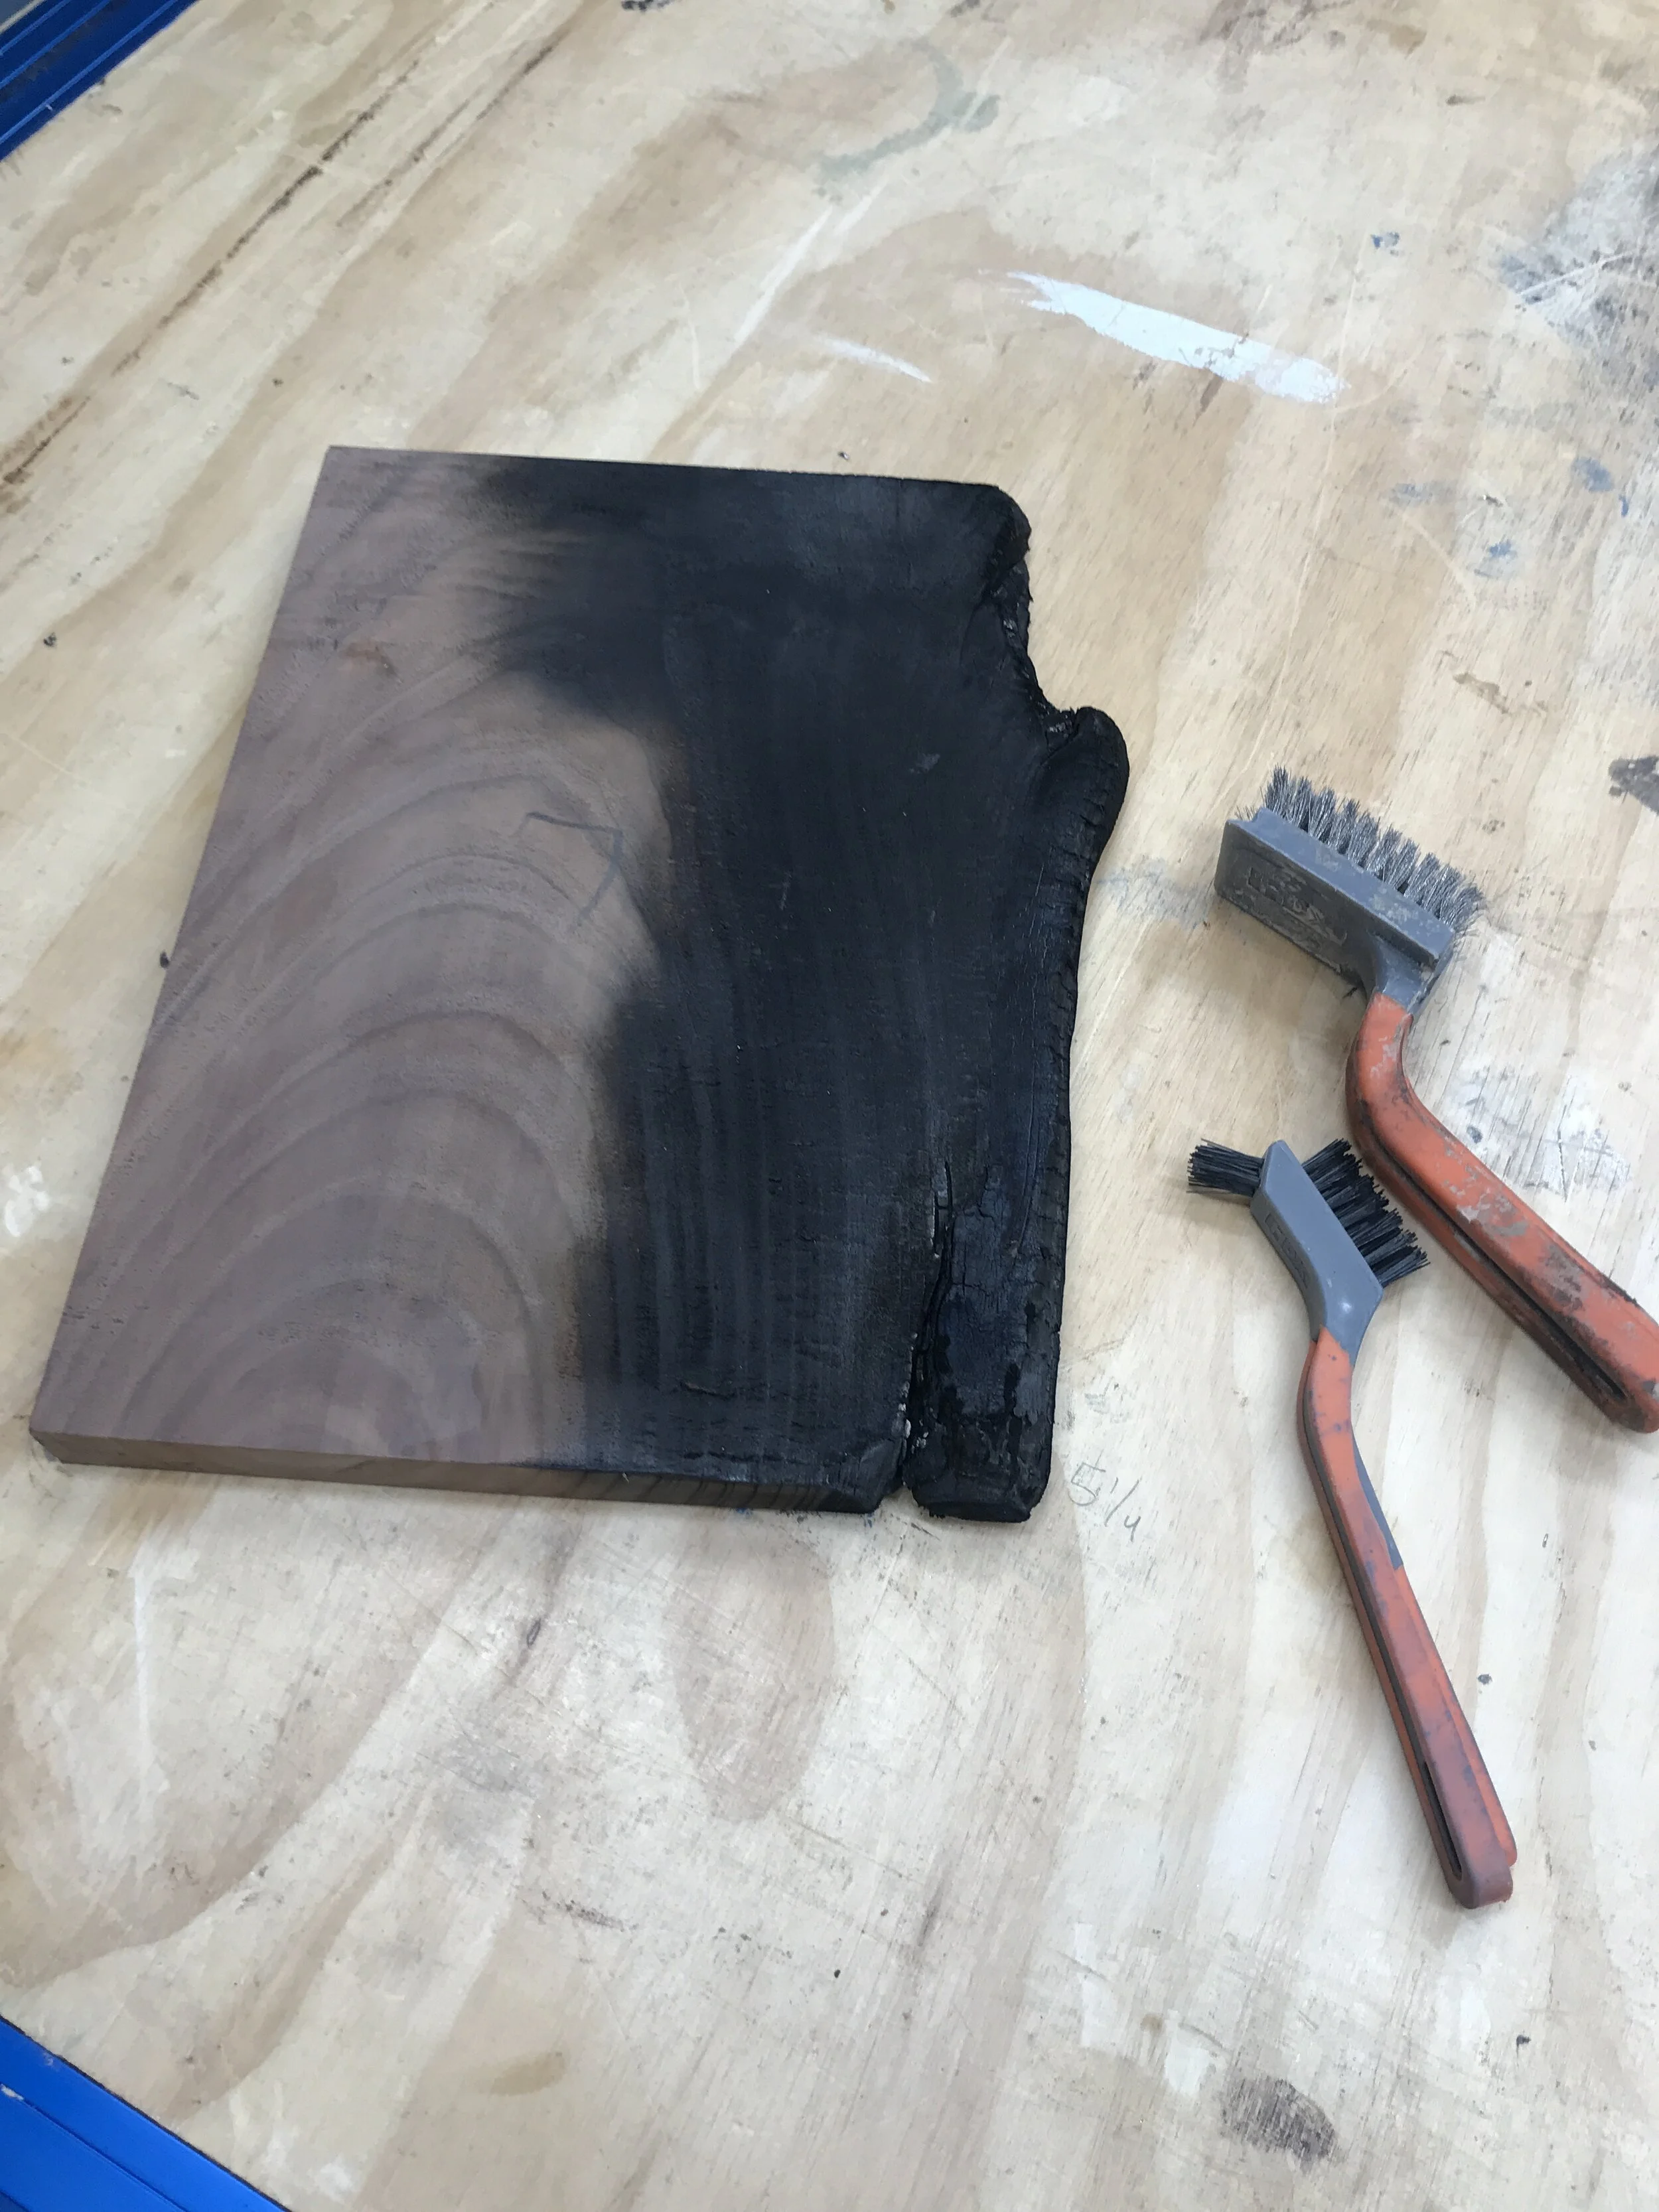
Once I knew what size I wanted the clock I cut the most twisted end off of the walnut and proceed to plane very light passes off it at my planer. I kept spinning the board and flipping it trying to get it as flat as possible. I should have spent the time to make a sled for my planer, but figured since I would be adding epoxy to this it didn’t make sense to spend the extra time doing that. But I do recommend starting with the flattest board you have.


Next up I made a mold that would house the wood and epoxy. I made it out of 3/4” scrap plywood I had lying around then shop. I oversized it just slightly than 12” so I had a little wiggle room when cutting the circle later. Be sure to not make it too big or else you will be wasting a lot of epoxy and it can get expensive. I also covered all the parts with Tyvek tape because the epoxy doesn’t stick to it and it will be easy to release the piece from the form when cured. Oh and I sealed the edges with some silicone caulk I had lying around. Nobody wants epoxy leaking all over their shop.


Then I set that aside and got out my Max Heat Torch TS8000T with Map Gas to Shou Sugi Ban the live edge of the walnut. I decided that I only wanted to burn part of the piece and not the whole thing to give it a look of being saved from the ashes. Almost like an ombre effect. And let me tell you the Max Heat Torch is perfect for Shou Sugi Ban’ing wood. It has auto start/shop, a continuous-run lock and adjustable flame. Plus, with the Map gas it burns hotter and faster to make quick work of your project. After I was done with that I used a wire brush to remove some of the charred finish and expose some for the texture of the wood.


Then next up was the epoxy pour. I mixed the epoxy per the directions and filled the void with two separate pours so as not to overheat and ruin the epoxy. Each brand of epoxy is different on how much and deep you can pour at a time, so be sure to read the instructions that come with your epoxy. What I didn’t do and now know that I should have done was do a seal coat of epoxy over the burnt portion of the wood. Because once I poured I would pop any air bubbles with my ST2200 Bernzomatic Micro Butane Torch, but they keep coming back after I left the piece. I believe they came thru the porous burnt wood section. I think they look cool and add another dimension to the piece, but just know if you don’t want bubbles to do a seal coat first.
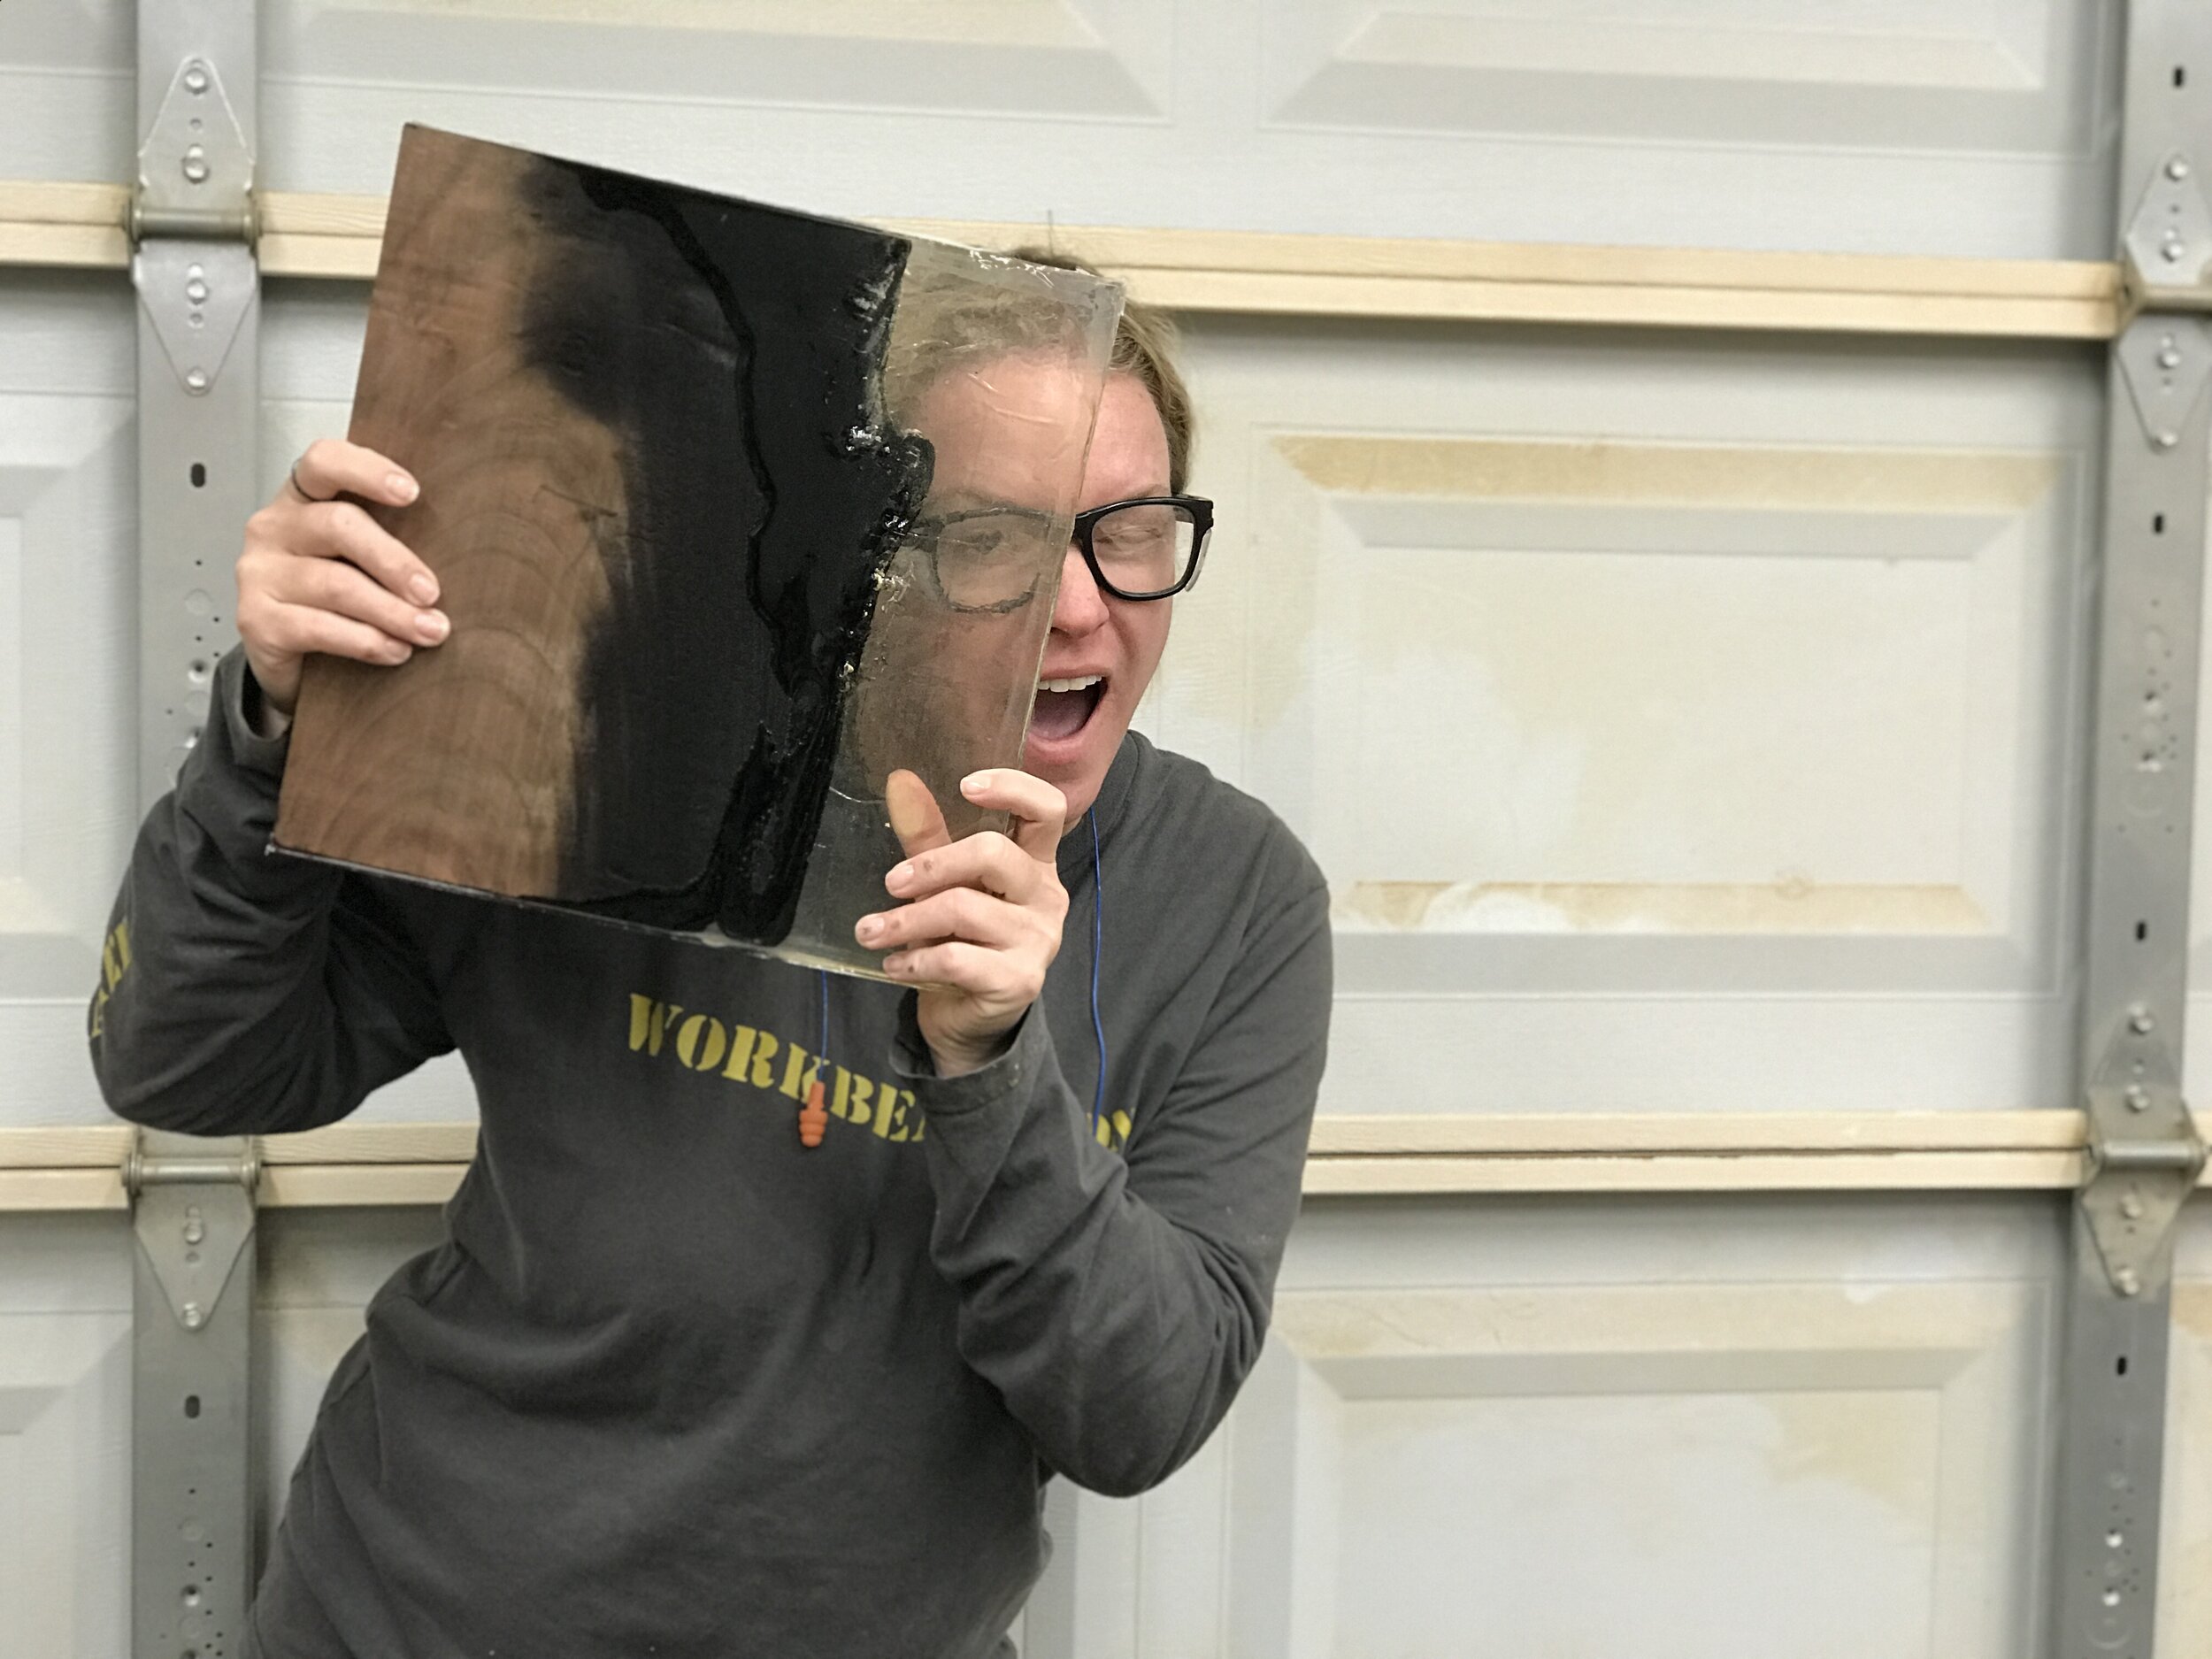


After I let that cure overnight, I again planed it down to save on sanding time. Then I used my circle cutting jig and trim router to shape the piece into a circle. And then started sanding… 80 grit, 120 grit, 180 grit, 220 grit, 320 grit, 400 grit and then lastly 600 grit!!! That is the highest I have ever sanded and the epoxy could probably go higher to get it clearer, but I was happy with the look.


Next I recessed a hole in the back of the clock to house the clock mechanism. My piece of wood ended up being close to 3/4” and the mechanism is only good for up to 1/2” thick. I could have completely recessed it, but I didn’t want my clock to sit flush with the wall when done. I thought if it was slightly away from the wall light would get behind the epoxy portion and give a cool effect.


I then finished the piece with mineral oil, installed the clock parts per their instructions and added a sawtooth nail hook and hook up my new clock!

This was such fun challenge mixing mediums. It gave me a chance to push my design skills and I think in the end create an AWESOME Burnt Live Edge Clock!


I hope you enjoyed this project as much as I did! And if you make one for yourself I’d love to see it, so please tag me in your post and use the hashtag #BuildingAwesome.
Til next time, keep #BuildingAwesome and have an AWESOME day!
-Sadie Mae