Easy & Awesome DIY Succulent Planters
Got scraps? Need gift ideas? Like DIY? Well I have another AWESOME project that will cover all those bases. For this one I teamed up with my friends at Bernzomatic to help me bring the fire and the fire is what truly make these planters AWESOME!
This post IS sponsored by Bernzomatic. All opinions are my own. This post DOES contain affiliate links. For more information on my affiliate program(s) see my DISCLOSURES page.
I have been on a total plant kick lately and have seen lots of different geometric succulent planters out there…and LOVE them… but I was always concerned on how to make the cuts safely. It seemed a little dangerous to try and cut something so small with some of my saws and how do you clamp them down? I have always wanted a Japanese pull saw and realized this might be the perfect time to get one and make some awesome planters to test it out.
So here is all the tools and materials you will need:

Scrap wood, pull saw, torch, drill, forstner bit, succulents = AWESOME!
TOOLS
Bernzomatic TS8000 High Heat Torch w/ MAP PRO
Wire Brush
Drill with 1 1/2” forstner bit or bigger!
Sander
Materials
Scrap Wood - preferably 4x4’s, but you could glue up pieces to any size you want.
Leftover Paint or Polyurethane - preferably spray paint, because it is easier to apply
I had these left over 4x4 scraps that I use to use to hold up furniture pieces when I was painting them and somehow over time I accumulated way to many of them, so I decided to use one of them to makes these planters. And this is how I did it.
Step 1
Cut 4x4 (actual dimensions 3 1/2” x 3 1/2”) down into 3 pieces 5” long. You could totally use the Japanese pull saw for this, but since I have a miter saw I used that to save some time.

Cut your 4x4 into three (3) 5” pieces.

Three 5” pieces of 4x4 scrap wood. Just wait to see how I transform these!
Step 2
Use the Japanese pull saw and start cutting random angles off the chunks of wood. I would flip the pieces after each cut and it would help the angles be totally random. When using a Japanese pull saw it cuts on the pulling motion and not when you are pushing it back thru the material. The one I got was super sharp and made quick work of cutting the angles. I like this process, because you can’t mess it up… you just keep cutting until you have a random geometric shape you like.
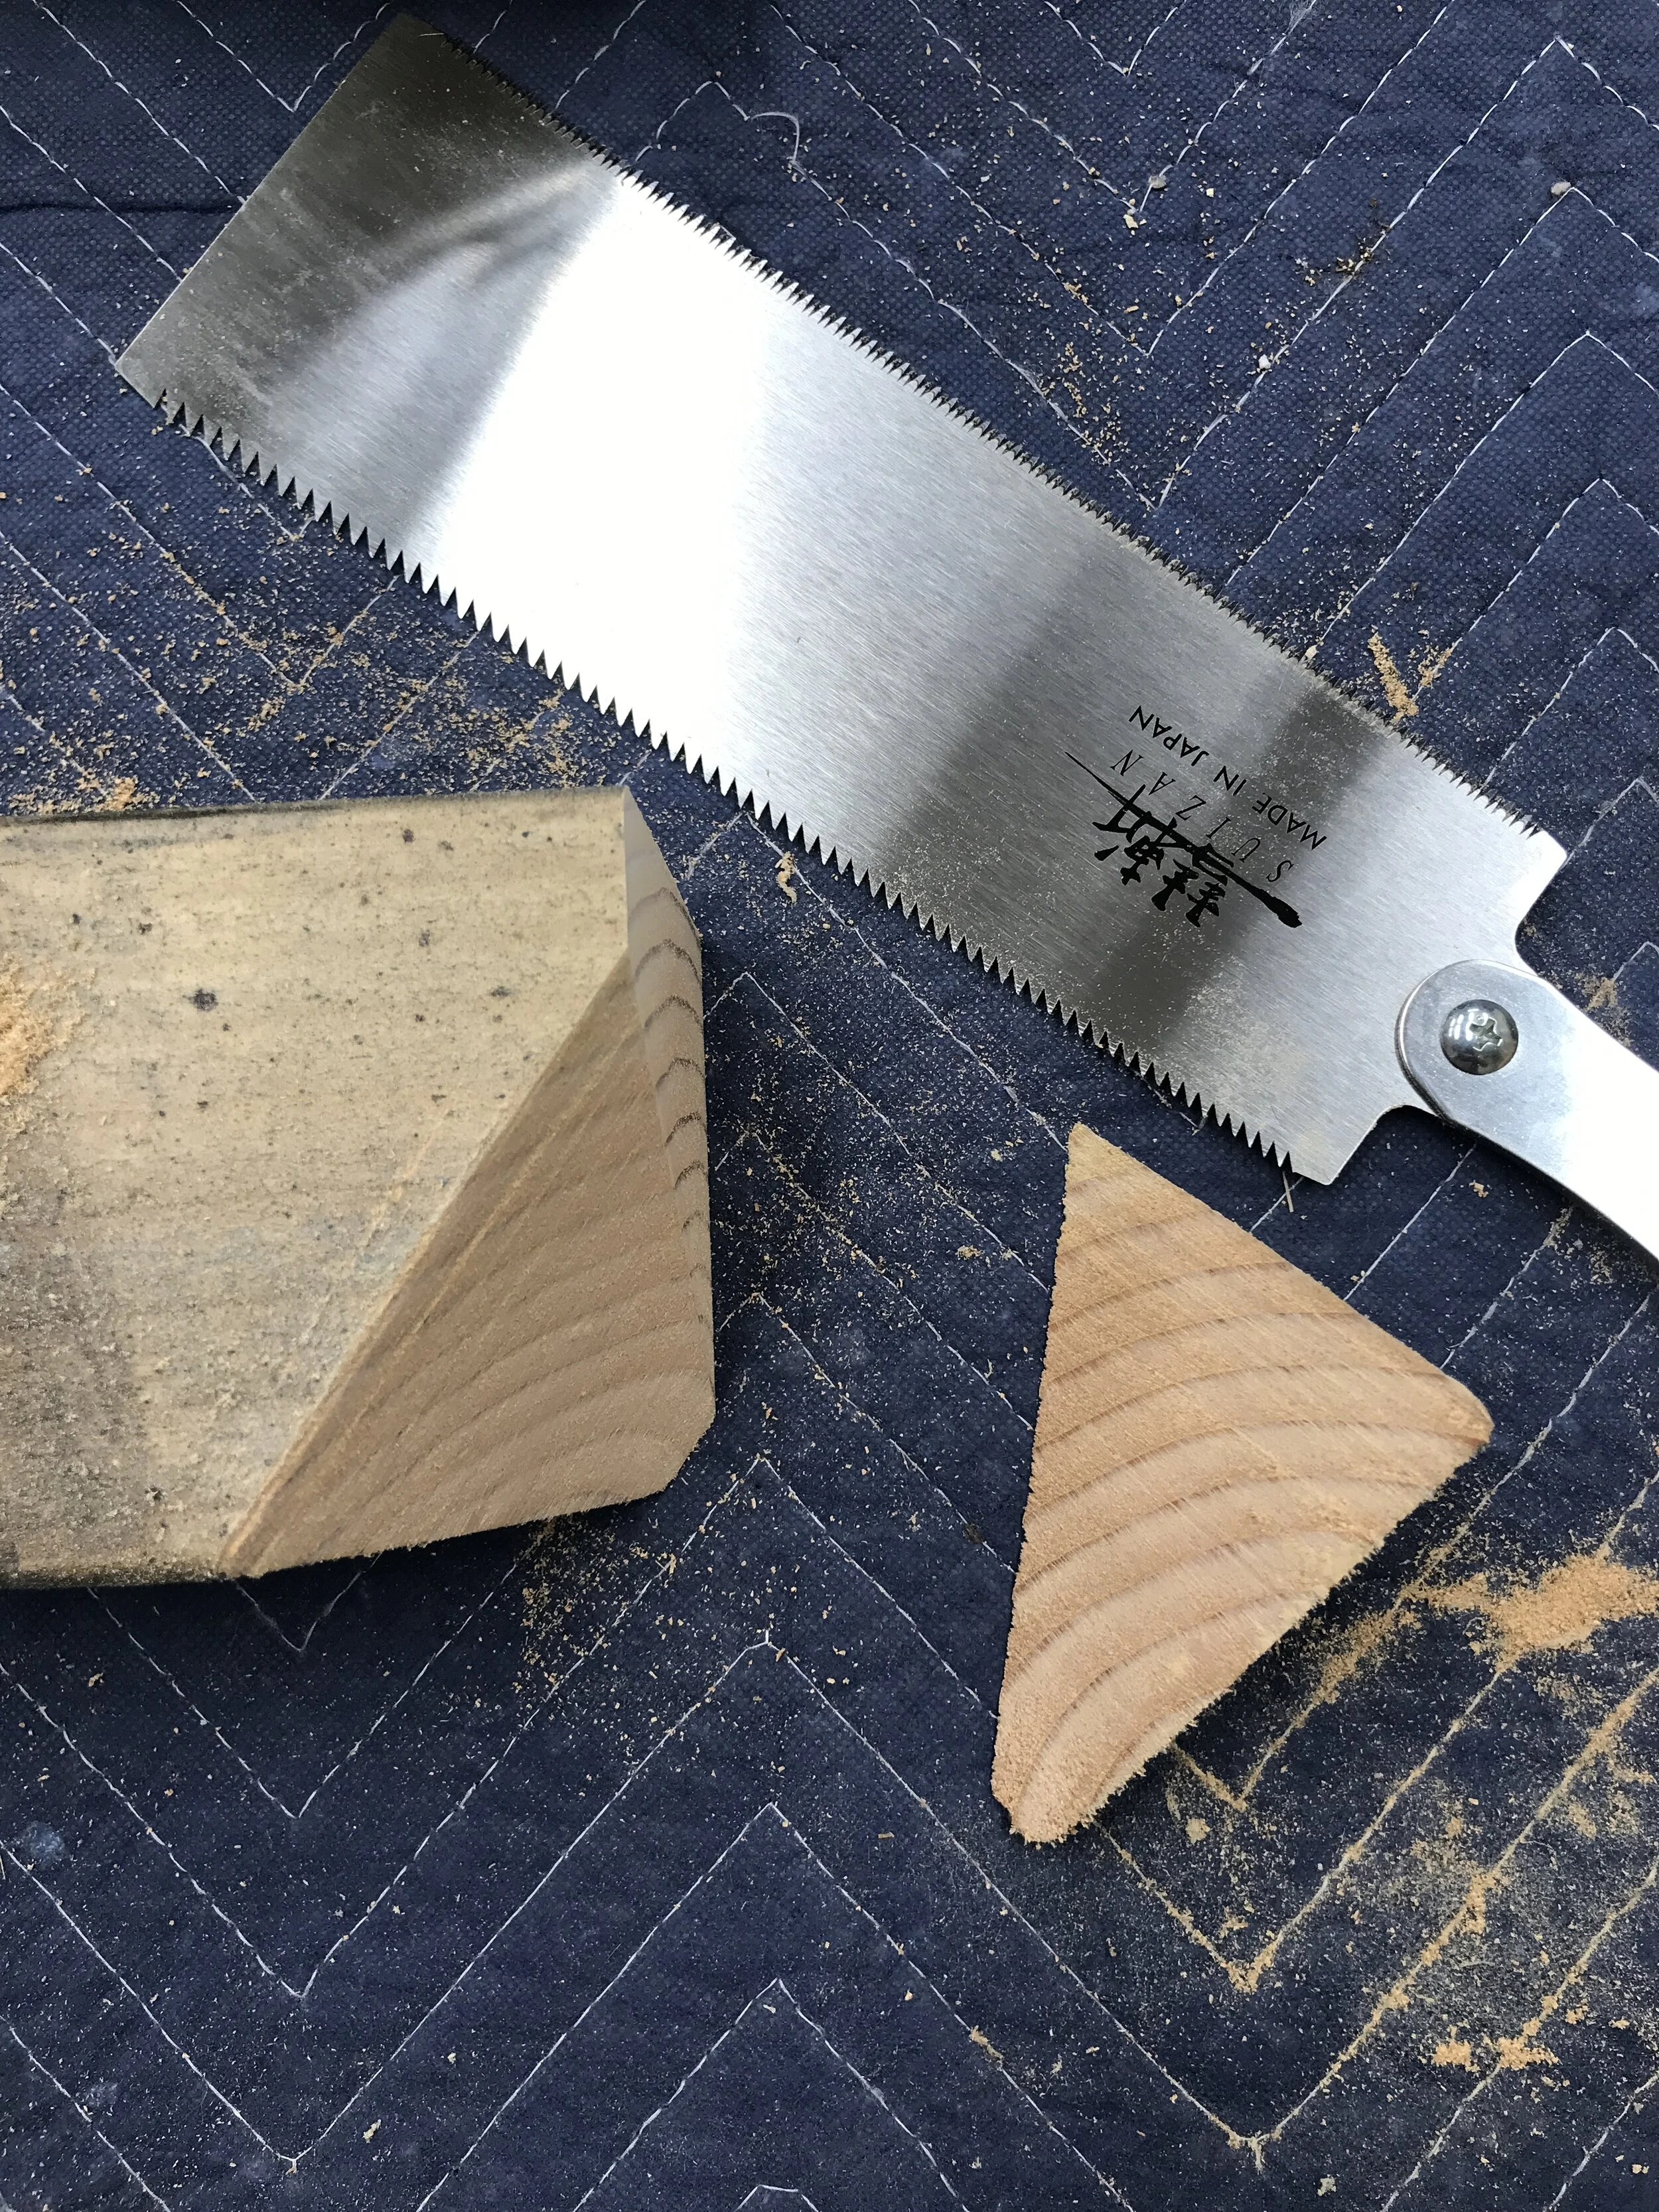
The pull saw cuts thru the 4x4 like butter!

Clamping down your piece will make cutting easier and safer. I really like these gear clamps from Pony.

Before Sanding. Just need to sand out any saw marks.
Step 3
Sand the piece. I used my belt sander and it made quick work of any rough edges. The sanding doesn’t have to be perfect because of the next step… but the goal of sanding is to make sure you get out any of your saw marks.

I clamped my belt sander down and sanded the pieces…. hang on tight!

After sanding. Ready for fire!
Step 4
Burn your pieces or Shou-Sugi-Ban them. I like using my Bernzomatic TS8000 High Heat torch with MAP PRO for this because it burns hotter and quicker making this project fly by. I also like that the torch has a lock button so you don’t have to hold the button down the entire time you are burning your piece.


AFTER burning - looks like a burn hunk of meat to me!
Shou-Sug-Ban is the accent Japanese art of preserving wood.
Be sure to use safety precautions when working with fire. I always keep a fire extinguisher handy and like to raise my piece off the ground on a brick to keep it away for anything that could possibly catch on fire easily.
Step 5* This is where the magic happens!
Using a wire bush, brush off all the excess soot from the piece. This also helps get rid of some of the soft wood and helps reveal the AWESOME grain pattern and texture in the wood.

AFTER wire brushing. See that texture!

L to R: Before Sanding, After Sanding, After Burning and Wire Brushing!
Step 6
Using your drill and forstner bit drill a hole in the center of your planter. I drilled mine 2” deep. The largest forstner bit that I had on hand was only 1 1/2” in diameter. It worked for the size of my succulents I had, but I would recommend going with a 2” one instead to give the plants a little more room, if possible.

Be sure to clamp piece down when drilling hole. I wish I would have had a 2” bit , but this worked.

My Freud forstner bit cut thru the fir so smoothly.

I made my holes approximately 2” deep to accommodate my plants, adjust yours as necessary.
Step 7
Paint or seal your planters! I choose to do both.
One I decided to apply a clear coat or polyurethane and darken it to make it almost look black.
The second one I spray painted white and I love how it really made it easy to see the texture or ridges of the piece.
For the third one I had to go with ORANGE!!! I only had this in a can, so I had to brush it on. It was harder to get a smooth finish with brushing, but when it was all done it came out so cool.

I sprayed the 1st one with a water-based polyurethane in satin. I like how it darken and almost blackened the wood.

I sprayed the 2nd one with a white spray paint with matte finish.

And I brushed the last one with my favorite ORANGE!
Step 8
Plant your favorite succulents. I recommend adding some tiny pebbles to the bottom to allow for drainage. Or even drilling a hole all the way thru so excess water can drain. Either way you don’t want to let the roots sit in standing water. But I am just learning all about plants, so I am not expert… yet!

I didn’t but it probably is a good idea to paint or seal the inside so your planters don’t rot from the inside.

Look at all that texture!
All three planters turned out so AWESOME, but I think my favorites are the painted ones. The painting just really brought out the cool texture that I was going for with the Shou-Sugi-Ban’ing. So what do you think? Please leave me a comment below and let me know if you like this type of project?


I think I love this project because you can make something from start to finish in an afternoon, they would make great gifts and if you got the tools like me… they don’t cost anything to make!
Well, I already think I need to make some more of these for gifts because I already claimed the first three for myself! Haha… thanks for following my building journey! Remember Build LOUD, Build Wild… meaning just go for it and have fun! Oh… and have an AWESOME day!
Sadie Mae
Can’t Make Them Now? PIN It and Save For Later!